
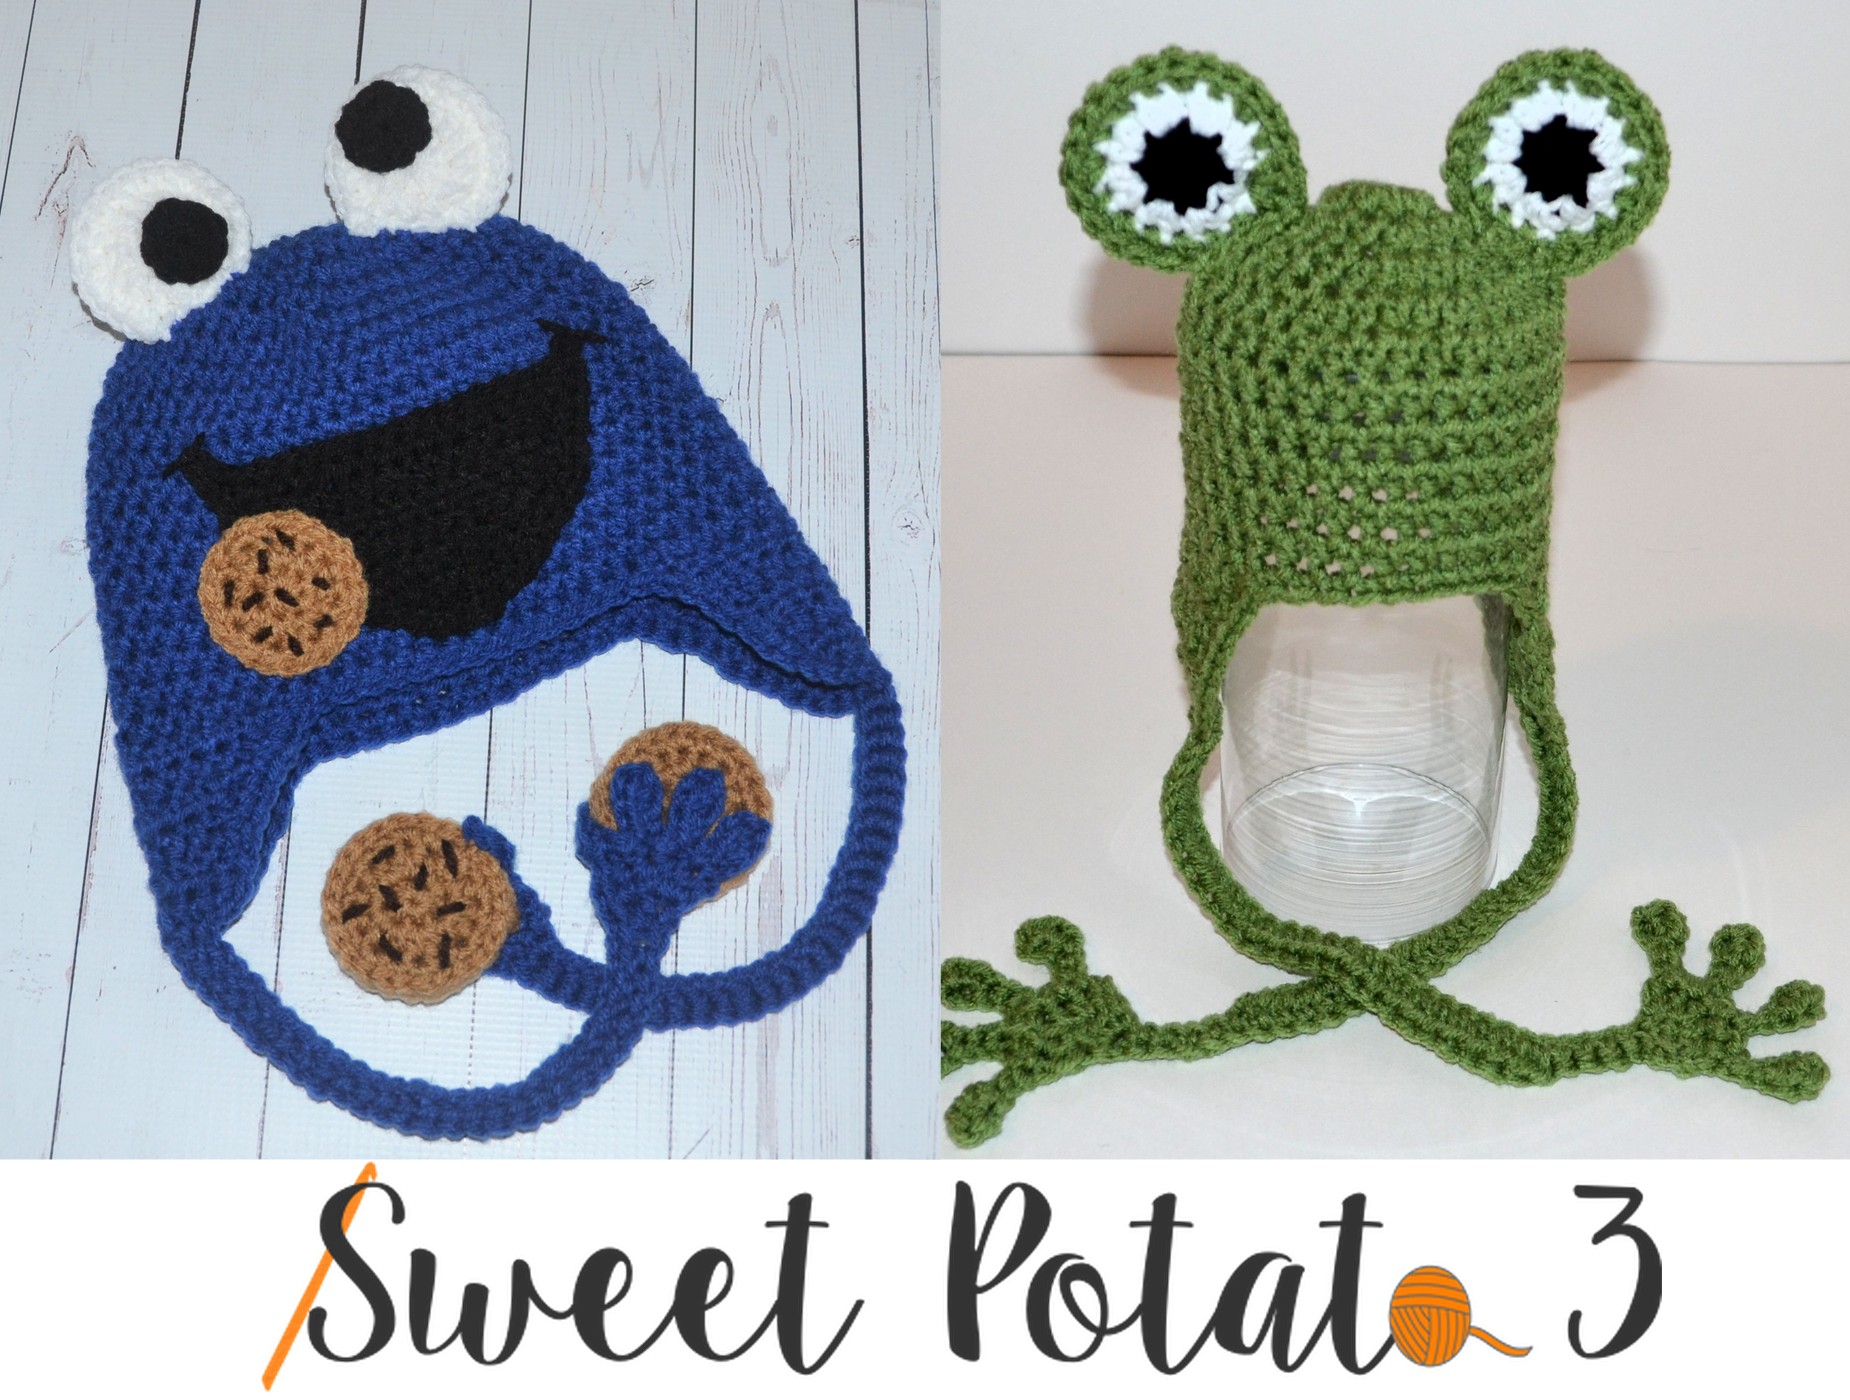
Animal hats are a fun way to show off someones personality, interests and is also an easy way to dress up for Halloween. I originally designed the frog hat pattern for newborn photos, a popular request years ago. To make my design stand out and feature something different I added frog feet to the ear flaps!


The hat is a classic beanie that covers the ears. The pattern now includes sizes from newborn up to Children! Add a simple flower to the side to give it a more feminine touch.

Frog Hat Material List
- Crochet Hook Size J (6 mm)
- Crochet Hook Size K (6.5 mm)
- Optional for flower – Crochet Hook Size H (5 mm)
- Worsted (#4) weight yarn – approximately 60-180 yards depending on the size of hat you are making
- Yarn Needle, Scissors & Measuring Tape
Stitches & Abbreviations Used in Pattern
- Hdc = half double crochet
- Sc = single crochet
- Ch = chain
- Slst = slip stitch
- Hdc2tog = half double crochet next two stitches together, decrease
- Join = join with a slst
- St(s) = Stitch(es)
- R = Round/Row

Check Your Gauge
When the completed size of your finished crochet project is important (very important in anything you wear), you must check gauge. This will ensure that your final piece will be the appropriate sizing. Change or adjust your hook to obtain the proper gauge: if your swatch is too small go UP a hook size, if you swatch is too large go DOWN a hook size.
For the frog hat use crochet hook K and work up a swatch of half double crochets to check: 9 rows with 12 hdc = 4 inches square.
Hat Sizing
Newborn (12 ¼ ” around & 5” high – fits up to 14” circumference)
3 to 6 Months (14” around & 5 ½ “ high – fits up to 15″ or 16″ circumference)
6 to 12 Months (16″ around & 6” high – fits up to 18″ circumference)
12 to 24 Months (17″ around & 6 ½ “ high – fits up to 19″ circumference)
Child (18” around & 7 ½ “ high – fits up to 20″ circumference)
Frog Hat Pattern
Follow the instructions for my Basic Hat with Ear Flap Option, then come back to this post for your final round of hat. The final round is where you will add the cute frog feet!
Frog Hat Final Round
- You will now complete the final round of the hat, please read all instructions for this section before you begin.
- With hook K Ch 1, sc in each stitch down side of earflap, around hat, up earflap to the tip.
- Once you reach the center stitch on the tip of the earflap you will make the ties with feet.
- Switch to hook J, ch 31, work 2hdc in 3rd ch from hook, Ch 2, turn
- 1hdc in first st, 2hdc in next st, 2hdc in top of beginning ch, turn
- *Ch 5, work 3hdc in 2nd ch from hook, slst in remaining 3ch, now insert hook into beginning stitch (that your ch 5 started from), bring up a loop, insert hook into next st, bring up a loop, yarn over and bring through all loops (sc2tog made)* repeat 3 more times eliminating the sc2tog after last one.
- We will now work our way back up the tie, work 3 slst along the foot to bring you to the bottom of the tie
- Switch back to hook K, 1 sc in next 5 chains, hdc in remaining chains
- Continue your sc down the other side of the earflap, around hat, back up other earflap, repeating tie & foot pattern at earflap tip.
- Join in the 1st sc made in your final round, fasten off and weave in all ends
Frog Eyes – make 2
- With Hook J & Black yarn
- R1: Ch 3, 7 hdc in 3rd ch from hook, join (8)
- R2: Switch to White yarn, ch 2, hdc in same st as joining, 2 hdc in each st around, join (16) fasten off
- With green yarn follow the same instructions as above through Row 2 but do NOT fasten off. At the end of Row 2, place the white eye piece on top of the green color piece (they should line up and be the same size), you will now stitch them together as you complete the final round working all the stitches through both stitches of both eye pieces.
- Final Round: slst in the first stitch of round 2 (of both eye pieces), ch 2, hdc in the same stitch you just joined in, hdc in next st, (2hdc in next st, 1hdc in next st) repeat around, fasten off leaving enough yarn to sew to hat.
Optional Flower
- With Hook H
- R1: Ch 2, 10 sc in 2nd ch from hook, join in top of beg ch (10)
- R2: Work front loops only, (ch 3, slst in next st) repeat around
- R3: Work back loops only from R1,(ch 2, dc in same st, 1dc in next st, ch 1, slst into same st as dc, slst into next st) repeat 4 more times, fasten off (5 petals), sew to hat.
If you like the frog hat, you’ll love this twist on it!
Last week, I had a customer contact me about making a Cookie Monster Hat. I sat down to draw up the pattern and soon realized it was nearly identical to my frog hat! Yipee!!! I quickly used the same pattern with just a few minor changes and Ta Da!!
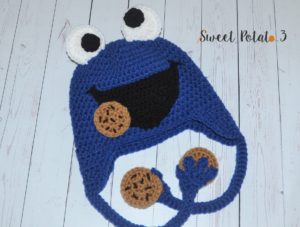
Do you see the similarity? How did I do it?
Follow the Child’s size Frog Hat Pattern exactly using blue yarn. Then crochet the eyes solid white and made a simple black round piece (with 7 hdc in the circle) and sewed them onto the eyes off balanced.
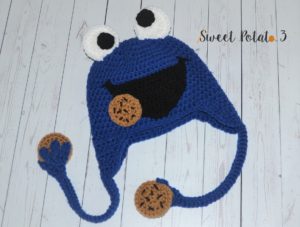
For the mouth I worked as follows (remember this is for the child sized hat):
- Using black yarn and a Crochet Hook I (5.5 mm)
- Foundation hdc 16 (tutorial for foundation hdc here)
- R1: Ch 2, hdc2tog, hdc in next 2 sts, 2hdc in next st, hdc in next 5 sts, 2hdc in next st, hdc in next 2 sts, hdc2tog, hdc in last st, turn (17)
- R2: Ch 3, dc3tog, hdc in next 8 sts, dc3tog, dc in last st, turn (12)
- R3: Ch 3, dc3tog, hdc in next 5 sts, dc3tog, dc in last st, turn (9)
- R4: Ch 3, dc3tog, hdc in next 2 sts, dc3tog, dc in last st, turn (6)
- R5: ch 1, sc across entire row and around entire mouth piece, sew onto front center of hat. Make sure when you reach the top corners of the mouth to embroider a small smile line, secure with a knot and weave in all ends.
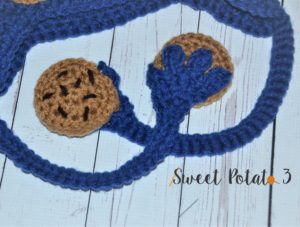
For the Cookies I worked as follows:
- Using medium brown yarn and a Crochet Hook I (5.5 mm)
- R1: Ch 2, work 7 sc in 2nd ch from hook, join in top of beg sc (7)
- R2: Ch 2, hdc in first st, 2hdc in each st around, join (14)
- R3: Ch 1, [2sc in next st, sc in next st], repeat [] around, (21)
- If this is your first piece, using a darker color yarn (dark brown or black) embroider small lines to represent Chocolate Chips.
- Repeat R1-R3, lay your first piece on top of your current piece and slst through the sc from R3, working through both circle pieces. This just reinforces the cookies. Make 2 cookies and sew onto the hands (or frog feet). For the cookie next to the mouth, just make one side and sew onto the corner of the mouth, there is no need to have it stronger so do not make the back side of the cookie.
I hope you found this fun! I love seeing how others have taken a Sweet Potato 3 pattern and customized it in their own unique way. If you have done this, please share it with me, I love to be inspired! Tag me on IG or FB with @SweetPotato3Patterns or join my SP3 Crochet & Conversations group for more interactive fun.


Precioso, te quedo muy hermoso, gracias linda, saludos.
Your patterns are adorable. I made an Elmo hat for a little by who has leukemia and Down Syndrome. He loves his hat. I am going to make the Cookie Monster hat this weekend. Hopefully will buy the bull dog and there was one other one. Thank you again.
Pingback: Soccer Ball Crochet Hat Pattern ~ Sweet Potato 3