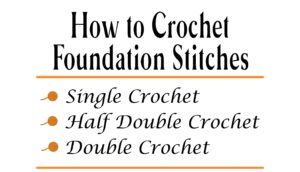
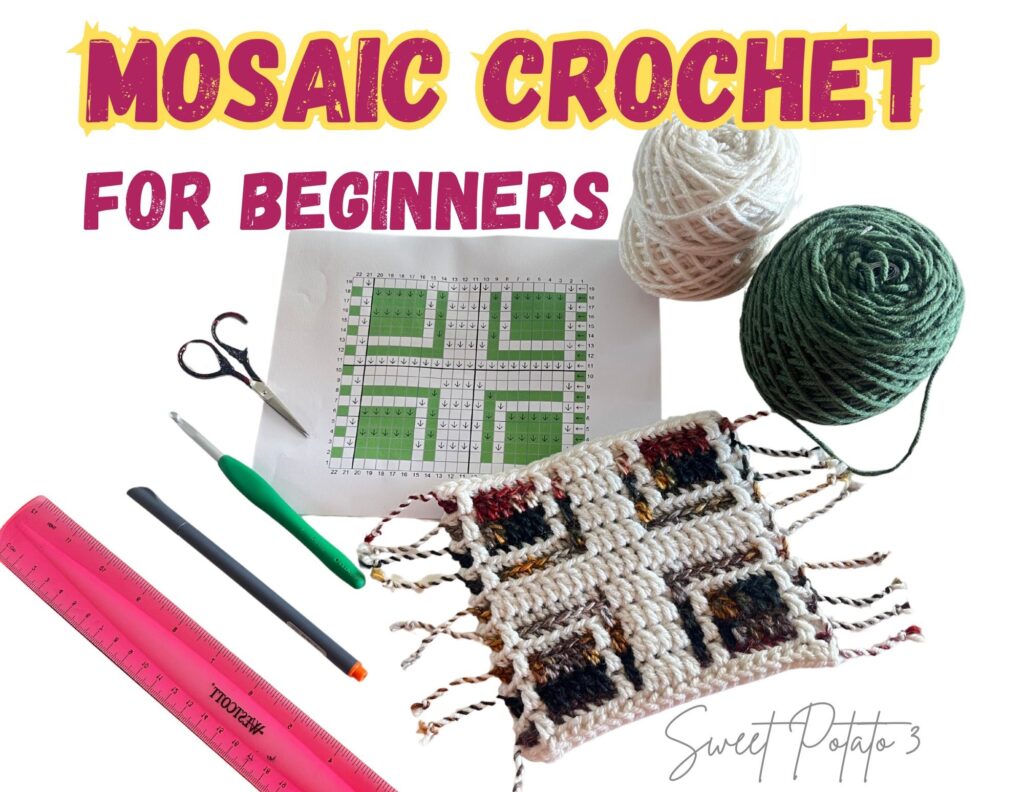
Mosaic crochet is an intricate-looking yet simple colorwork technique that creates visually appealing patterns using basic crochet stitches. Whether you want to create striking geometric designs for your blankets or eye-catching coasters, this method allows for bold visual impact with minimal effort. In this guide, I will cover the basics of mosaic crochet, including how to read charts, handle yarn changes, and link to the best finishing techniques for a polished look.

This article will walk you through the highlights of working mosaic crochet from a graph. I have also created a YouTube tutorial if you prefer learning through video. The video tutorial walks through the same information that is included here. Find the YouTube link toward the end of this blog post.
What is Mosaic Crochet?
Mosaic crochet is a colorwork technique that uses only single crochet and anchored double crochet stitches to create intricate designs. Unlike tapestry crochet, where you carry unused yarn, mosaic crochet works one color per row, making it an excellent choice for those who prefer not to juggle multiple strands at once.

Understanding Mosaic Crochet Charts
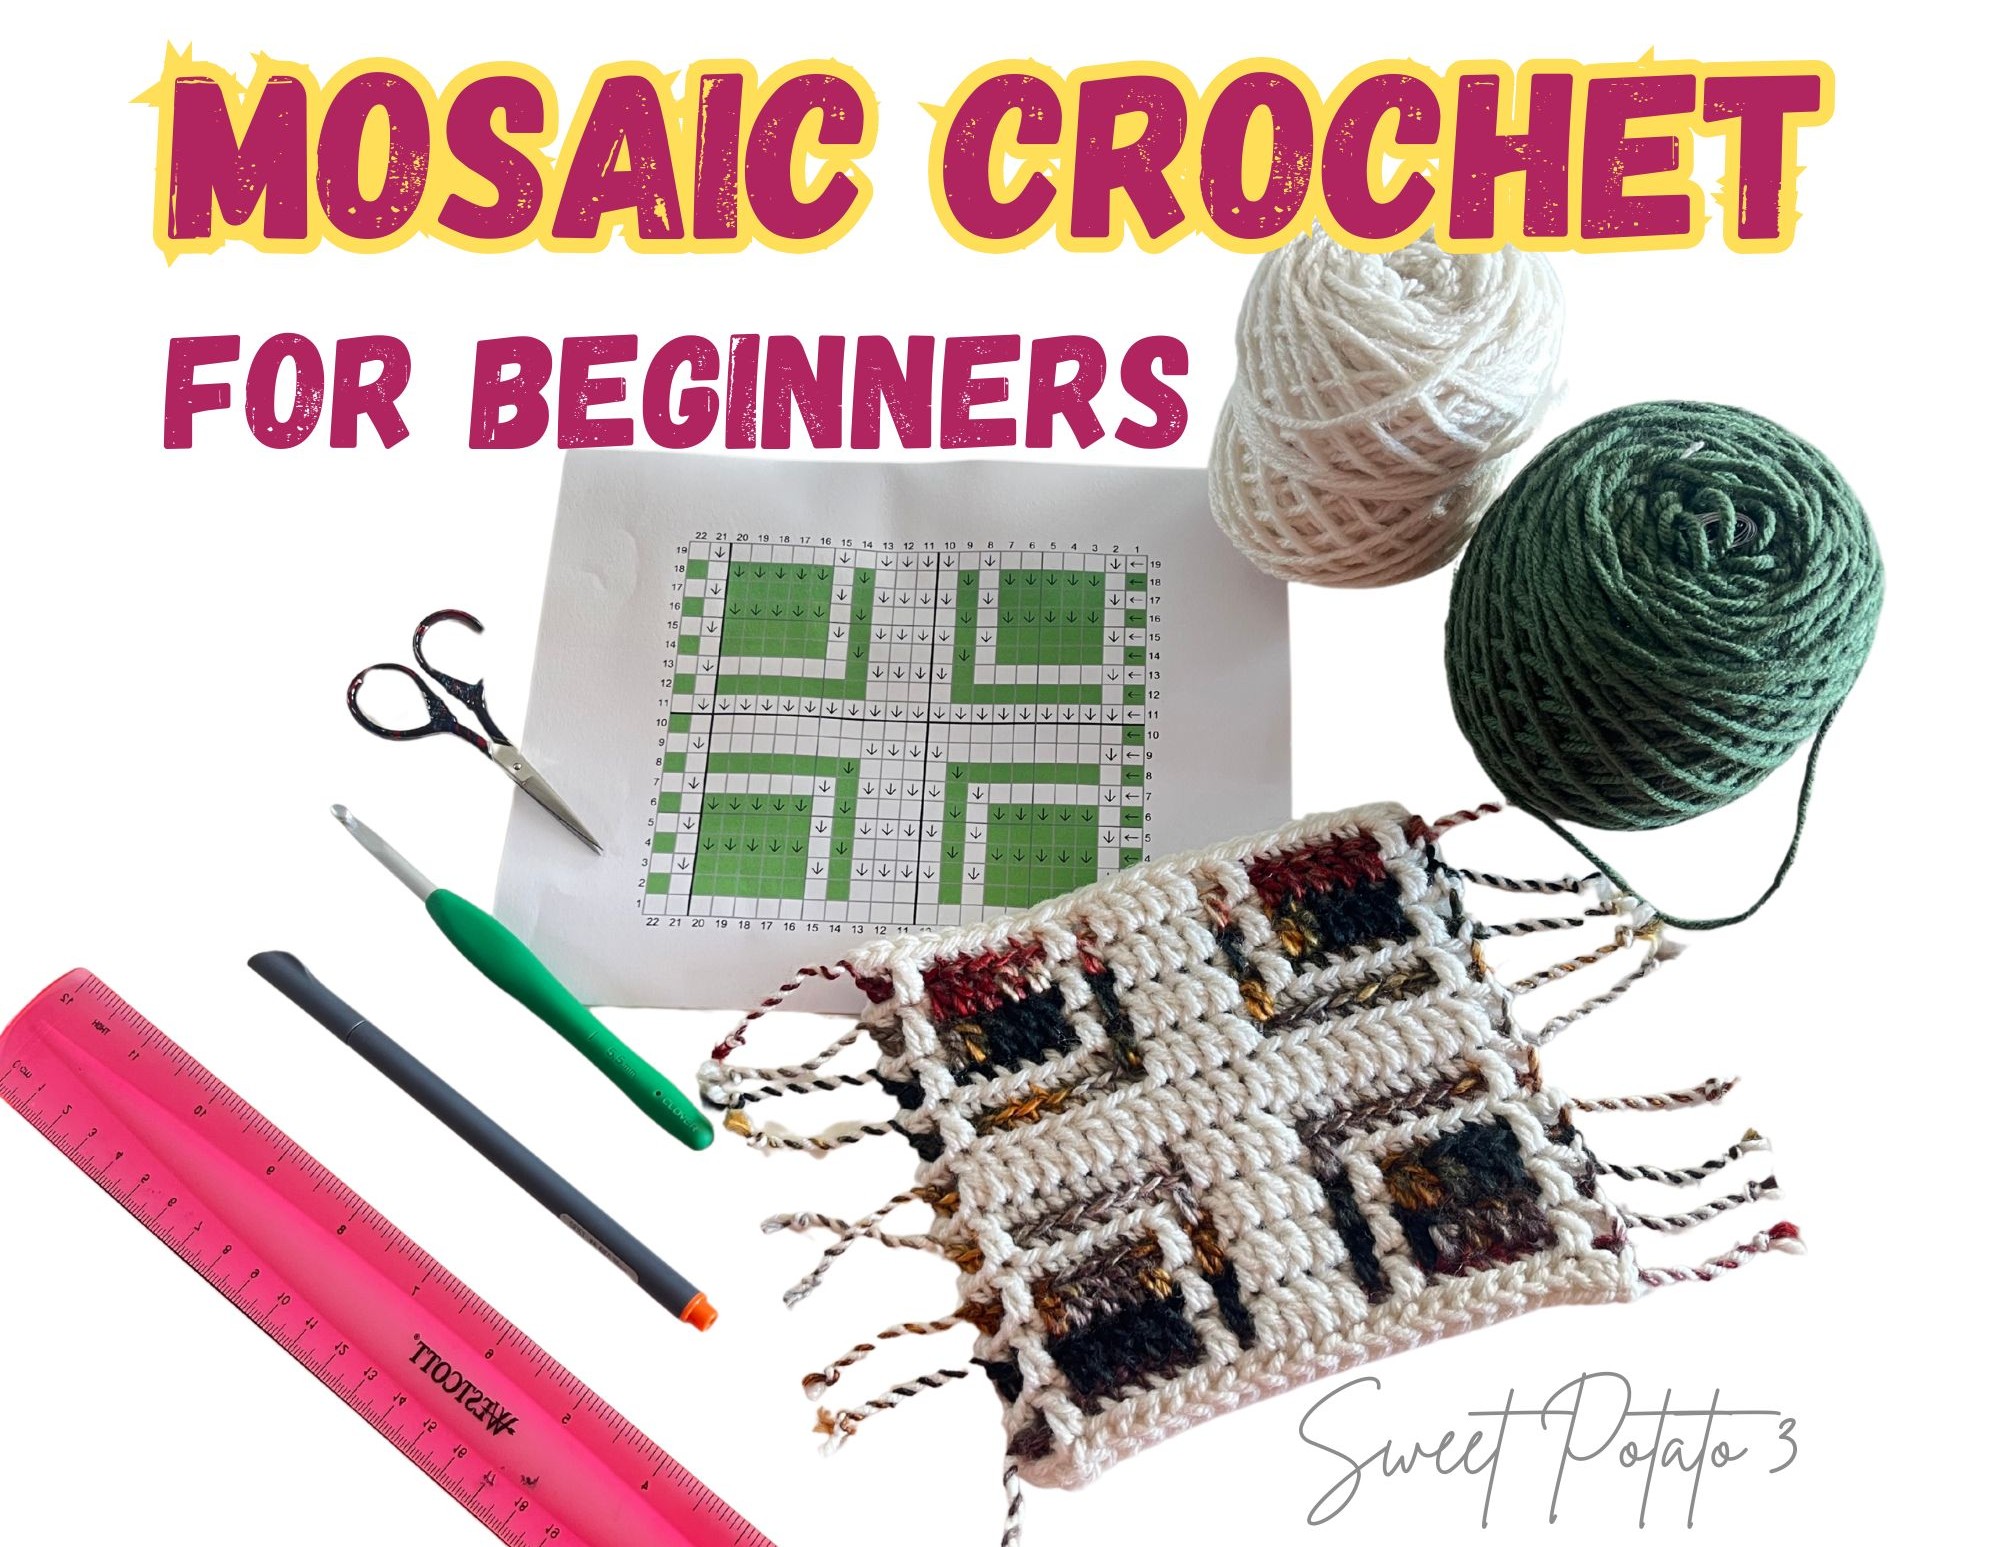
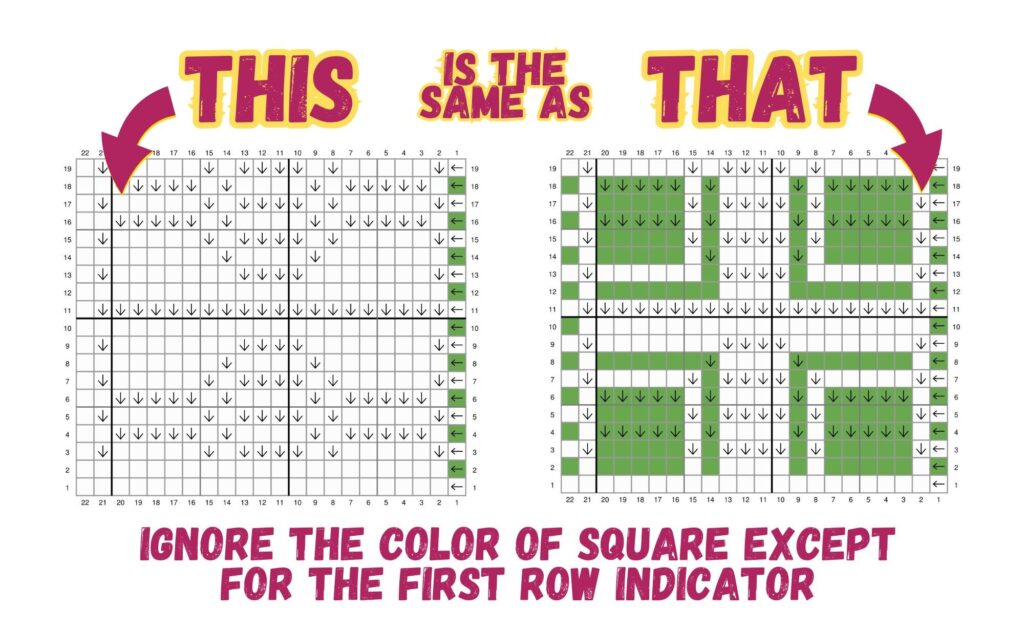
One of the key elements of mosaic crochet is working from a chart rather than a written pattern. Here’s how to read a mosaic crochet chart:
- Each row is worked in one color only. The chart will indicate which color to use in the first square of the graph. Rows will alternate from color A to color B.
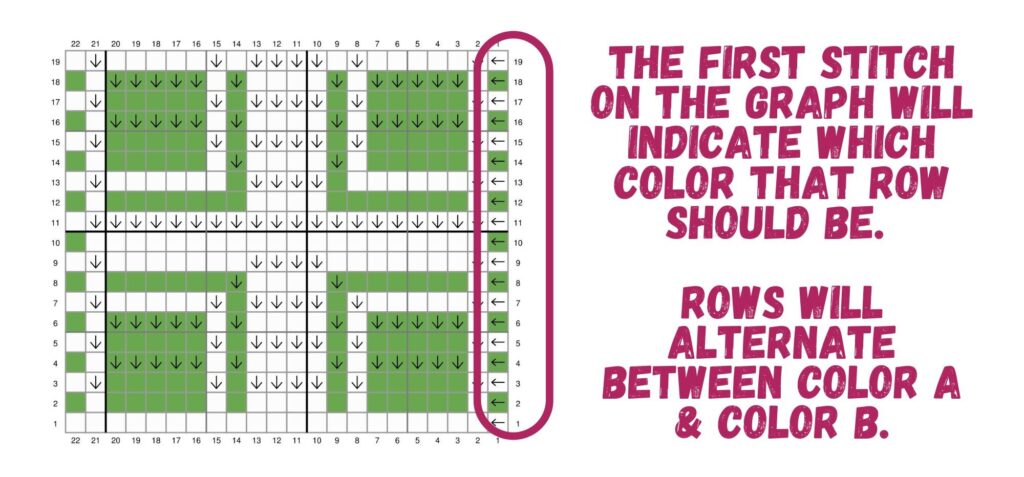
- Rows are always worked from right to left (for right-handed crocheters) or left to right (for left-handed crocheters), starting a new row in the same direction each time and alternating the color of yarn used. Each row will begin with a chain 1. This beginning chain will not count as a stitch.
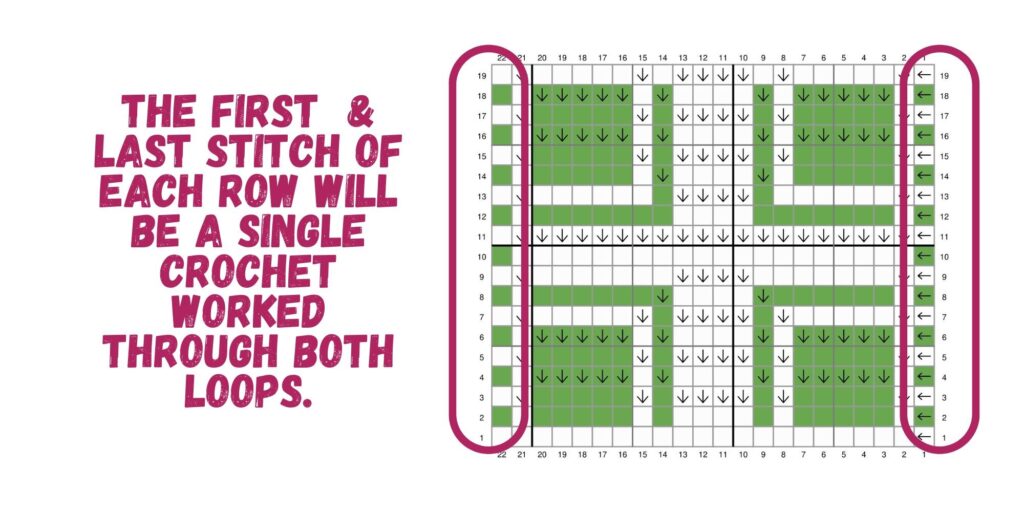
- The first and last stitches of each row will always be a traditional single crochet. Traditional means that the stitch is worked through both the Front and the Back Loops of the stitch from the prior row.
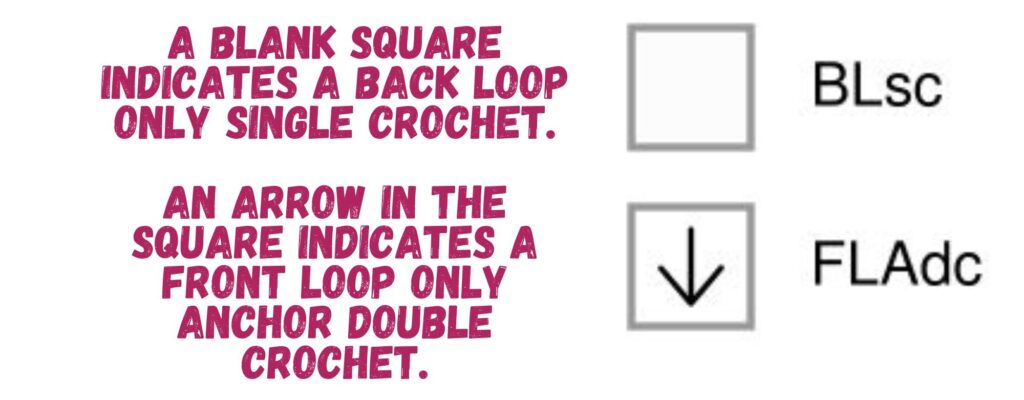
- Single crochet (sc) stitches: After the first stitch (sc) of each row, all other single crochets will be worked in the BACK LOOP only, leaving the FRONT LOOP exposed. This is a key part of overlay mosaic crochet. Single crochet stitches are indicated with an EMPTY Square on the graph (see image below).
- Anchored double crochet (adc) stitches are worked into the FRONT LOOP of the stitch from the prior row, creating the ‘overlay’ of the color in the design. It is key that when you work an anchored double crochet that it is work into the same color of stitch as the color you are using in your current working row. The Anchored Double Crochet is indicated with an Arrow pointing down in the square on the graph (see image below). Some graphs may use a different symbol, an arrow or an ‘x’ are the most common symbols on the mosaic graph.
- Ignore the Color of the Graph Squares! Only the first square of each row will indicate the color the row is to be worked in. Follow the indicated stitch and the design will eventually unfold. This is the most important part of mosaic crochet and the most confusing part.
You can work mosaic crochet from a graph or written instructions. Be sure to check any mosaic pattern to see how it is being offered prior to purchasing and make sure you are comfortable with that format. Some mosaic patterns will come with only written instruction or only a graph.
Mosaic Crochet YouTube Tutorial
For a more detailed explanation I have a series of YouTube tutorials dedicated to Mosaic Crochet.
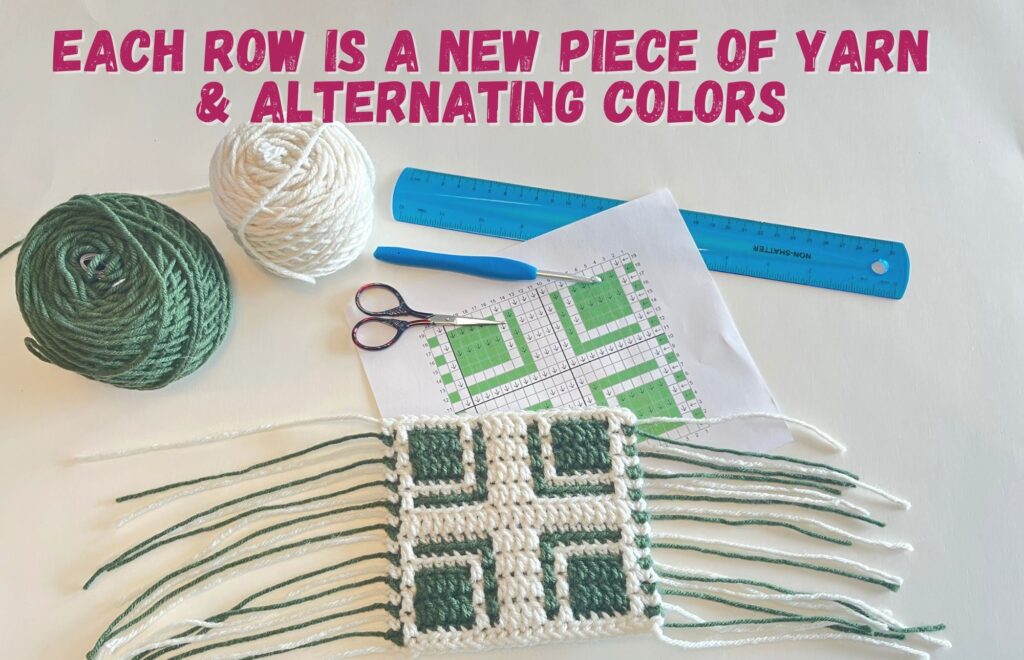
Handling Yarn Changes: Cutting After Every Row
Unlike traditional crochet techniques where you turn your work and continue with our project, mosaic crochet requires you to cut the yarn after each row and restart at the same side for the next row. This prevents the design from becoming distorted but does leave tails at each row’s edge.
What to Do with the Yarn Tails
Since you cut your yarn after every row, you’ll have leftover ends to manage. Here are some finishing options:
- Twist Fringe: Leave the ends as they are and twist them together for a stylish fringe.
- Tassels: Add tassels along the edges while incorporating the row ends.
- Crochet a Border: Add a double-layer or pocket border where you hide the yarn ends inside while hiding the messy row ends.
- Weave in the Ends: I do NOT recommend weaving in yarn ends due to the number of them and the possibility of them becoming loose or entwined in each other resulting in a messy look.
I have created a YouTube tutorial that will show you how to finish off with the twist fringe, tassels or the pocket border. Watch the step by step guide to polish off your crochet piece, just click HERE.
Important Note: Mosaic Crochet is Not Reversible
One thing to keep in mind is that mosaic crochet is not reversible. The back side of your work will have uneven lines and ridges. This makes it better suited for projects where the back side won’t be visible, or where a border can help clean up the look.

Mosaic Crochet Project Ideas
Mosaic crochet’s versatility makes it ideal for various projects. Here are some ideas to get you started:
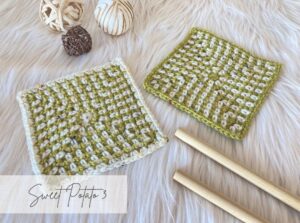
- Blankets: Large-scale geometric designs make for beautiful statement pieces. (Check out my mosaic crochet blanket sample [link])
- Coasters: A great way to practice small patterns before committing to a big project. (See my mosaic crochet coasters here [link])
- Pillow Covers: Add a unique decorative touch to your home decor.
- Wall Hangings: Showcase stunning patterns as art pieces.
- Scarves and Wraps: Play with colors and patterns for a stylish accessory.
Overlay Mosaic vs. Other Mosaic Techniques
The technique covered in this guide is called overlay mosaic crochet. There is another type of mosaic crochet where rows are worked back and forth, but that technique is not as clean and is generally not preferred so I focused on overlay mosaic in this tutorial.
Final Thoughts
Mosaic crochet is an incredible technique that allows for endless creativity while using simple stitches. With a bit of practice and the right finishing techniques, you can create stunning pieces that showcase beautiful patterns and colors. Whether you’re making a cozy blanket or a set of stylish coasters, mosaic crochet opens up a world of design possibilities.
Are you ready to try mosaic crochet? Let me know what project you’ll start with in the comments below!
Be sure to check out my Mosaic Coaster Free crochet pattern. It is beginner-friendly and has a step-by-step photo and video tutorial included. Find it by clicking HERE.
Another fun project in the Mosaic Months of the Year Blanket pattern. This is a collaborative design with multiple designers. I participated and am the featured June design that has a sun shining in the mosaic design. You can check out my pattern or the full blanket by clicking HERE.
More Crochet Fun
I host an interactive Facebook group called, “SP3 Crochet & Conversations”. You’re invited to join, it is a great spot to share photos, ask questions, and have fun. I invite you to join today by clicking HERE.