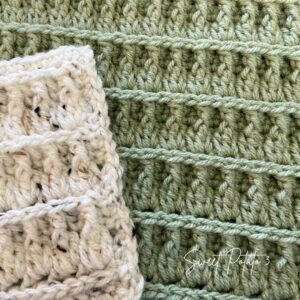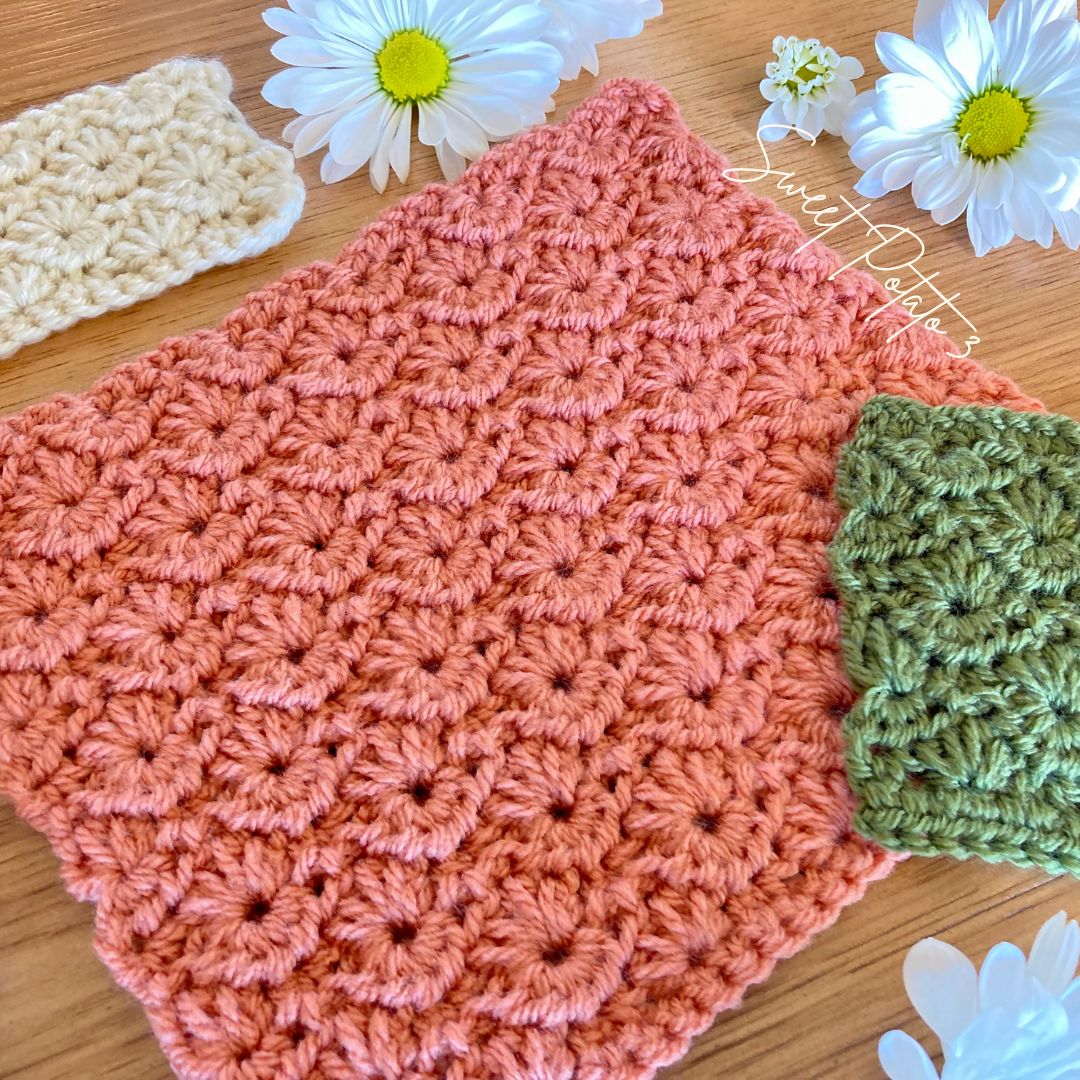
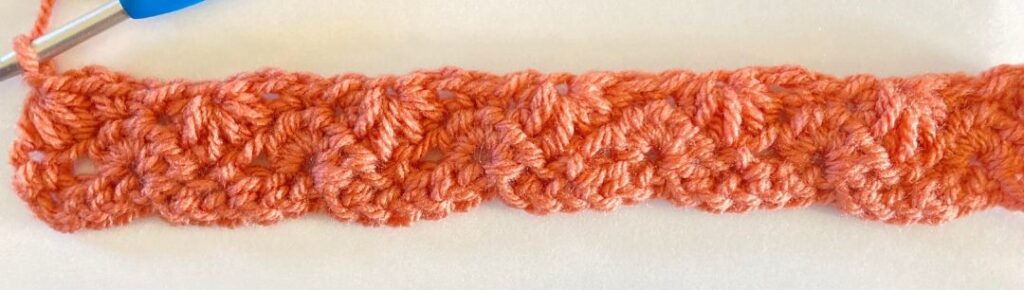
Crochet is something so many of us crafters love. However, many of us get stuck using the same stitches repeatedly. I love using basic techniques to show how to really make the stitches pop. One of my favorite stitch combinations creates this unique elusion that the stitches are a starburst, or circle, it is call the Catherine’s Wheel.
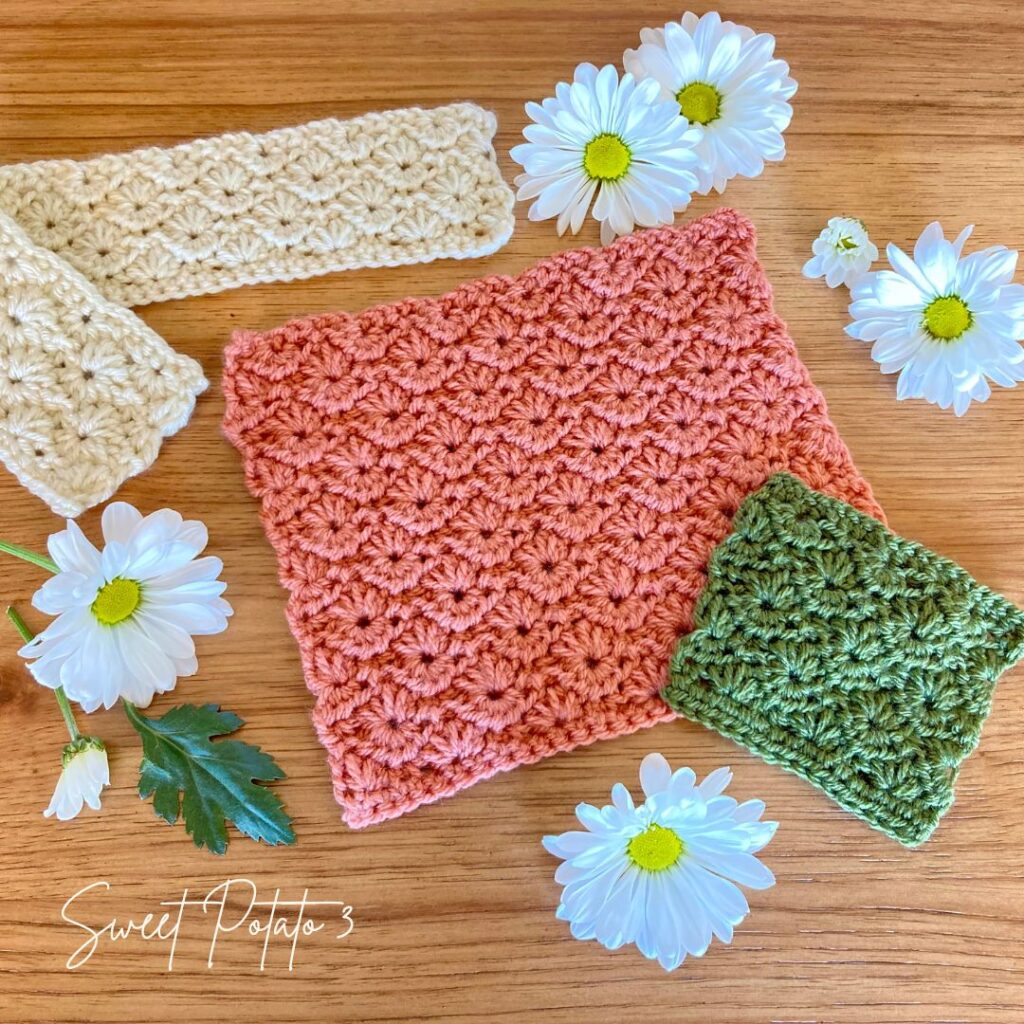

The stitches are so unique and fun to crochet. So, when Hortense from Knitting with Chopsticks asked me to share a stitch combination for a blanket crochet along she was hosting, I knew this was the perfect tutorial. The blanket Crochet Along’s theme is Blooming Blossoms, obviously, I thought of flower stitches. However, for blankets, I prefer more closed stitches instead of open and lacey stitches. The Catherine’s Wheel is a perfect stitch to work into a blanket.
Blooming Blossoms CAL
The Blooming Blossoms Crochet Along is an event that is hosted by Knitting with Chopsticks (yes, it is a crochet pattern). The sections are all released on different designers’ websites-so you have to follow along. The tutorials are free with photos and some videos to walk you through the steps.
However, if you just want the full pattern in print, that option is also available! You can order the eBook and you will have access to the full pattern in one easy pdf that you can print or work off of from your device-you choose.
Skill Level
The Chatherine’s Wheel stitch combination is an intermediate level. All the stitches used are pretty basic, but you will be working multiple stitches in one stitch, decreasing stitches, and skipping stitches. Don’t let this scare you off. I have a full photo tutorial and video tutorial included to help you master the Catherine’s Wheel.
Materials Used
- Crochet Hook G (4.50 mm) for the CAL – or use whatever is recommended on the yarn label for other projects.
- Yarn – worsted (#4) weight yarn for the CAL – in the samples and video I used Zeeman’s Royal yarn)
Gauge Information
If you are just testing this stitch out, don’t worry about your gauge. Just enjoy learning the steps and take the time to enjoy the process.
However, if you are here to make the Blooming Blossoms Blanket, you will want to make sure your gauge has been met for the Crochet Along. Knitting with Chopsticks has specified that her gauge (using crochet hook G (4.50 mm) is: 14.5st per 10cm in double crochet (or 15 double crochets measures 4 inches in US terms). For height, you can work the rows until the proper height has been reached.
Abbreviations (US)
- st(s) = stitch(es)
- slst = slip stitch
- ch = chain
- sc = single crochet
- hdc = half double crochet
- hdc3tog = half double crochet next 3 stitches together
- hdc5tog = half double crochet next 5 stitches together
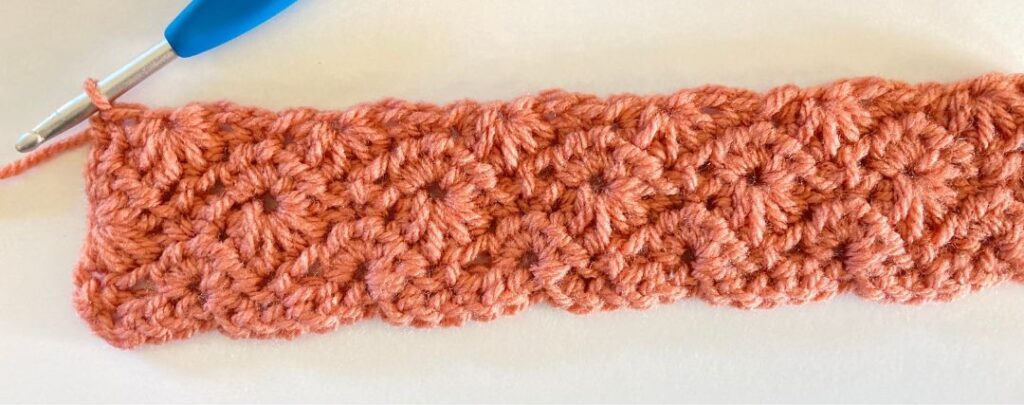
Catherine’s Wheel Instructions
This stitch combination has been adjusted to work with the Blooming Blossoms CAL and is made in multiples of 6 stitches. Ideally, you would work it in multiples of 6+1, but I have made the proper adjustment in row 2 to accommodate for the Crochet Along.
The stitch count specified for the CAL is 180 stitches per row.
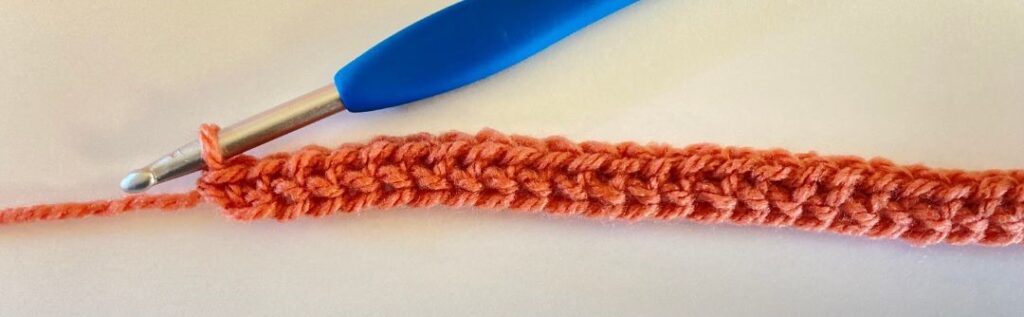
Row 1 (RS): Ch 1, sc in each st across row, turn (180)
Row 2 (WS): Ch 1, sc in first st, skip next 2 sts, 5hdc in next st, [skip next 2 sts, sc in next st, skip next 2 sts, 5hdc in next st], repeat [ ] until 2 sts remain, skip 1 st, sc in last st, turn
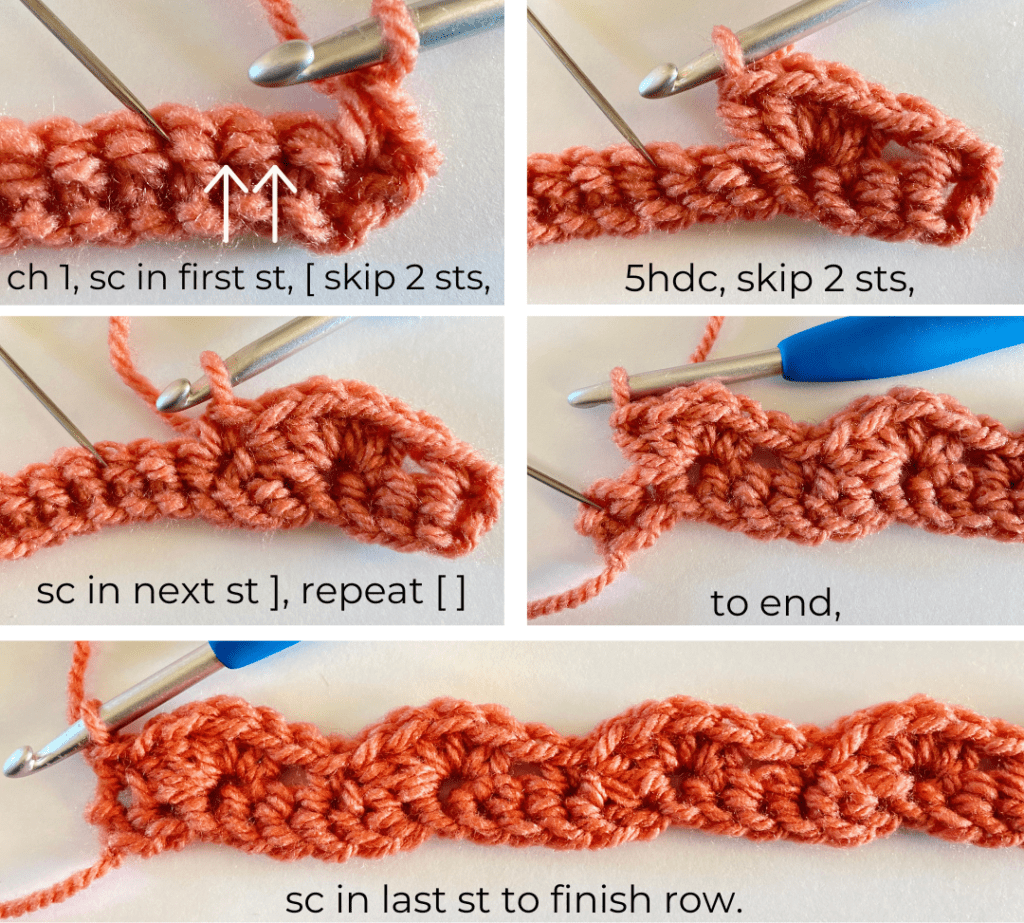
Pattern Note: Row 2 was adjusted to accommodate the 6-stitch repeat for the CAL. The repeat until 2 stitches remain is where it is adjusted. If you began with a stitch count of 6 + 1, then you would have repeated until 3 stitches remain, skipped 2 stitches and sc in the last stitch.
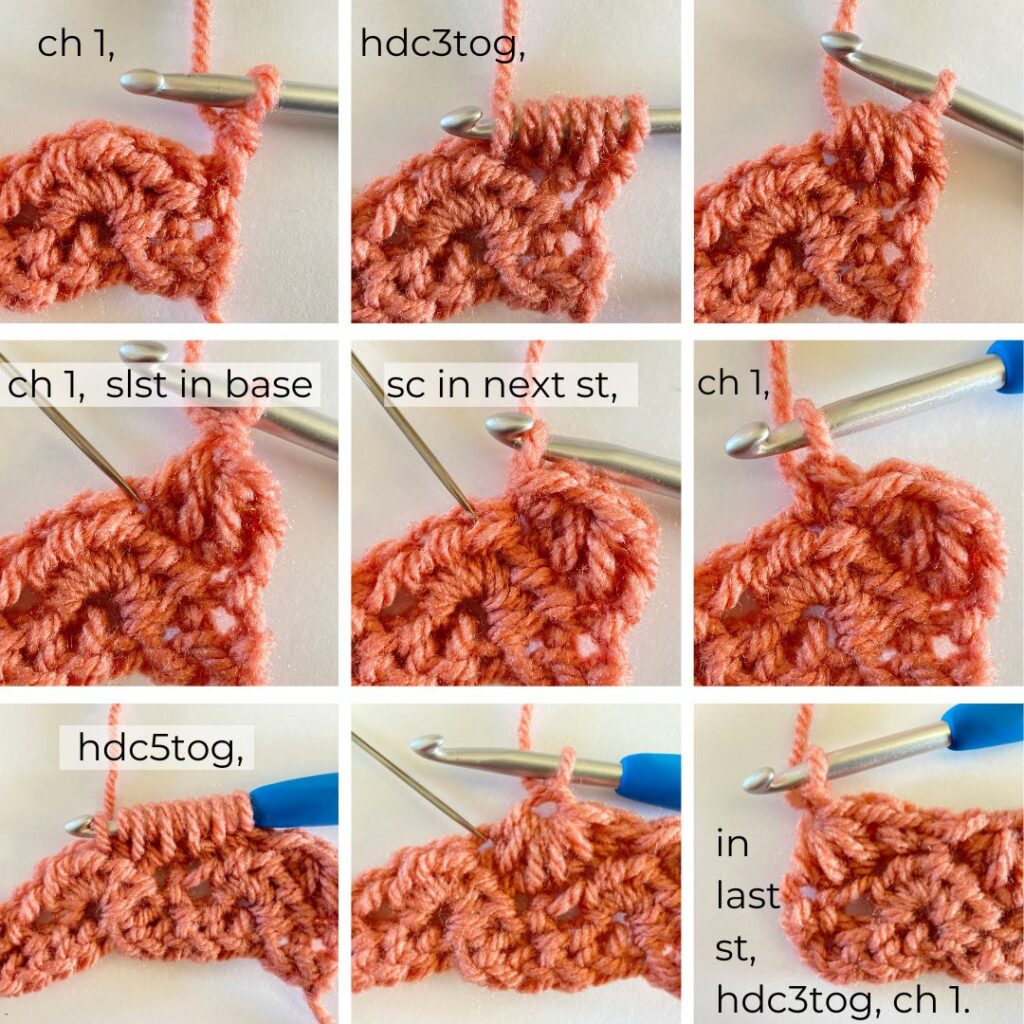
Row 3 (RS): Ch 1, hdc3tog, ch 1, slst into base of last st of 3tog, sc in next st, ch 1, [hdc5tog, ch 1, slst into base of last st of hdc5tog, sc in next st, ch 1], repeat [ ] until 3 sts remain, hdc3tog, ch 1, turn
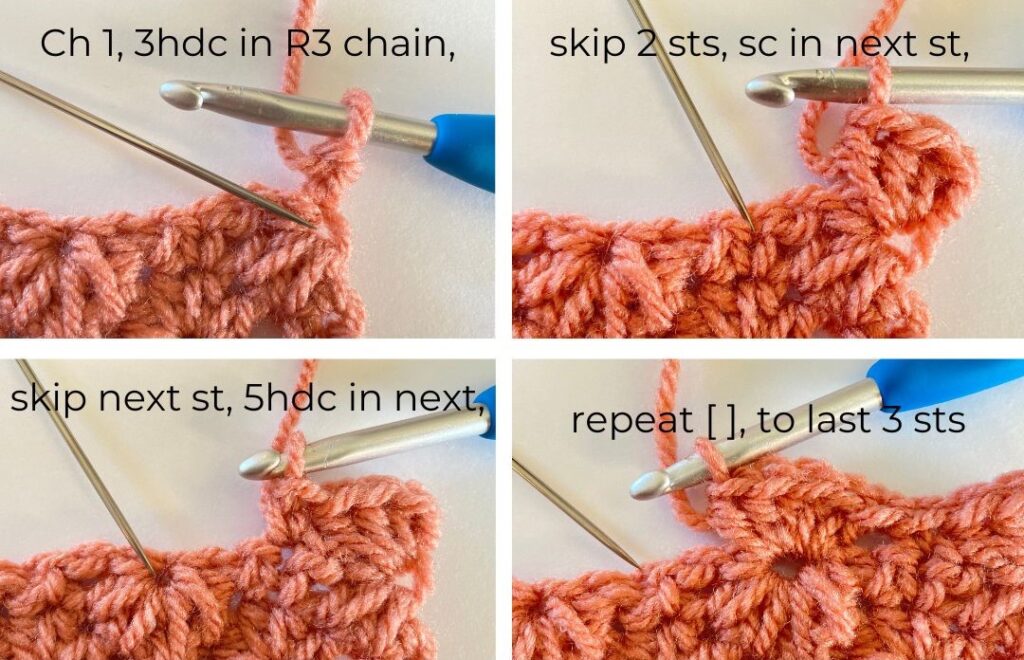
Row 4 (WS): Ch 1, 3hdc in the last ch of row3, skip next 2 st, sc in next st, skip next st, [5hdc in next st, skip next 2 sts, sc in top of sc of prior row, skip next st], repeat [ ] to last st, 3hdc in top of last st, turn
Row 5 (RS): Ch 1, sc in first st, [ch 1, hdc5tog, ch 1, slst into base of last st of 5tog, sc in next st], repeat [ ] to end, turn
You may notice that row 5 is very similar to row 3, however, the rows begin and end at different stitches which is why they are not repeat rows. The same is true for row 6 and row 4.
Row 6 (WS): Ch 1, sc in first st, [skip next st, 5hdc in next st, skip next 2 sts, sc in top of sc from prior row], repeat [ ] to end of row, turn
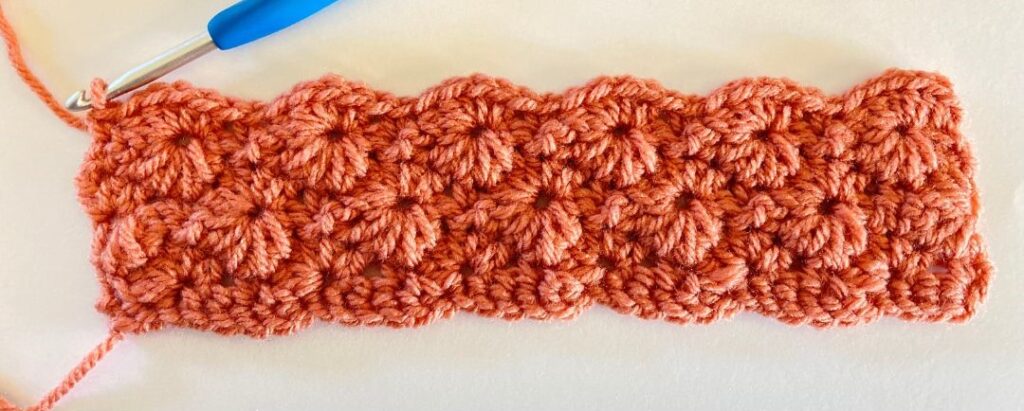
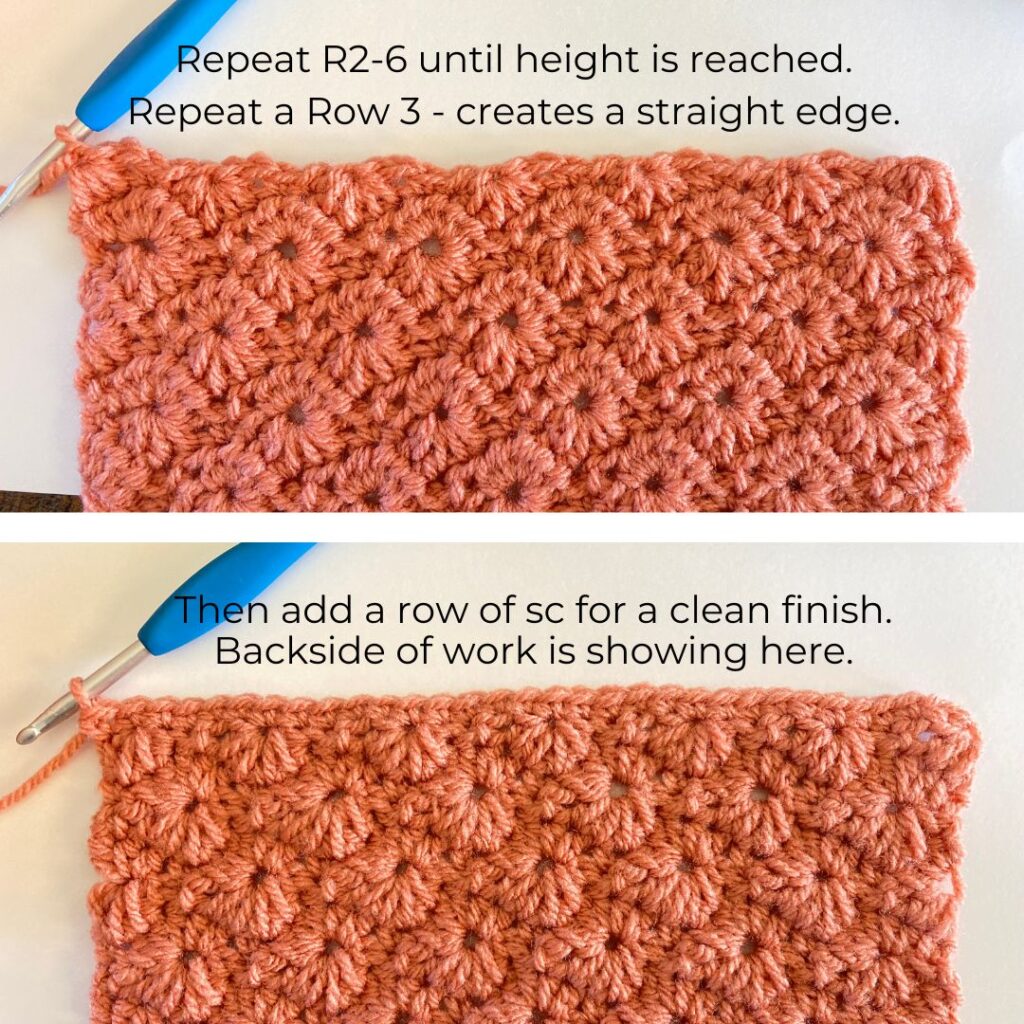
Repeat R3-R6 until ½” of the desired length
Repeat R3 (RS): this will leave a straight edge along the top of your crochet work then continue to the final row
Final Row (WS): for the final row you will work a row of single crochets to create a straight edge. Ch 1, 2sc in 1st st, sc in each st across while working 2sc in the top of each hdc5tog from the prior row
Watch The Full YouTube Video
I know photos can be helpful, but sometimes seeing it worked can be even more beneficial and easier to catch on. You can watch my YouTube video as many times as you need.
Blooming Blossoms CAL Information
insert info including buttons here
Another Option for the Catherine’s Wheel
The tutorial I just walked you through was for the Catherine’s Wheel stitch combination where the rows are mirrored. This means that the rows that began with a sc, also ended with a sc. Or, if they began with a hdc3tog, it mirrored at the end with a hdc3tog.
You can also work the Catherine’s Wheel in the same stitch combination but with the rows not beginning and ending in a mirrored way. For example, Row 3, begin with 3hdc in the first ch, if you don’t have multiples of 6 stitches, that row could end with a sc instead. This requires a stitch multiple of 6 + 4 stitches. If this works into your project better, watch my video tutorial on YouTube below:
More Stitch Tutorials you may love
- 4 row textured repeat – click HERE
- Vertical Stacked Puff Tutorial – click HERE
- Mini Bean Stitch Tutorial – click HERE
More Crochet Fun
Follow Sweet Potato 3 on Facebook to see more pattern releases, sales and crochet fun, just click HERE.
However, if you would enjoy a more interactive group experience, you need to join my Crochet & Conversations facebook group, click HERE. It is a ton of fun and I encourage everyone to share their projects, WIPS (works in progress) and inspirations. Plus you get exclusive deals, are the first to see new releases, give input on designs and have opportunities to win patterns. Join now and get to know others who also enjoy the art of crochet.