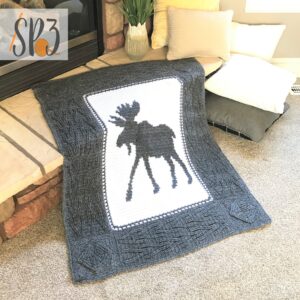
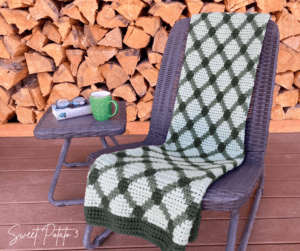
Mosaic crochet might just be one of the most beautiful crochet techniques out there—but let’s be honest, it leaves behind a whole lot of yarn tails that look like a tangled mess. And I totally get it—those wild ends are enough to scare anyone off!
But don’t worry—I’ve got you covered with three creative ways to tame those tails and finish your project with flair. Whether you’re into twist fringe, tassels, or a sneaky little pocket border, these finishing options will make your project look polished (and help you fall in love with mosaic crochet, mess and all!). In this step-by-step tutorial, I’ll walk you through three easy and decorative ways to finish your mosaic crochet: twist fringe, tassels, and a crocheted pocket border. Each technique offers a different vibe—from playful to polished—and works great for items like blankets, coasters, wall hangings, and scarves.

Whether you’re looking to hide your yarn tails or add some flair, you’ll find a finishing method that suits your style. I’ve also included a video tutorial for visual learners and image suggestions so you can follow along with ease.

Option 1: Twist Fringe
Twist fringe is a simple, elegant way to finish the edges of a mosaic crochet project where yarn tails are left hanging.
Steps:
- Separate the yarn tails into 2-row sections. Tie two pieces of yarn together, this helps secure them in place.
- Twist one strand clockwise until it twists around itself.
- Repeat with the next row end, twisting clockwise as well (both pieces of yarn MUST twist in the same direction), make sure it twists around itself as well and are twisted about the same. I like to count and twist each size about 15 times.
- Pull both pieces of yarn so they are the same length, then holding the strands of yarn together, tie them in a knot.
- Let go of the yarn after the knot is secure, and the yarn will naturally twist around each other and hold itself in a fun twist.
- Repeat along row ends until all ends are twisted.
- Trim all twisted fringe pieces to an even length.


Option 2: Tassels
Tassels are great for adding a fun boho finish to corners or edges.
Steps:
- Separate the yarn tails into 2-row sections. Tie two pieces of yarn together, this helps secure them in place.
- Wrap yarn approximately 3x around a small object that is slightly longer than you want your tassels (it is easier to work with longer pieces).
- Cut the ends of the yarn you wrapped on the same side you started wrapping on (this way your cut ends are on the same side), now cut the wrapped ends on the same end as your cut yarn ends.
- Slide the yarn off the object and notice there is a loop on the top.
- Insert your crochet hook from the back to the front of your mosaic crochet piece. I like to place this directly between 2 knotted sections from the first step.
- Take the loop that was created and using the crochet hook, pull the loop through the crochet piece.
- Using your fingers, pull the yarn ends (including the row end yarns from both sides of the hook) and pull them through the loop.
- Pull yarn ends so they are tight enough so they do not come undone, if you feel like this looks a little messy, take a minute and pull each individual yarn end. This usually make each piece of yarn even and cleans up the look of your tassel.
- Repeat along row ends.
- When all row ends are done, comb the tassels with your fingers and trim them evenly across.


Option 3: Crocheted Pocket Border
This method hides all those yarn tails neatly inside a border.
Steps:
- You do NOT need to tie the yarn ends as you did in the first 2 methods. Instead, just trim them to about 1- 1.5 inches long.
- Use a crochet hook that is about 1 to 2 sizes larger than you used for the crochet mosaic project.
- With the right side of the mosaic crochet piece facing you, join in any stitch with a slip stitch. Continue to work a slip stitch in each stitch across the row. When you reach the end of the row, simply rotate the crochet piece and work a slip stitch in each row end. Continue this around the entire mosaic piece,e making sure your stitches are loose. Fasten off.
- Turn your work so the back side is facing you. Join in the back bar of any of the slip stitches you just worked, Chain 1, and work a hdc (or dc if you prefer) in each back bar around the crochet piece. However, in the corners, you will need to add stitches to get a nice rounded corner. I recommend crocheting 2 stitches in the last and the first stitch of each row to help create the rounded corner. Join in the first stitch and fasten off.
- Now, turn your work so the front side is facing you. You will repeat the stitches in step 4, but work in the top or back loop of the slip stitches you completed in step 3. Once you have finished working the round, join in the top of the first stitch but do NOT fasten off.
- You now have 2 sides crocheted (or the front and the back of the ‘pocket’).
- Holding those 2 sides together, you will work a slip stitch in the top loop of each row. Slip stitch working through both pieces around, making sure you tuck the yarn ends in between the sides of the pocket.
- Once you have slip-stitched around the entire project, join and fasten off.


Watch the Finishing Techniques in Action
Prefer to follow along with video instructions? I’ve got you covered! Watch the full demonstration of all three finishing options in my latest tutorial.
🎥 Watch the Mosaic Crochet Finishing Video Tutorial on YouTube

Which Finish Should You Choose?
- Use twist fringe for a clean yet decorative edge.
- Choose tassels for statement pieces like scarves or wall hangings.
- Go with a pocket border if you want a polished look with no tails showing.
No matter which option you choose, your mosaic crochet project will look beautiful and professional!

More Mosaic Crochet Resources
If you’re new to mosaic crochet or want more ideas, check out:


Best place for image: A collage of all three finishing techniques on small projects like coasters or swatches.


