

Can you believe we are only 72 days away from Christmas (as of October 14th anyway). It is crazy how quick these next few months will go. A couple years ago I shared a hot pad tutorial with printables that everyone loved making for gifts during the holidays. So this year I put a spin on it and am sharing a Pocket Hot Pad Crochet Pattern.

I love to have a stash of small gifts to give. Everyone always needs last minute gifts for those that happened to not make the gift list during the hustle and bustle of shopping. But, we still want to recognize them and gift them something. Therefore, having a stack of small useful gifts in your stash is helpful and convenient.
Crochet Hot Pads Make Great Gifts
Crochet hot pads are one of those gifts everyone, and I mean everyone, LOVES. Plus they can be hard to find for most people that don’t crochet. So, gifting hot pads is a great handmade gift that will be appreciated. Check out my traditional hot pad and dish scrubby pattern that also has a free printable gift tag by clicking HERE.
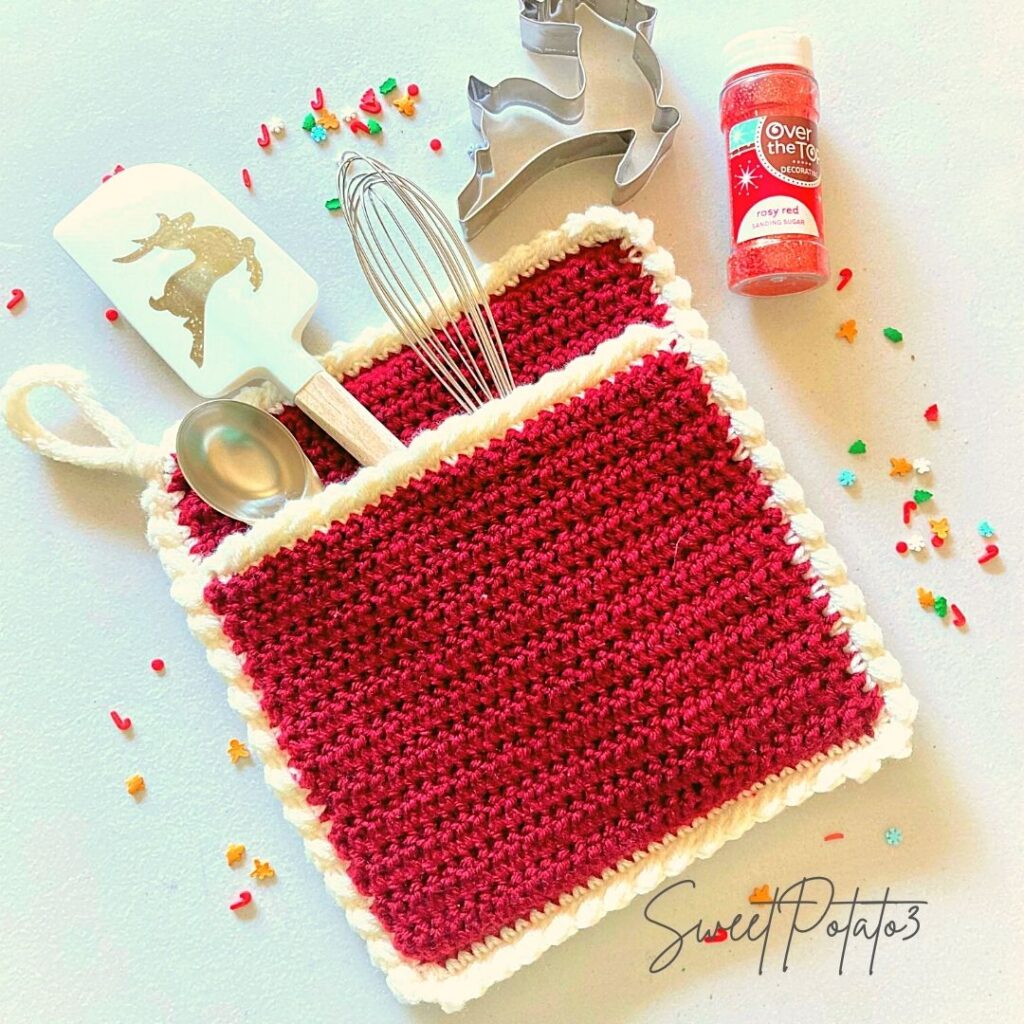
Because that last design was so popular I wanted to create another hot pad with a different spin on it. I created another FREE hot pad tutorial, but this time it features a handy pocket! Everyone loves pockets, plus it makes an adorable way to gift goodies!
But, before I get to the details about the Pocket Hot Pad crochet pattern, I want to share with you a great resource for more fun stash buster projects that make great last minute gifts.
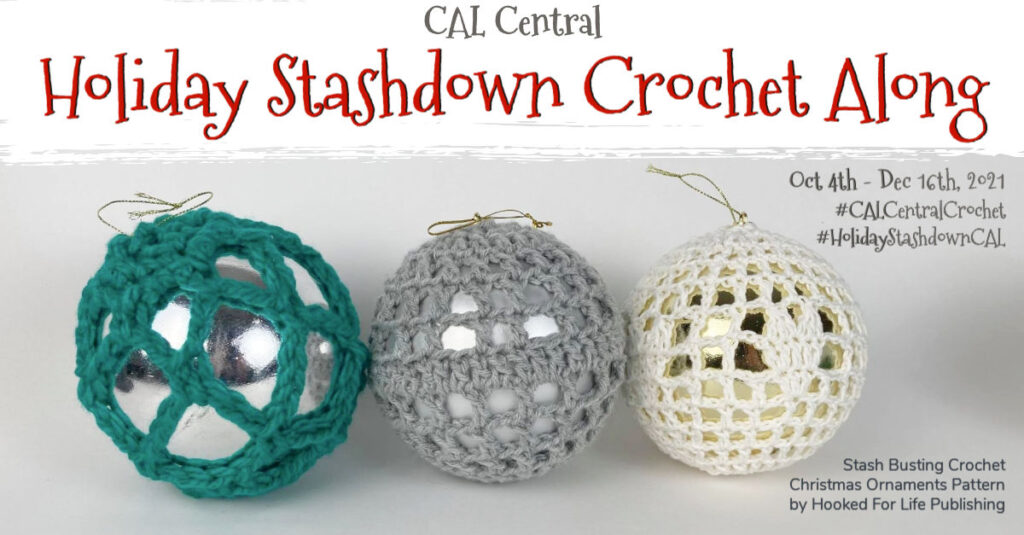
The 2021 Holiday Stashdown CAL
Every Monday and Thursday from October 4 through December 16, 2021, a free crochet pattern from a different designer will be shared. Each pattern will be a one-skein project, or a stashbuster/scrappy project, so you can work from your own existing yarn stash to make a great winter holiday gift, decoration, or wrap. If you’d like to go ahead and buy some yarn just for the project, we won’t stop you! We love yarn as much as you do.
Plus at the end of the CAL there is a huge giveaway so don’t forget to enter in this post on Underground Crafter by 11:59 p.m. on Friday, December 31, 2021! Enter HERE.
How to Participate in the Stashdown CAL
- You can join in by crocheting the featured patterns as you have time.
- Share your progress and post pictures of your finished projects. Tag your projects and posts #CALCentralCrochet and #HolidayStashdownCAL on all social media.
- If you’d like to chat with other crocheters, join the CAL Central Crochet Facebook group, or visit this thread in the CAL Central Ravelry group.
- By the end of the CAL, you’ll have up to 22 gifts, decorations, or wrap projects for the winter holidays.
- Visit Underground Crafter to learn more about the prizes, enter the end-of-CAL giveaway, and to get links to each Holiday Stashdown CAL pattern as it is released.
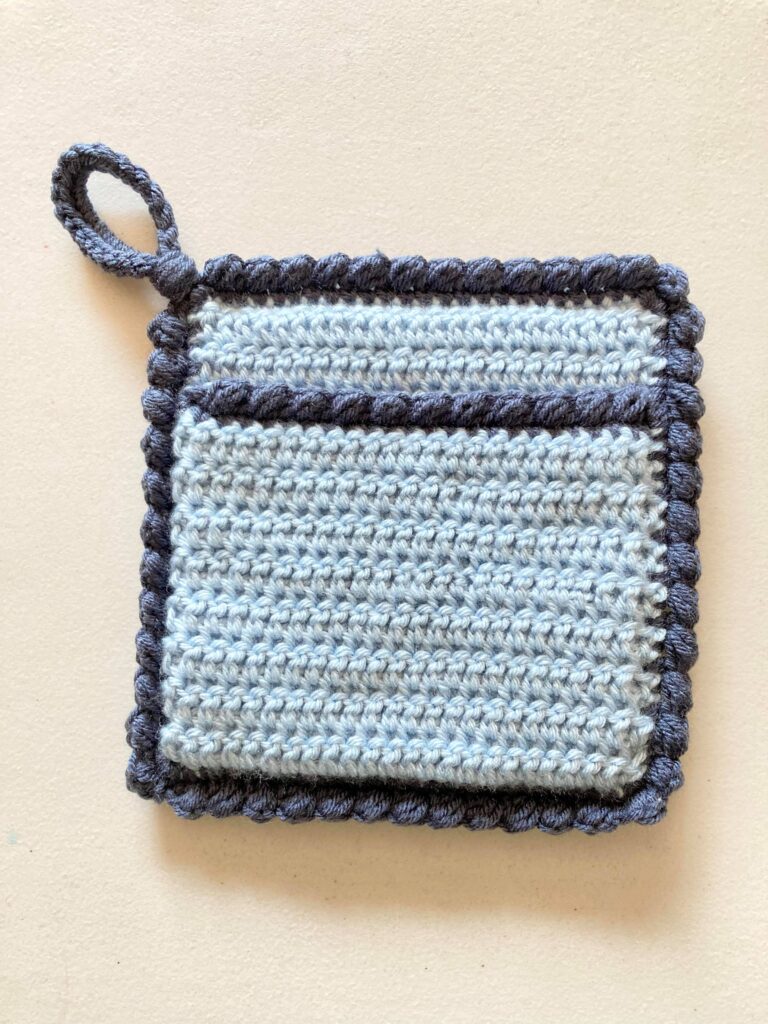
About the Pocket Hot Pad
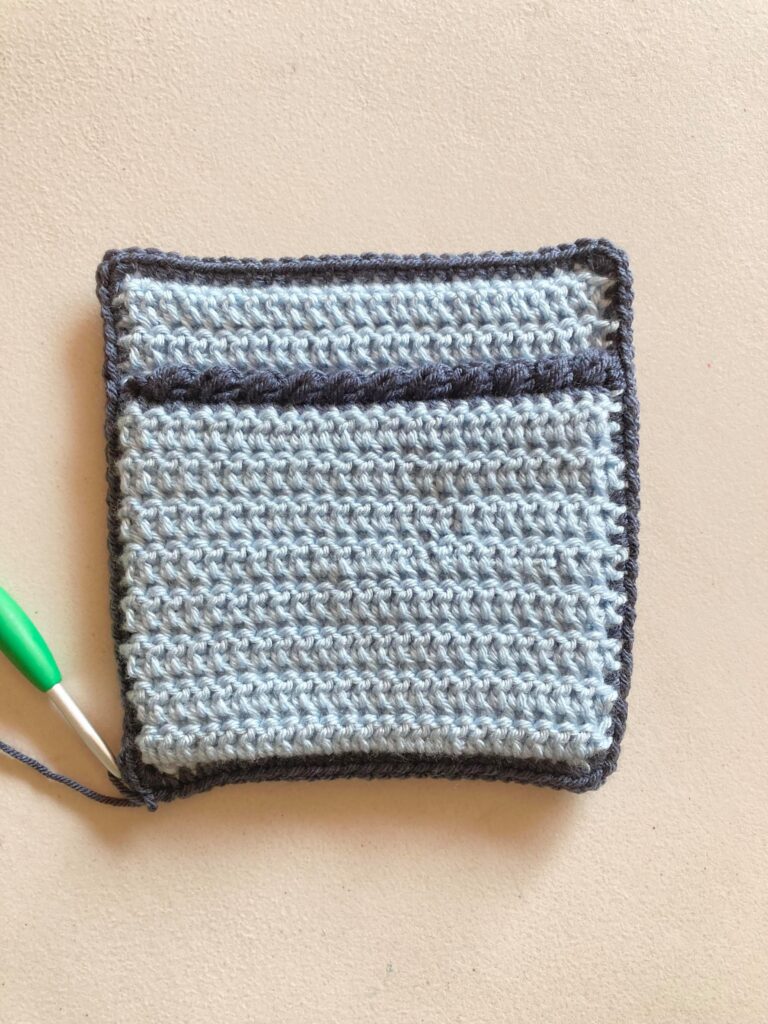
The design of the hot pad is created with a stitch that practically crochets a double thickness so there is no need for a double layer. This is a big time saver. The pattern includes 2 sizes and can be made with or without a pocket on it. But, my favorite part is the cute little hanging loop in the corner!
Materials Needed
- Crochet Hook Size I (5.50mm)
- Worsted (#4) Weight Yarn in 2 colors – these were so much fun to make I made a few samples to show you- you can check out the yarn details below:
- Large Red sample – Premier Anti Pilling Everyday Worsted
- Main Color (Burgundy) ~ 120 yards (less than 1 skein)
- Contrasting Color (Cream) ~ 30 yards (less than 1 skein or scrap)
- Small Blue sample – Premier Anti Pilling Everyday Worsted
- Main Color (Quiet Blue) ~ 100 yards (less than 1 skein)
- Contrasting Color (Admiral Blue) ~ 25 yards (less than 1 skein or scrap)
- Small with No Pocket Gold sample – Premier Anti Pilling Everyday Worsted
- Solid Color (Mustard) ~ 95 yards (less than 1 skein)
- Measuring Tape
- Yarn Needle
- Scissors
Stitches Used
- Ch = Chain
- Slst = Slip Stitch
- Sc = Single Crochet
- Dc = Double Crochet
- ThermalDc = Thermal Double Crochet (photo tutorial & video tutorials are below in this post)
- ReversePuff = Reverse Puff Stitch (photo tutorial & video tutorial are below in this post)
- BL = Back Loop
Gauge
Gauge will be checked while making the pattern. However, gauge isn’t essential unless you want the final size to be exact. It is essential that your stitches are even throughout the pattern and tight so heat doesn’t transfer through to your fingers too quickly. If your stitches are not tight, change hook to smaller size until this is achieved.
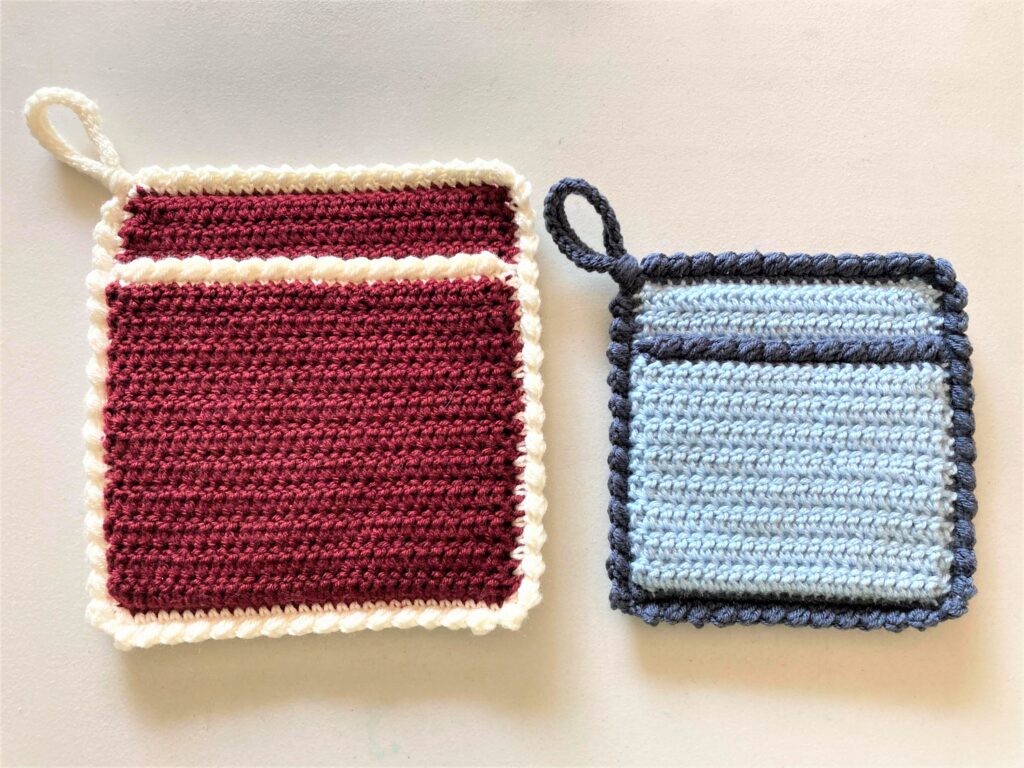
Pocket Hot Pad Size
7” square (blue sample)
9” square (burgundy sample)
Pattern Notes
- The pattern has 2 sizes. Instructions are written for the smaller size with larger size in parenthesis.
- The hot pad is made in 2 pieces, a front and back that are then stitched together.
- Do not count the beginning chain as a stitch.
- When the pattern states to repeat, repeat what is stated in the brackets [ ].
Main piece of the Hot Pad Pattern
Begin by making the back of the hot pad (this is the full square piece) and if using 2 colors of yarn use your main color of yarn.
R1: Ch 25 (31), sc in 2nd ch from hook and each ch to end, turn (24, 30)
R2: Ch 1, working in BL only for this row, dc in each st across, turn (24, 30)
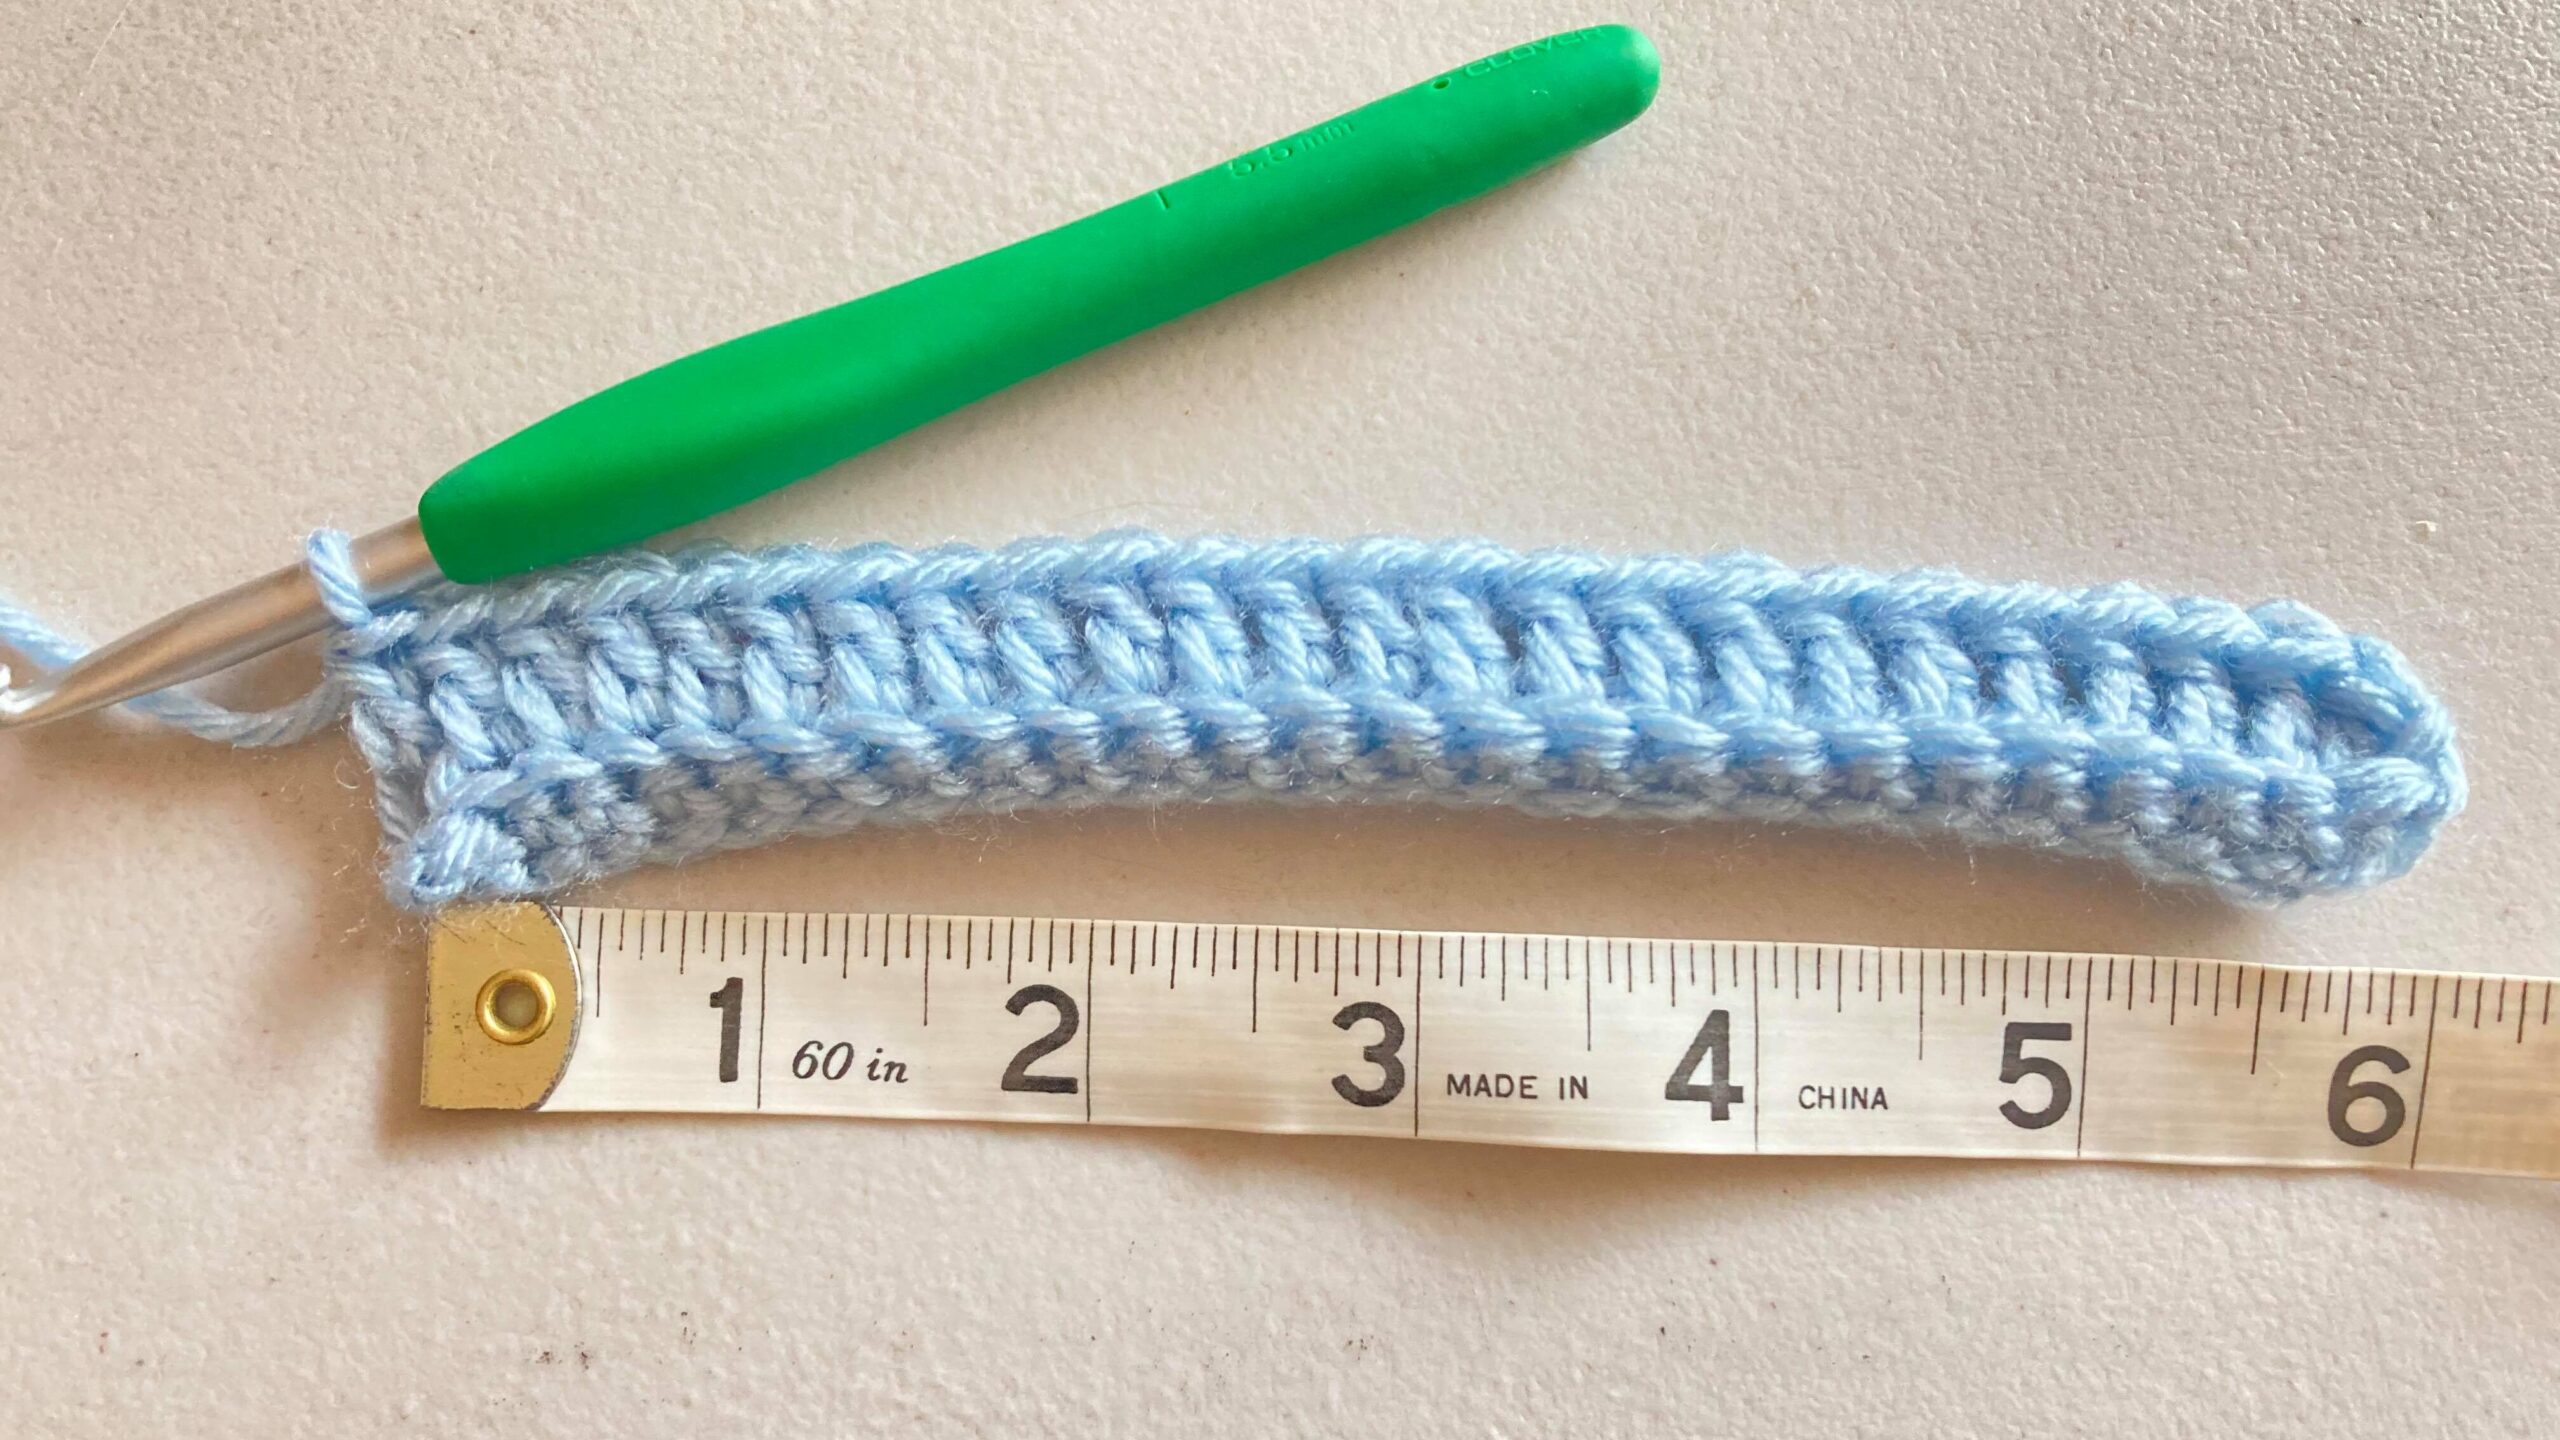
Small Size Measures 6″ Wide / Large Size Measures 8″ Wide
R3: Ch 1, ThermalDc in each st across, turn (24, 30) Note: the first couple rows of the thermal stitch it is easier to rotate your work instead of turning, this allows you to see your stitch plaement. After a couple rows have been crocheted, a traditional turn works great. If this is confusing you can watch my video tutorial below.

This image only shows the hook placement for the first step. 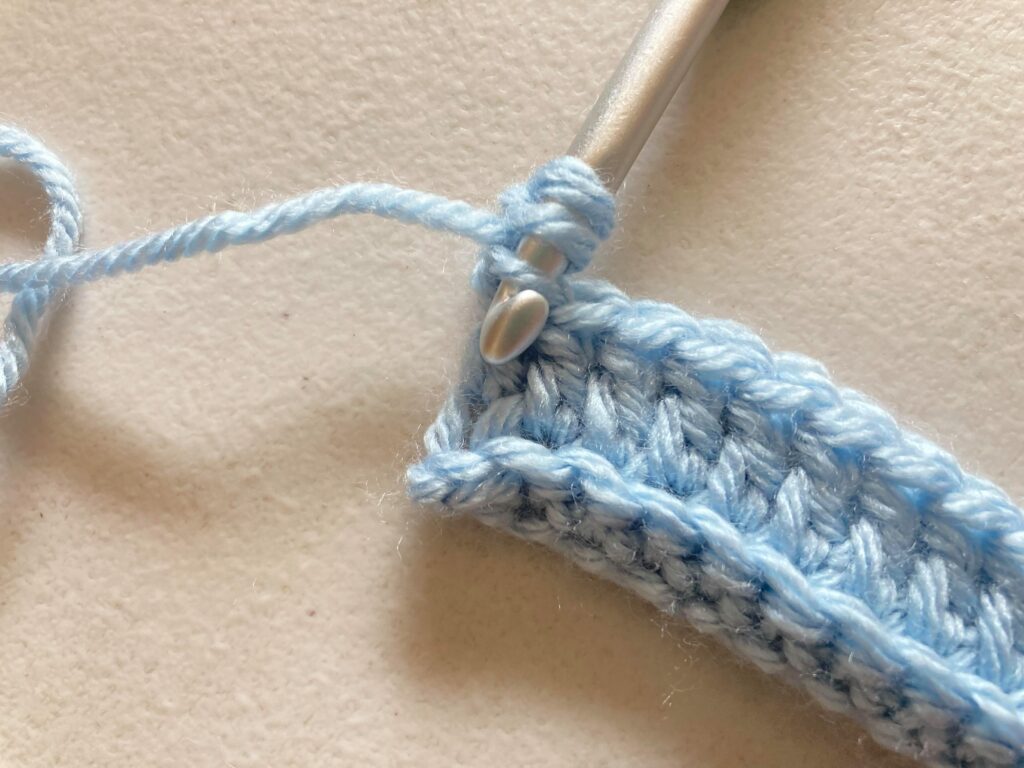
yarn over, insert hook into the back loop 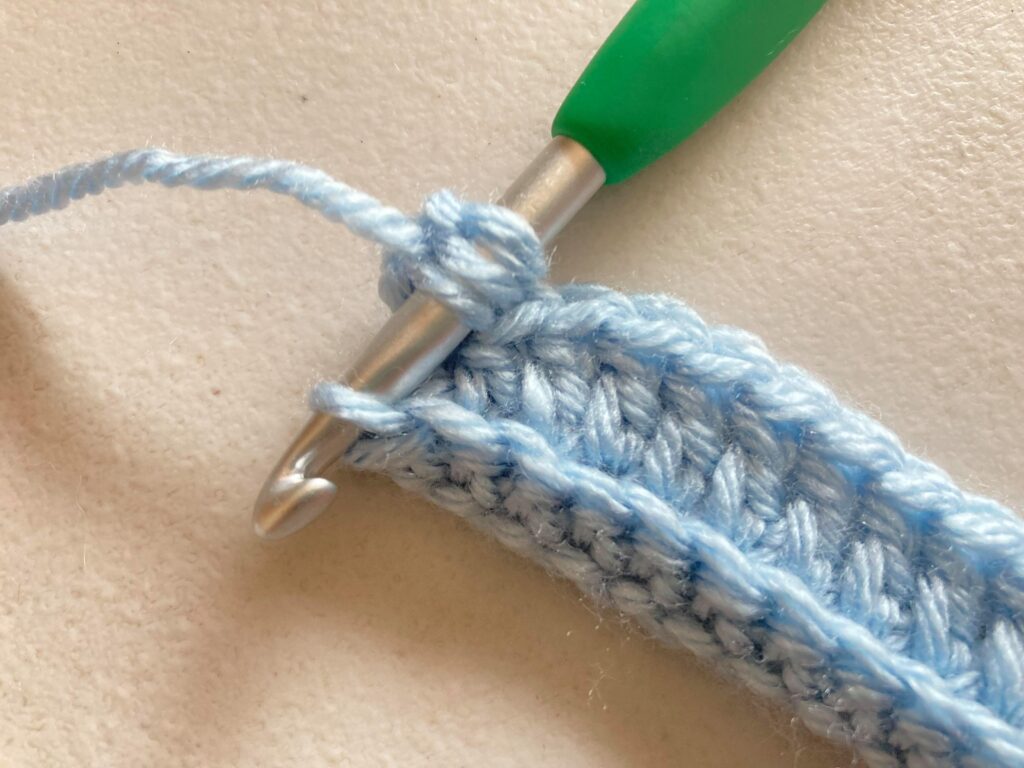
insert hook into the unworked loop from prior row 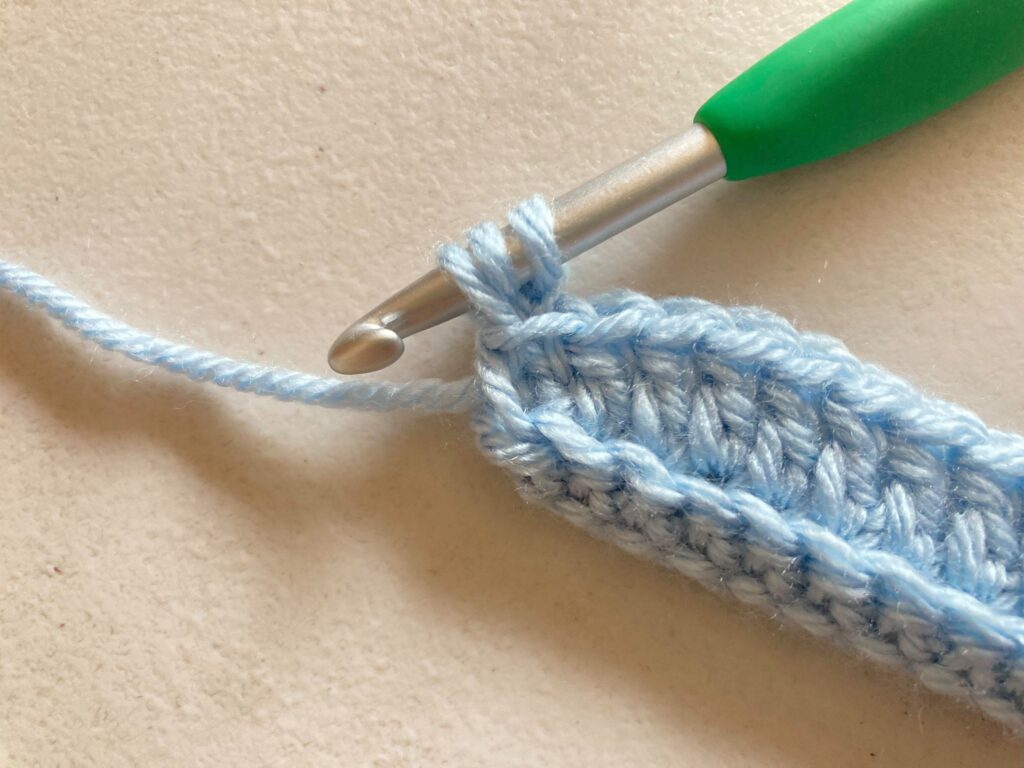
pull up a loop 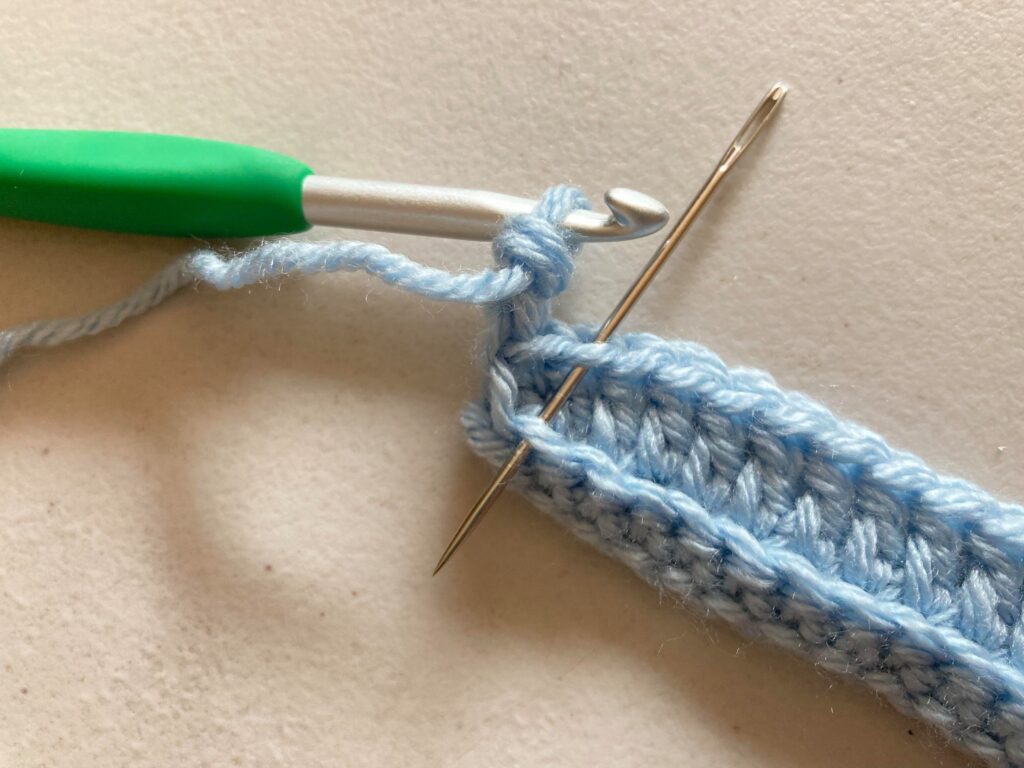
complete dc by yarn over pull through 2 loops on hook, yarn over pull through remaining 2 loops on hook-repeat this process in the next loops
Thermal Double Crochet tutorial
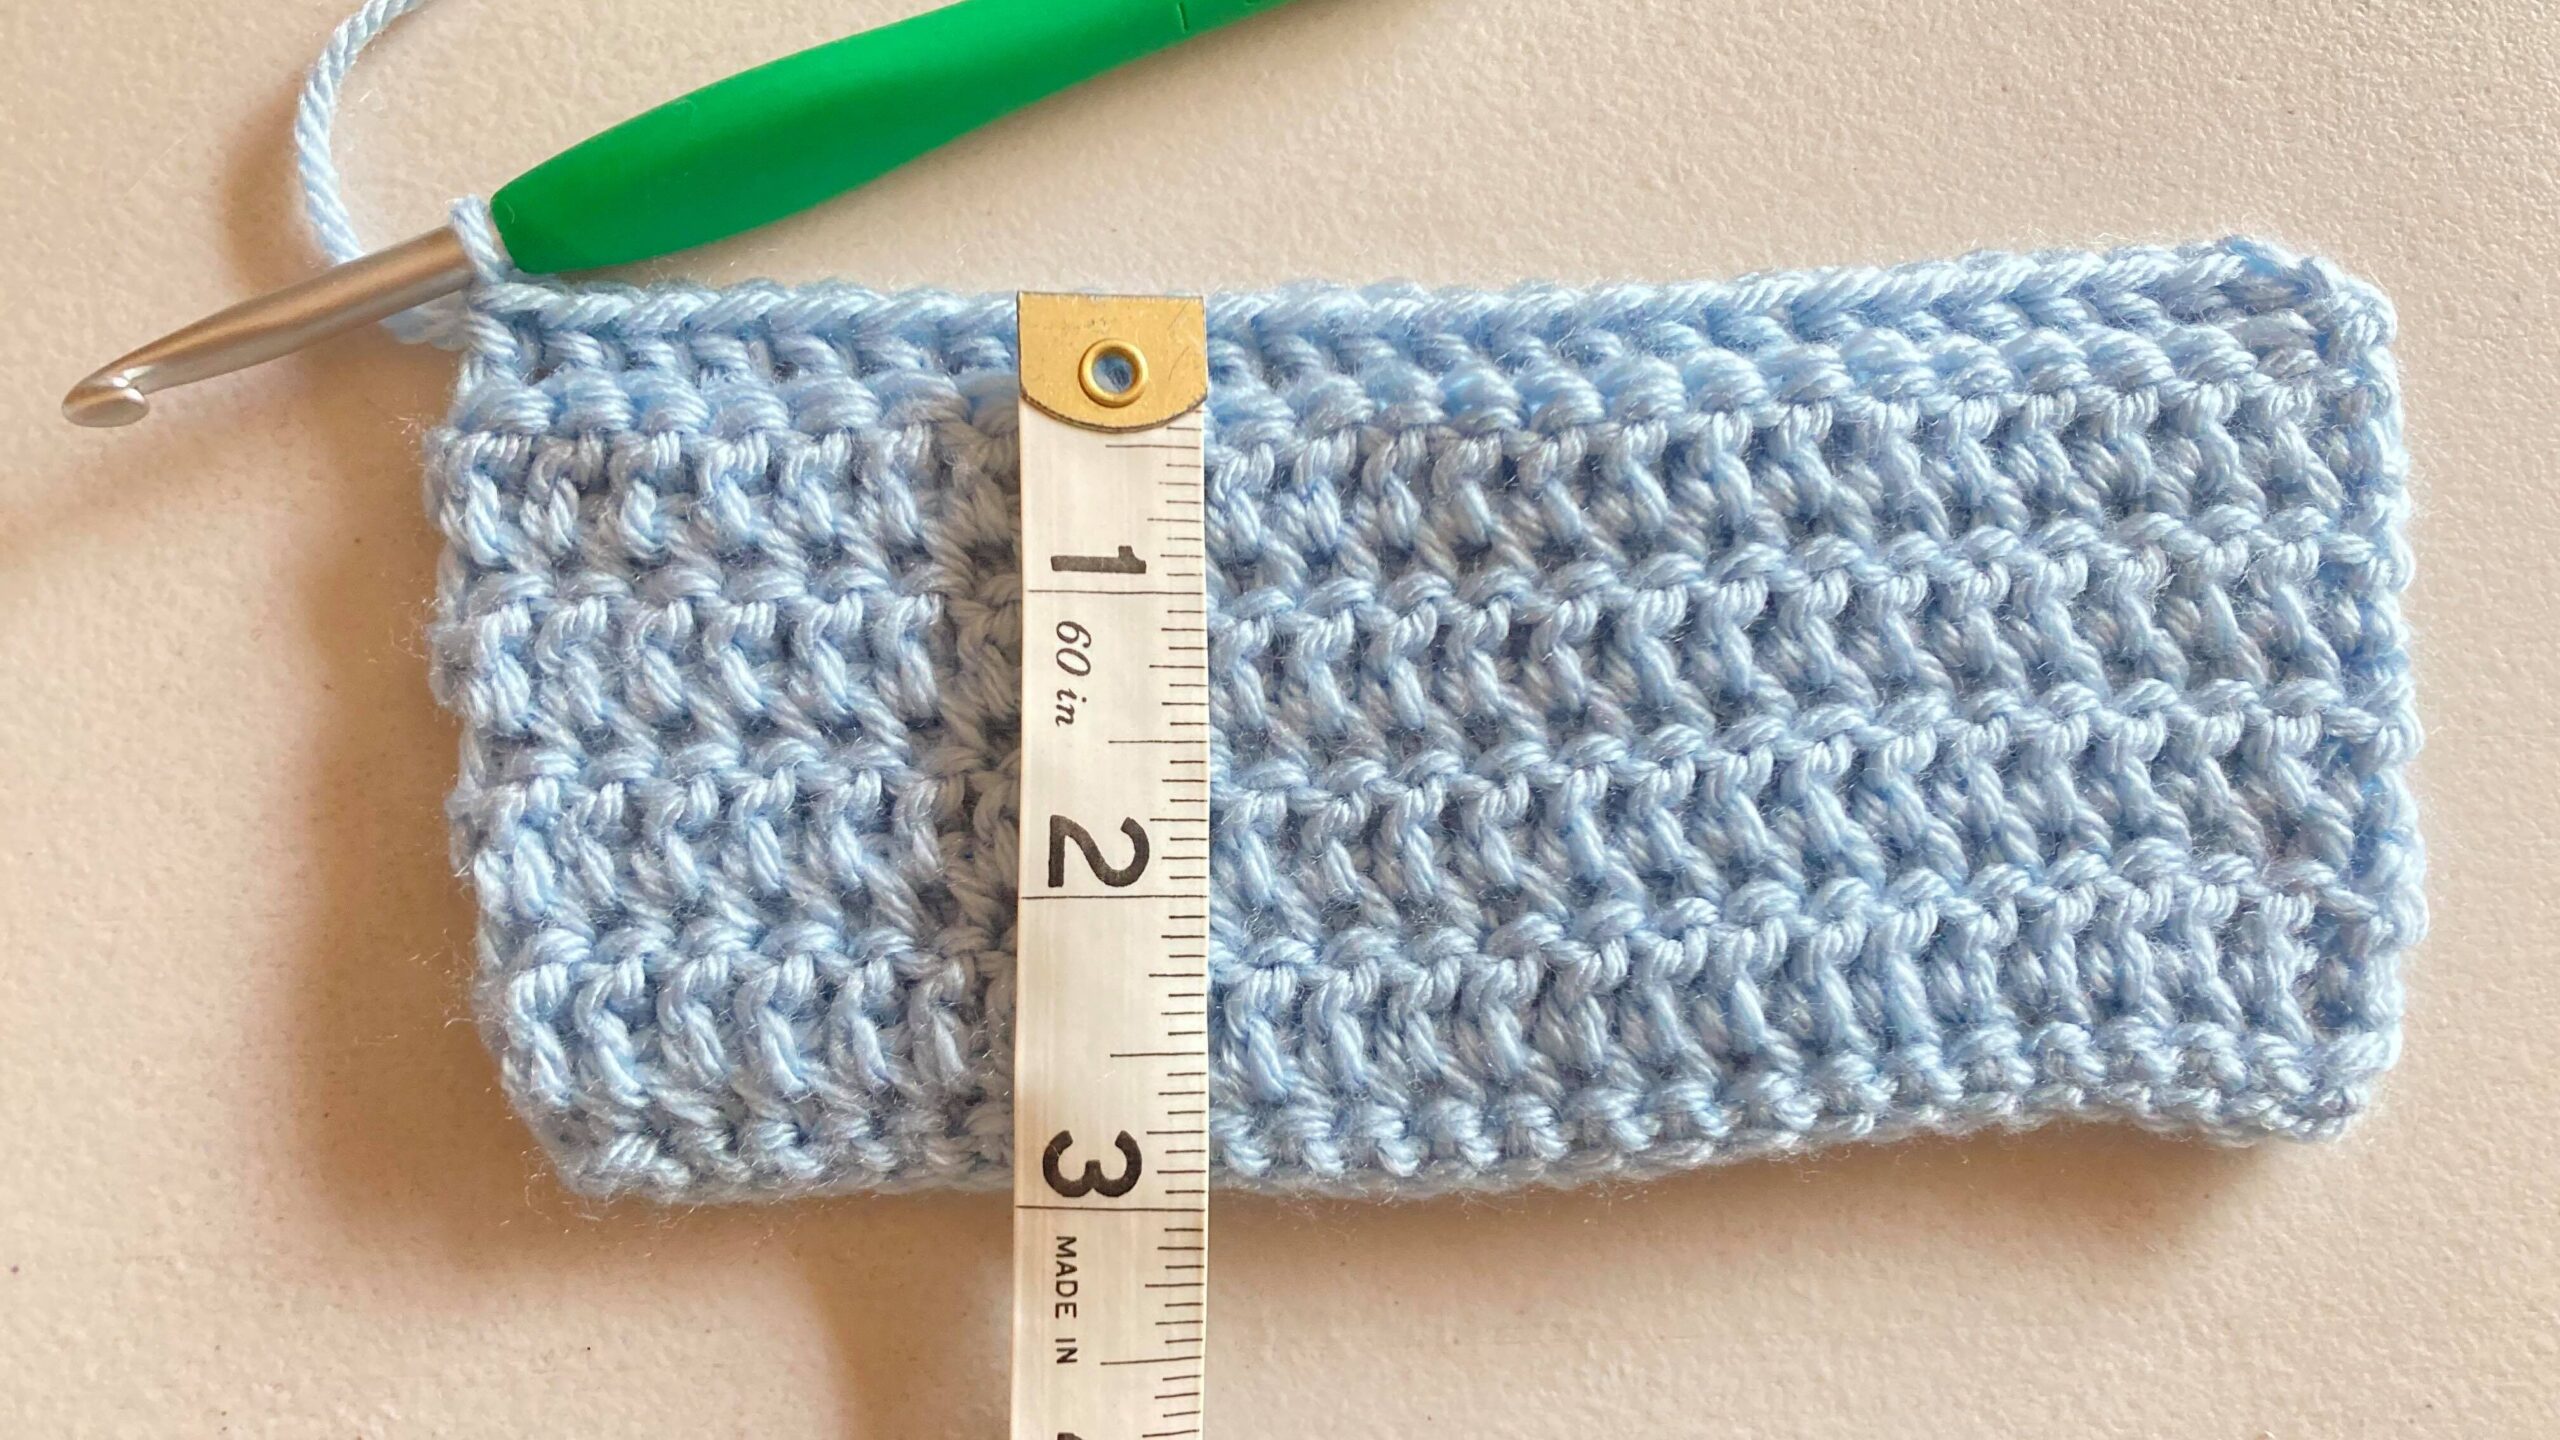
Continue to repeat R3 until you have crocheted a total of 10 rows. This is when you should/can do a gauge check, your height for both the small and larger size should measure 3″ high.
Repeat R3 until measures 6” (8”) high or until the height matches the width
Final Row: Ch 1, in each st across sc through both loops of stitch AND the BL (unworked loop) of corresponding st from the prior row, fasten off and weave in ends (24, 30)
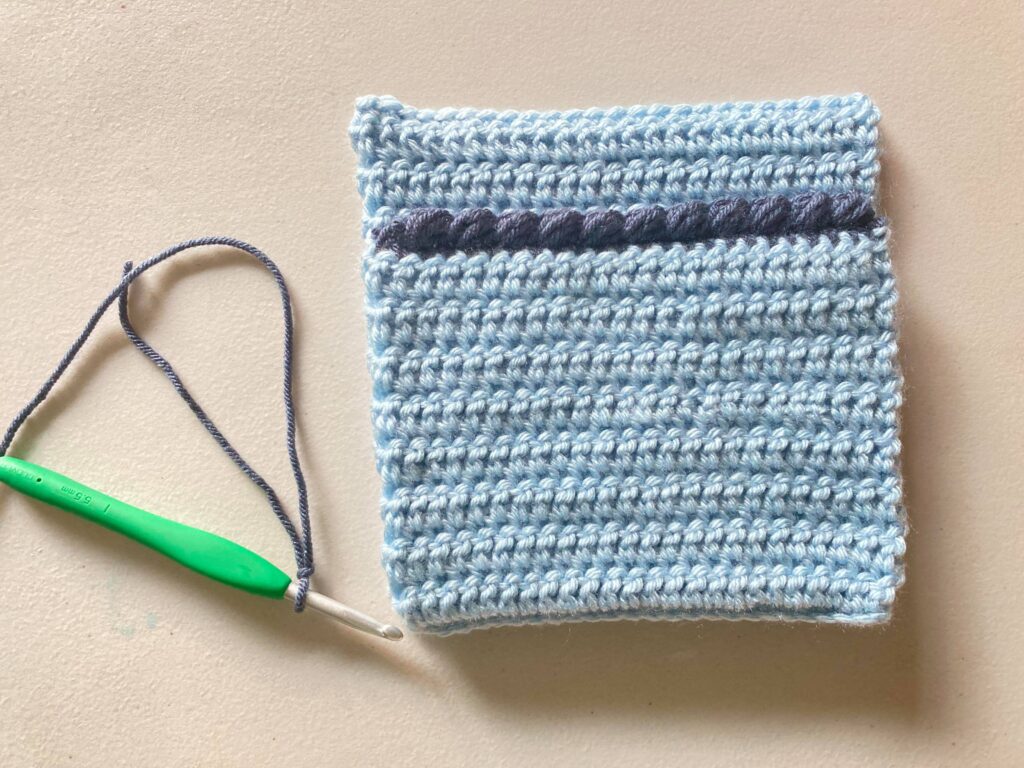
Make The Front Pocket for the Hot Pad (optional)
Repeat R1-R3 of the Hot Pad
Repeat R3 until measures 4” (6”) high or until the height is 2” short of the hot pad height
Switch to contrasting color
Final R1: Ch 1, in each st across sc through both loops of last stitch AND the BL (unworked loop) from the prior row, do not turn
Note: if you are right handed work next row from left to right / if you are left handed work the next row from right to left
Final R2: Ch 1, see above note, [skip st, yarn over, insert hook into next st from the right of your hook, pull up a loop, yarn over, insert hook into same st, pull up a loop, yarn over, pull through all 5 loops on your hook, ch to close], repeat [ ] until 2 sts remain, skip next st, slst into next st, fasten off and weave in ends.
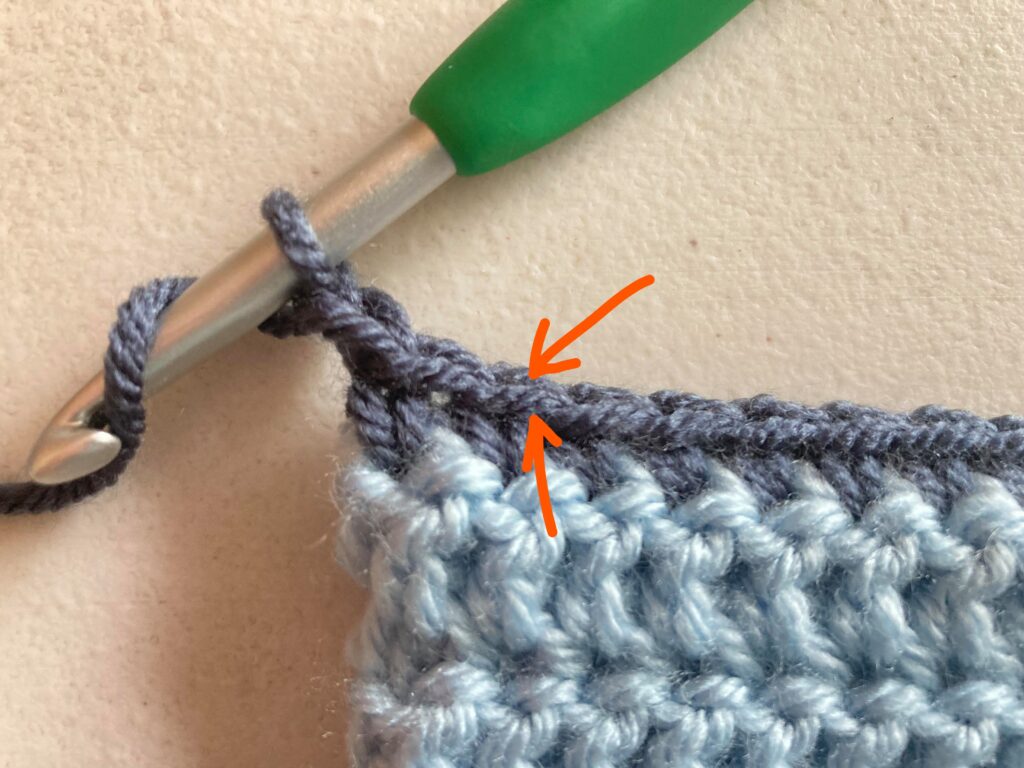
Working from left to right, skip first st, yarn over, insert hook into next st 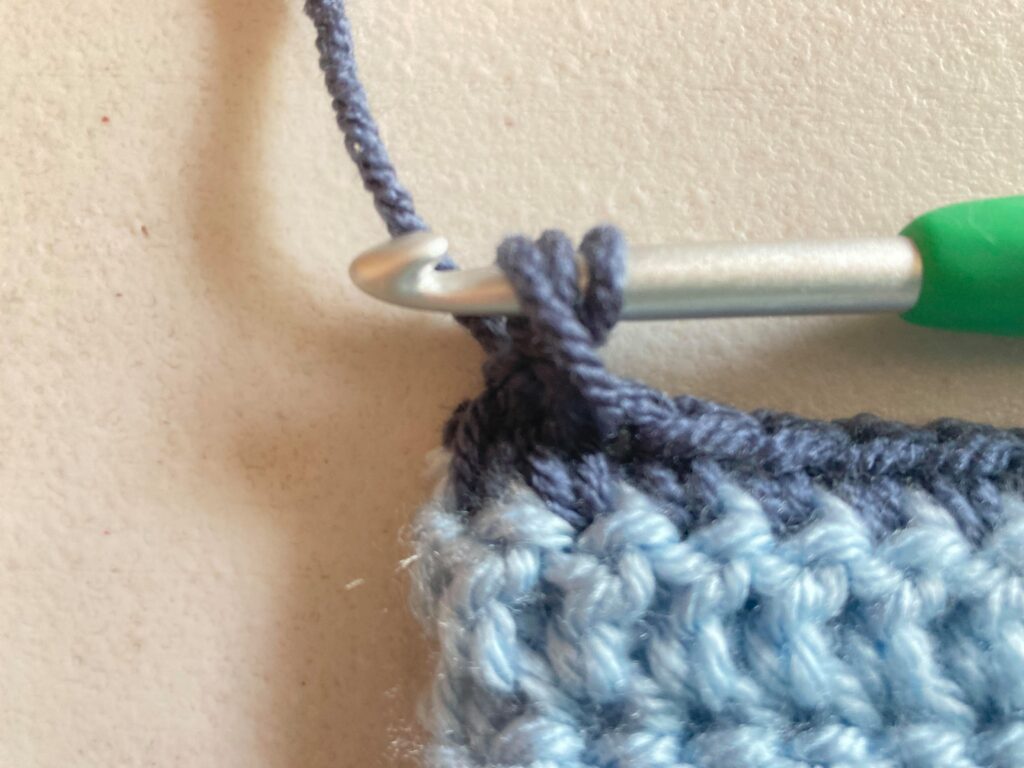
and pull up a loop 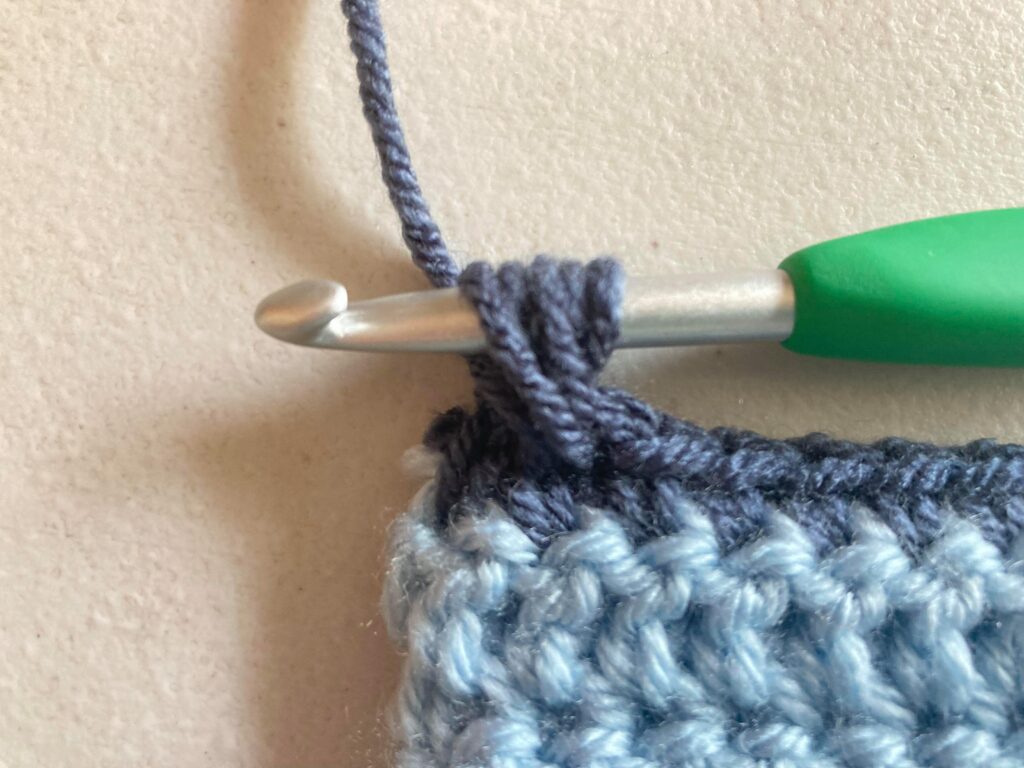
yarn over, insert hook and pull up another loop, 5 loops on hook 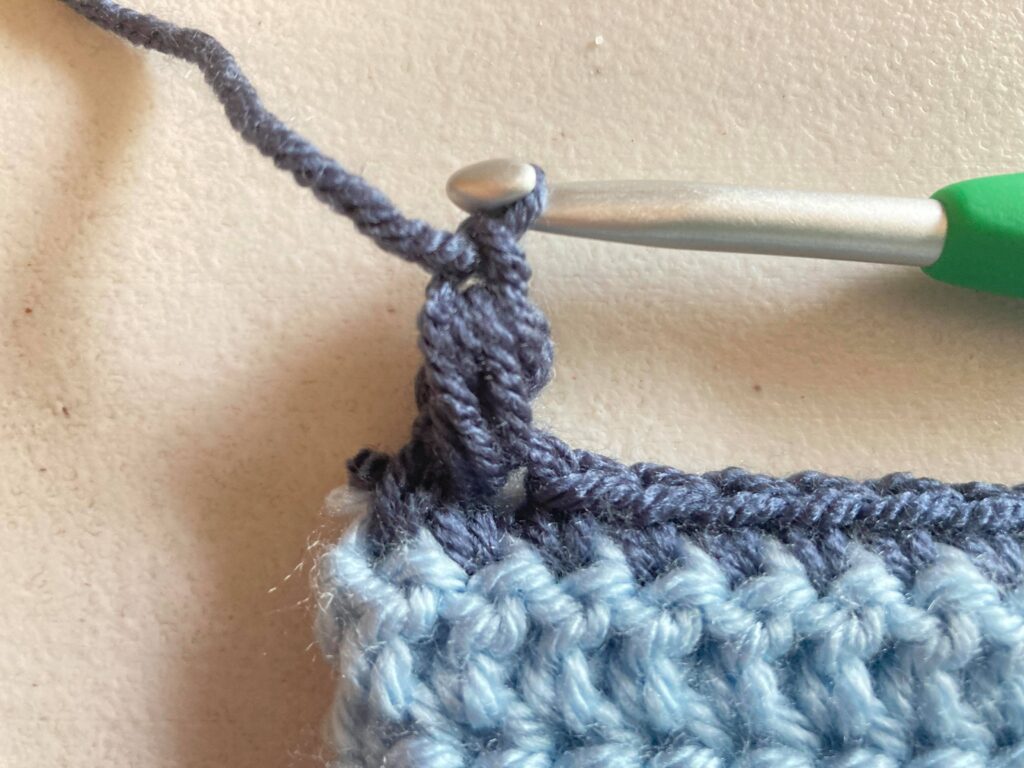
yarn over, pull through all loops on hook, ch to close 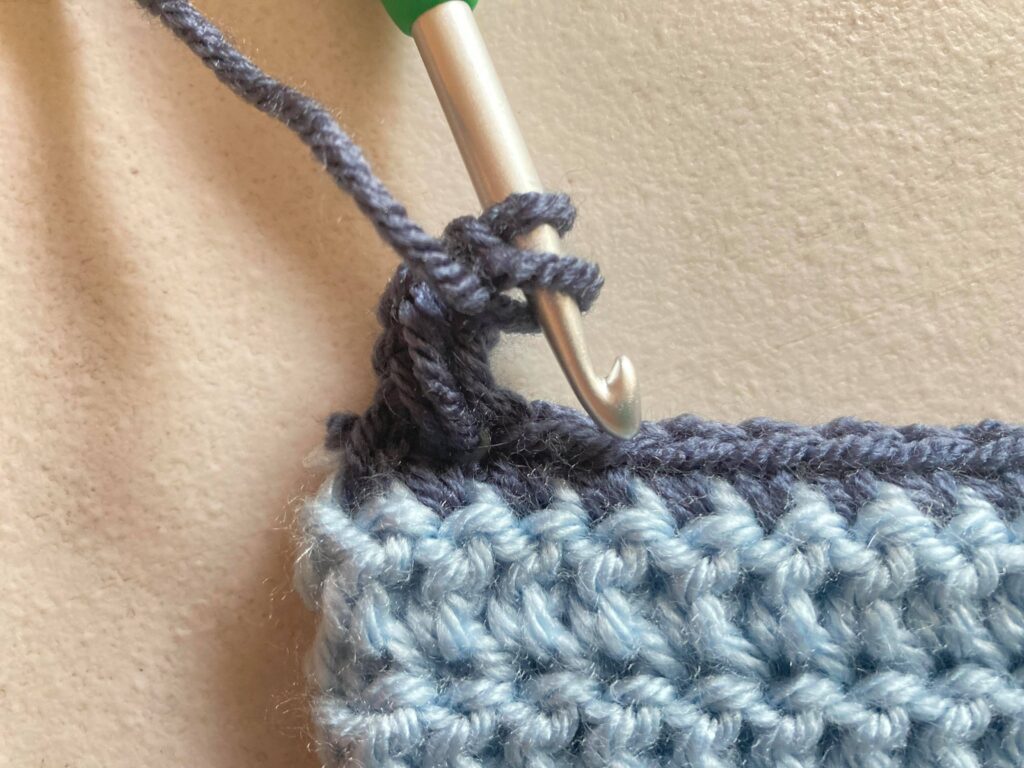
Skip next st, yarn over 
insert into the next st, pull up a loop 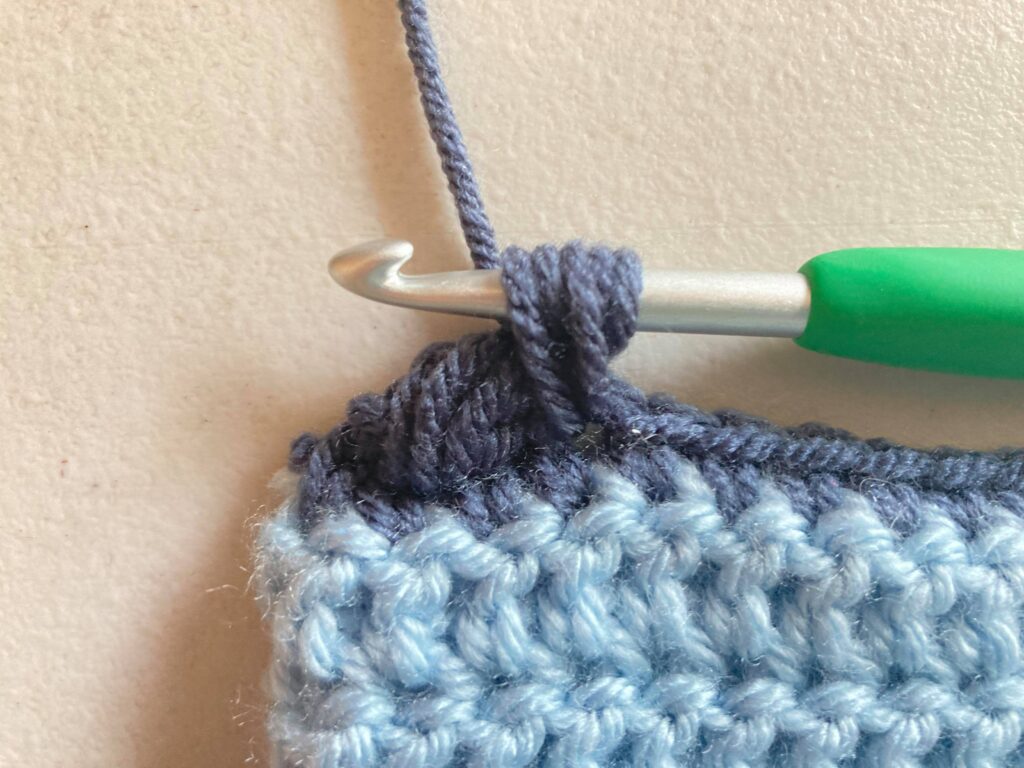
yarn over, pull up a loop 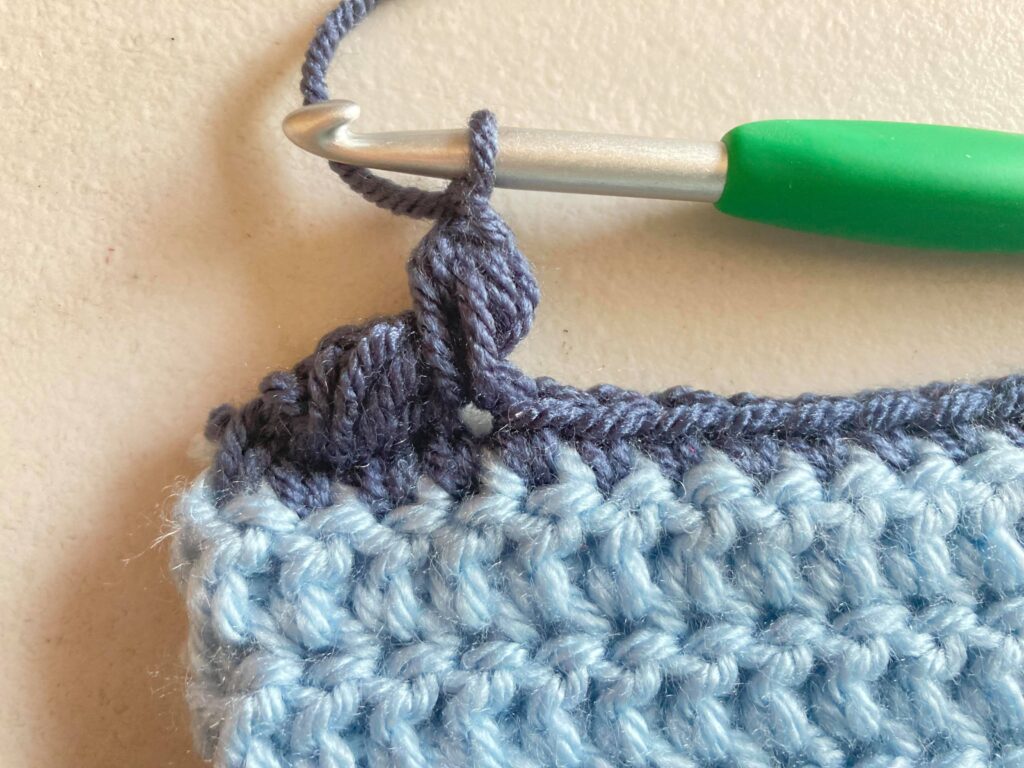
yarn over, pull through all 5 loops on hook, ch 1 to close 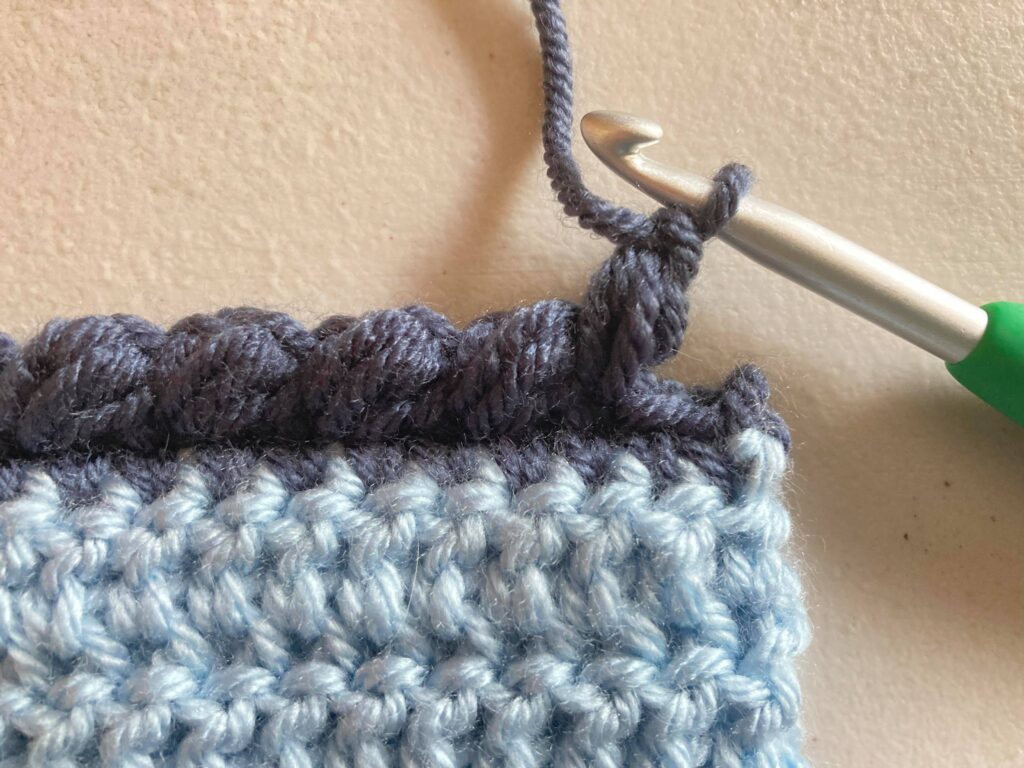
repeat pattern to end, slst in last st.
Video Tutorial for the Reverse Puff Stitch
Stitching Pocket & Border of Hot Pad
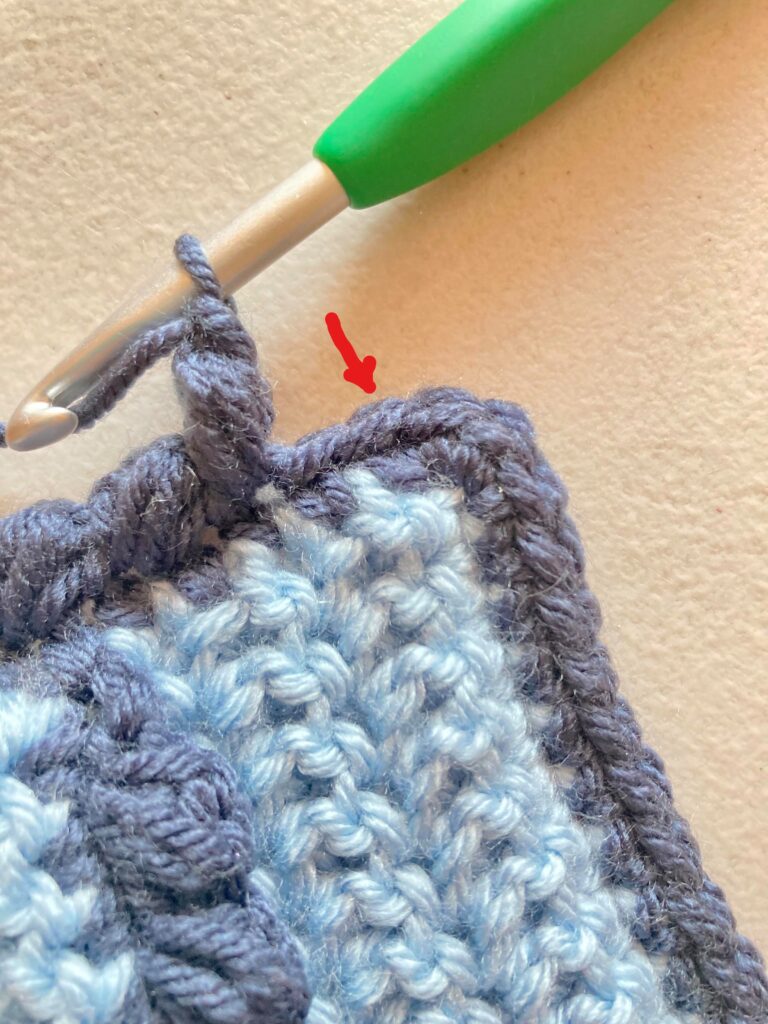
- 1st Step: If you did not make a pocket, skip to step 2. Place the pocket on top of the hot pad. Single crochet the pieces together working through both the hot pad and the pocket. Join with a slip stitch in the lower left corner, chain 1, working an even number of stitch on each side sc in each row end and/or st around (working 3 sc in the corners), do not count these corner 3 sc in your even number of stitches, join in top of the first sc, do not turn.
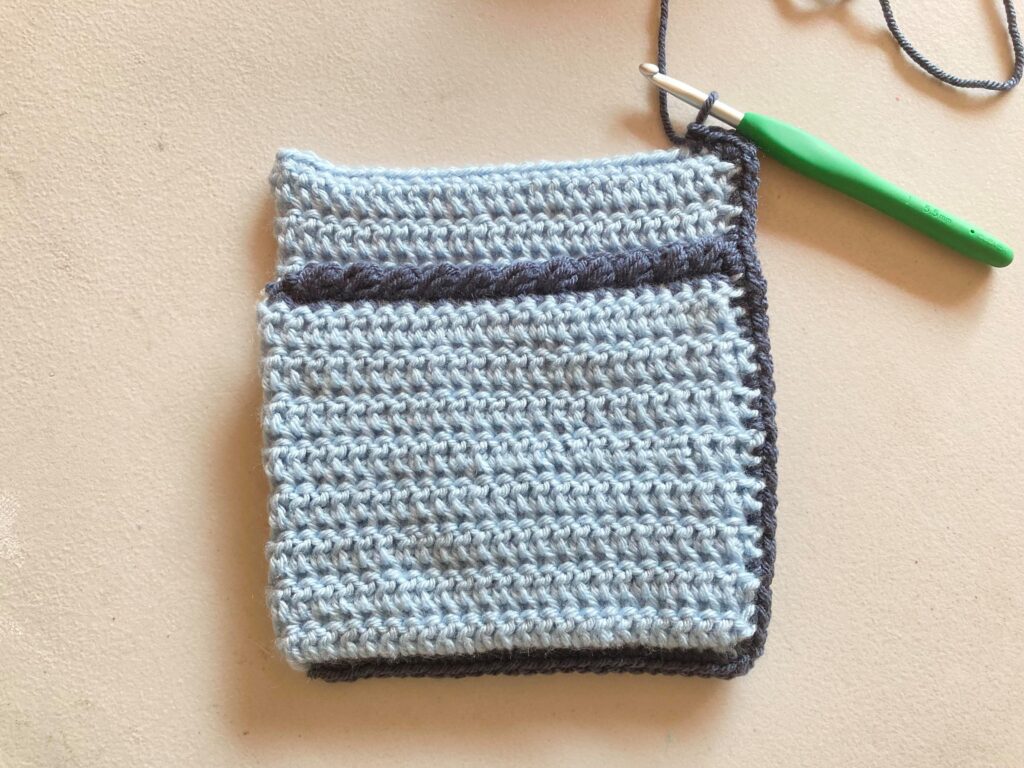
- 2nd Step: Begin the left side reverse puff stitch: Ch 1, Reverse Puff along the first side (left side working from bottom towards the top) until you reach the 3sc corner.
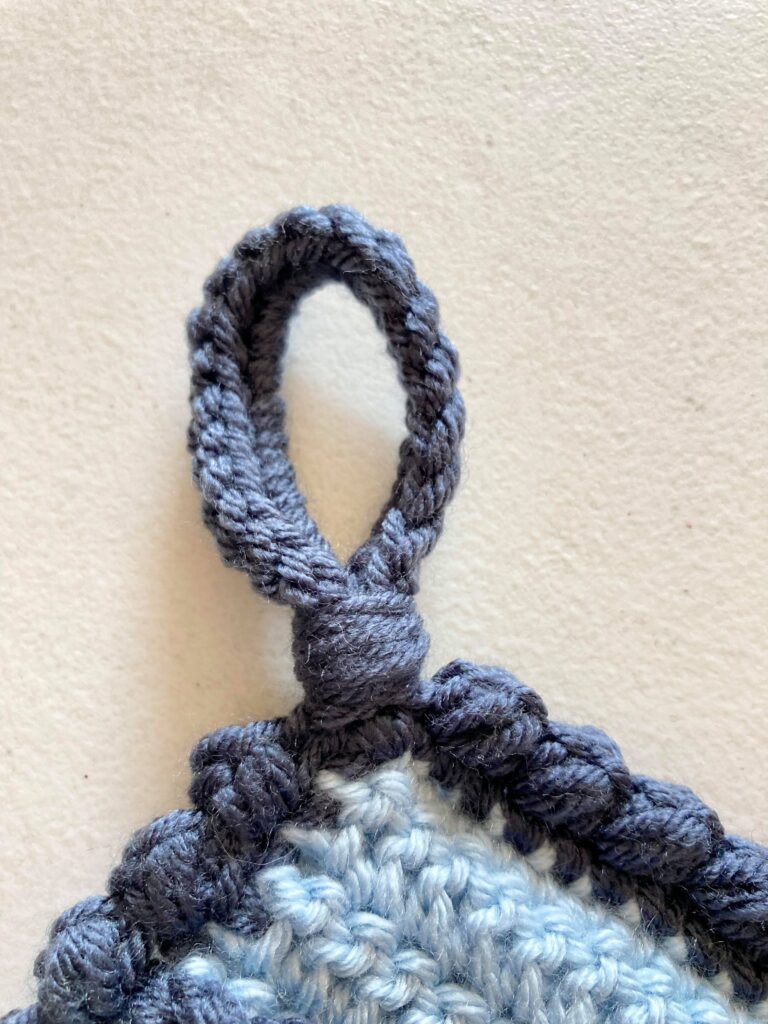
Create the Hanging loop
- 3rd Step: Reference photos below: Slst into 1st sc of the corner, ch 18 (same for both sizes), skip next st, slst in next st, turn, ch 1 and work 20sc in ch sp, slst into same st as beginning slst, turn, (if this transition is not the cleanest it is okay-it will be covered up when we wrap the base of the loop) slst into each sc in loop, slst into same st as slst in 3rd corner sc.
3. Slst into 1st sc of the corner 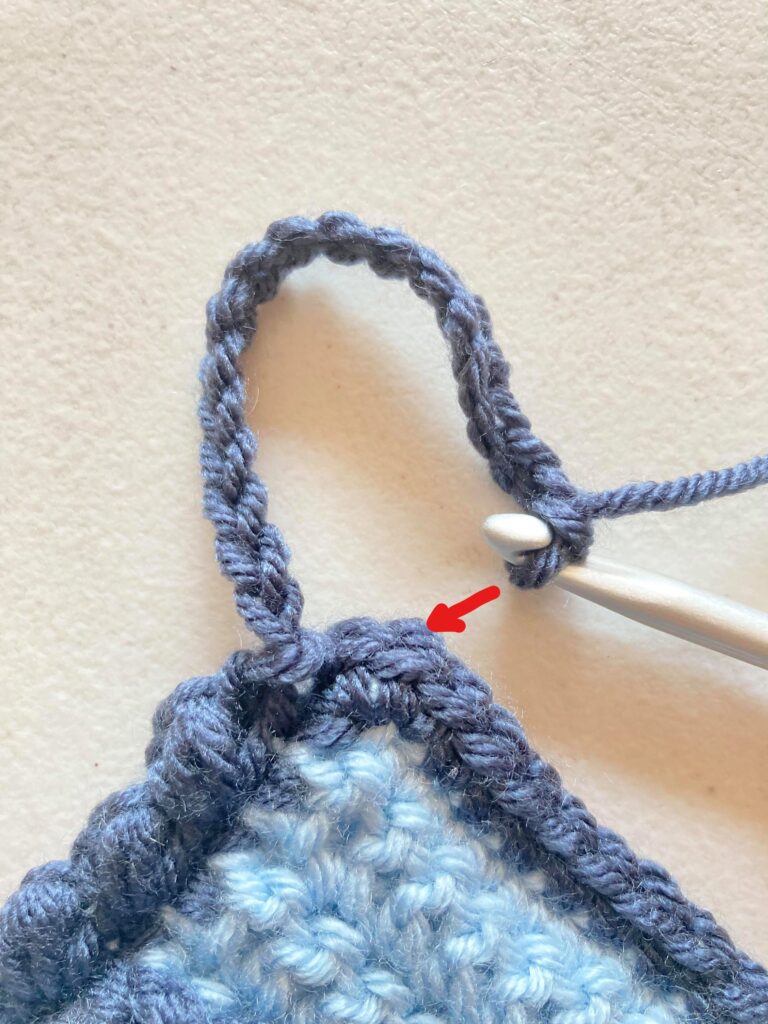
ch 18, skip next st, slst in next st 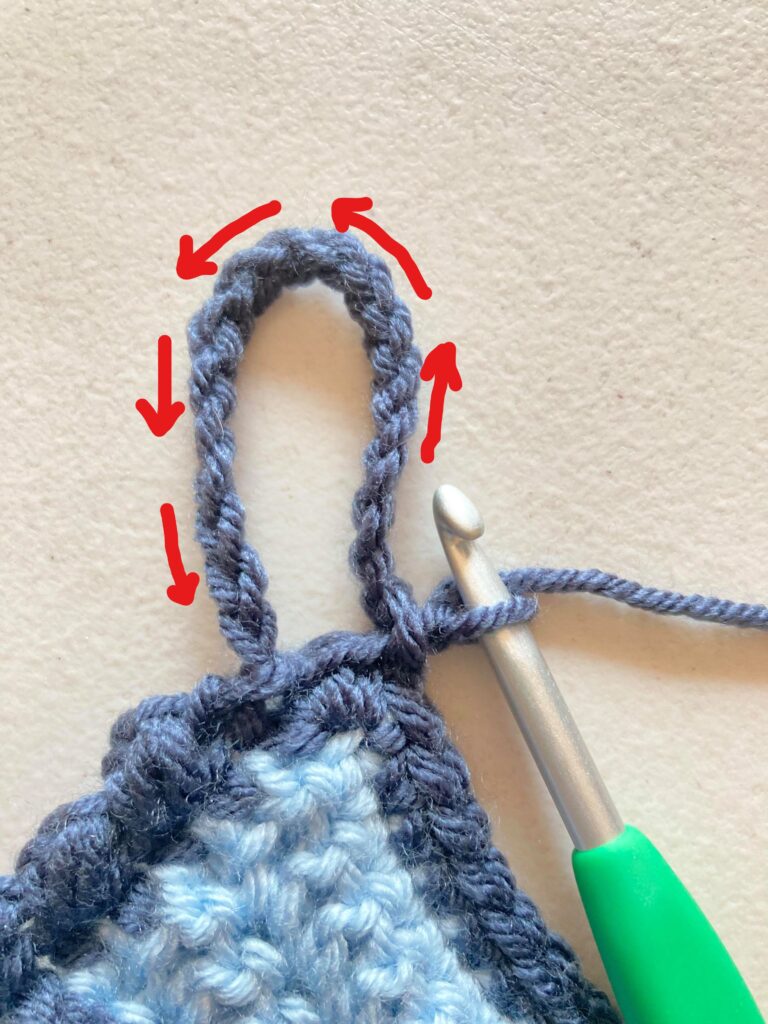
turn, ch 1 and work 20sc in ch sp 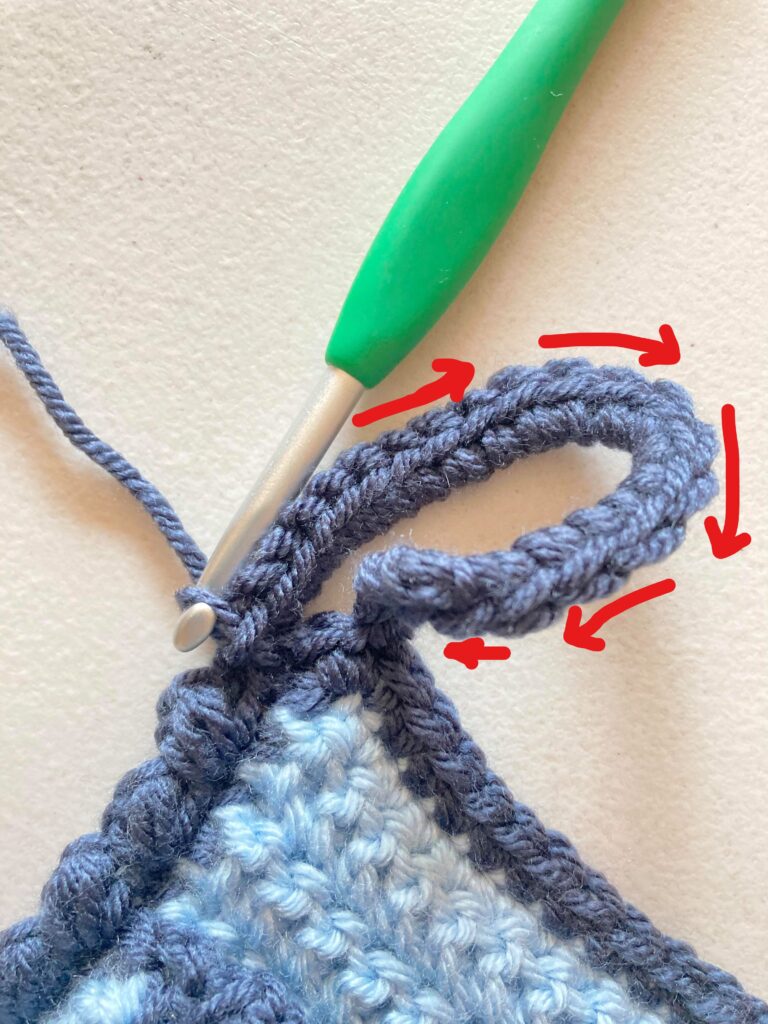
slst into same st as beginning slst, turn, slst into each sc in loop 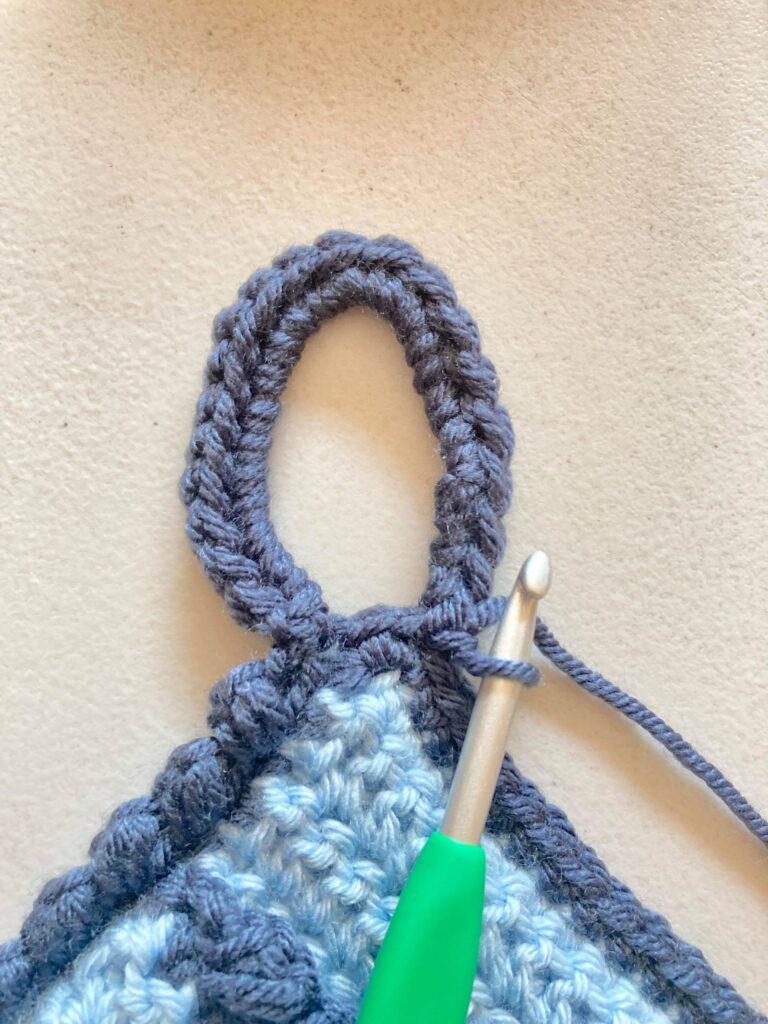
slst into same st as slst in 3rd corner sc
- 4th Step: Repeat the Reverse Puff around the remaining 3 sides & corners of the hot pad, join in the beginning st of the round, fasten off and weave in ends.
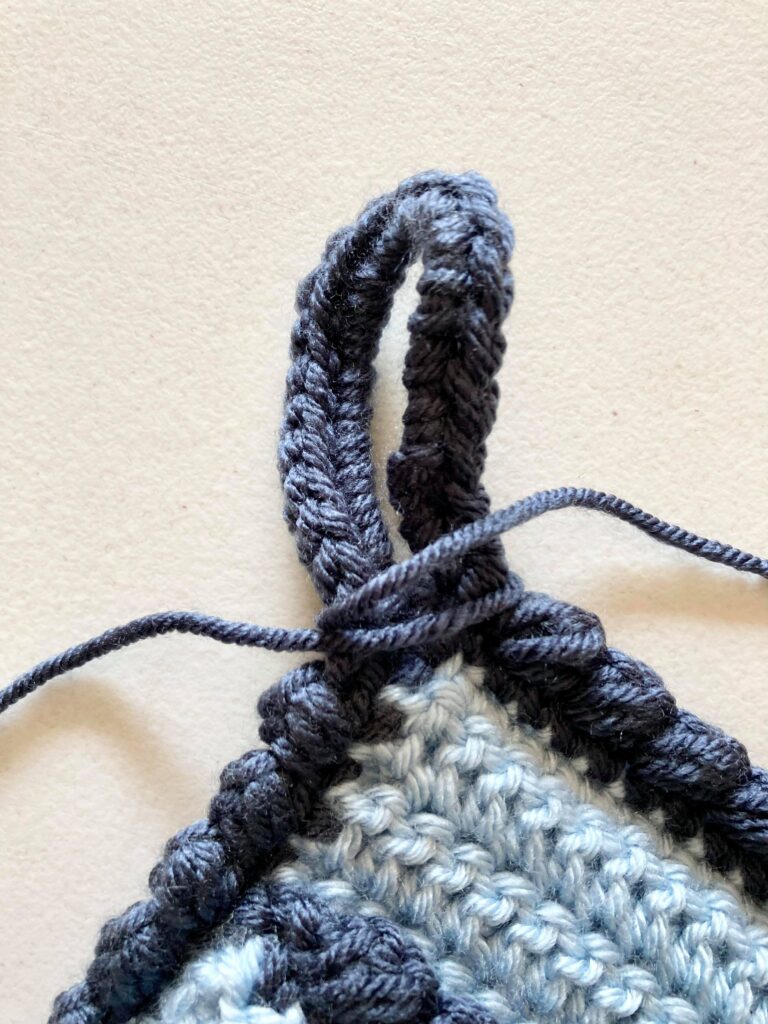
- 5th Step: Wrap the base of the loop about 20 times, secure with a knot in the back and weave in the ends into the stitches of the border.
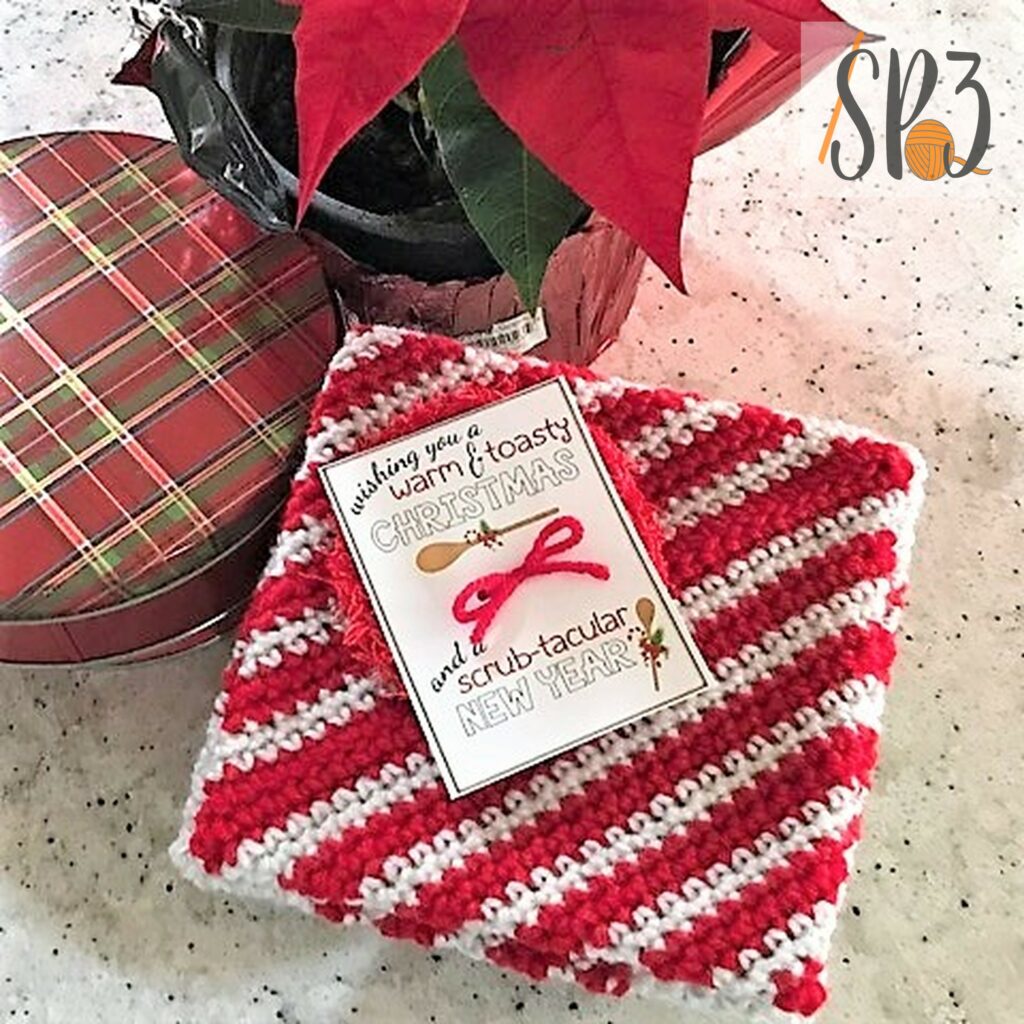
A Traditional Hot Pad, Dish Scrubby and Gift Printable
I mentioned in my earlier post that I have a tutorial for a traditional hat pad. That same tutorial includes a dish scrubby and a super cute printable for gift giving during the Christmas Season.
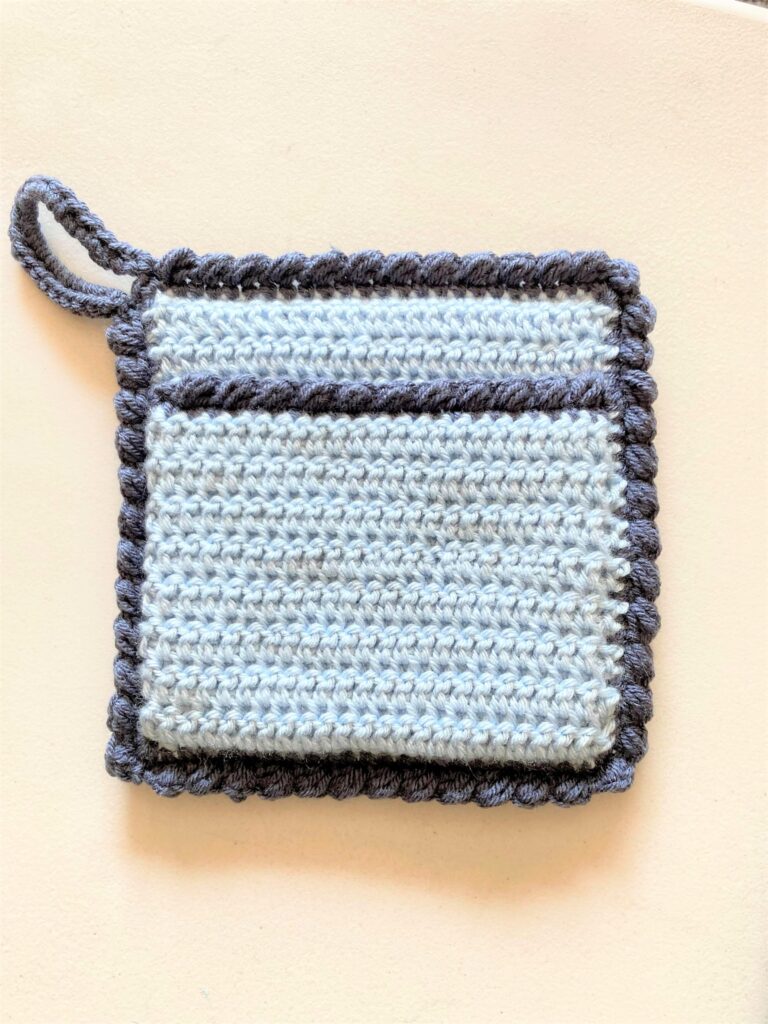
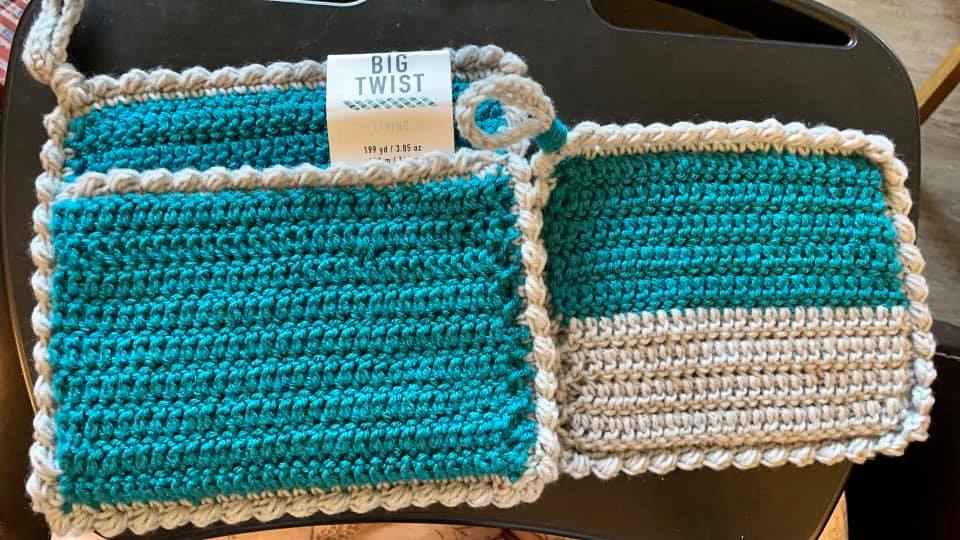
Pocket Hot Pad Samples
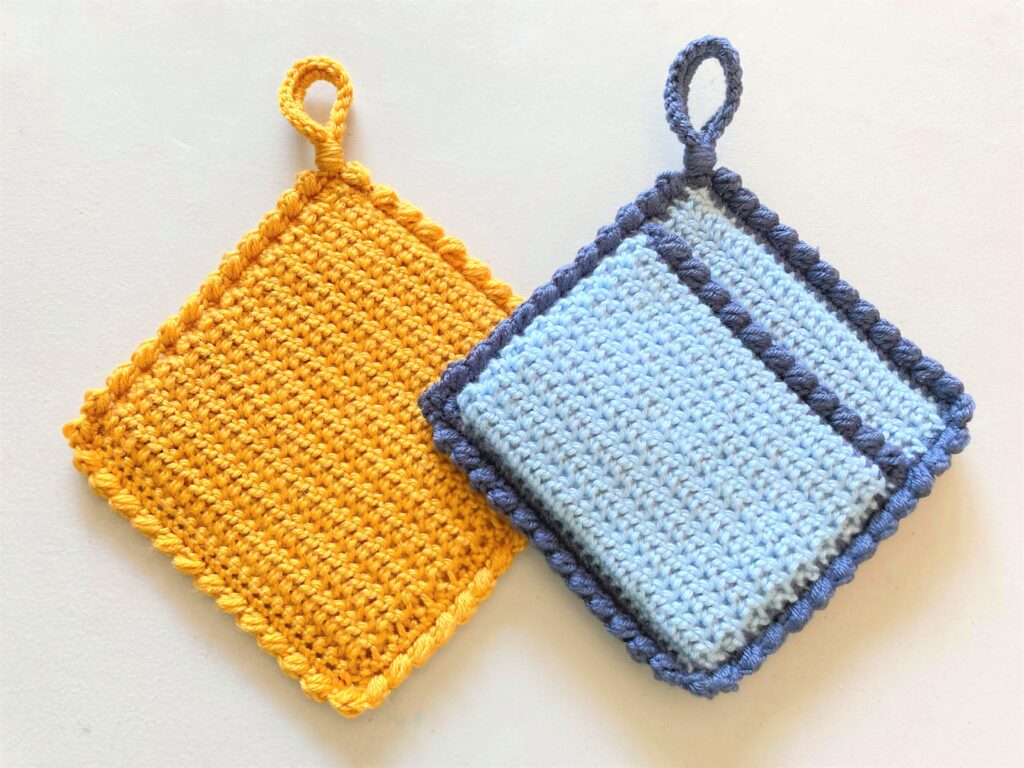
I wanted to share how cute some of the hot pads that my pattern testers finished. They always do such an amazing job! Their samples show how different you can make this pattern. Some demonstrate what it looks like with no pocket, or no hanging loop, solid color or multi-colored. Each one is unique and handmade with love.
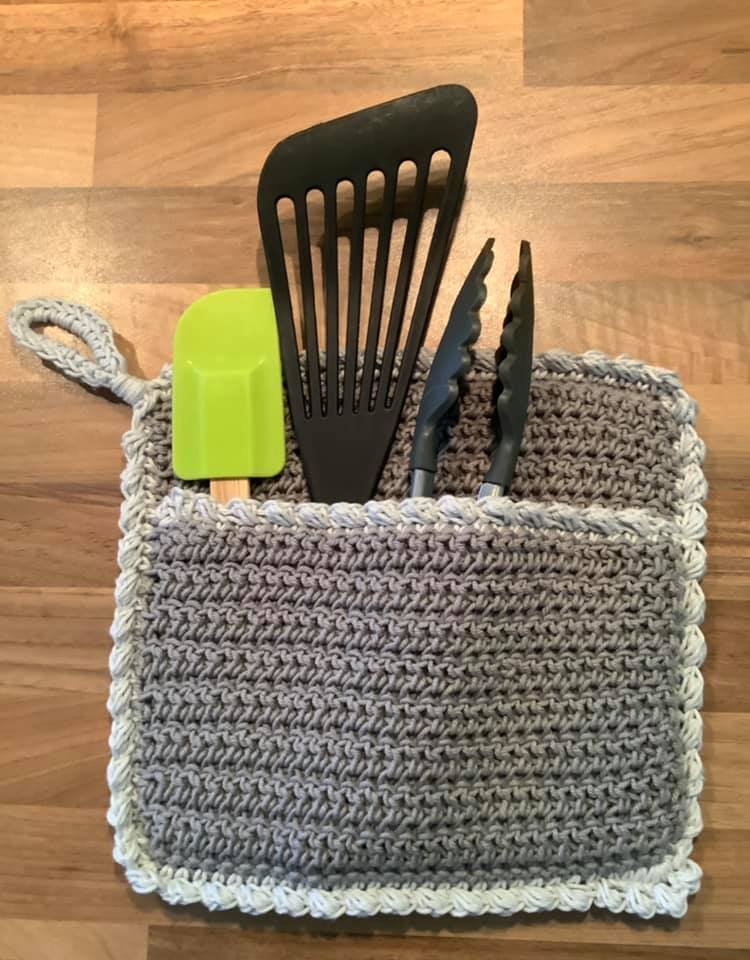
I love the display in this test by Trudy, shows how you can make it into a gift! 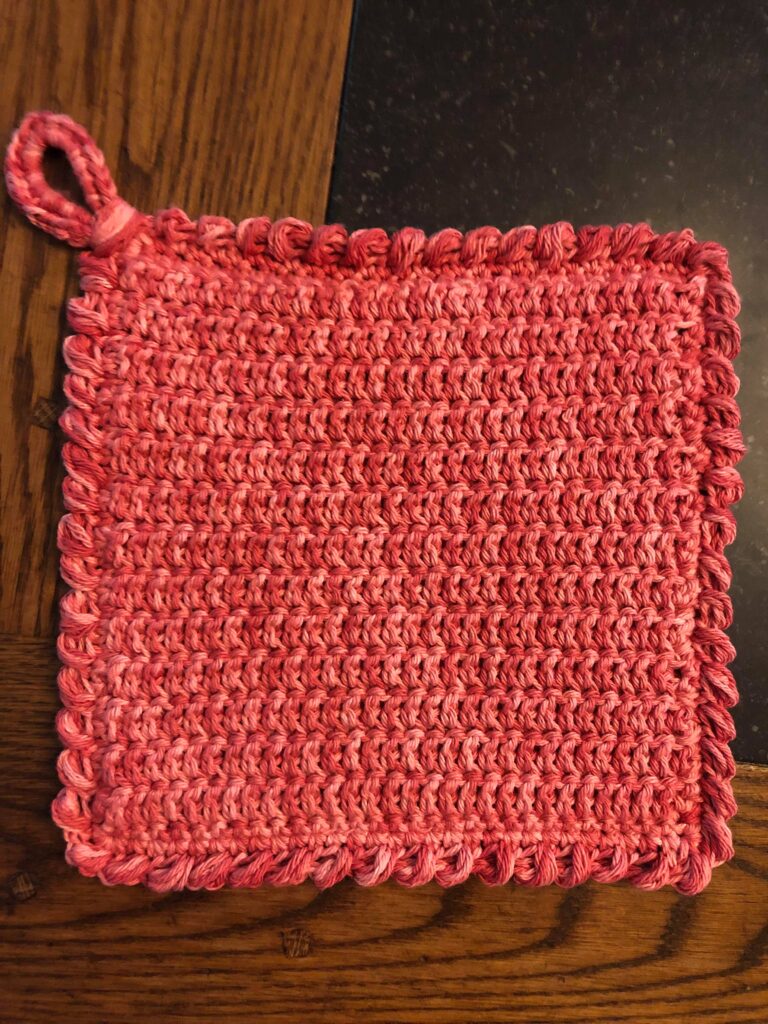
A no pocket & single color version in the test by Tanya. 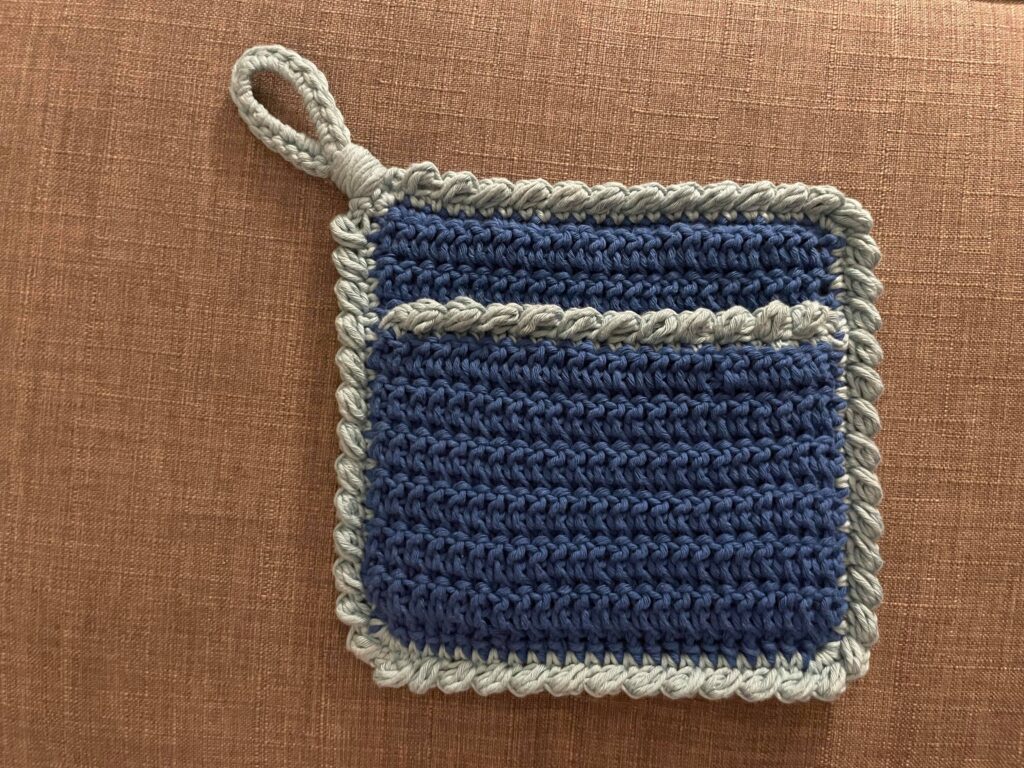
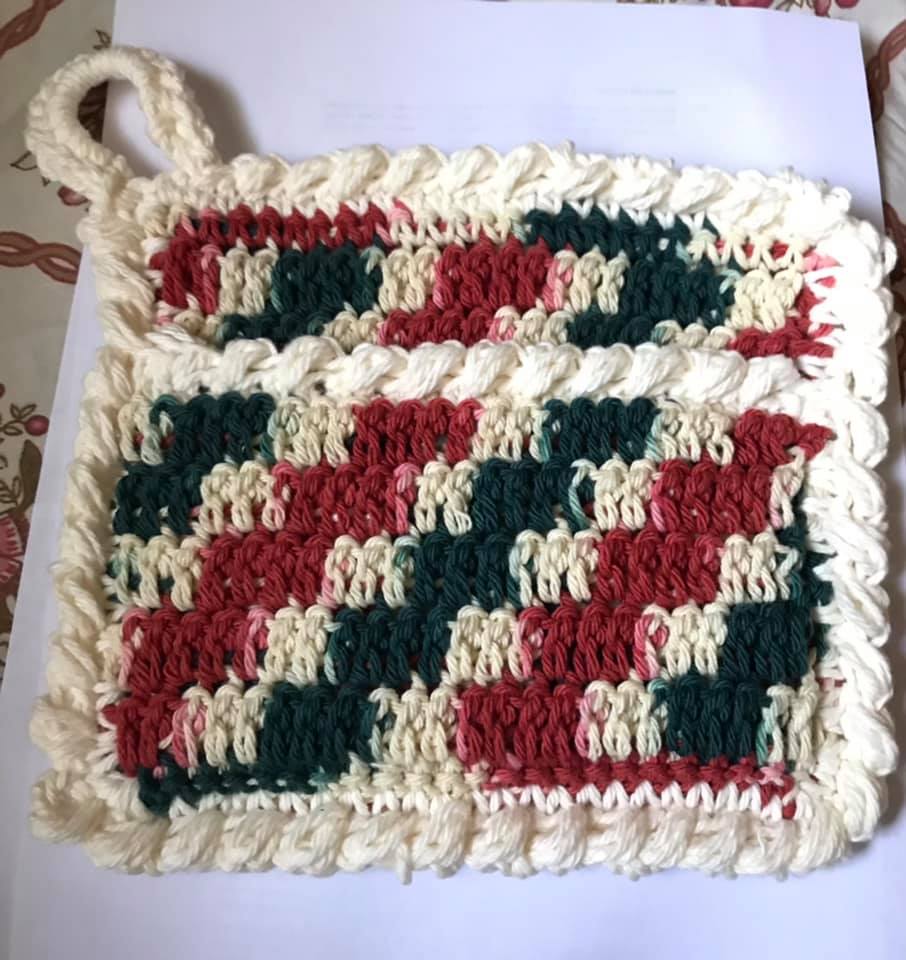
Showing details in the test by Sarah, love how defined her reverse puff stitch is. 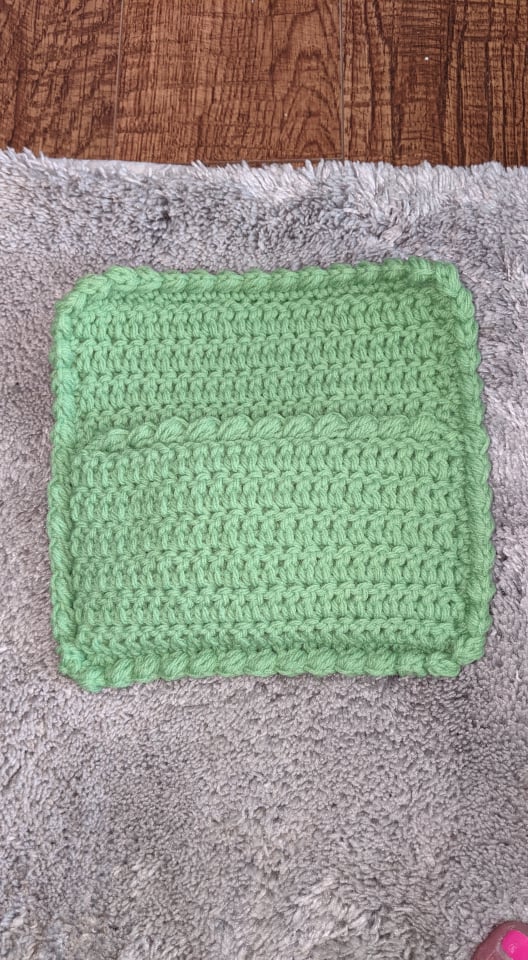
Nancy decided she didn’t want the hanging loop and it is still useful and looks great. 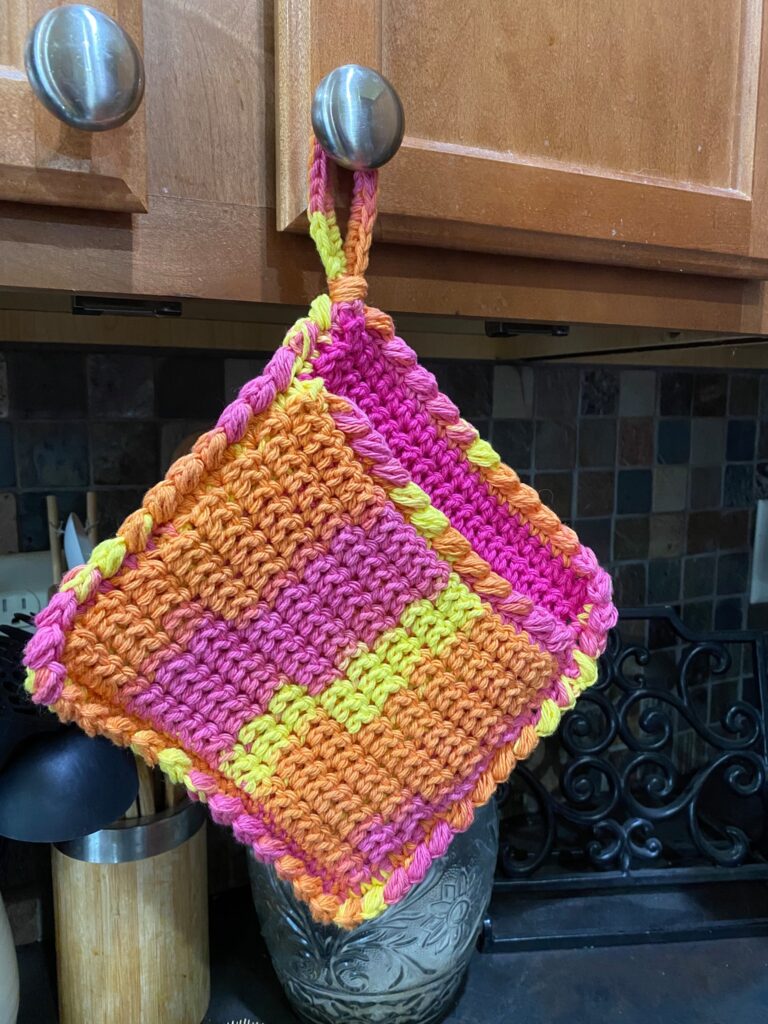
A very fun and colorful test by Michelle W
Test by Linda 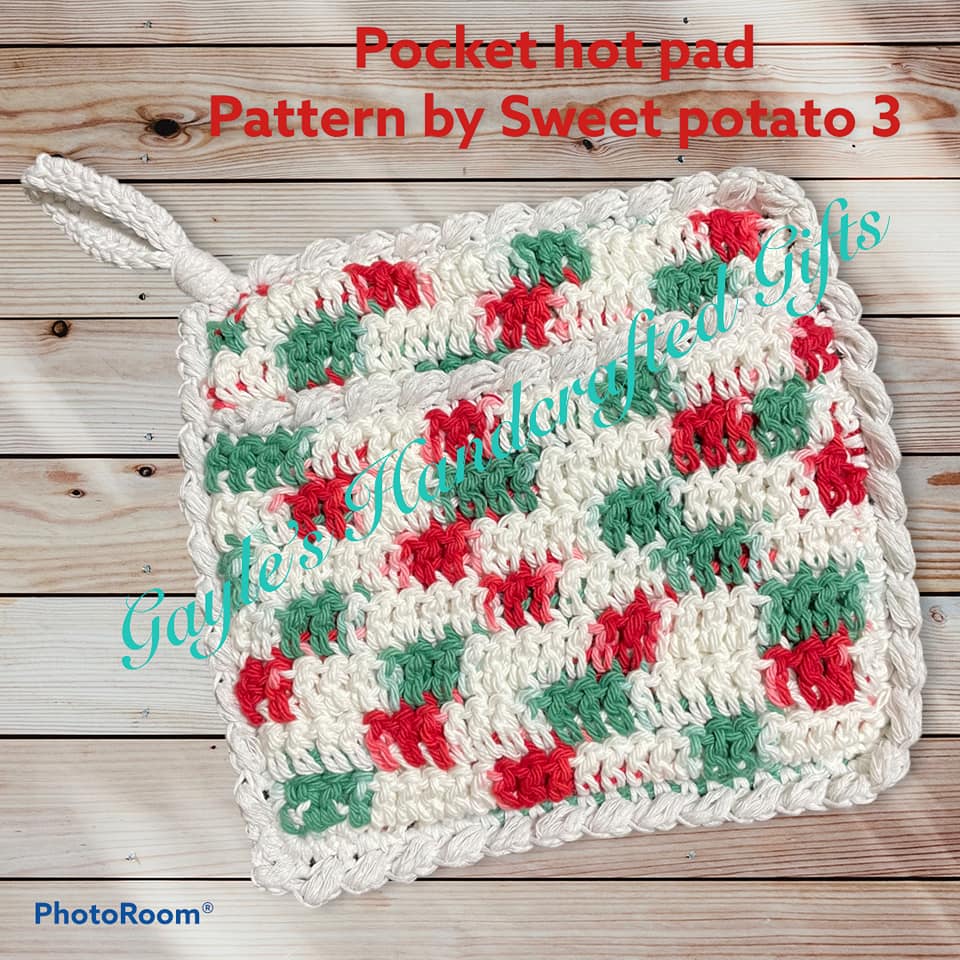
Test by Christina


It would be a good idea to tell others that if they are going to actually use these with hot dishes or as oven mitts they need to be made out of natural fibers such as cotton or wool because someone could spend a lot of time making these cute hot pads and then have them get ruined the first time they use them and they melt under a hot dish when made with acrylic yarn.
I am happy to add a section about that. However, is over 30 years I have always used acrylic and prefer traditional acrylic for my hot pads. I have never had a hot pad melt and they hold their shape and the stitches stay tighter with acrylic. So, although I know natural (especially cotton) is recommended, I feel as though they can be made with pretty much any yarn 🙂