
One of my favorite Christmas Traditions is the tree. Not the decorating, although that is a huge part of our holiday, but that fact that you are bringing in something beautiful, something living and something that fills your home with an aroma that is incomparable!
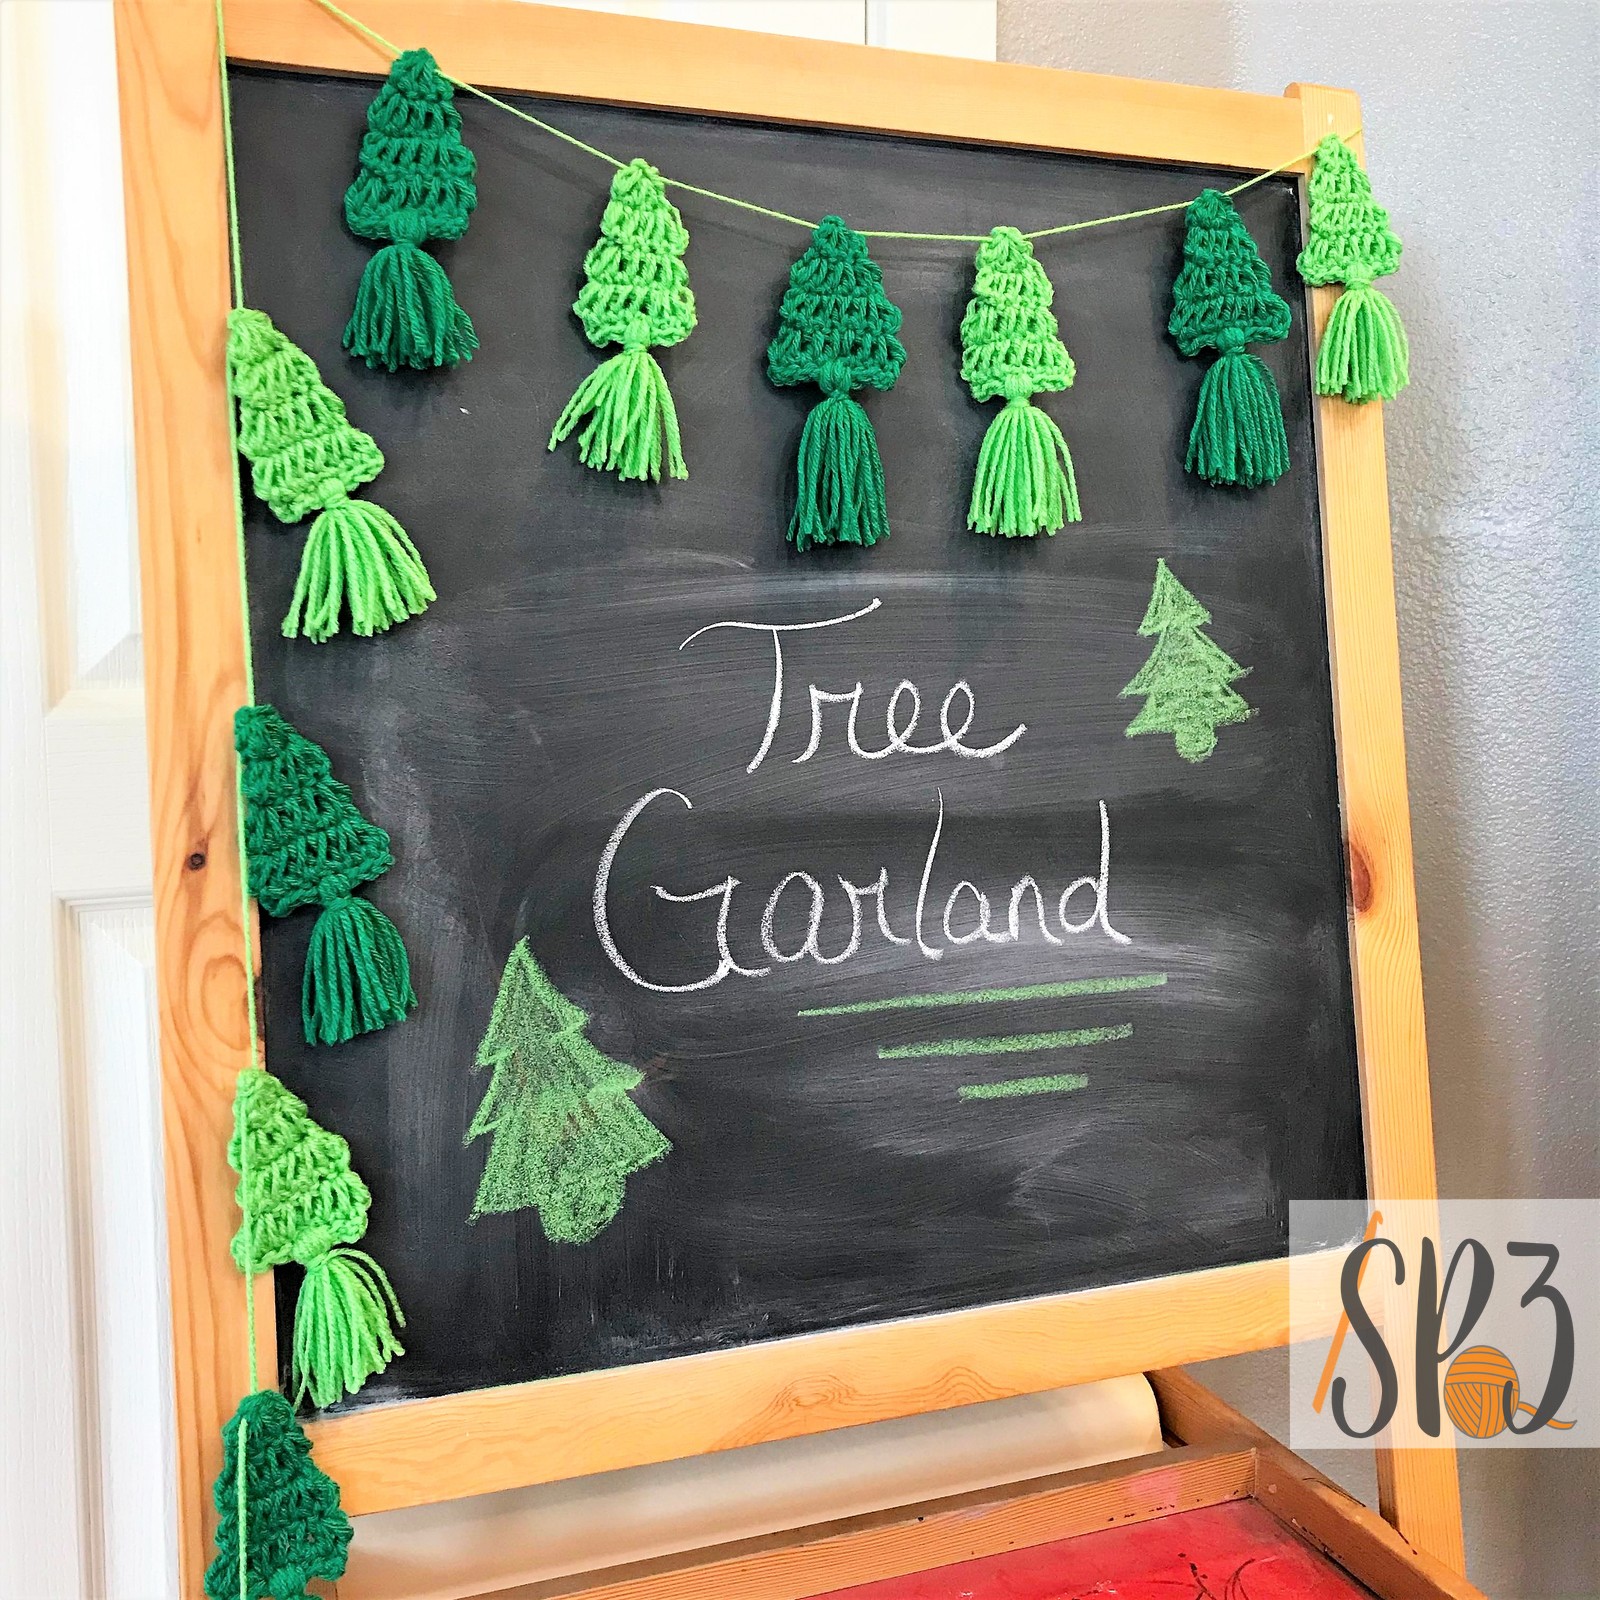
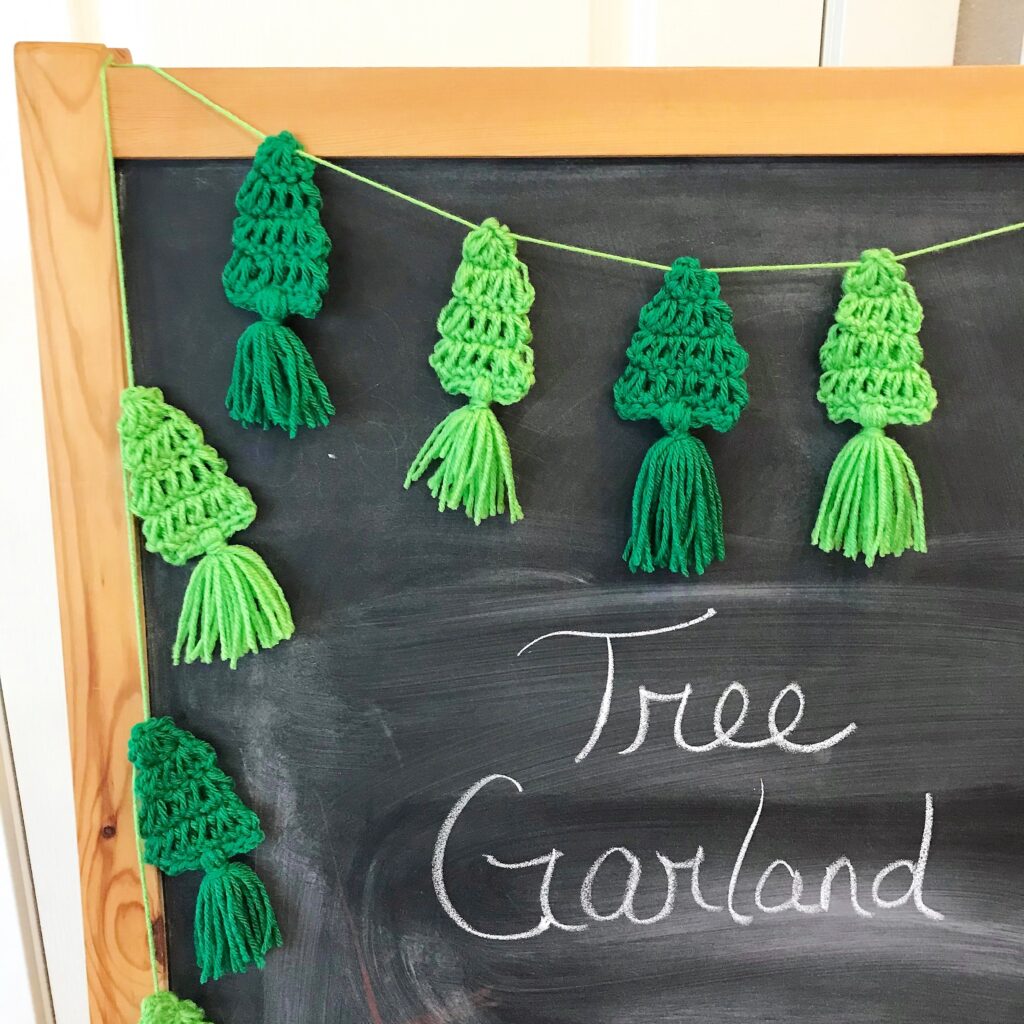
So, you may have guessed it. I am a huge fan of the pine tree. So, when I was thinking of a fun, cute, and quick holiday crochet pattern I could design and offer for free, this cute Tree Garland popped into my mind!
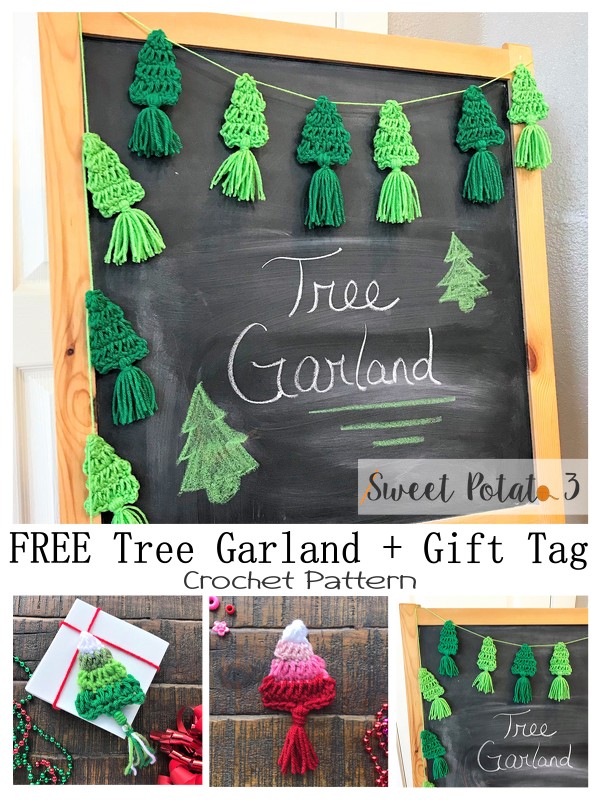

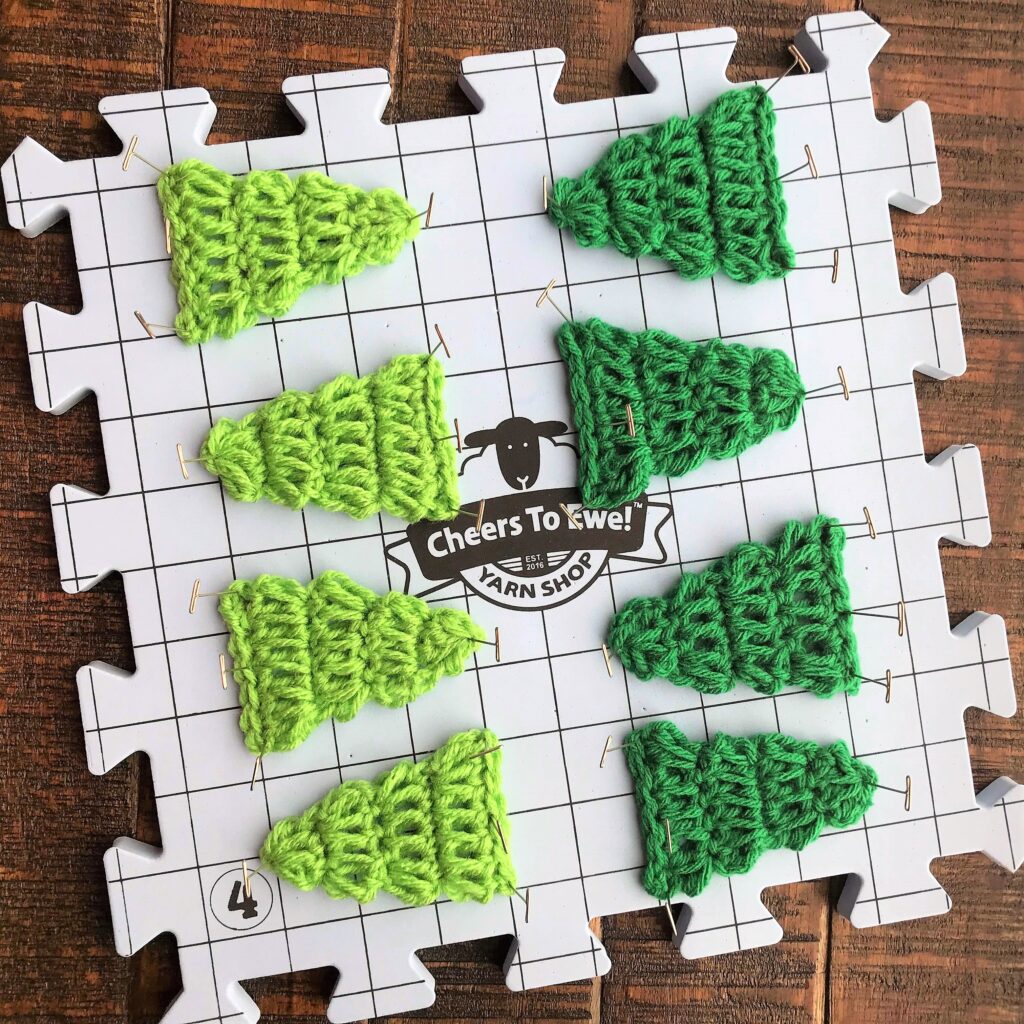
I started off creating a bunch of pine trees in the traditional color of pine green and bright green. It was fantastic how quick they worked up but then I thought….. I need to add more color! So, again, I turned to my favorite things again and decided I loved the ombre look. And next thing I knew, I had a bunch of darling gift tags!
About the Tree pattern
I love to create patterns with texture so I always turn to my notebook of trusted stitches and sat down to play around. I fell in love a stitch that was “loopy” and made the layers of the branches whimsical and stand out.
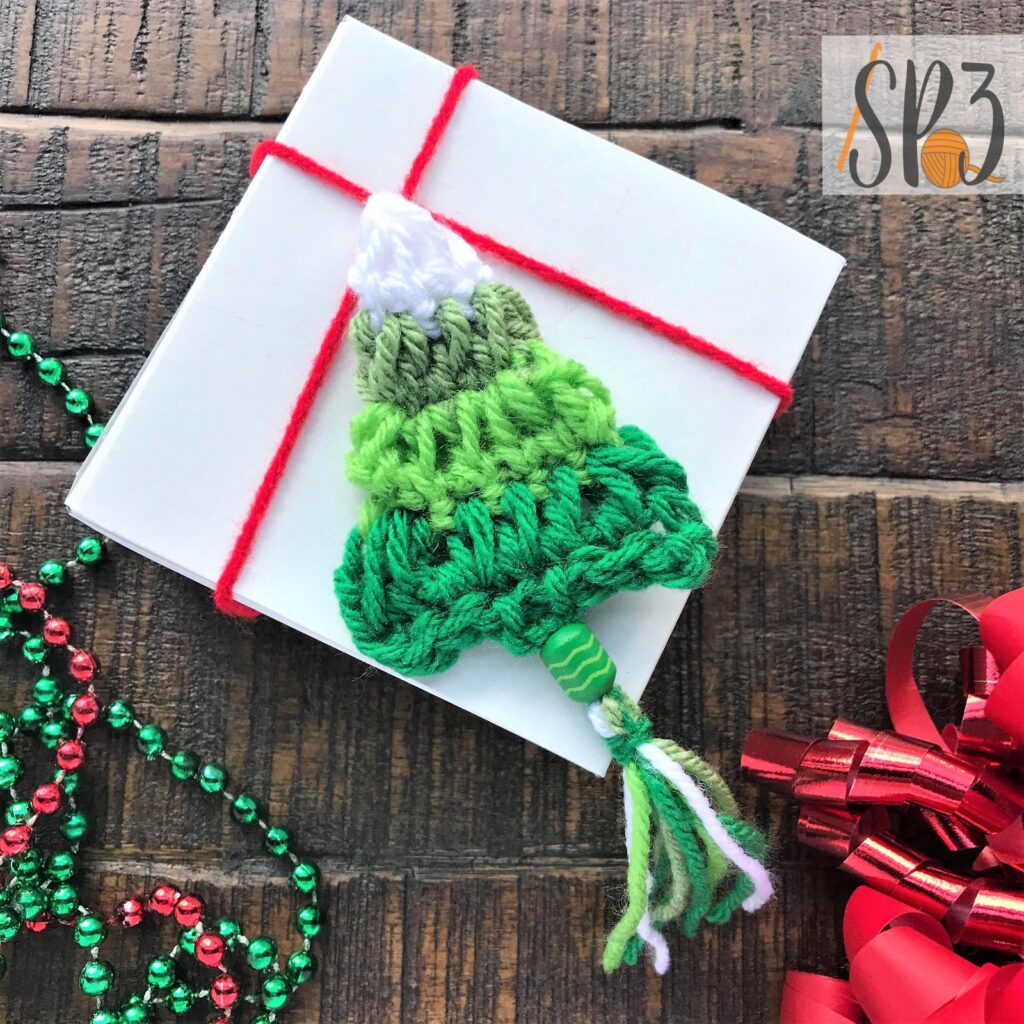
The “trunk” of the tree is a great place to add your own personality too. I love the look of the tassels in the garland but on the gift tags I kind of liked to add a bead with a smaller tassel to make it look longer. It really is just a personal choice. So be creative and have fun.
Materials Needed for the Tree pattern
- Worsted Weight yarn (#4) – scrap amounts
- Crochet Hook H (5.00 mm) – recommend a hook with no comfort handle
- Measuring Tape
- Scissors
- Yarn Needle
Stitches + Abbreviations Used
- Ch = Chain
- Sc = Single Crochet
- Slst = Slip Stitch
- St(s) = Stitch(es)
- Sp = Space
- R = Row/Round
Finished Size of Crochet TREE
The completed tree will be approximately: 2 ½” wide X 3 ¼” high
For this tutorial, since the crochet piece is so small I do not have a gauge in this pattern. Instead, I recommend making 1 tree. If you want your tree larger, go up a hook size until you reach the desired height. If your finished tree is too large, go down a hook size accordingly

Notes about the Tree pattern
- The final size of the tree may vary. The height that you customize your stitches can change the final size of your tree.
- You can make your tree a solid color or change throughout the pattern. In the ombre sample, I changed yarn color at the beginning of rows 3, 5 & 7.
- Other yarn weights may be used to make the tree pattern, be sure to adjust your hook size down one size from the recommend size on the yarn label.
Tree Garland + Gift Tag Pattern
The pattern is worked in a Tunisian crochet style. Each row will have a forward and a backwards pass. This is much easier than you think and does not require a special hook. Just follow the photo tutorials and you’ll be surprised and how much fun they are to make.
R1 forward: Ch 1, pull loop up about ¾” high, [yarn over, insert hook into st, pull up a loop about ¾” high], repeat [] 3 more times in same st, do not turn, 9 loops on your hook
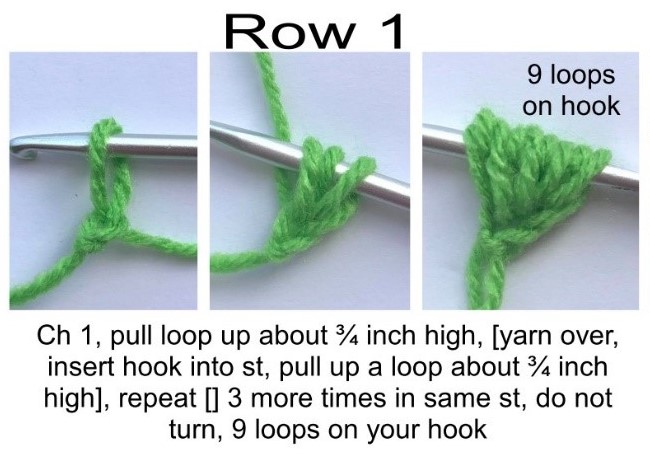
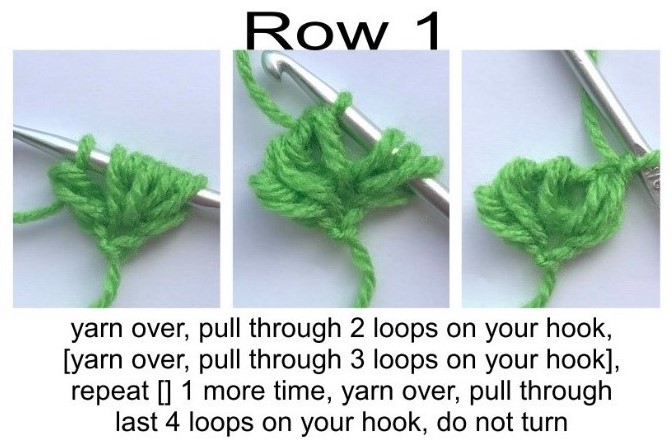
R1 return: yarn over, pull through 2 loops on your hook, [yarn over, pull through 3 loops on your hook], repeat [] 1 more time, yarn over, pull through last 4 loops on your hook, do not turn
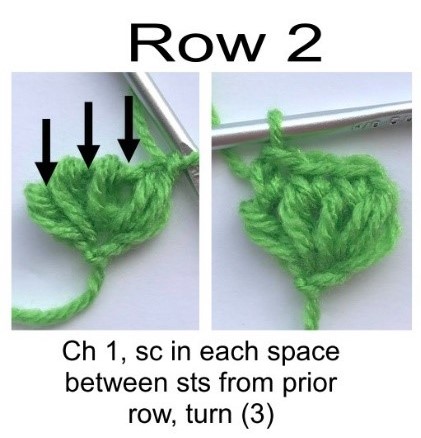
R2: Ch 1, sc in each space between sts from prior row, turn (3)
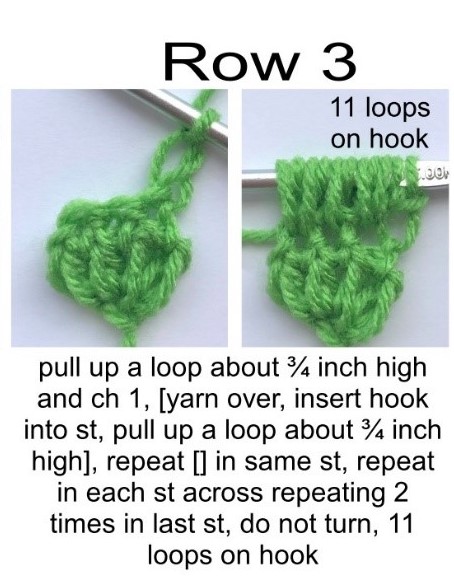
R3 forward: pull up a loop about ¾” high and ch 1, [yarn over, insert hook into st, pull up a loop about ¾’ high], repeat [] in same st, repeat [] in each st across repeating 2 times in last st, do not turn, 11 loops on hook
R3 return: yarn over, pull through 2 loops on your hook, {yarn over, pull through 3 loops on your hook}, repeat {} 2 more times, yarn over, pull through last 4 loops on your hook, do not turn
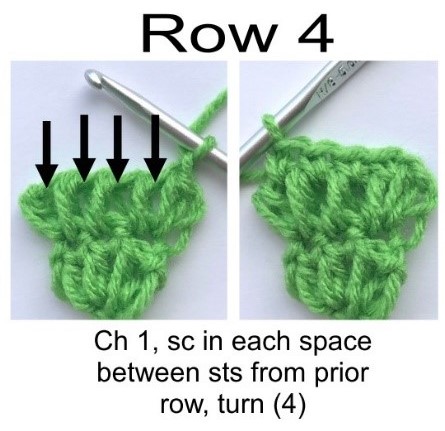
R4: Ch 1, sc in each space between sts from prior row, turn (4)
R5 forward: pull up a loop about ¾” high and ch 1, [yarn over, insert hook into st, pull up a loop about ¾’ high], repeat [] in same st, repeat [] in each st across repeating 2 times in last st, do not turn, 13 loops on hook
R5 return: yarn over, pull through 2 loops on your hook, {yarn over, pull through 3 loops on your hook}, repeat {} 3 more times, yarn over, pull through last 4 loops on your hook, do not turn
R6: Ch 1, sc in each space between sts from prior row, turn (5)
R7 forward: pull up a loop about ¾” high and ch 1, [yarn over, insert hook into st, pull up a loop about ¾’ high], repeat [] in same st, repeat [] in each st across repeating 2 times in last st, do not turn, 15 loops on hook
R7 return: yarn over, pull through 2 loops on your hook, {yarn over, pull through 3 loops on your hook}, repeat {} 4 more times, yarn over, pull through last 4 loops on your hook, do not turn
R8: Ch 1, sc in each space between sts from prior row, turn (6)
R9: Ch 1, loosely slst in each st across, fasten off and weave in ends
Optional: add a tassel, fringe, bead or any other accessories to the center of the last row.
Blocking is not necessary, but sometimes I like to block just to give my crochet piece the best shape.
You can then add your finished tree to a gift as a cute tag that everyone will love. Or you can string it on some yarn or cord to create a fun garland.
If you enjoyed this Tutorial, check out the ones below:
- Free Hot Pad + Holiday Printable Gift Tag, click HERE
- Coffee Cozy Sweater Wrap pattern, click HERE
- One Cup at a Time Coasters pattern, click HERE
- Hygge Coffee & Wine Cozy pattern, click HERE
More Crochet Fun
Follow Sweet Potato 3 on Facebook to see more pattern releases, sales and crochet fun, just click HERE.
However, if you would enjoy a more interactive group experience, you need to join my Crochet & Conversations facebook group, click HERE. It is a ton of fun and I encourage everyone to share their projects, WIPS (works in progress) and inspirations. Plus you get exclusive deals, are the first to see new releases, give input on designs and have opportunities to win patterns. Join now and get to know others who also enjoy the art of crochet.


What a cute idea!