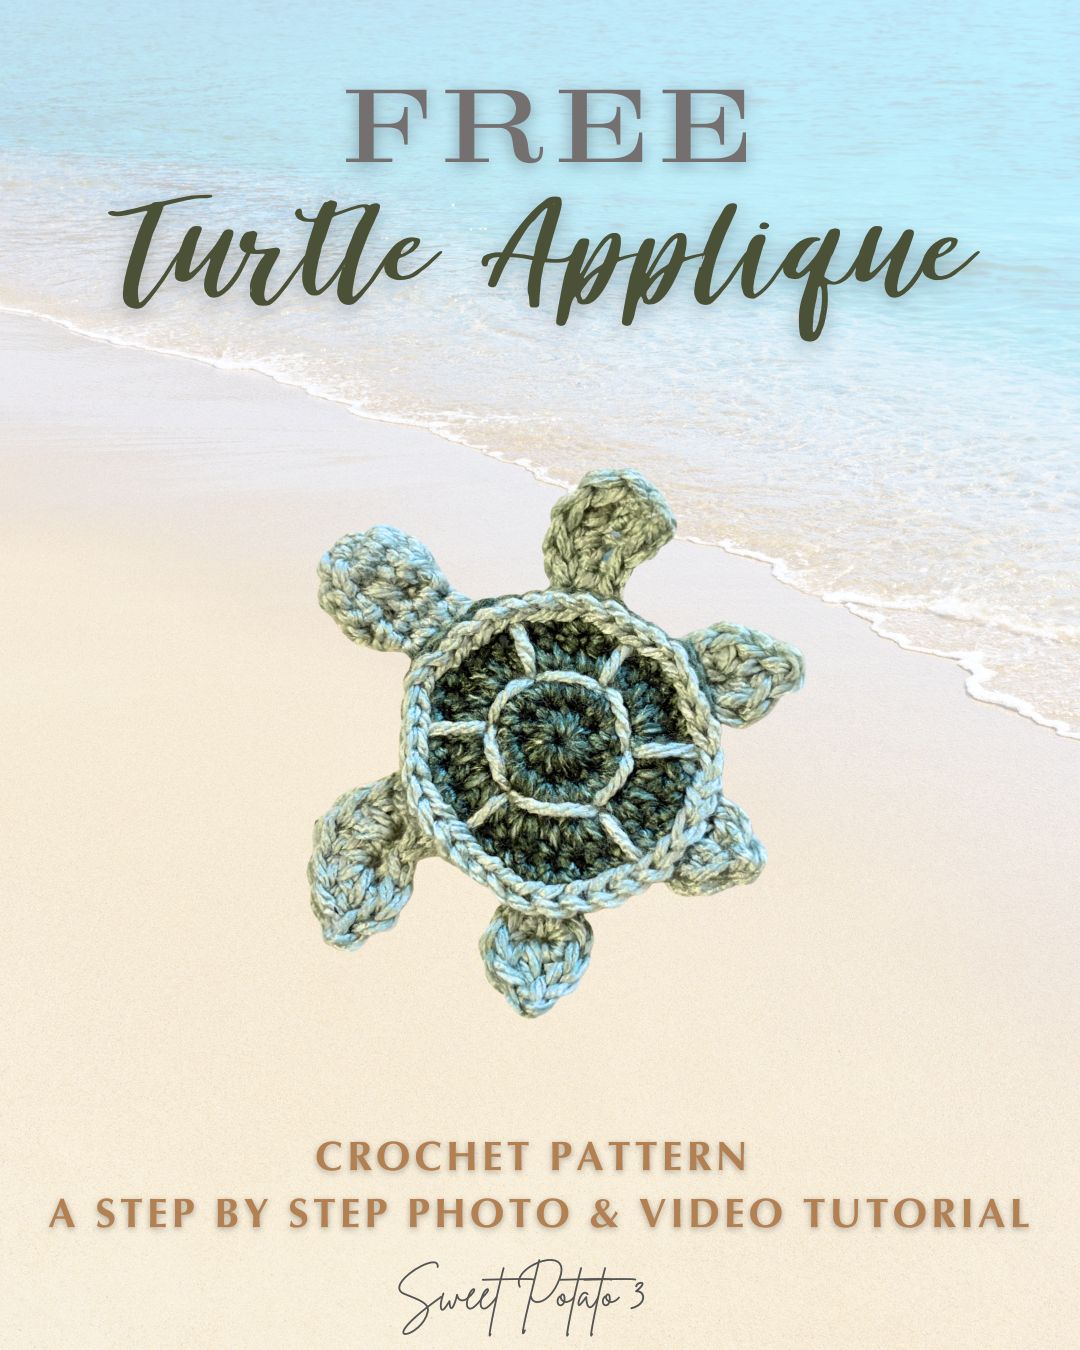
Looking for a fun little crochet project to add some personality to your next make? This free turtle applique crochet pattern is an adorable way to add that little something extra to blankets, pillows, bags, hats, clothing, and so much more! The possibilities are endless.
Whether you’re making something for a turtle lover, creating a themed blanket, or simply looking for a quick crochet project, this little turtle is a fun addition to your crochet collection. If you are not sure what to add it to right now, be sure to save this post, pin it, or share it so you can always come back.
A Little Turtle With So Many Possibilities
One of my favorite things about crochet appliques is how versatile they are. A small appliqué can completely transform a simple project! A few ideas you can add any appliqué to are: Crochet blankets and baby blankets, bags and totes, hats and beanies, sweaters and clothing, pillows, backpacks, baskets, children’s playroom & nursery decor, any handmade gift.
You could even make several turtles in different colors for a fun ocean, beach, or animal-themed project.
Easy Crochet Turtle Applique
This turtle is a relatively small project measuring only about 4″, making it a great way to use up some of your yarn scraps. Choose traditional turtle colors like green and brown, or have fun with your color choices and create a whole collection of colorful turtles!
Free Turtle Applique Crochet Pattern
Ready to make your own little turtle? The complete pattern is below, and it’s free to use!
Materials
- Crochet Hook size G (4.50 mm)
- 25 yards Worsted Weight Yarn (#4) – Samples made in:
- Bag O Day Tonal Hues Worsted Anti-Pill Yarn color: Garden Lodge
- * Note: This is an ombre yarn; I specifically used the dark green on the background and then the light green for the head, feet, tail, and outline detail. You can opt to use 2 contrasting colors instead.
- Measuring Tape
- Scissors
- Yarn Needle
Finished Size
- Turtle body is 2 ½” wide
- Full length from top of head to tip of tail is 4” long
- Width at widest part, front leg to front leg, is 4” wide
Crochet Stitches and Abbreviations Used:
- Ch(s) = Chain(s)
- Dc = Double Crochet
- Hdc = Half Double Crochet
- Invisible Join: https://youtu.be/nuFjLnlaqNc?si=ZJiA1q2W8irhnVmn
- Join = Join with a slip stitch in the top of the first stitch of the row
- R = Round
- Sc = Single Crochet
- Sewing Applique onto Crochet Piece: https://youtu.be/ukil6fPT9BY?si=6wgSCMFZ3shF9F-w
- Slst = Slip Stitch
- St(s) = Stitch(es)
- Surface Crochet = https://youtu.be/aNvrsaTvIsE?si=Gmyys6AJKm75UcgK
Gauge:
In crochet, gauge is always essential to obtain the stated size of the finished project. If you do not meet the gauge, your finished applique will vary in size. For this applique, your gauge will be checked after making the body/shell of the applique. If your gauge swatch turns out bigger, then decrease your hook size. Likewise, if your gauge swatch turns out smaller than it is supposed to, increase your hook size.
If it is not essential for your applique to be an exact size, then don’t fret over the gauge. Instead, focus on making sure your stitches are uniform and close. Using a different yarn than stated will also affect the final size of your applique; sometimes that is a great way to achieve a smaller or larger applique.
Pattern Notes:
In the turtle applique pattern, do not count the beginning chain as a stitch. T
All patterns from Sweet Potato 3 are written using U.S. crochet terminology.
The applique is made in multiple pieces, then stitched together prior to sewing the applique onto your finished project. This helps ensure that the body/shell is the top piece of the applique and lays seamlessly on your project.
Video Tutorial – Step by Step – How to Crochet the Turtle Applique
Prefer to crochet along with a video? I’ve also created a step-by-step video tutorial to help you make this adorable turtle appliqué.

If you’re new to crochet appliques, I recommend following along with the video while working through the written pattern. You can pause, rewind, and crochet at your own pace!
Free Turtle Applique Pattern: Body or Shell of the Turtle
Begin with a darker color of yarn for the body/shell
R1: Ch 2, 9 sc in 1st ch, join (9 st), and pull the beginning tail of yarn to cinch/close up the center hole; alternatively, if preferred, you can begin with a magic circle.
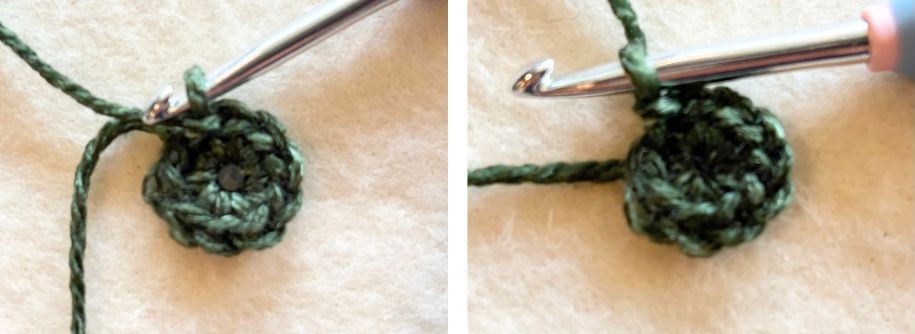
R2: Ch 1, 2sc in each st around, join (18)
R3: Ch 1, 2hdc in 1st st, hdc in next st, [2hdc in next st, hdc in next st], repeat [ ] around, join (27)
R4: Ch 1, 2sc in 1st st, sc in next 2 sts, [2sc in next st, sc in next 2 sts], repeat [ ] around, join (36)
Switch to a lighter color of yarn
R5: Do not ch, slst in each st around, invisible join (36), and fasten off, leaving about 18” of yarn that you will use to embroider the shell detail.
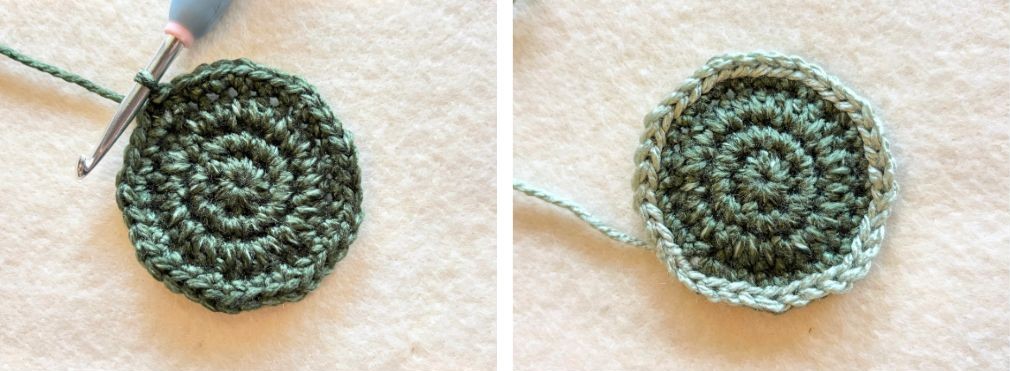
Gauge Check: measuring across the center of the circle, it should measure 2 ¼” wide
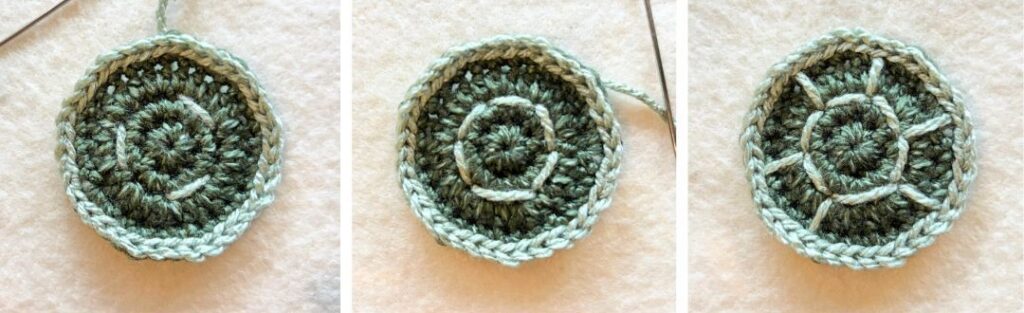
Shell Detail: embroider a circle using the lighter color yarn around to the top stitches of round 2, working through every 3rd stitch. Notice the join on every 3rd stitch; there are 6 around the circle you just embroidered. This is where you will embroider down to the slip stitch round, making sure your needle goes under the slip stitch. Work 6 lines around the shell, then fasten off and weave in your ends.
Head of Turtle Pattern
Use a lighter yarn color
R1: Ch 2, 6 sc in 1st ch, join (6 st), and pull the beginning tail of yarn to cinch/close up the center hole; alternatively, if preferred, you can begin with a magic circle.
R2: Ch 1, 2sc in each st around, join (12)
R3: Ch 1, sc2tog around, join (6)
R4: Ch 1, sc in each st around, join (6)
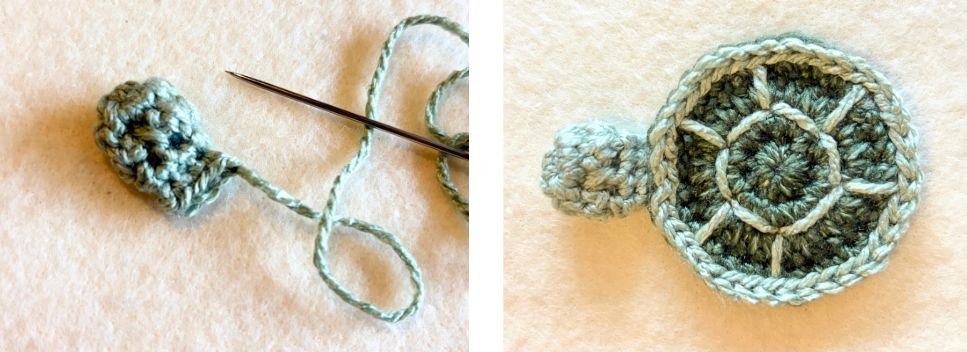
R5: Ch 1, pinch the opening together; there are 6 stitches, align 3 stitches with 3 stitches and sc them together across the opening, fasten off with about 7” of yarn, sew the head to the underneath part of the body of the turtle.
Tail of Turtle Pattern
Use a lighter yarn color
R1: Ch 2, in 1st ch complete the following (hdc, dc, ch 1, slst in back bar of ch, dc, hdc, slst), then fasten off leaving about 7” of yarn to sew tail onto body/shell. Using the tail of yarn, sew into the center of the section directly below the head of the turtle.
Front feet of Turtle: make 2
Use a lighter yarn color
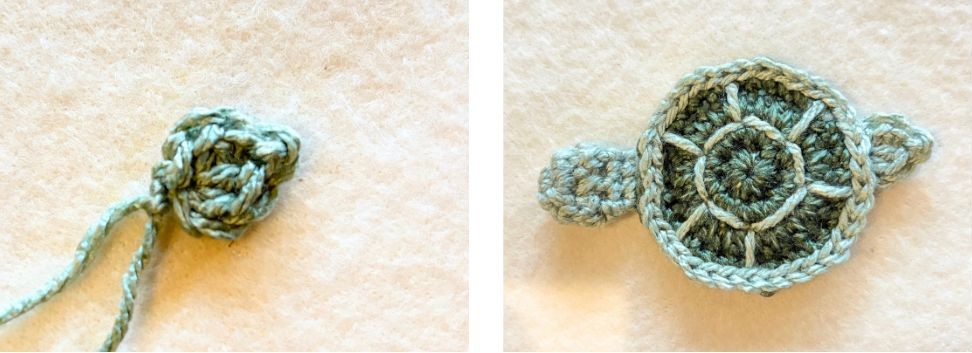
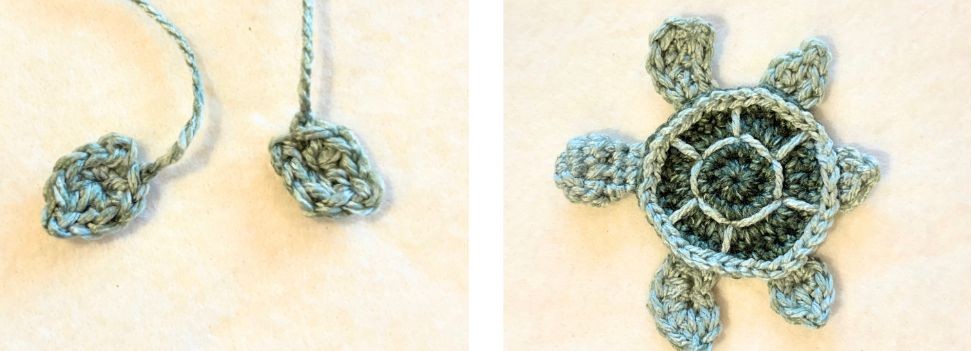
Ch 6, work in the back bar of the ch for the rest of the foot, sc in 2nd ch from hook, hdc in next st, 3dc in next st, hdc in next st, sc in last st, invisible join in beginning ch. Fasten off, leaving about 7” of yarn to attach applique to turtle body/shell.
Sew the front feet appliques onto the middle section on each side of the head of the turtle body.
Back feet of Turtle: make 2
Use Lighter yarn color
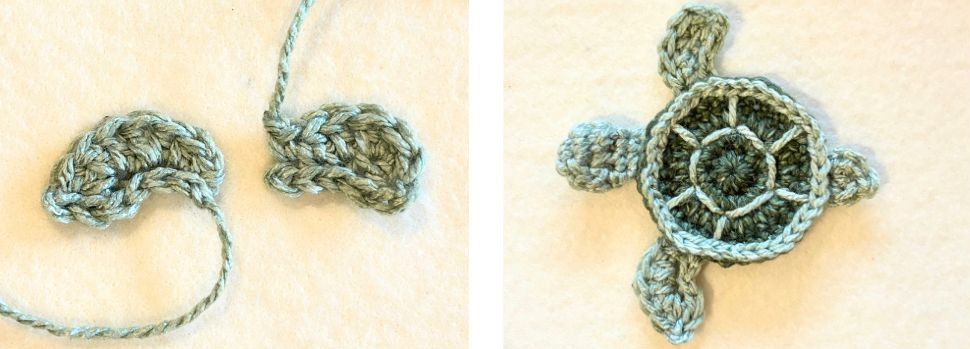
Both feet: Ch 3, slst in 2nd ch from hook, in next st work (2hdc, ch 1, slst in the back bar of the ch), rotate the beginning ch so you can work down the opposite side, 2hdc in 1st st, slst in next st, fasten off, if this is your first applique leave about 7” of yarn to attach applique. If this is your 2nd foot, leave about 24” of yarn, you will use this to attach the foot the turtle then to attach the entire applique onto your crochet project. Sew the back feet, one on each side, in the center of the sections behind the front feet of the turtle.
How to Attach a Crochet Applique
Once you’ve finished crocheting your turtle, it’s time to add it to your project! Take a minute to watch my video below showing how to sew on, or attach, an appliqué so you cannot see the seam on the backside of your crochet piece.
You can sew the appliqué onto your finished project using a tapestry needle and coordinating yarn. Take your time securing the edges so your turtle stays firmly in place. For items that will be washed frequently, such as blankets or children’s clothing, I recommend taking a few extra stitches around the edges to make sure the appliqué is securely attached.
[OPTIONAL: INSERT PHOTO OF TURTLE BEING ATTACHED TO A BLANKET/PROJECT]
Get Creative – Here is an Idea!
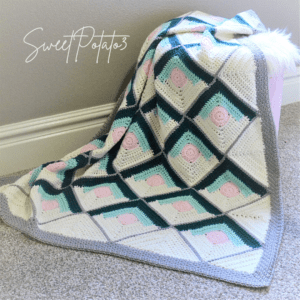
If you enjoyed this free turtle appliqué, be sure to explore the other free crochet patterns here on Sweet Potato 3. I love creating designs that are fun to make and give you plenty of opportunities to put your own creative spin on them. I have lots of more detailed premium patterns too. My first thought for a fun FREE blanket pattern this turtle appliqué would be cute added to is my Rock The Block Blanket that can be found through the link below:
I hope you have fun making this little turtle! I would love to see what you create with it. If you use this pattern in one of your projects, be sure to share it and tag Sweet Potato 3 so I can see your work!