

I love learning new stitches with fun textures! When those stitches work up quick it is an added bonus, and I know I am not the only one tht feels that way. Earlier this year I was hosting a crochet along and when I released a section that featured a block stitch, the participants went crazy over how much they loved the stitch combination. I immediately knew I had to write a blog tutorial for everyone to enjoy.
There are many different ways to crochet a block stitch, so if you learned a different way, that is perfectly fine. A quick search on YouTube for “crochet block stitch” will result in thousands of various tutorials that are all worked up differenly and have a little different look to them as well. Today I am sharing one way to work up a block stitch that I enjoy crocheting because it works up quick and has a lovely texture.

I already mentioned that there are thousands of different block stitches. Similarly, the tutorial I am sharing with you today you may also see it called the grid stitch, boucan stitch or the leaping stripes stitch. But essentially, it is one of many different types of block stitch.
Rock the Block Stitch – So many Variations
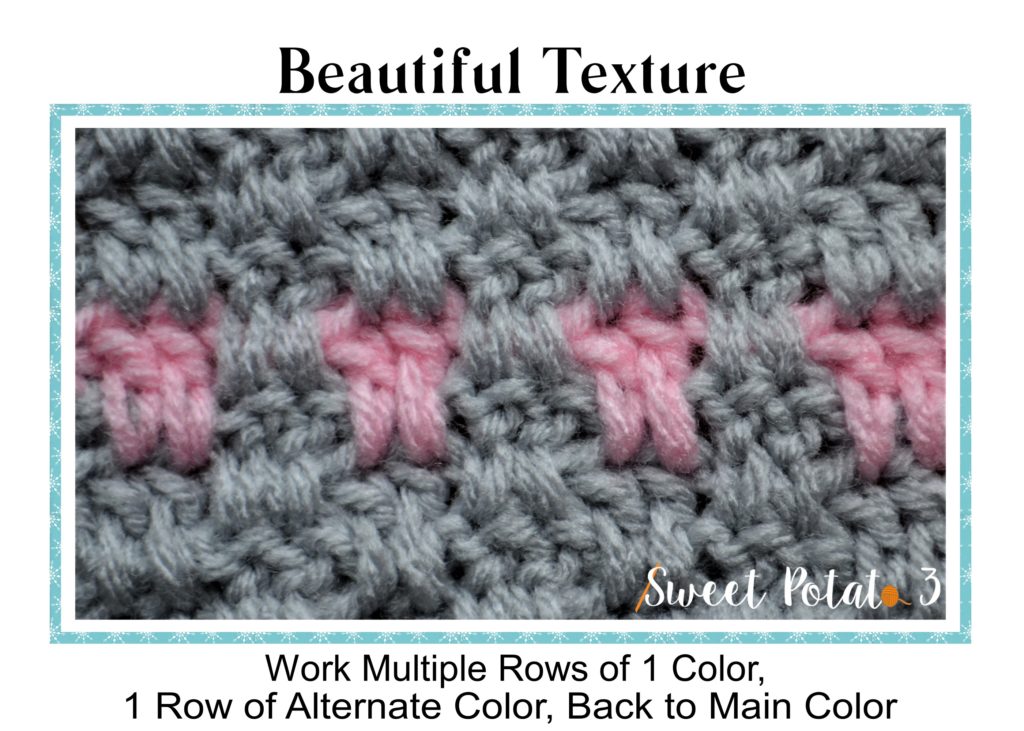
In the tutorial I will share with you how to work the stitches, it is a combination of 2 rows worked in a repeating pattern. However, you can change the look of it by changing your colors-this is a very fun way to introduce color changes and even consider working up a stash buster project.
Another fun part about the stitch pattern is that your finished rows have very clean side edges. If you’re like me and dread finishing a blanket only to have to begin the border, this is a great project for you. No border is necessary, I think I can hear you all shouting with JOY right now!
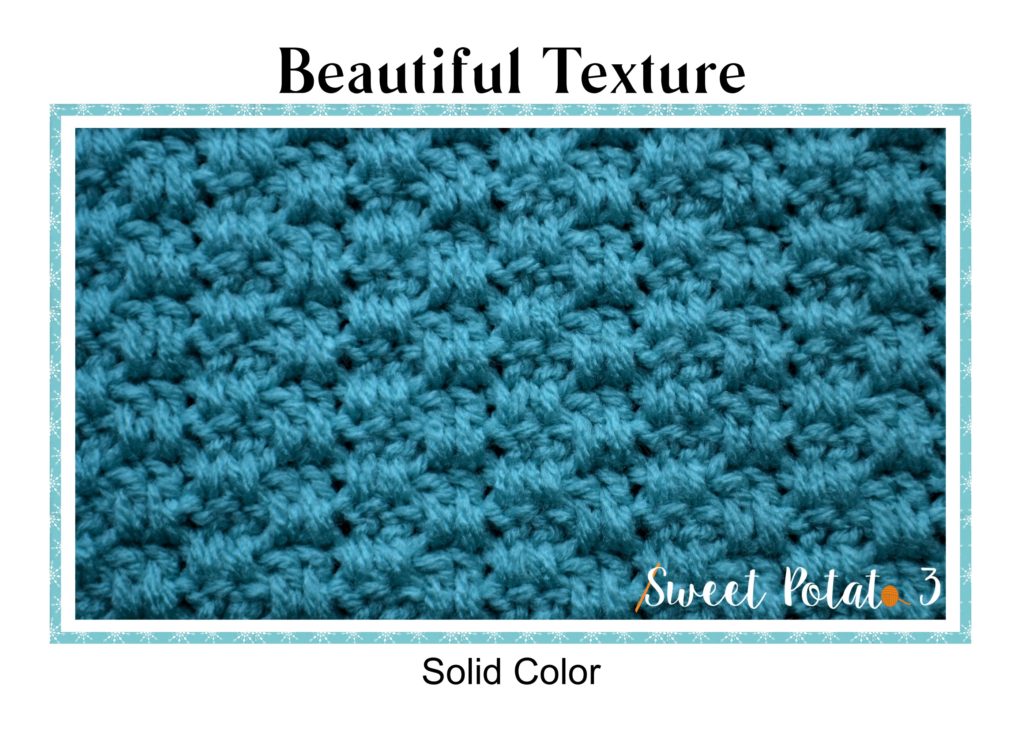
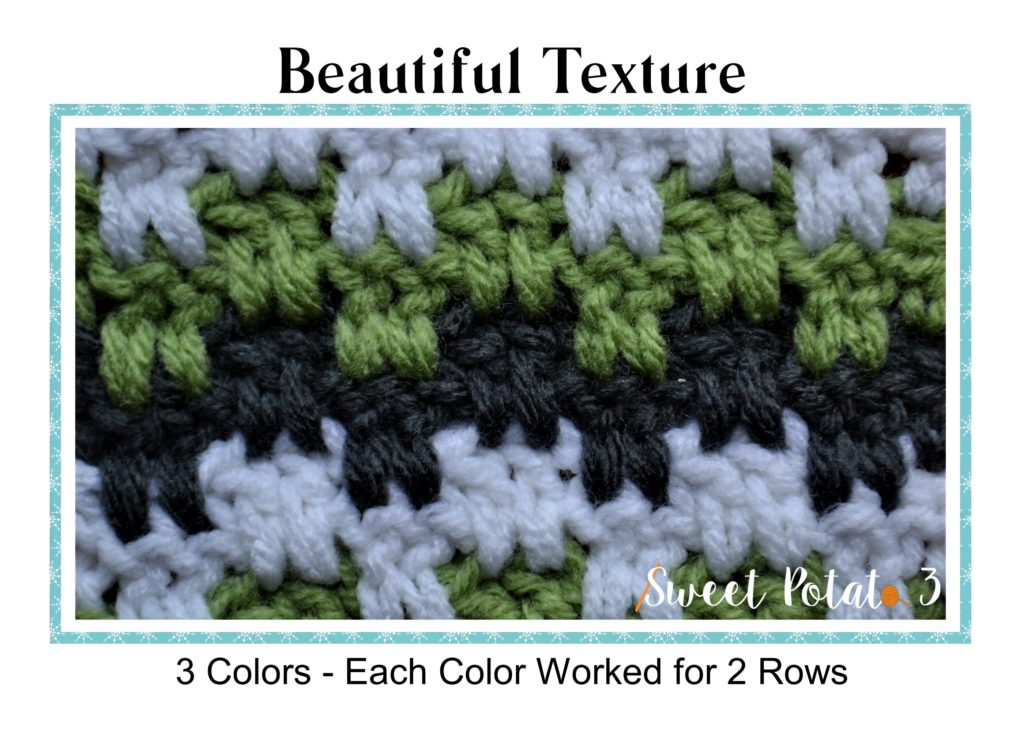
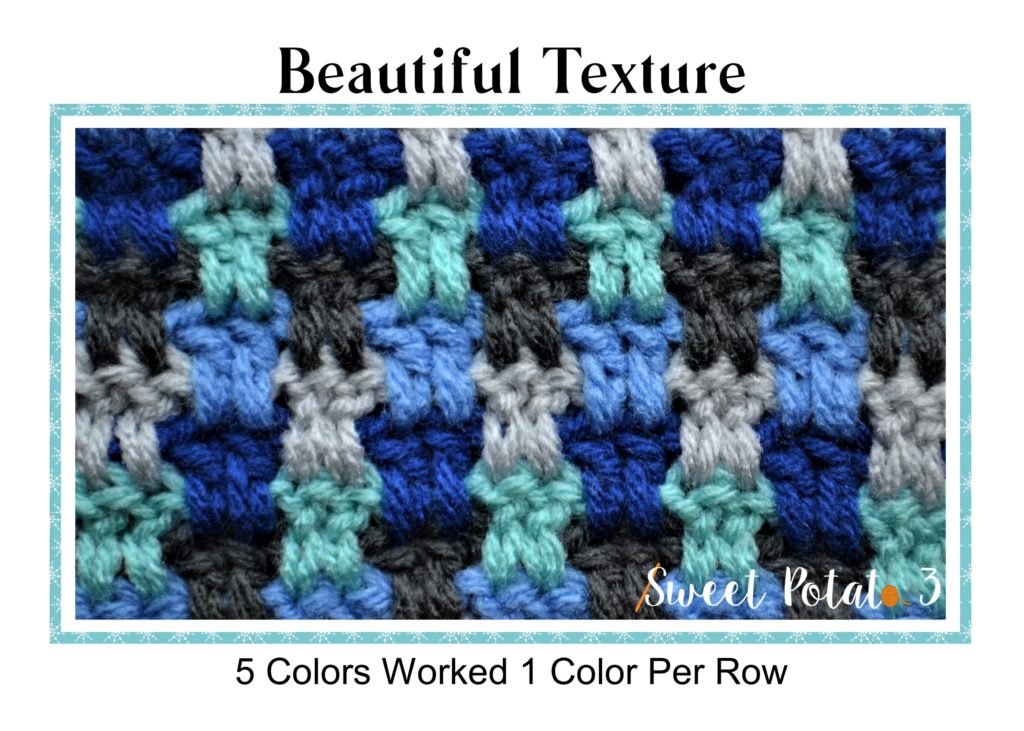
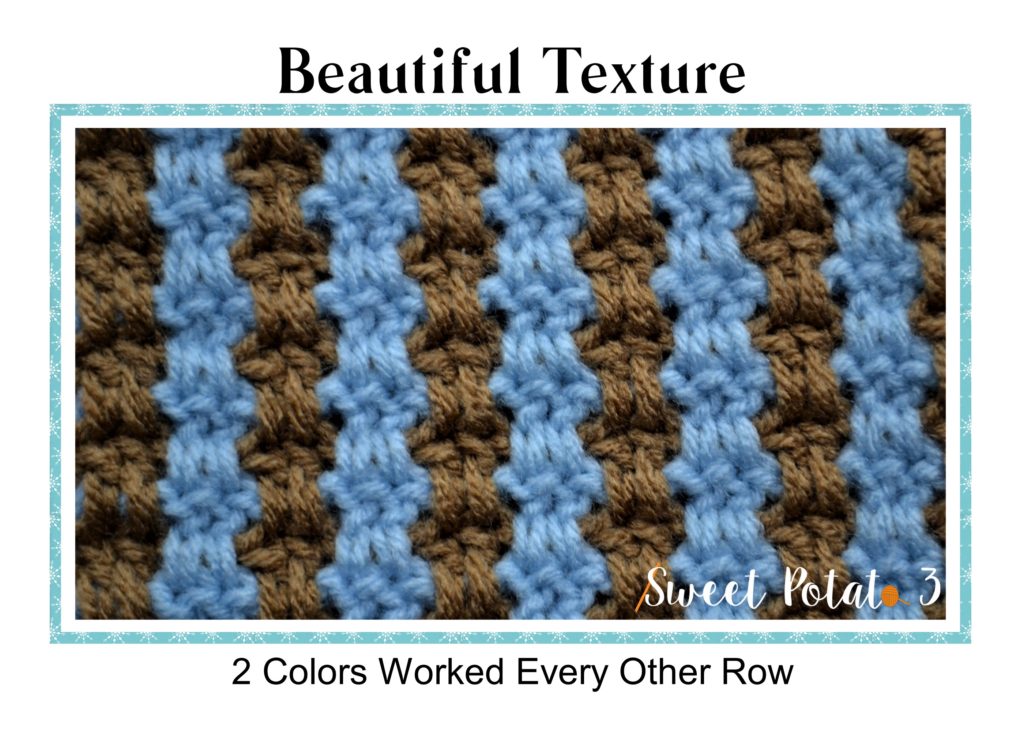
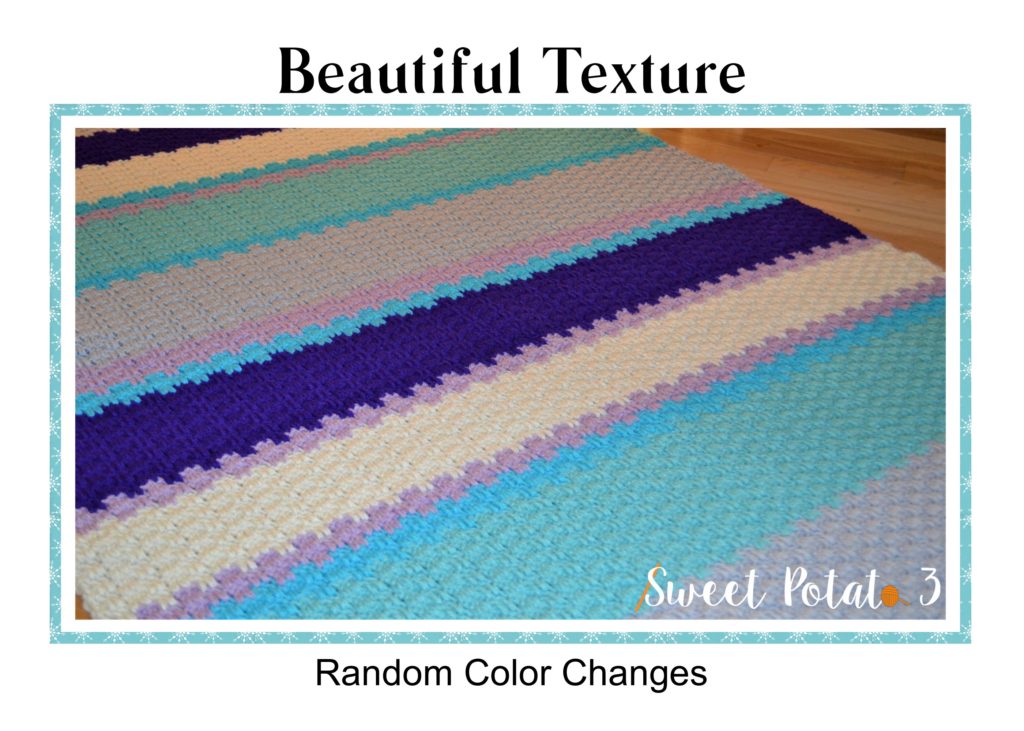
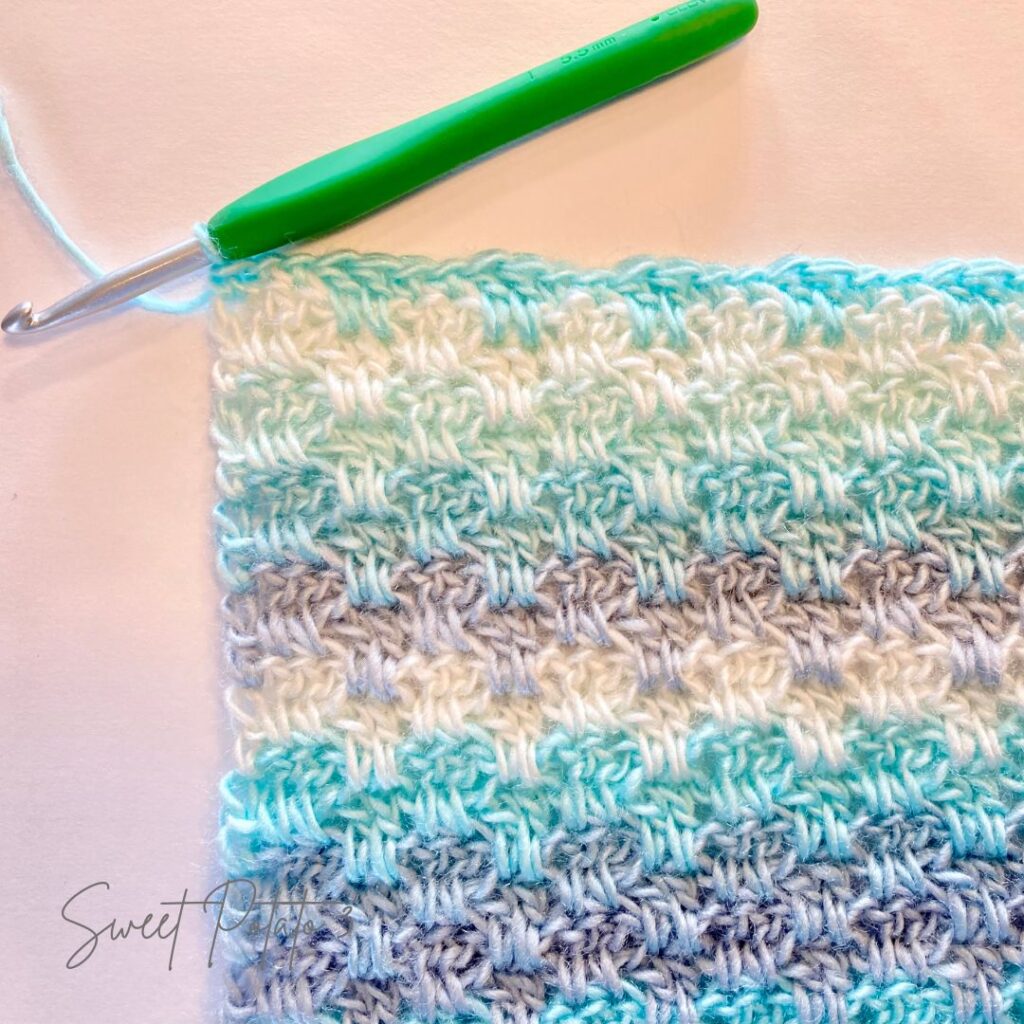
One Block Stitch / 6 Different Looks
As I mentioned above this stitch can result with many different looks just by adding color changes in. Below I have a quick visual for you to see all the options. This is one of my favorite parts about the rock the block stitch combination is how versatile it can be.
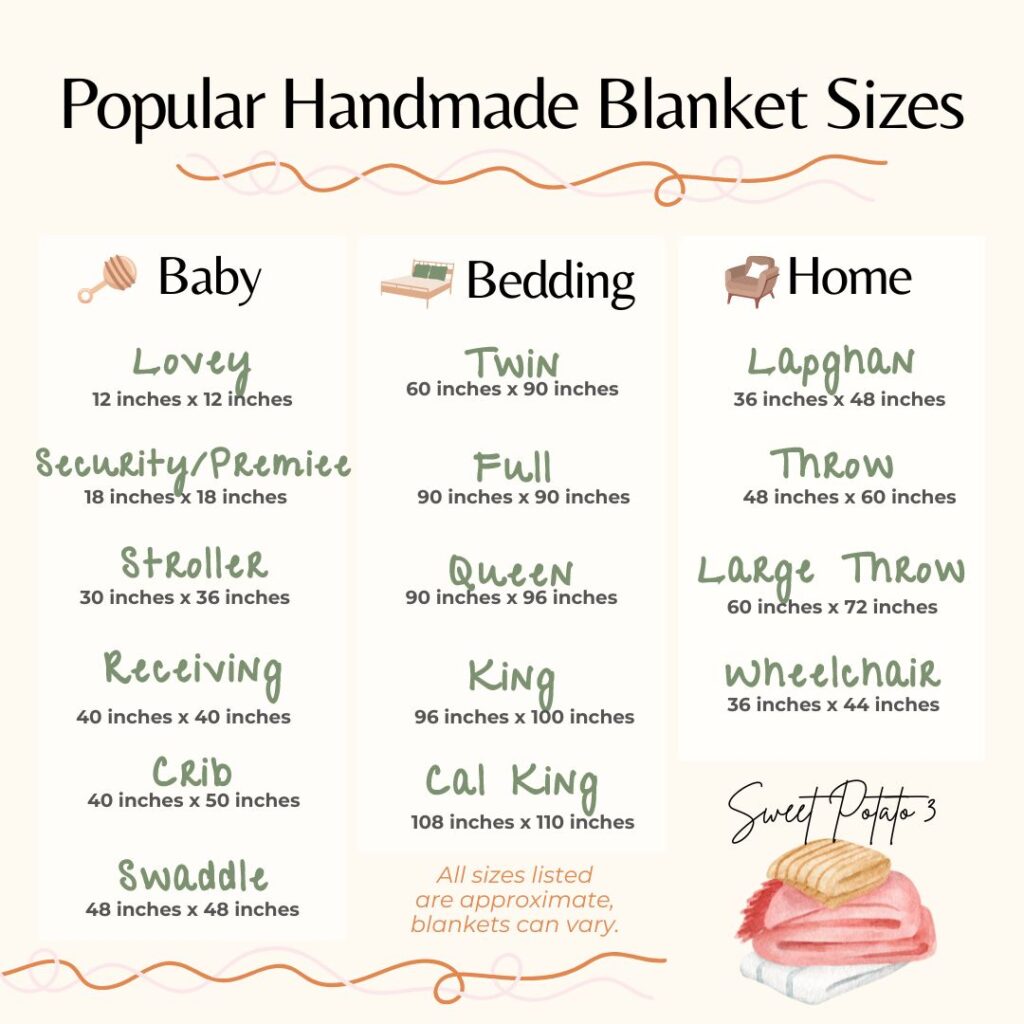
Rock the Block Blanket Size
When crocheting a blanket, you need to decide what size you want your finished blanket to be. This is a very simple stitch combination, so it is easy to adjust to the size you want. Make a note of the length and width you want your finished blanket to be, I have included a visual below of popular blanket sizes for an easy reference.
Make your decision
Yes, I know it can be difficult but, you have to decided. How many colors do you want to use and how big of a blanket do you want to make. Another thing to conside is what type of yarn you will use. This stitch pattern can be made with any weight yarn, be sure to use the suggested hook size for your yarn.
Keep in mind that the lighter weight the yarn is, the more lightweight your blanket will be. The one I use in my tutorial below is a #3 sport weight and made a lovely summer weight blanket. I have made a couple in the past (the one shown in the video tutorial) with a #4 worsted weight, and it is perfect for chillier weather or cooler evenings.
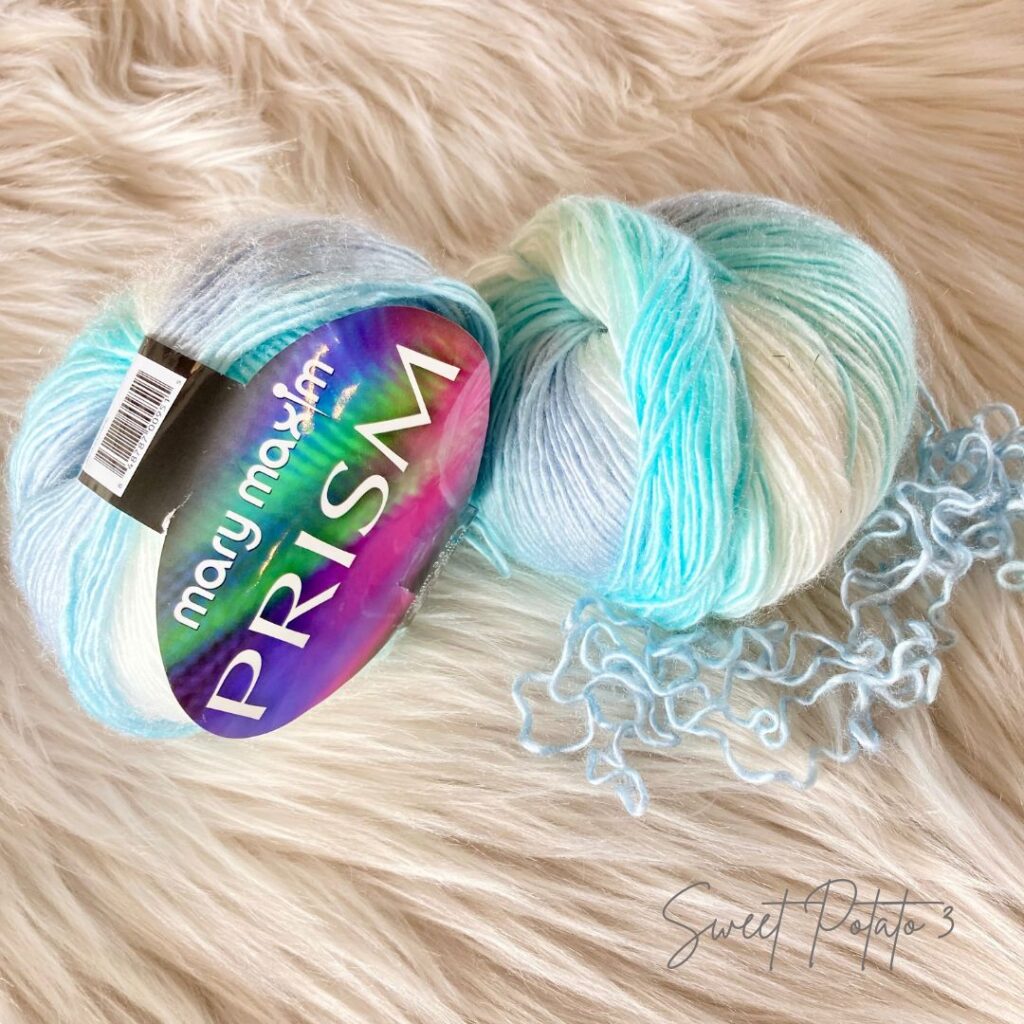
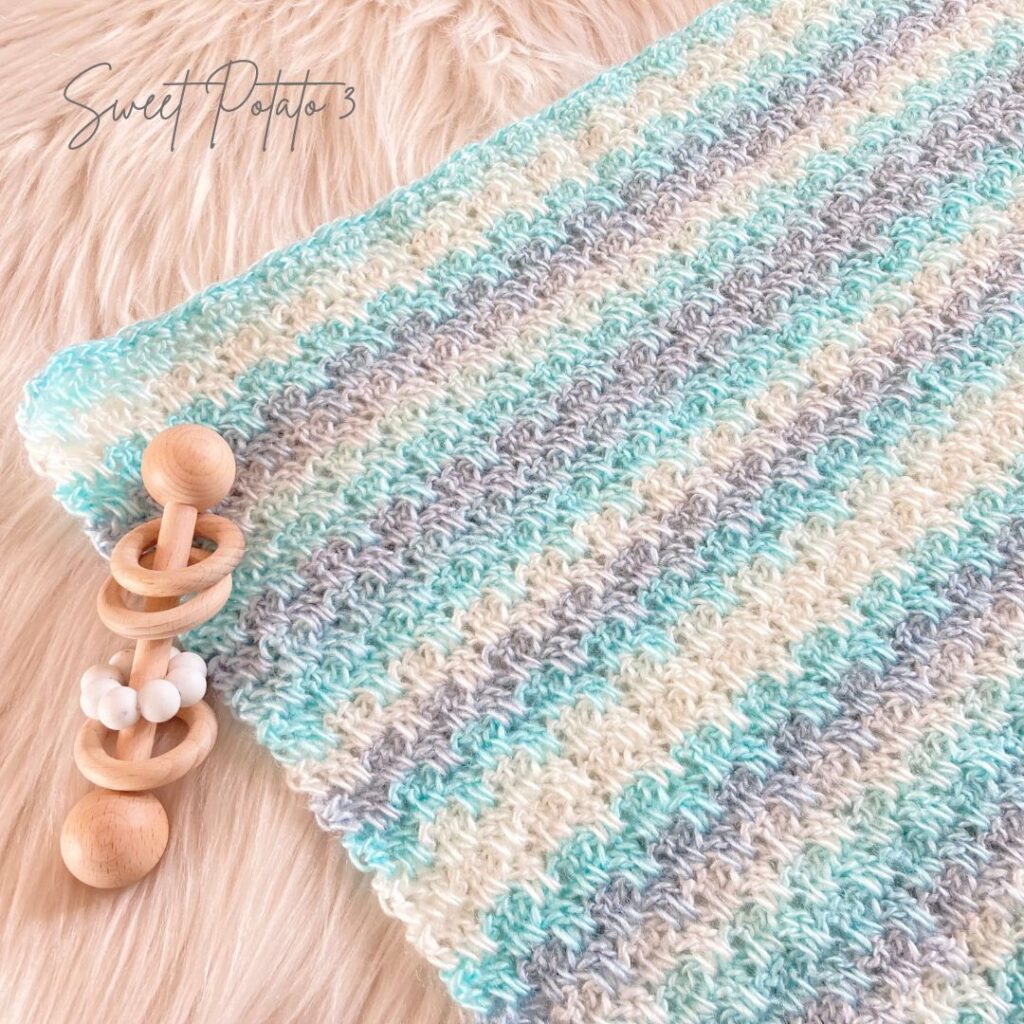
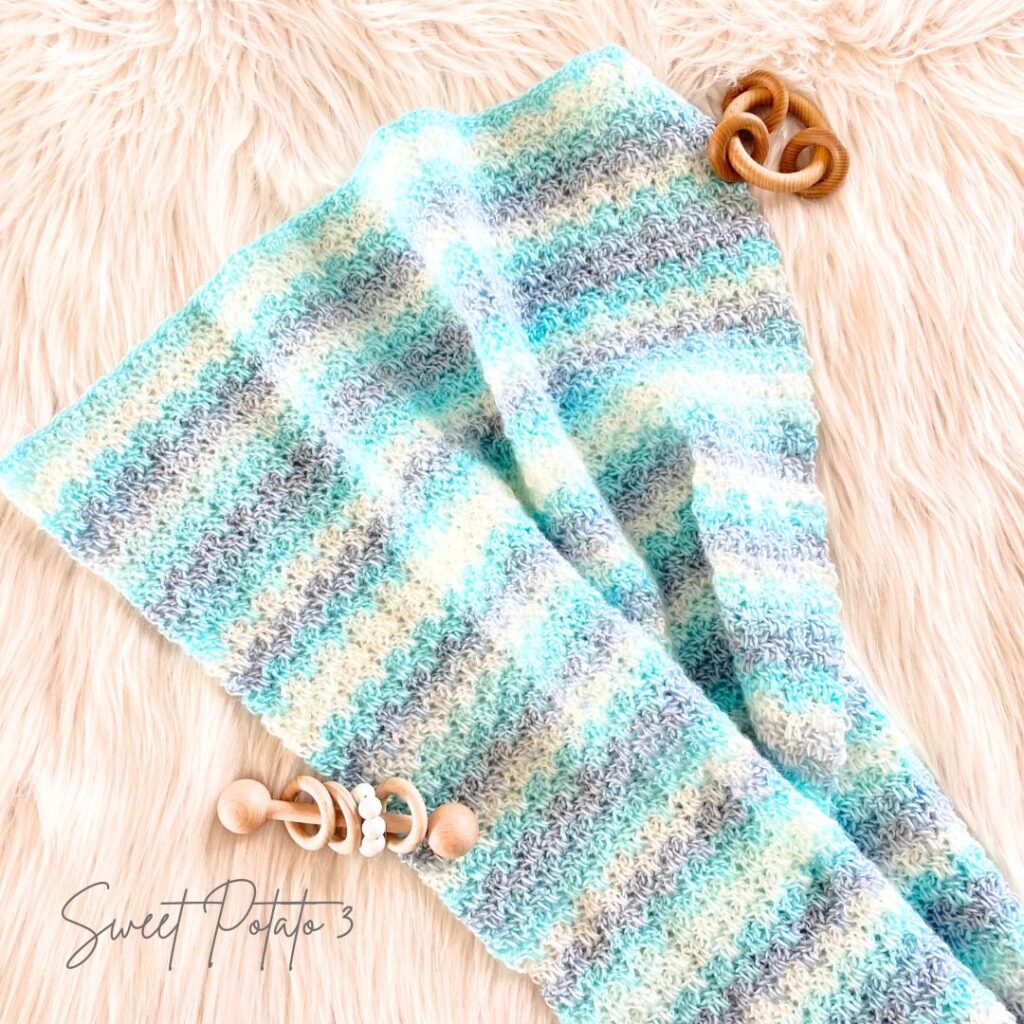
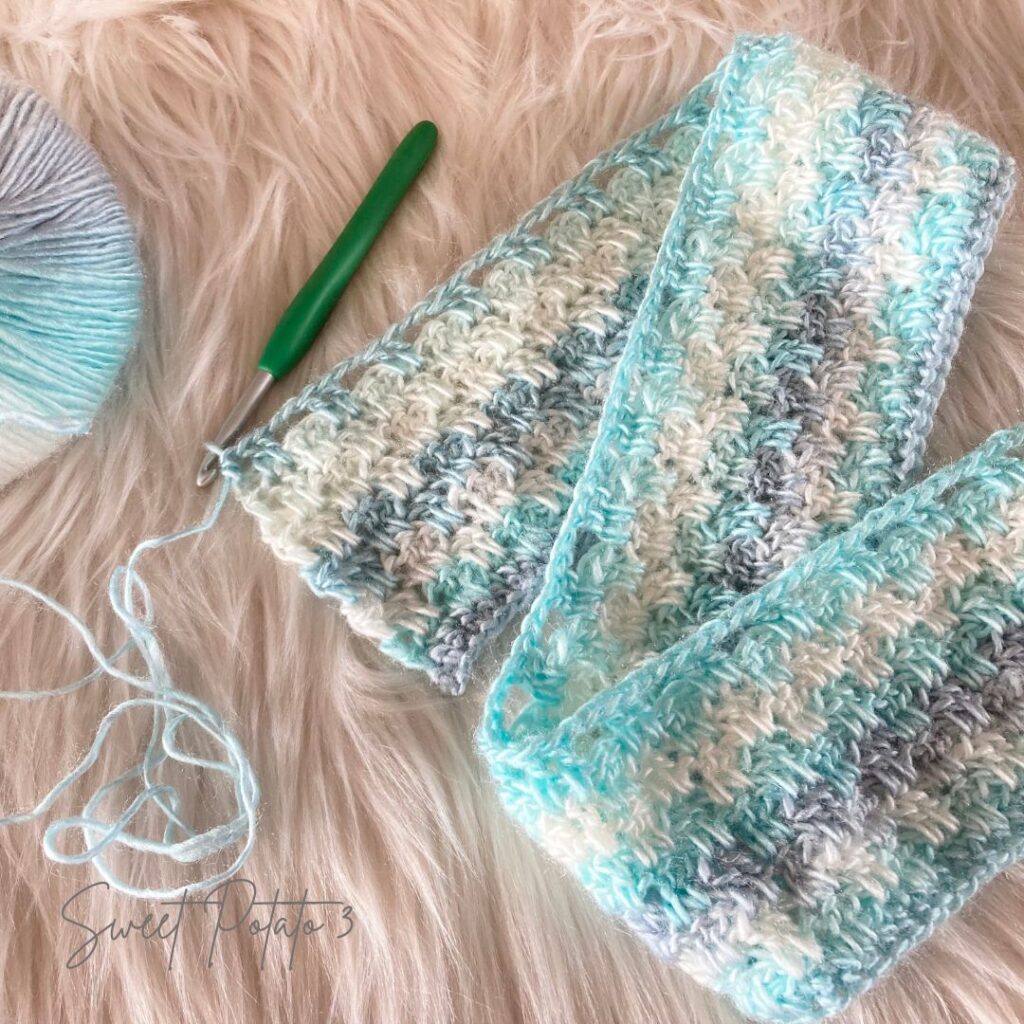
For the sample below I used Mary Maxim Prism yarn. I love how the colors fade into one another creating easy color changes and ombre hues.
Begin your Rock the Block Blanket
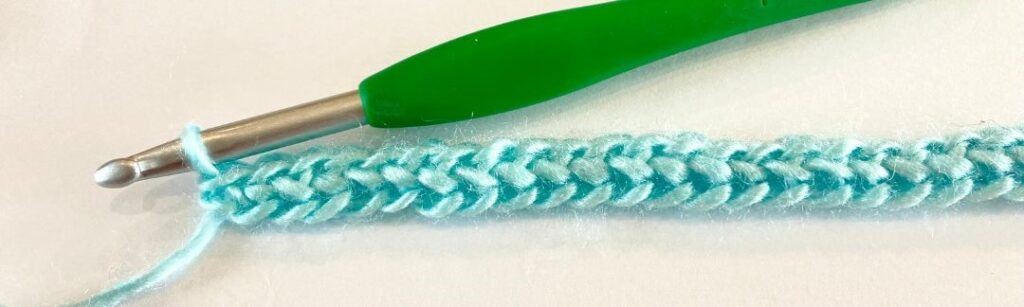
Crochet a foundation row of single crochet in multiples of 4 until the desired width is reached. If you are not familiar with how to crochet a foundation row, check out my video tutorial by clicking HERE. This is the row where you will work the width of your blanket.
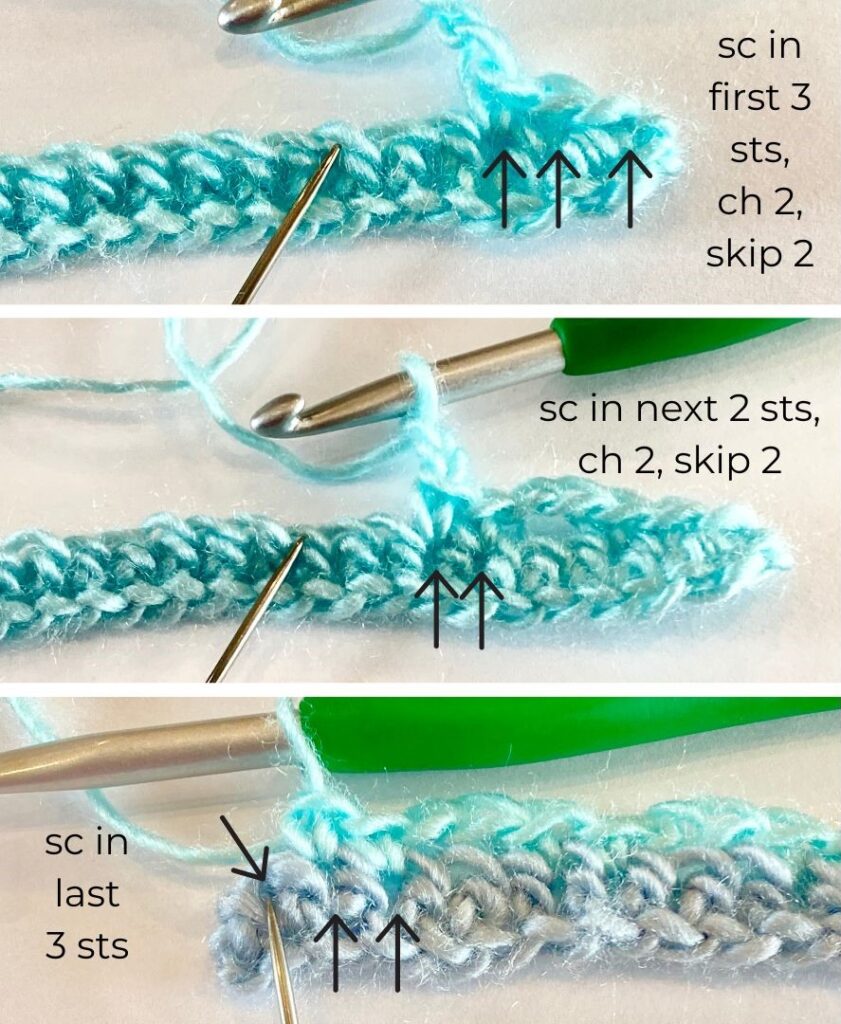
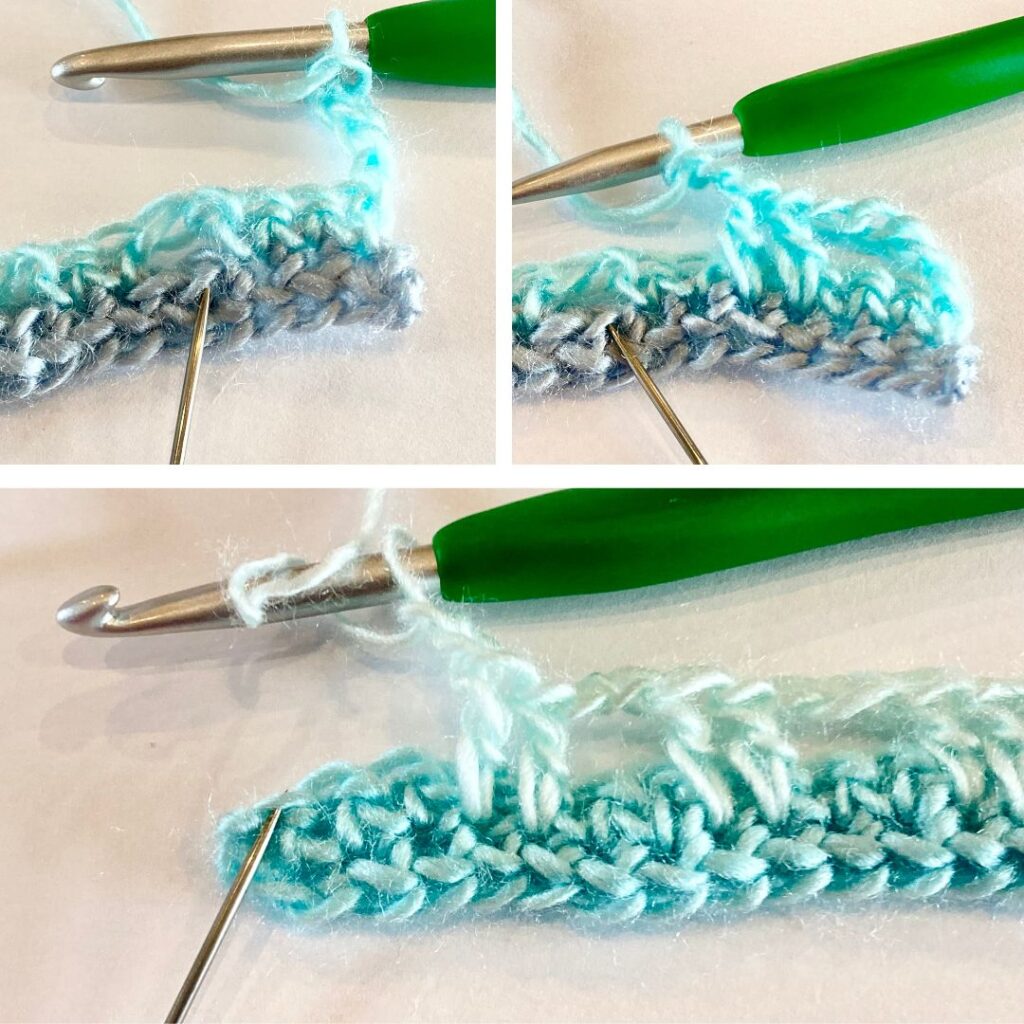
The next row will be considered row 2, follow these instructions: Ch 1, sc in next 3 sts, [ch 2, skip next 2 sts, sc in next 2 sts], repeat [] until 1 st remain, sc in last st, turn.
For row 3, you will work stitches in the top of the stitches of your foundation row (where you skipped stitches in the previous row). Row 3 instructions are: Ch 4 (counts as hdc + ch 2), skip next 3 sts, [dc in next 2 skipped sts from 2 rows prior, ch 2, skip next 2 sts], repeat [] to last st, hdc in last st, turn Note: Dc in this and following rows will be worked around/over the chain sp of the prior row, ch sp will be covered by the dc.
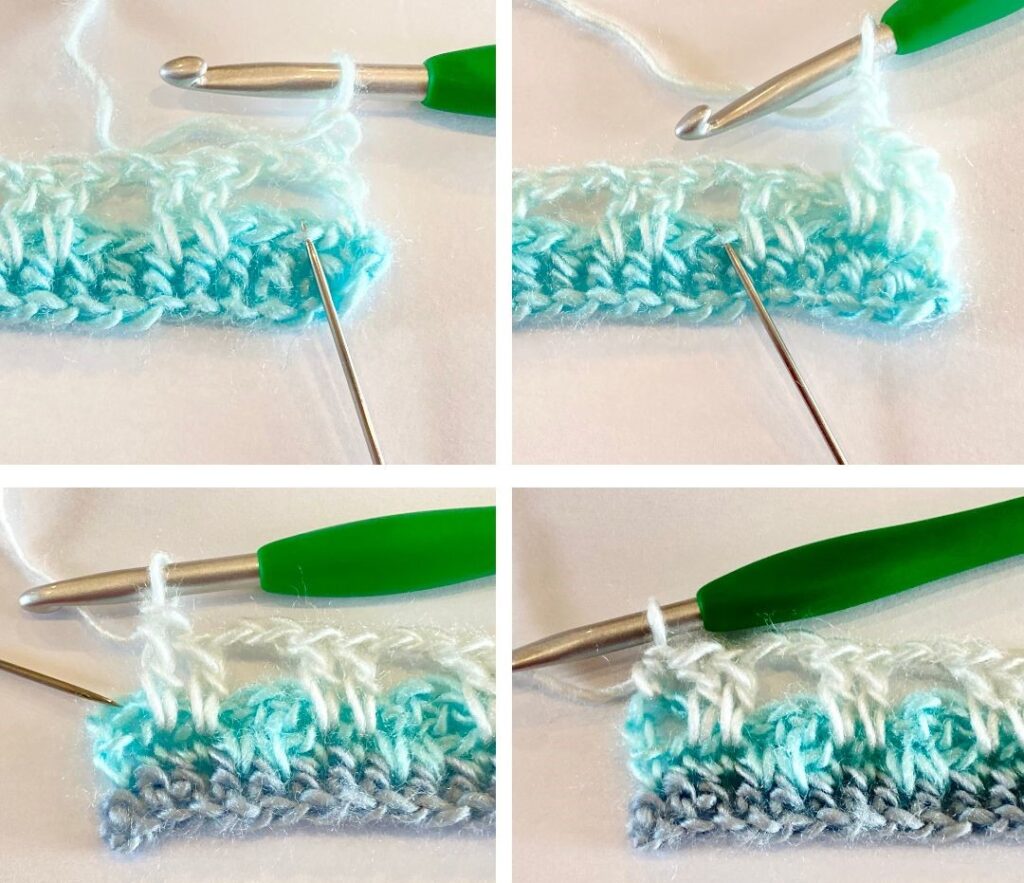
Row 4: Ch 2 (counts as a hdc), dc in next 2 skipped sts from 2 rows prior, [ch 2, skip next 2 sts, dc in next 2 skipped sts from 2 rows prior], repeat [] to last st, hdc in 2nd ch of beg ch, turn
That is it for the tutorial, pretty easy, right. You will now repeat row 3 and row 4 until the until desired length is reached. Once you have reached the final length you will continue to work the final row instructions below.
In the final row of your blanket you will be working stitches to “fill in” the holes that were created in the previous row. Final Row: Ch 1, sc in next 3 sts, [dc in next 2 skipped sts from 2 rows prior, sc in next 2 sts of current row], repeat [] to last st, sc in last st. At this point, you can be done with the blanket or you can choose to work one more row of single crochets. I typically finish with a row of single crochets so the blanket mirrors the first row of foundation single crochets.
YouTube Tutorial on the Rock the block stitch
Other Stitch Tutorials you may love
- 4 Row Twist of Serenity – click HERE
- Vertical Stacked Puff Stitch – click HERE
- Striped Linen Square Pattern – click HERE
- A Course on Changing Colors with my signature blanket designs – click HERE
More Crochet Fun
Follow Sweet Potato 3 on Facebook to see more pattern releases, sales and crochet fun, just click HERE.
However, if you would enjoy a more interactive group experience, you need to join my Crochet & Conversations facebook group, click HERE. It is a ton of fun and I encourage everyone to share their projects, WIPS (works in progress) and inspirations. Plus you get exclusive deals, are the first to see new releases, give input on designs and have opportunities to win patterns. Join now and get to know others who also enjoy the art of crochet.


Love this, thankyou