Crocheting small Christmas projects is always a great thing to make during the summer months. It gives you a head start on one of those holidays that always approaches faster than we anticipate. Plus, crocheting small projects is always a great idea when it is hot outside-seriously, who wants a large blanket or sweater draped over their lap during crochet time?
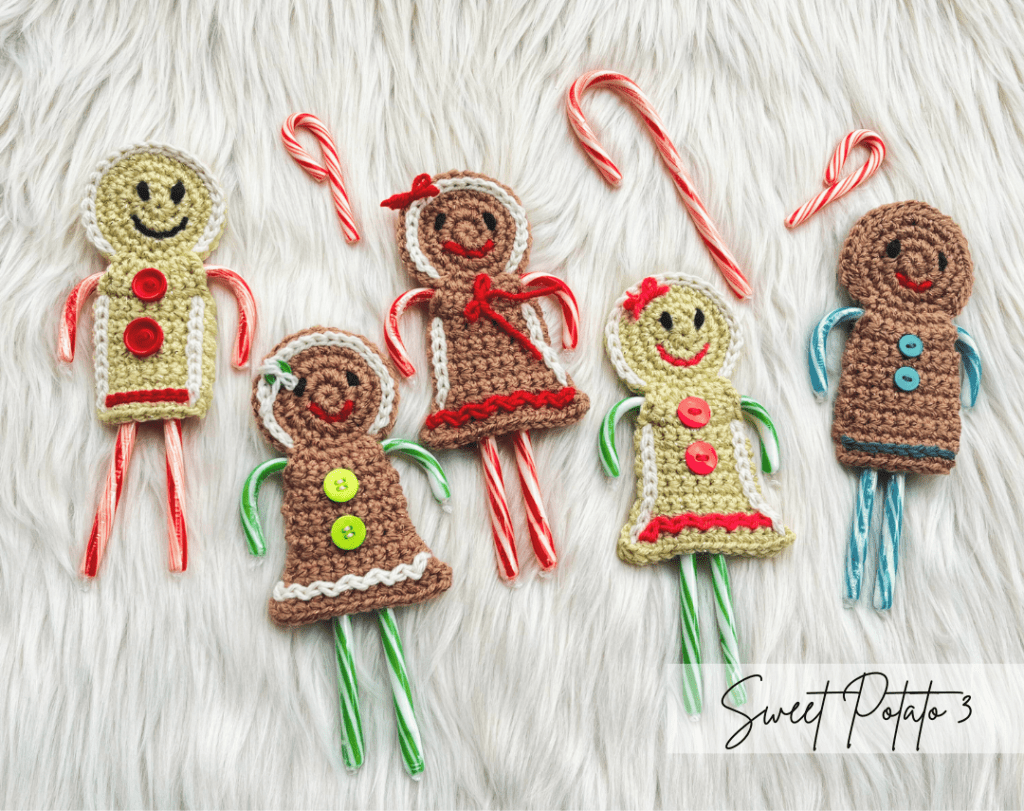
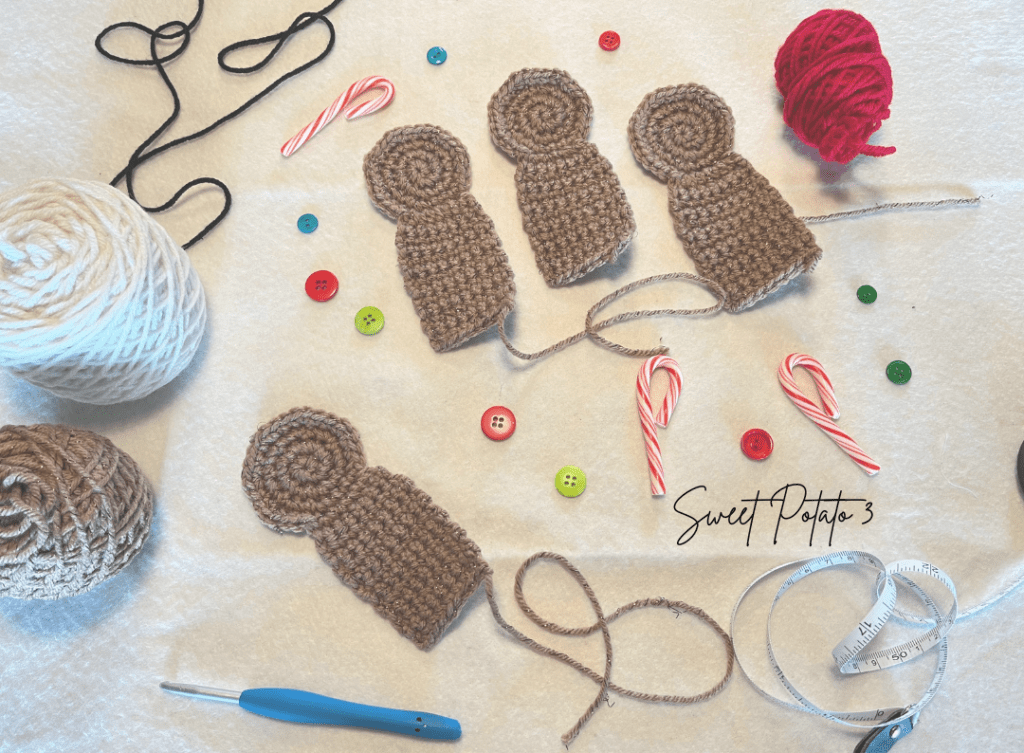
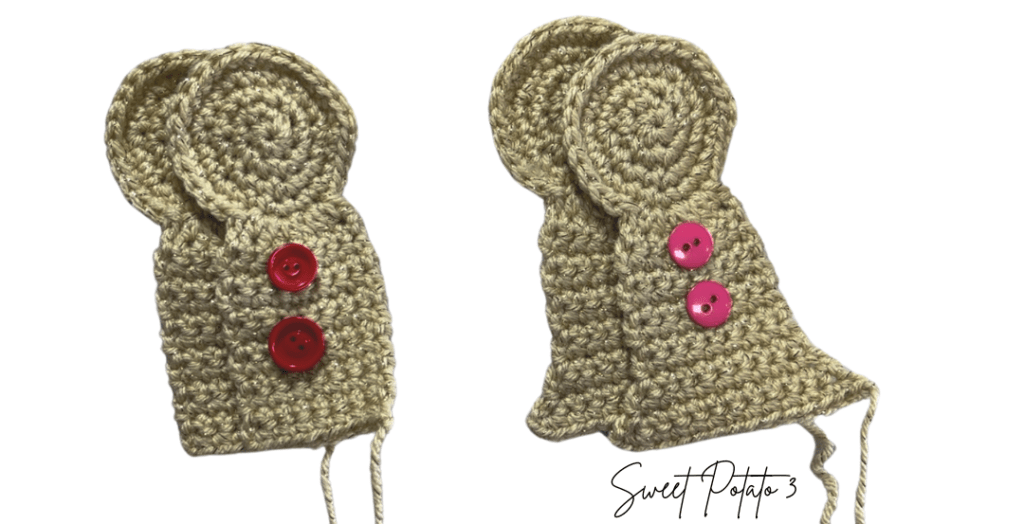
I ran across some really cute felt candy can holders that I thought would make adorable Christmas classroom gifts, or would be cute to lay on top of the plates of the children’s table at Christmas. I quickly sat down and crocheted a few, and they turned out adorable. These are little Gingerbread Boys & Girls that use Candy Canes for their arms and legs.

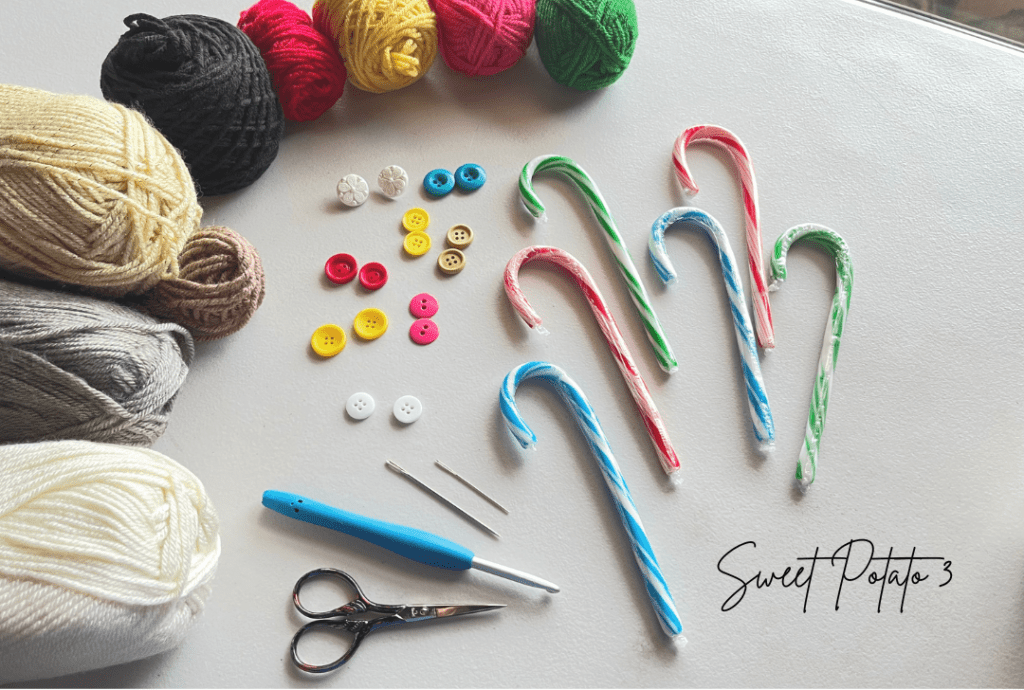
Supplies Needed
- 2 full-size candy canes
- If you need Candy Canes, they may actually already be in stores. I had to order mine from Amazon. Many of their options have next-day delivery, including these ones:
- Red Peppermint: https://a.co/d/8Mtwtxo
- Red, Blue & Green Option: https://a.co/d/2TunxoI
- Colorful Options: https://a.co/d/bFMbAJf
- If you need Candy Canes, they may actually already be in stores. I had to order mine from Amazon. Many of their options have next-day delivery, including these ones:
- 20 yds brown yarn
- scrap yarn amounts
- crochet hook H (5.00 mm)
- scissors
- needle
- optional: buttons
Gingerbread Candy Can Holder Crochet Pattern
Crochet the head
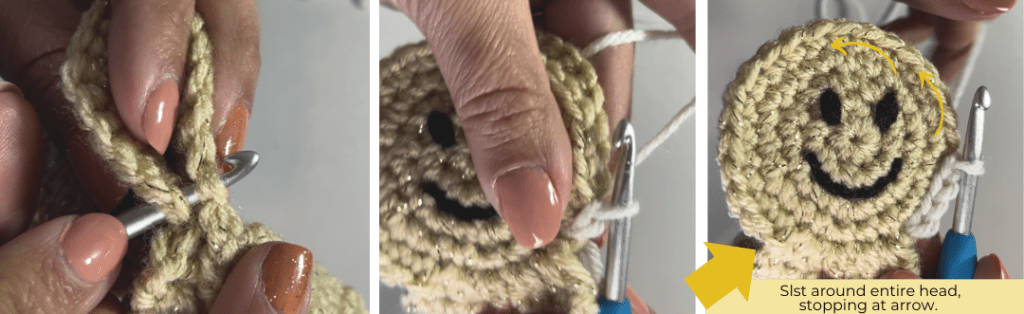
You will begin the project by crocheting the head in a continuous round. Grab your brown yarn and crochet hook H (5.00 mm). I typically begin my rounds with a chain, but if you prefer to begin with a magic circle, that is perfectly fine.
Round 1: Ch 2, in 2nd ch from hook (or 1st ch made) work 7sc, do NOT join
Round 2: work 2sc in each st around (14 total sts)
Round 3: [2sc in next st, sc in next st], repeat [ ] around (21 sts)
Round 4: [2sc in next st, sc in each of the next 2 sts], repeat [ ] around (28)
Round 5: this is just a partial round, work a sc in each of the next 15 sts, slst into the next st (15)
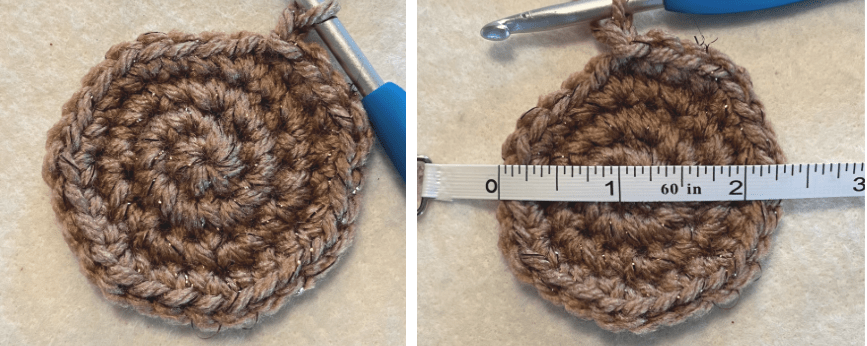
The head will measure just over 2 inches wide (about 2 1/4 inches).
At this point in the project, the face of the gingerbread has been completed. Do NOT fasten off; you will continue to work the body from the head. Instead of continuing to work in the round, you will begin to work in rows.
Crochet the body
Row 1 of Body: Ch 1 (do not count the ch as a st), work 2hdc* in each of the next 4 sts, turn (8) *note that this is the only row that you will work half double crochets, this is correct and by design
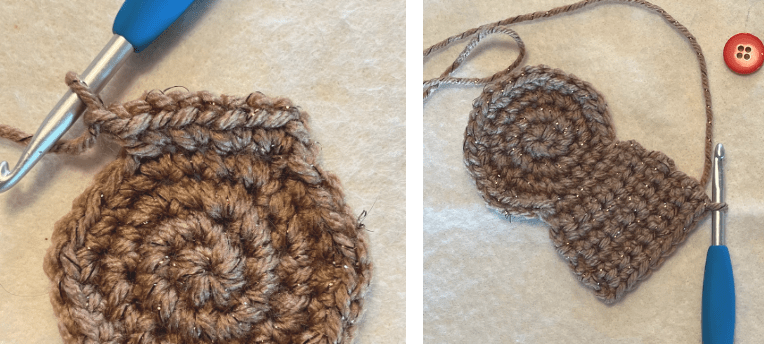
Row 2-9: Ch 1 (does not count as a st now or for the rest of the body), sc in each st across row, turn (8)
Decision Time! You are almost done with your first gingerbread piece, but first you need to decide if you want to make a girl or a boy version. Follow the correct instructions below. After the body is completed, the body length will be about 3″ long.
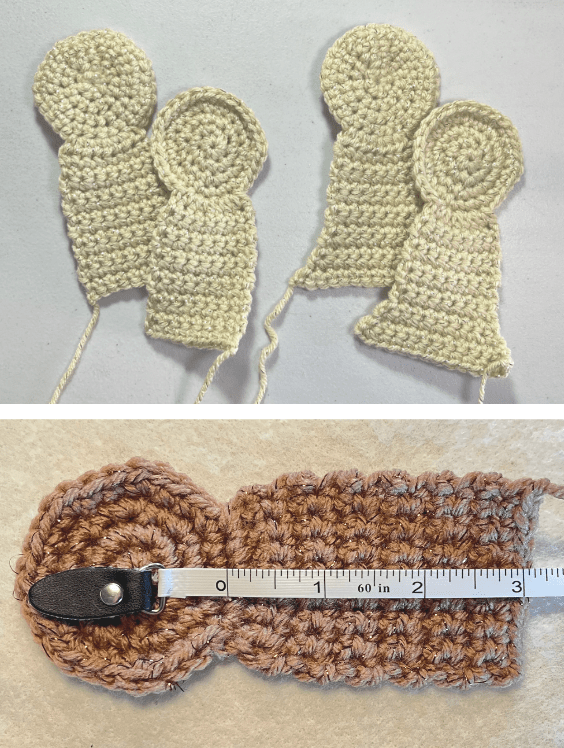
Boy Row 10-13: Ch 1, sc in each st across, turn (8) after row 13, go ahead and fasten off and weave in yarn ends.
Girl Row 10: Ch 1, 2sc in first st, sc in each of the next 6 sts, 2sc in last st, turn (10)
Girl Row 11: Ch 1, sc in each st across, turn (10)
Girl Row 12: Ch 1, 2sc in first st, sc in each of the next 8 sts, 2sc in last st, turn (12)
Girl Row 13: Ch 1, 2sc in first st, sc in each of the next 10 sts, 2sc in last st, turn (14) after row 13, go ahead and fasten off and weave in yarn ends.
One body has been crocheted. Each Gingerbread boy or girl will need to have 2 pieces, so go ahead and make the 2nd one. Then make as many friends as you want, the more the merrier!
Adding Details (buttons & embroidery)
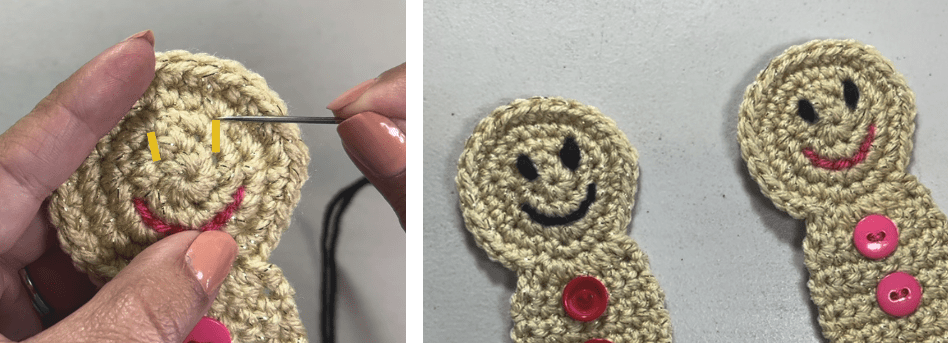
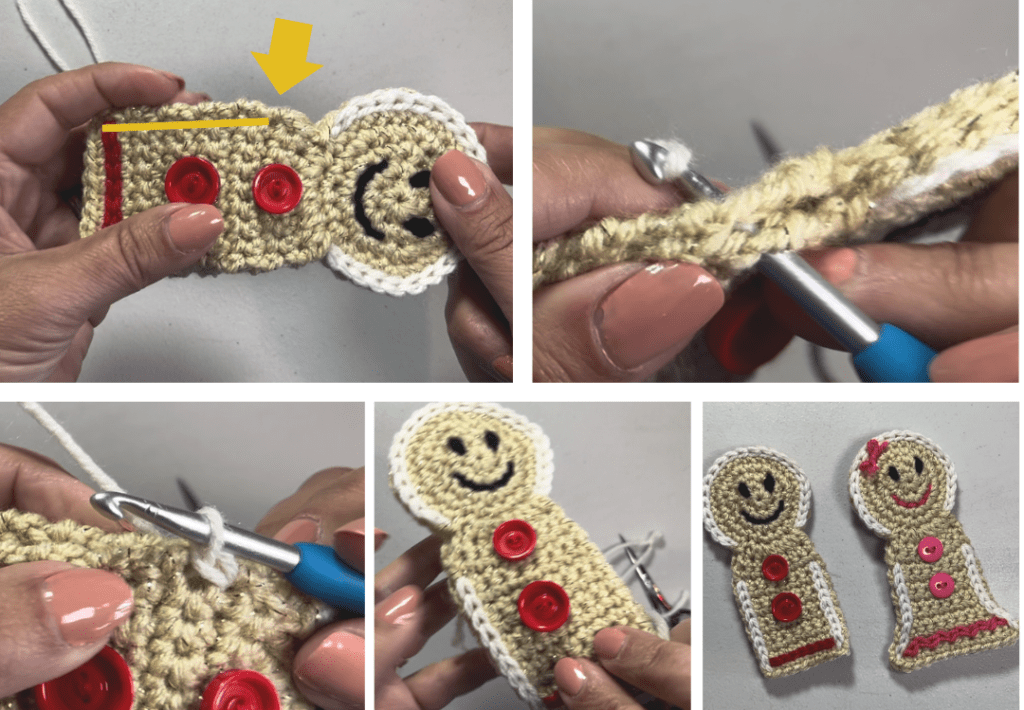
This is the fun part of the project, where you can really personalize the look of your gingerbread boy or girl. Add colors to your project and be creative with the ways you can decorate the front body and headpiece. It is important to note that although you have crocheted two pieces for each candy cane holder, you will only decorate the details on the front piece.
To start, I like to add the button detail along the front of the body first. You can decide if you want to add buttons or not, then choose if you’d like one, two, three, or more. In most of my samples, I used two buttons down the front, just eyeball the placement to see what you think will look best (this may vary depending on how big the buttons are).
Embroidering – I recommend watching the video for this part
To add the details on the face, the smile, and the eyes, I used my yarn and needle to embroider them on. It was very difficult to try to photograph how to embroider, so I recommend you watch the video for this part if you haven’t embroidered on crochet before. Essentially, you will weave the yarn between stitches to create a line.
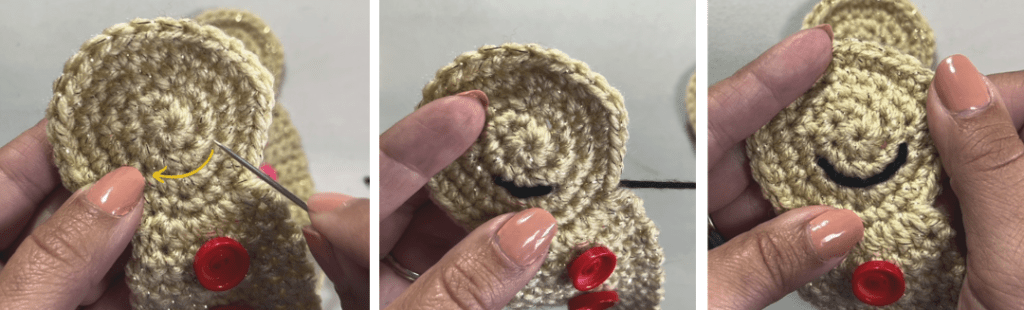
For the smile, I followed along the top of the stitches of round 2 (bottom of stitches from round 3) and began straight up from the center. Embroider along 3 stitches to the left, then the 3 stitches to the right, and the smile is done. Next, find the space between the stitches the line straight up and down on each side of the fac,e just above the inside edge of the smile, and embroider 1 stitch up and down.
If you are wondering how to finish off your details, just turn your crochet piece to the backside and tie a knot, trim up the ends, and leave it. Since the gingerbread boys or girls are made with two pieces, the inside will be covered with the back piece, so this doesn’t need to be nicely woven in and hidden.
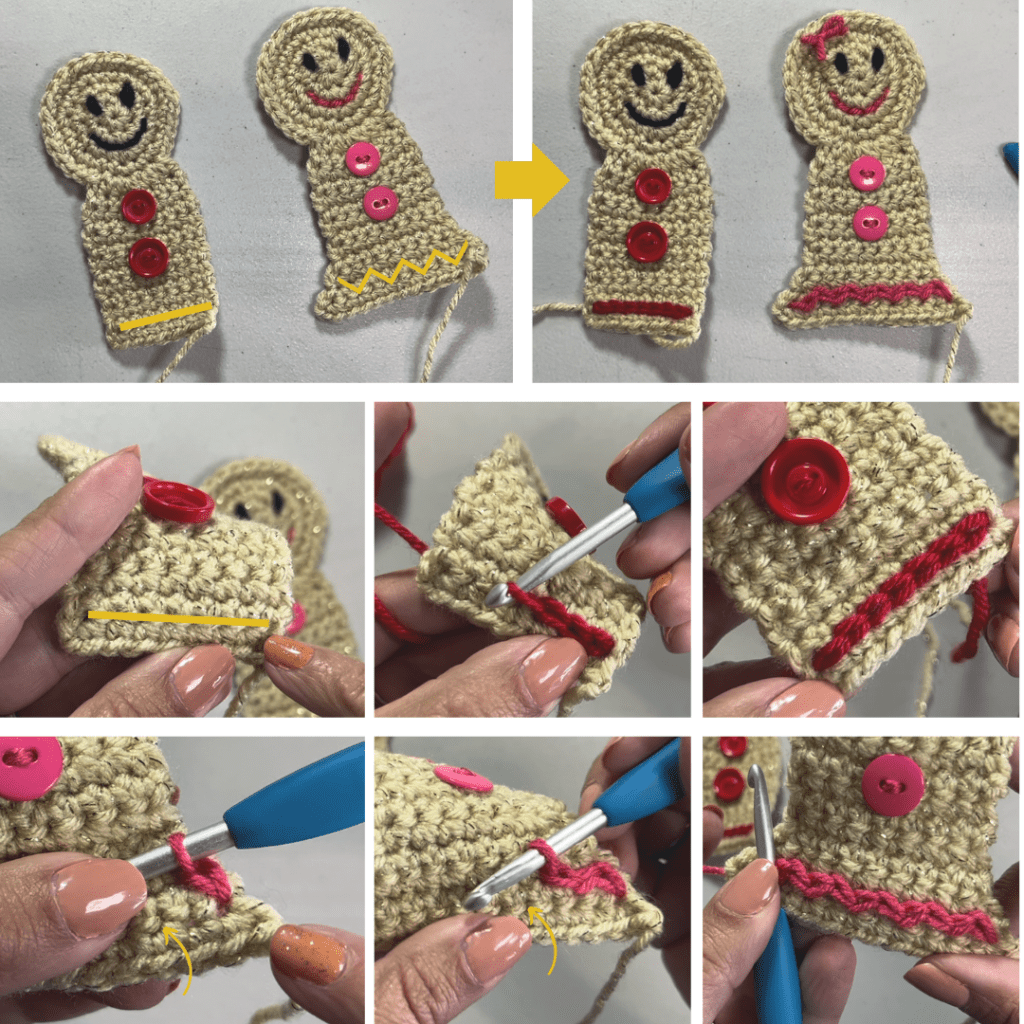
Body Outline Along Bottom of Dress or Shorts
This is a fun place to add color to your project, whether you match your candy cane, coordinate with it, or just go completely different. To create this detail, you will surface slip stitch along the base of the stitches in the last row of the body. You can slip stitch in a straight line, as you can see in my boy samples. Or you can alternate every other stitch between the rows to create a slight ruffle, as seen on my girl samples. Again, this is a great section to watch the video tutorial if this is something you haven’t done before.
Finishing Touches (sewing pieces together & adding candy canes)
It’s so exciting, you are almost done with your Gingerbread Boy or Girl Candy Cane Holder. All you have to do is stitch the pieces together. That’s right, I said ‘stitch’, not ‘seam’. There is no actual sewing. I hope that makes many of you happy!
The first thing you are going to want to do is take your two pieces. Place them with the wrong sides together. The front will be the piece you just decorated, while the blank/empty piece will be the back. To start, you will stitch the head together. Insert your hook through the first unworked stitch of the top piece and the first unworked stitch of the bottom piece, put the yarn loop on your hook, and pull through. Now slip stitch (just like your surface crochet in the above steps), but make sure you work through the top and bottom pieces. Slip Stitch all the way around to the last unworked stitch, fasten off, and weave in your ends.
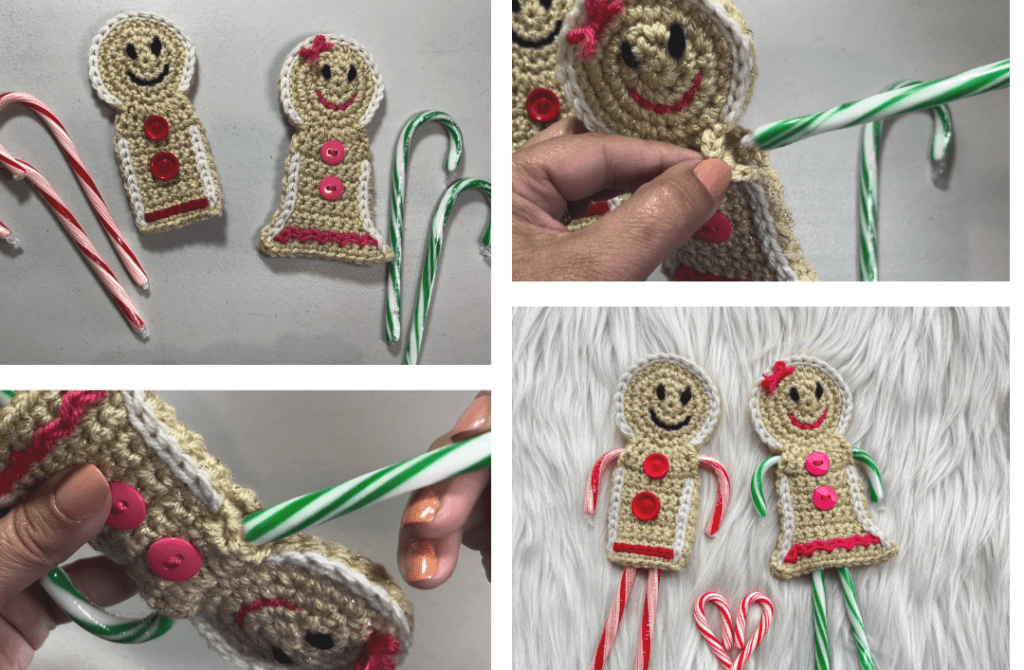
Now you will use the same technique, surface slip stitch, to stitch the sides of the body together. You need to leave an opening, though; this is where the candy canes will be placed. Skip the first 3 rows of the body (this is the hdc row plus two single crochet rows). You will work through both pieces, front and back, and slip stitch down the side. Once one side is completed, go ahead and repeat on the second side.
Adding the Candy Cane!
The final step is ready; all you need now is a couple of candy canes! Find the opening between the head and side surface crochets; you may need to pry it open a little with your finger. Slide the straight edge of the candy cane into the body until the “curve” of the candy cane rests on the seam. Repeat on the other side, and you are done!
I hope you love how your project turned out, and I hope it inspired you to make many more! Please feel free to tag me and share on social media (@sweetpotato3patterns).
Full YouTube Tutorial
If you are unable to view the video above for any reason, just click the link below to watch the video on YouTube.
More Free Crochet Patterns You May Love
- FREE Tree Garland & Gift Tags – click HERE
- FREE Braided Christmas Wreath – click HERE
- FREE Christmas Hot Pad + Holiday Printable Gift Tag – click HERE
More Crochet Fun
I am sure you will love these home décor crochet patterns. When you make one, I would love to see a photo of your project. I host an interactive Facebook group called “SP3 Crochet & Conversations”. You’re invited to join this community; it is a great spot to share photos, ask questions ,and have fun. Join by clicking HERE.