I am always on the hunt for a new and unique crochet design. This year, I really wanted to create a Christmas pattern that hadn’t been done before. And with so many patterns out there, that can be tricky to do. Even though all us crochet designers put our own unique spin on designs, there are still similar designs out there. I mean check out how many Christmas stocking, tree skirt or even Santa hat patterns there are.
I often look at sewing or quilting designs for inspiration. This year I ran across a beautiful, braided wreath and knew immediately that I needed to put the Sweet Potato 3 spin on it and design a crochet version. I may not be the first to design one, but I haven’t seen a crochet version yet.


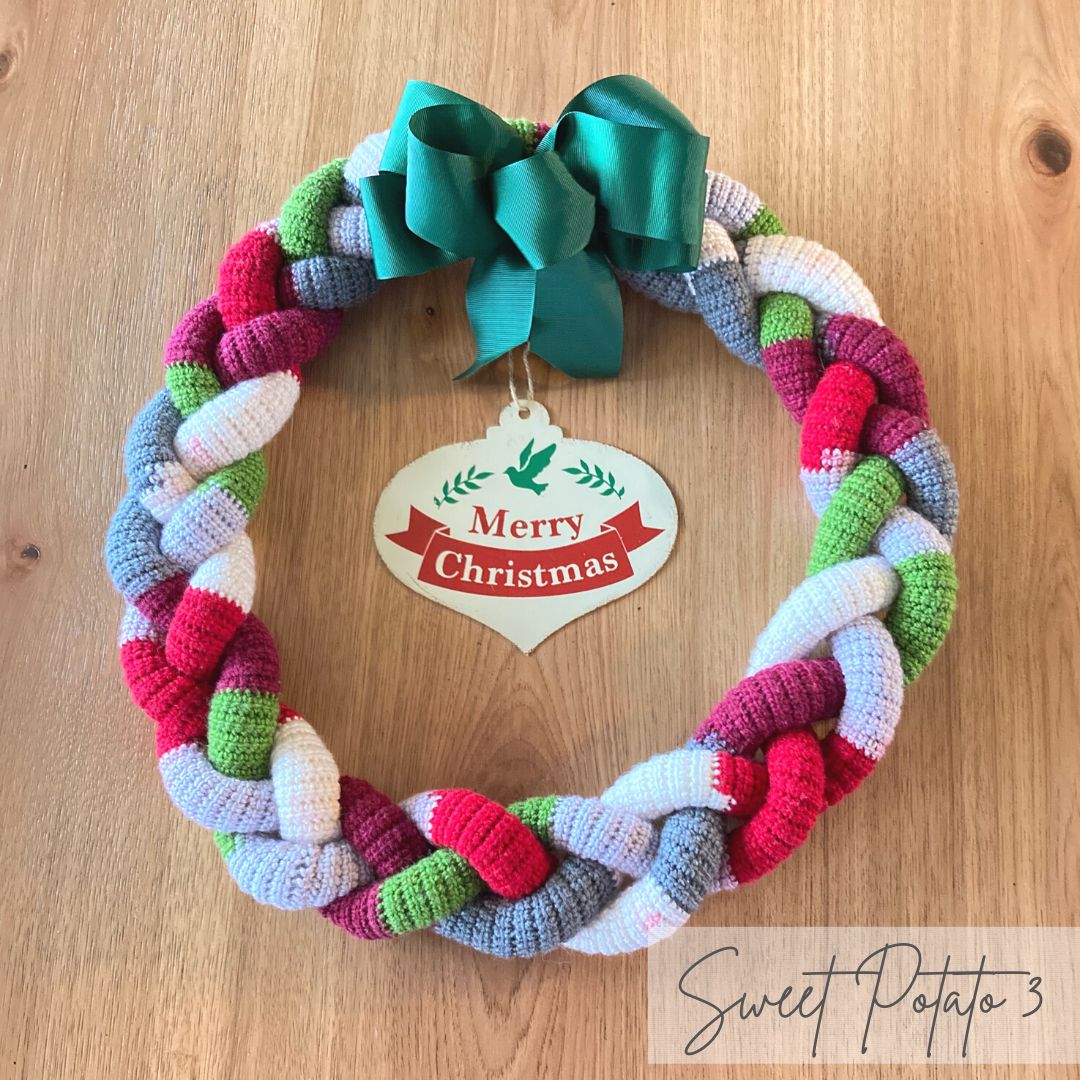
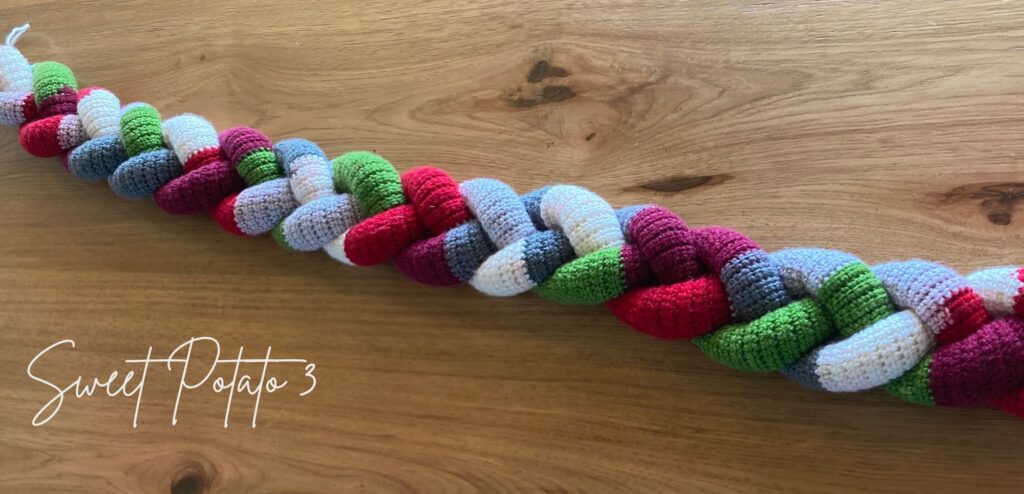
The Braided Wreath Design
About the same time I was trying to find a design I was contacted by Hobbii yarn to work on a Christmas design for the #ChristmasWithHobbiiYT. I was excited to collaborate with them. They shipped me some gorgeous self striping yarn from their Horizon line of sport #3 weight yarn that you can find by clicking HERE.
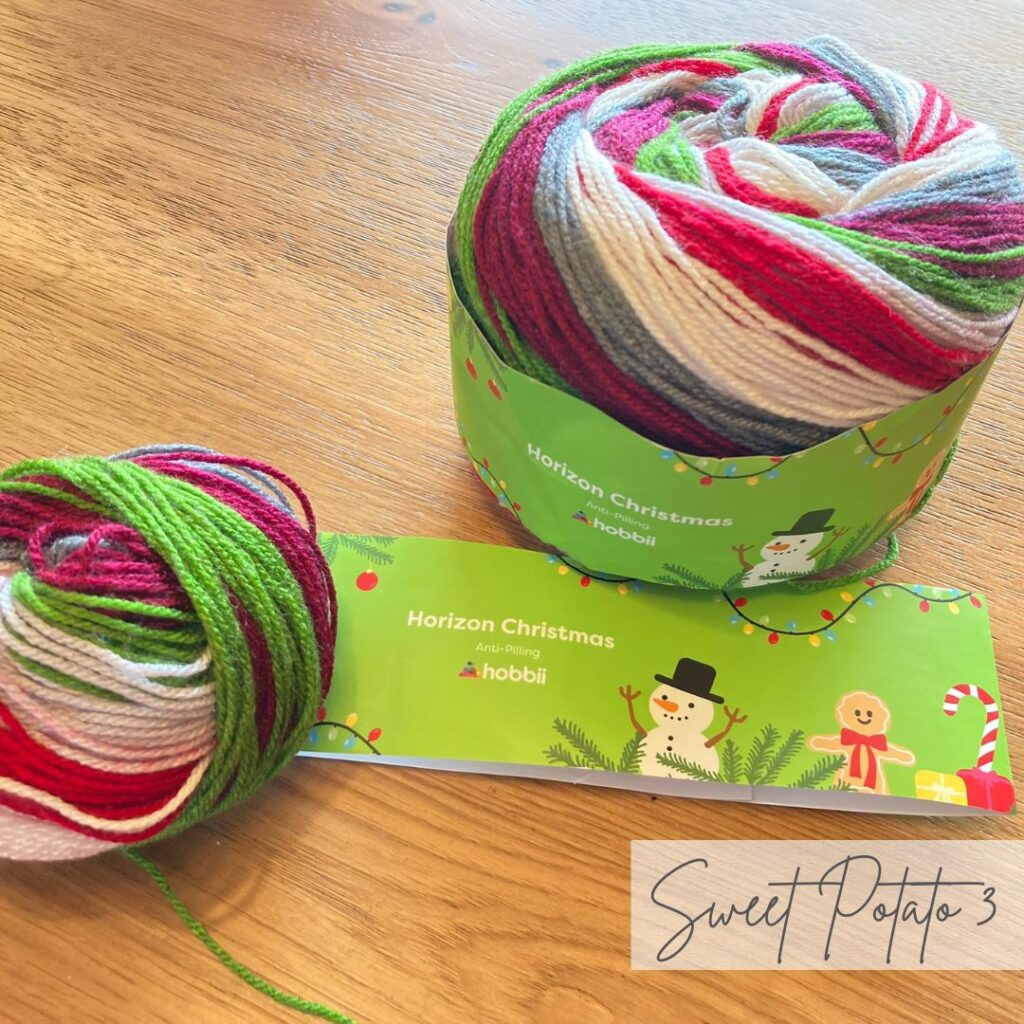
The Horizon yarn comes in different color options, but they have some lovely Christmas themed options. As much as I love this yarn and the braided wreath, I would love to see it in solid colors too. I think an entire wreath in one color would be lovely but making each strip in a different color would also be fabulous. Think of all the different holidays through the year and the possibilities are endless!
Materials Need to Make the Wreath:
- Crochet Hook G (4.00 mm)
- 675 yards of Sport (#3) Weight Yarn – Sample made using Hobbii Horizon Christmas Anti Pilling yarn (can be found by clicking HERE).
- 4.5 ounces Fiber Fill
- Measuring Tape
- Scissors
- Yarn Needle
- Optional: Stitch Markers, Binder Clips (or Safety Pins)
Finished Size
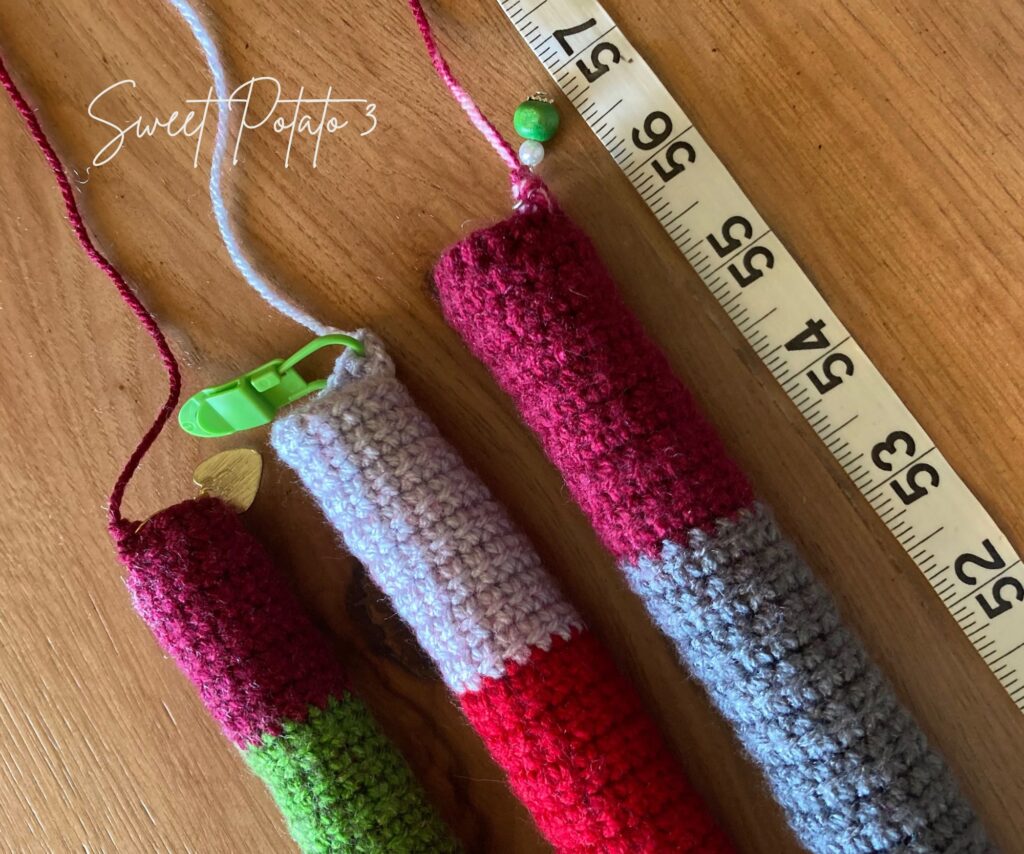
You can adjust the size of your wreath by making the strips longer or shorter. If you make the strips longer, it may be difficult to keep the circular shape though. The final size of my wreath was about 16″ across the center of the wreath.
Making the Braided Wreath
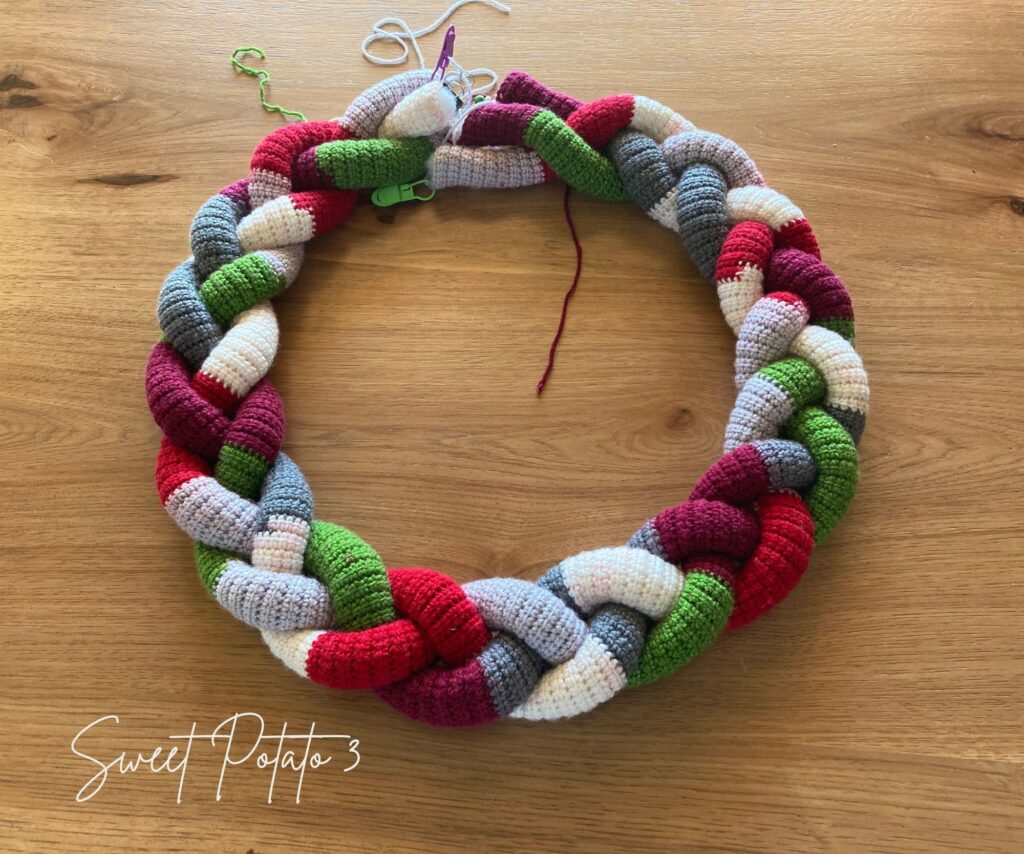
To make the wreath you will crochet 3 strips of yarn. Each strip will be like a tube that you will stuff with fiber fill as you make it. After all 3 strips are crocheted you will braid them together to make the wreath.
Gauge is not essential in this pattern, just make sure your stitches are tight enough that when you stuff it with fiber fill that it doesn’t show through the stitches.
Beginning/Foundation
15 Foundation sc
If you haven’t worked a foundation single crochet you can watch my YouTube video below:
After you have completed 15 foundation scs, crochet a hdc in the top of the first foundation stitch. This will create a ring to allow you to continue working in rounds for the rest of the strip. Your next stitch will be a Linked Hdc, you will only work one of these stitches, a video tutorial can be watched below:
For the rest of the strip/tube you will crochet using the linked double crochet stitch. This is a great stitch to use because it leaves the crochet fabric in a tight weave similar to working all single crochets. You can see a tutorial on the linked double crochet below:
Work continuous rounds of Linked Double Crochets until 56″ is reached. I recommend stopping every 2 inches to stuff with fiber fill. When the crochet strip has reached 56″ fasten off.
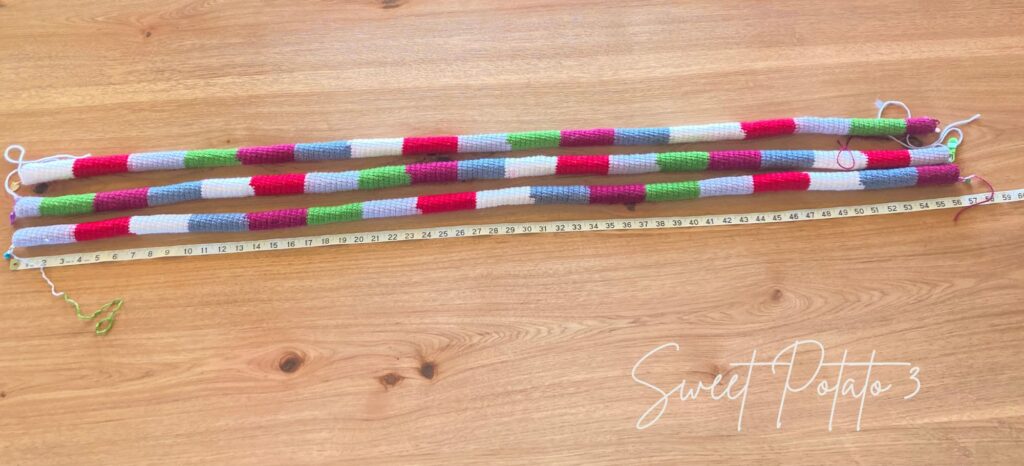
The stitches from the foundation row and the last row will not be even, they will be an abrupt edge. The abrupt edges will align with each other in the final steps of making the wreath.
A couple helpful tips
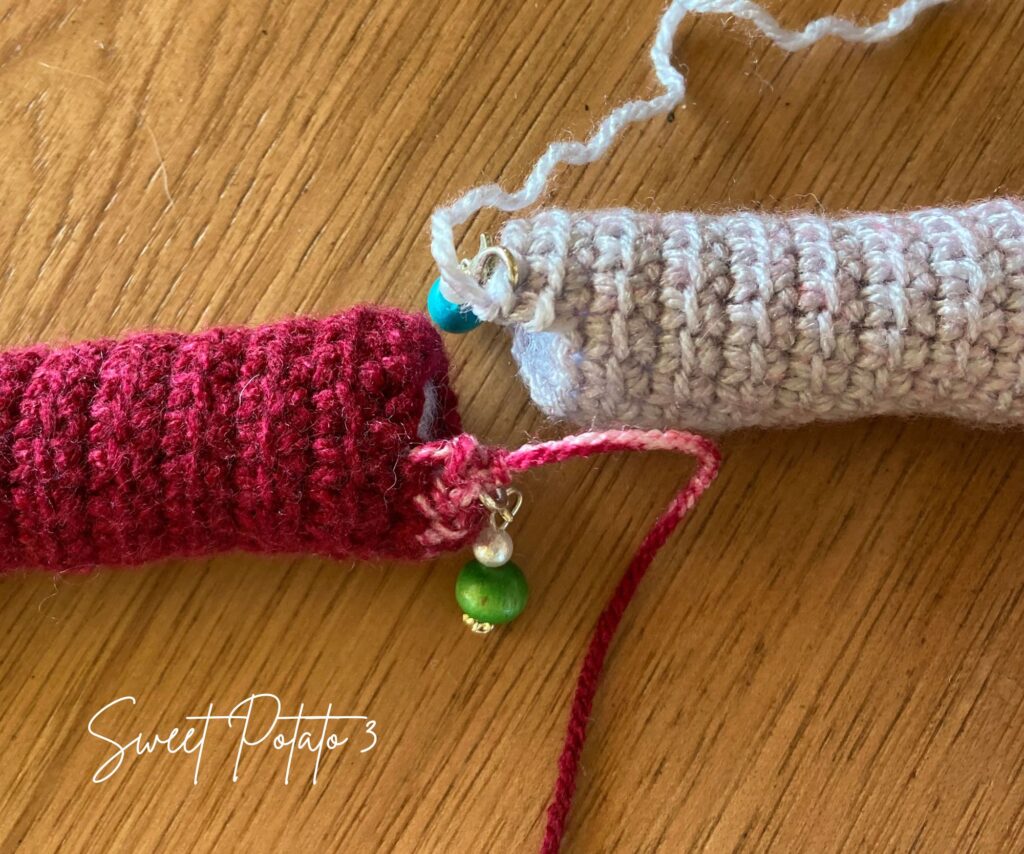
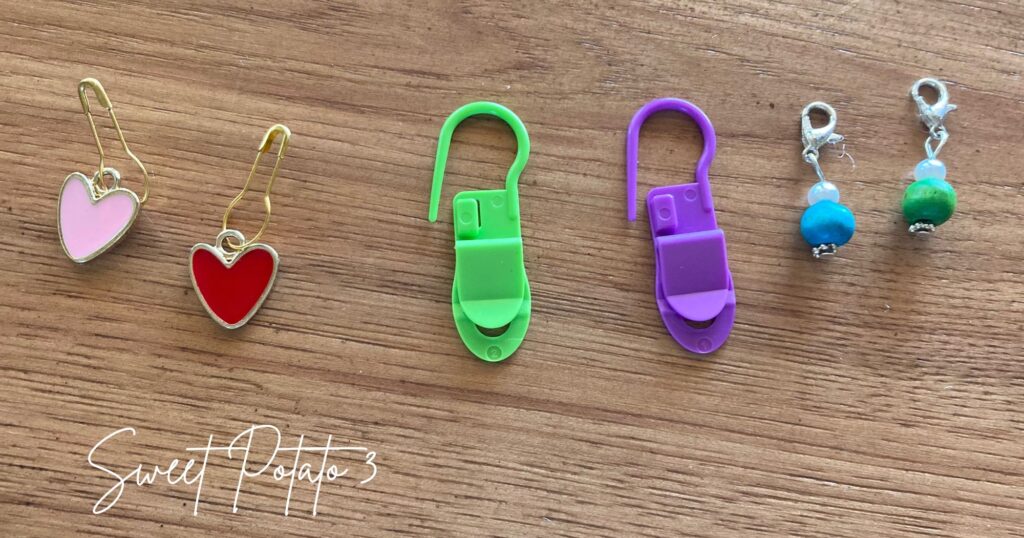
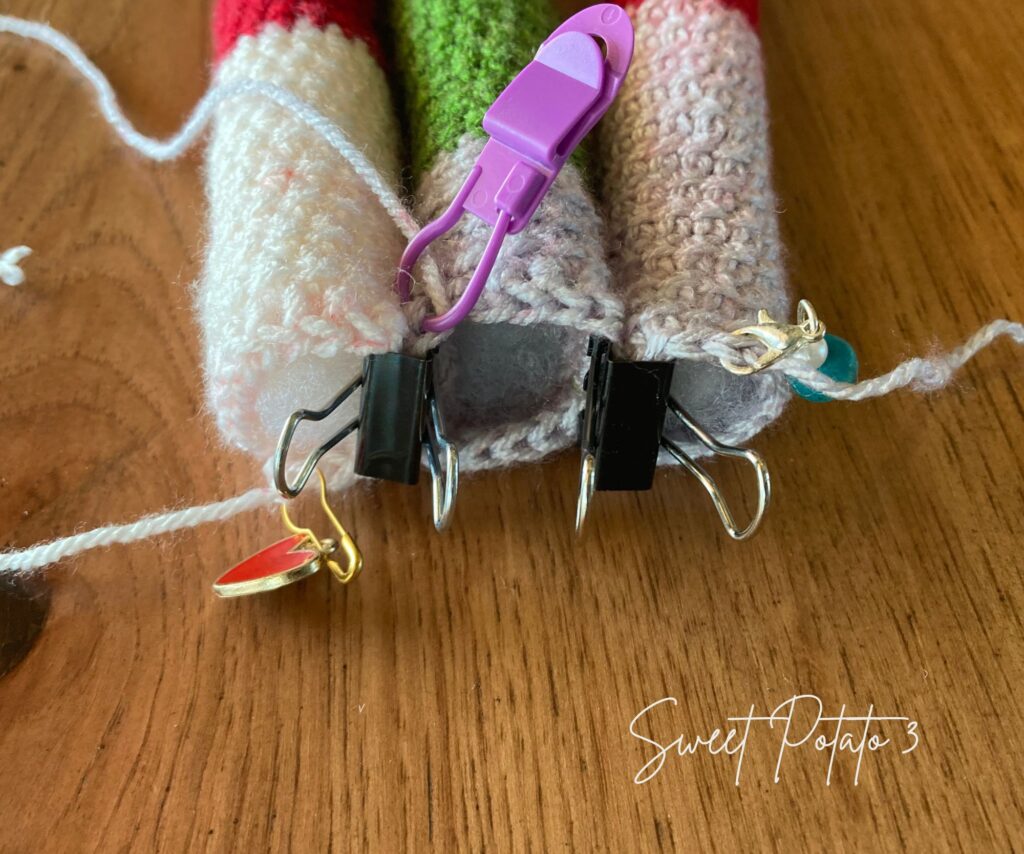
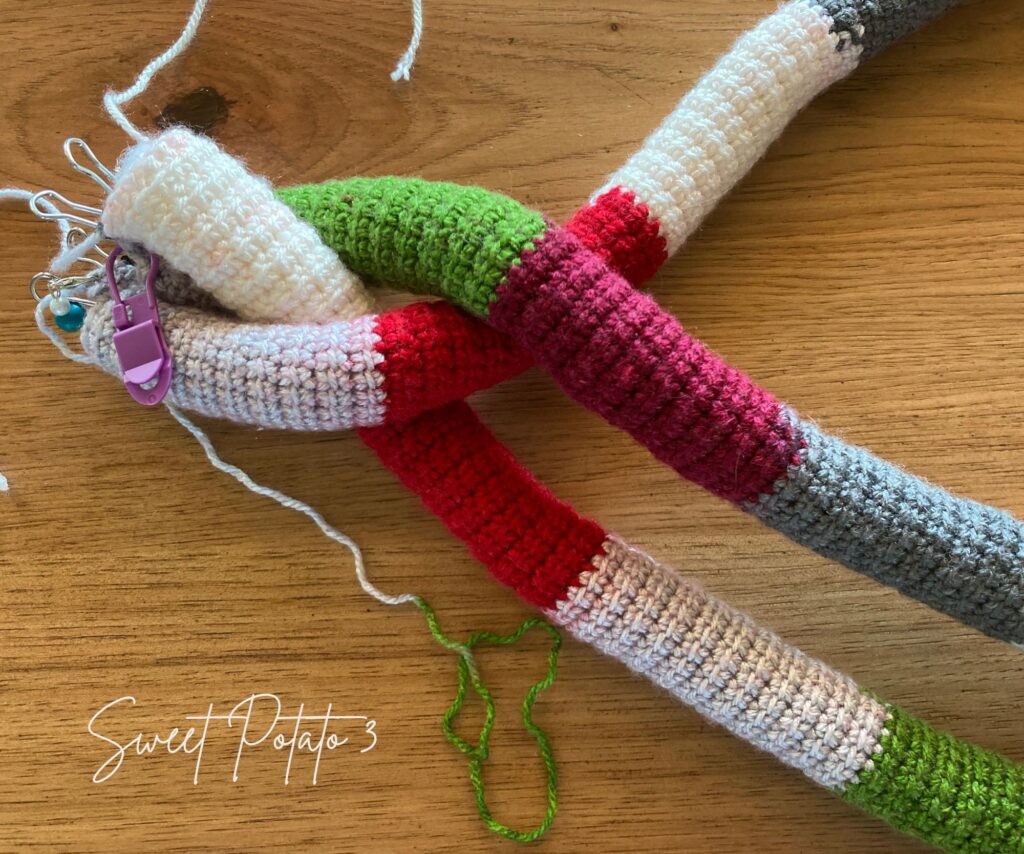
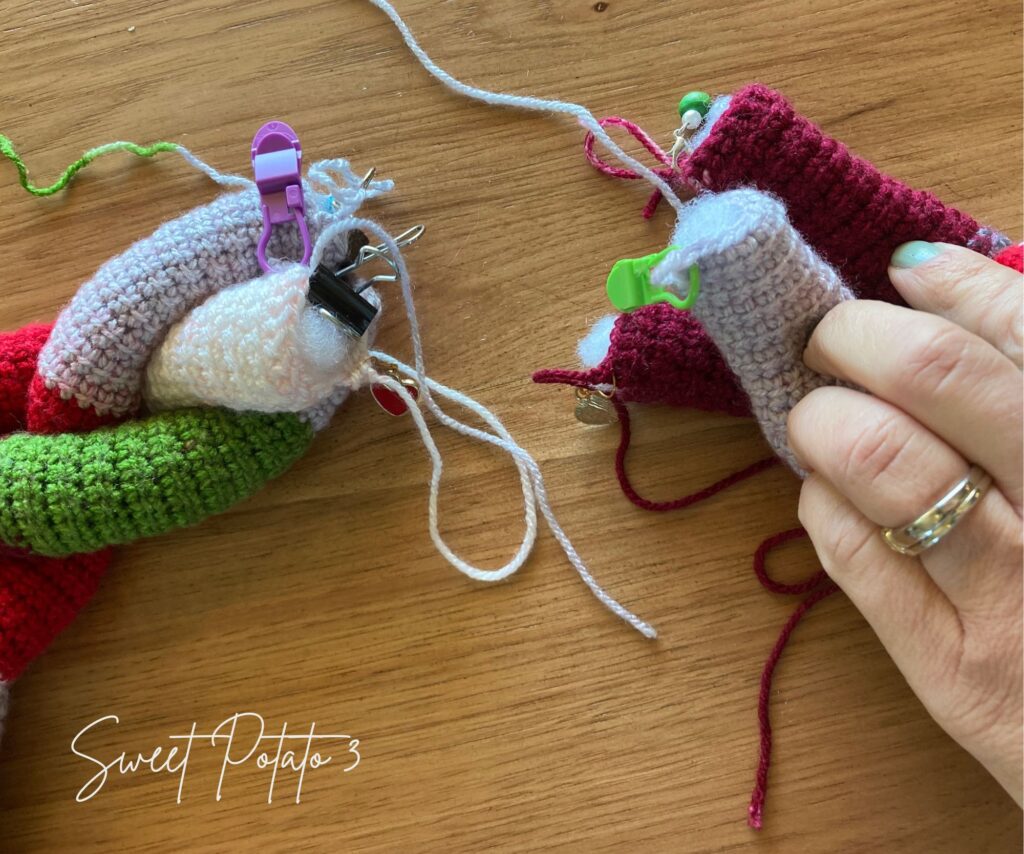
I found it helpful to mark the ends of each strip to identify them as the same strip. To do this I used sets of 2 stitch markers that coordinated (2 plastic, 2 hearts and 2 round beads).
Pair the stitch markers (or just make note of which ones are paired together) and place one on each end of each strip. For example, I placed one plastic stitch marker on the first stitch of one of my strips. I then placed the other plastic marker on the last stitch of the same strip. Repeat on each of the remaining 2 strips.
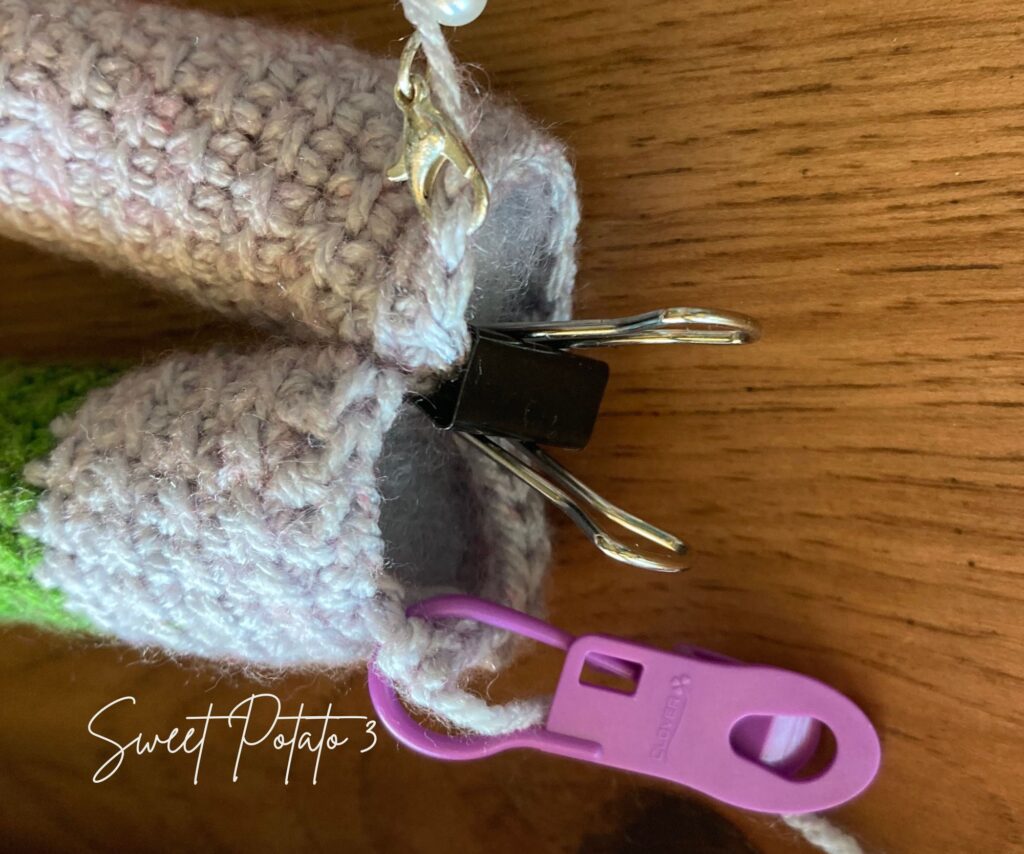
You now need to secure the ends of all 3 strips together on one end. I used binder clips, but you could also use safety pins.
Braid the Wreath Together
Now braid the strips together all the way to the end of the strips and secure those ends with clips as well. To braid, you will have all 3 strips lying next to one another. Take the top outer strip and place it in the middle.
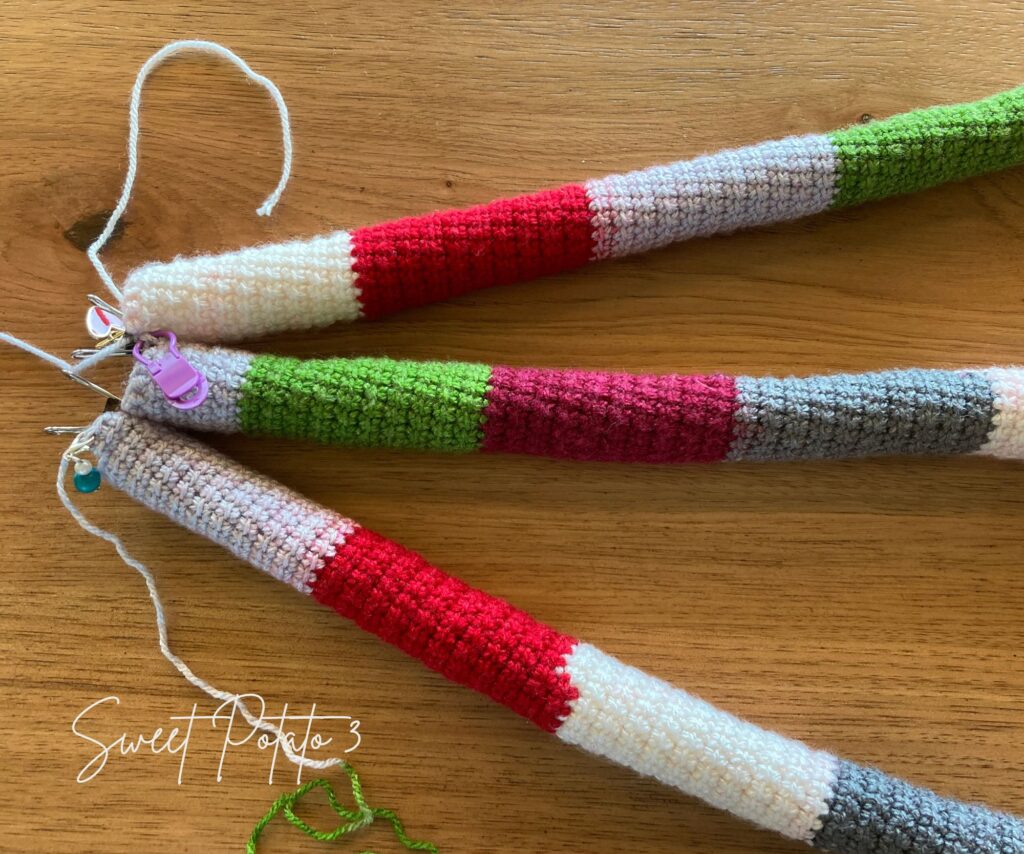
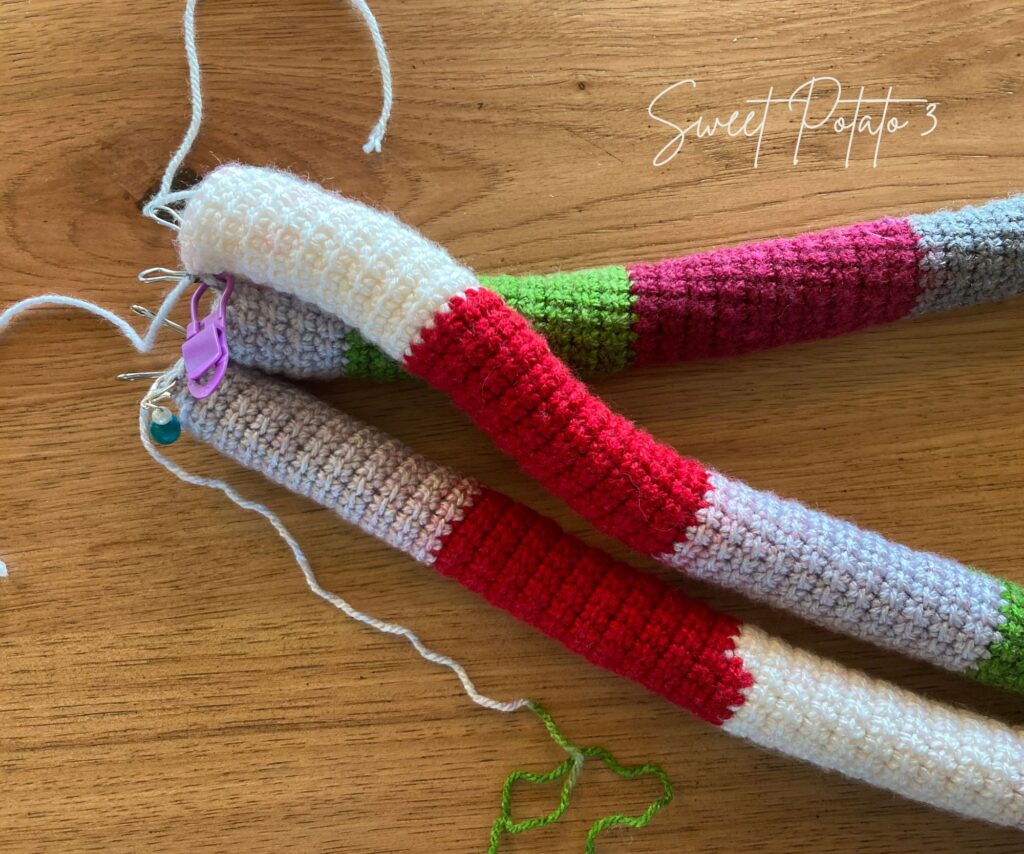
Now, take the bottom strip and place it in the middle. Repeat taking the top strip and placing it in the middle, then the bottom strip and placing it in the middle. Make sure the braid is pretty tight so it will hold it’s shape once the circle is made.
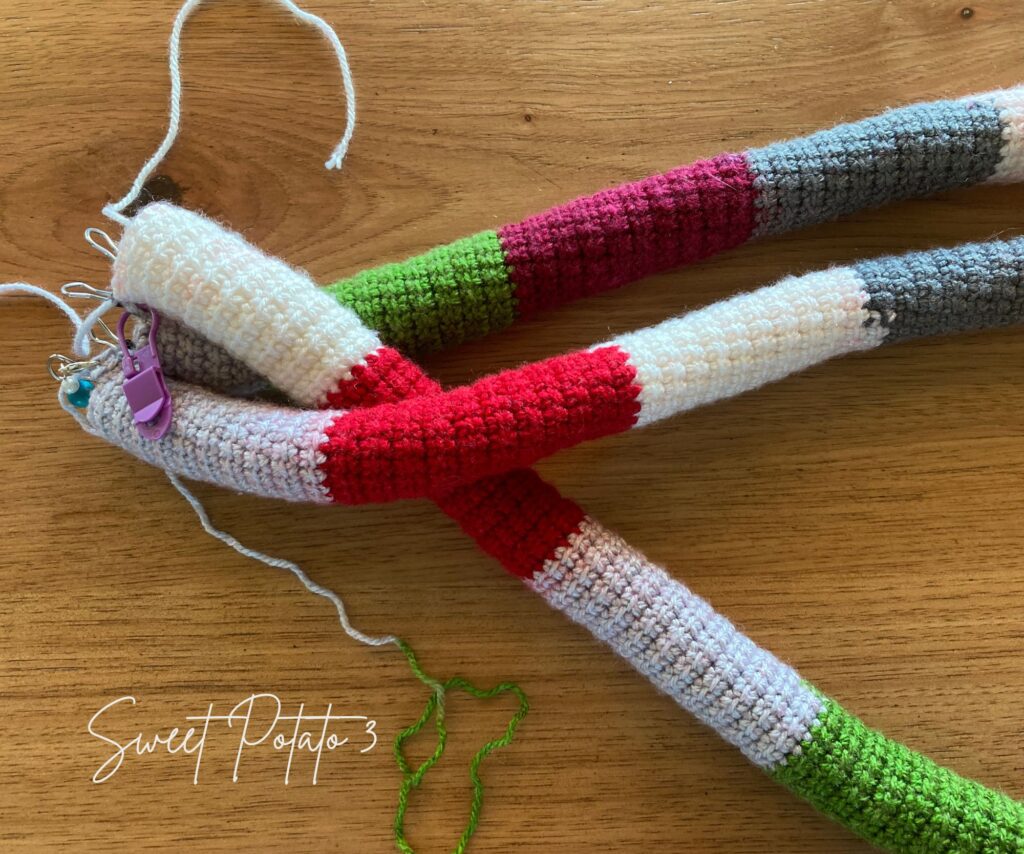
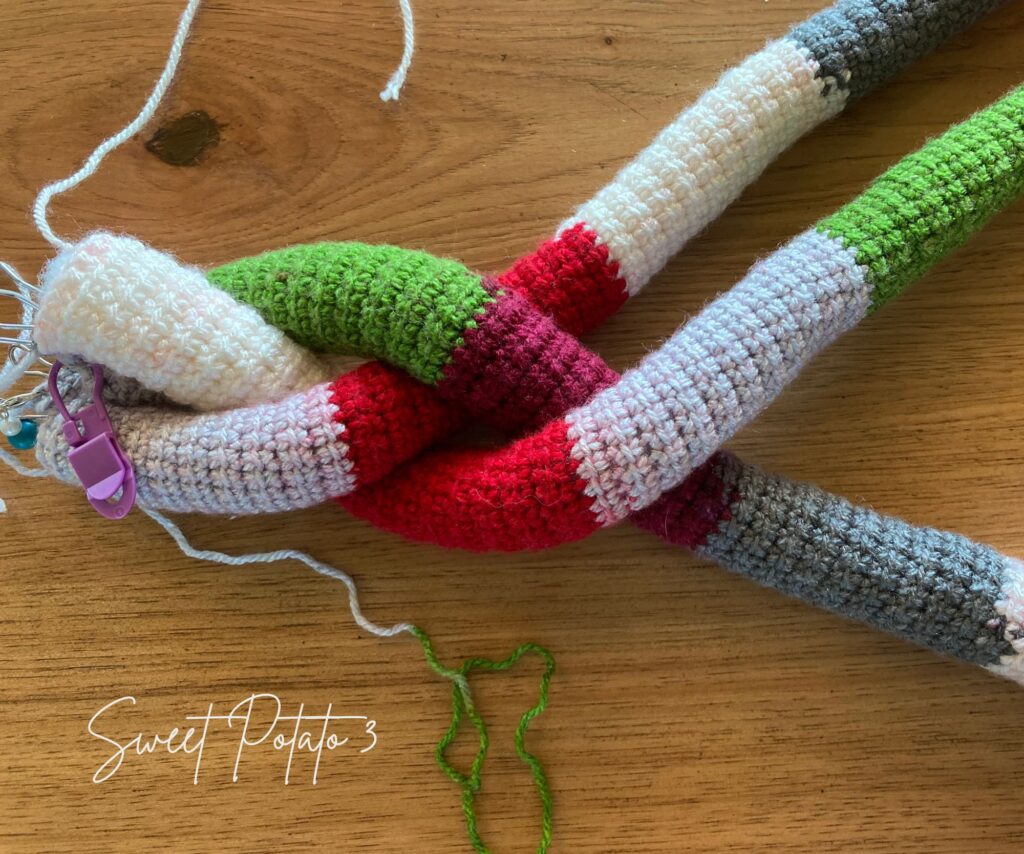
Repeat these steps until the entire strips have been braided tightly. Secure the ends together with the binder clips (or safety pins). At this point you will curve the braid into your circular shape. Make sure to do this on a flat surface.
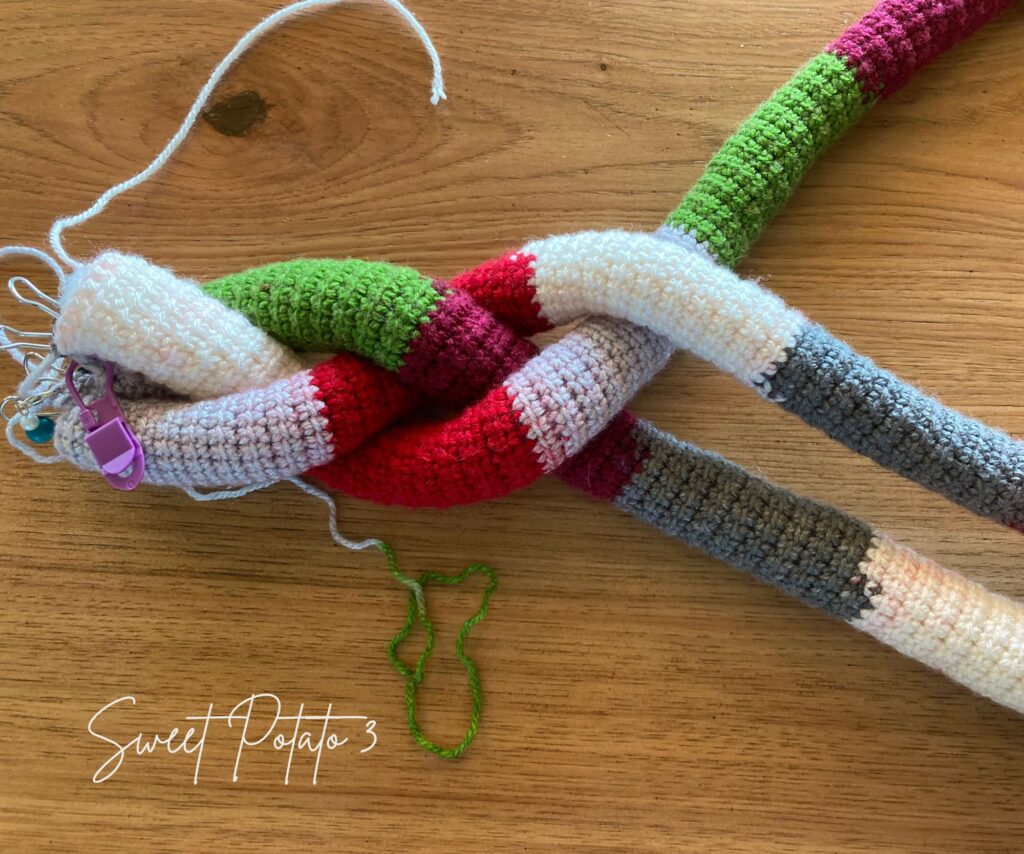
Sewing/Seaming Ends Together
This next step can be a little tricky so be patient.
Figure out the ends of one of the strips, I’ll do the one I marked with the plastic markers. Using the yarn ends, seam the ends together. After this is done, you can remove the stitch markers from this strip only.
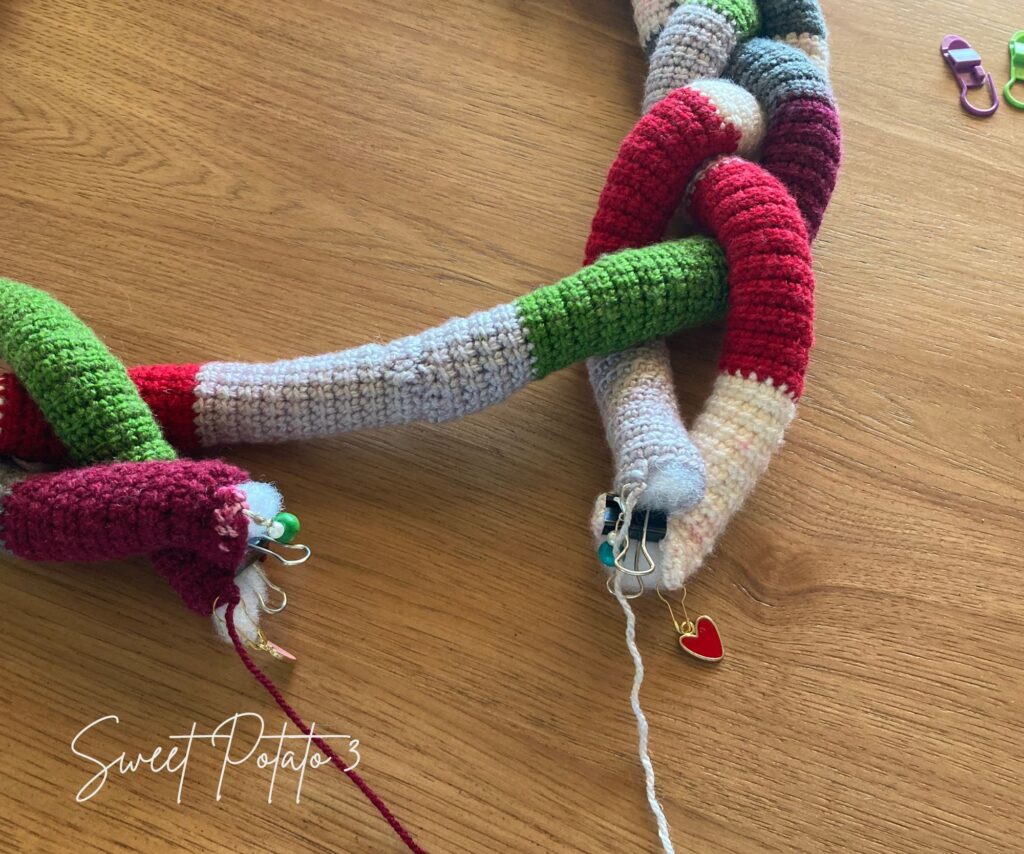
Now, take the next strip. Make sure the braid is continuous at this point, you may need to wrap, or rebraid the strip an extra time to get it aligned correctly. Seam those ends together and repeat with the last strip.
Remove all the stitch markers and your crochet braided wreath has been completed.
YouTube Tutorial for Finishing
I understand these last few steps can be tricky so I created a YouTube video you can watch to help you through them. Take a minute to watch it below:
More Christmas Pattern you may love
- Free Gingerbread Candy Cane Holder Pattern – click HERE
- Partridge in a Pear Tree Ornaments – click HERE
- Joyeux Noel Christmas Stocking – click HERE
- Christmas Cabled Candle Wraps – click HERE
- O’Christmas Tree Skirt pattern: Click HERE
- Long John Christmas Stocking pattern: Click HERE
- Mitten Bunting & Advent Calendar pattern + printable: Click HERE
More Crochet Fun
I am sure you will love these home décor crochet patterns. When you make one, I would love to see a photo of your project. I host an interactive Facebook group called, “SP3 Crochet & Conversations”, this is a great spot to share photos, ask questions and have fun. I invite you to join today by clicking HERE.