I have been crocheting for over 30 years. I have stored my crochet hooks about every way you can think of. I still think a zipper pouch is the best way to keep them all together and readily available. However, when I am working on a project, it is nice to have a seperate place to store the ones I need along with other often used supplies. I have seen so many mug organizers and thought, I should just crochet one that wraps around my coffee mug.

The Mug Organizer Wrap = Perfect Scrap Project!
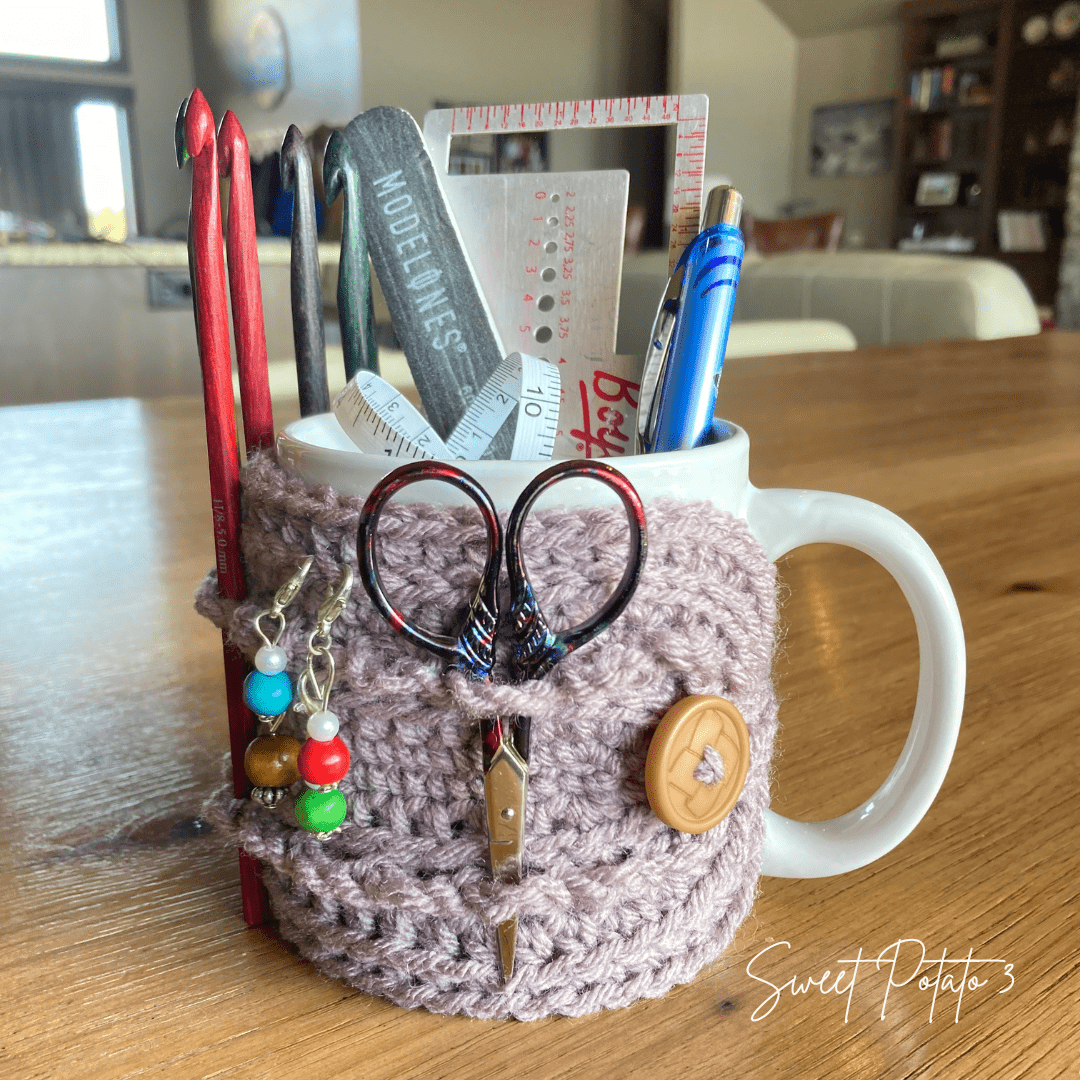
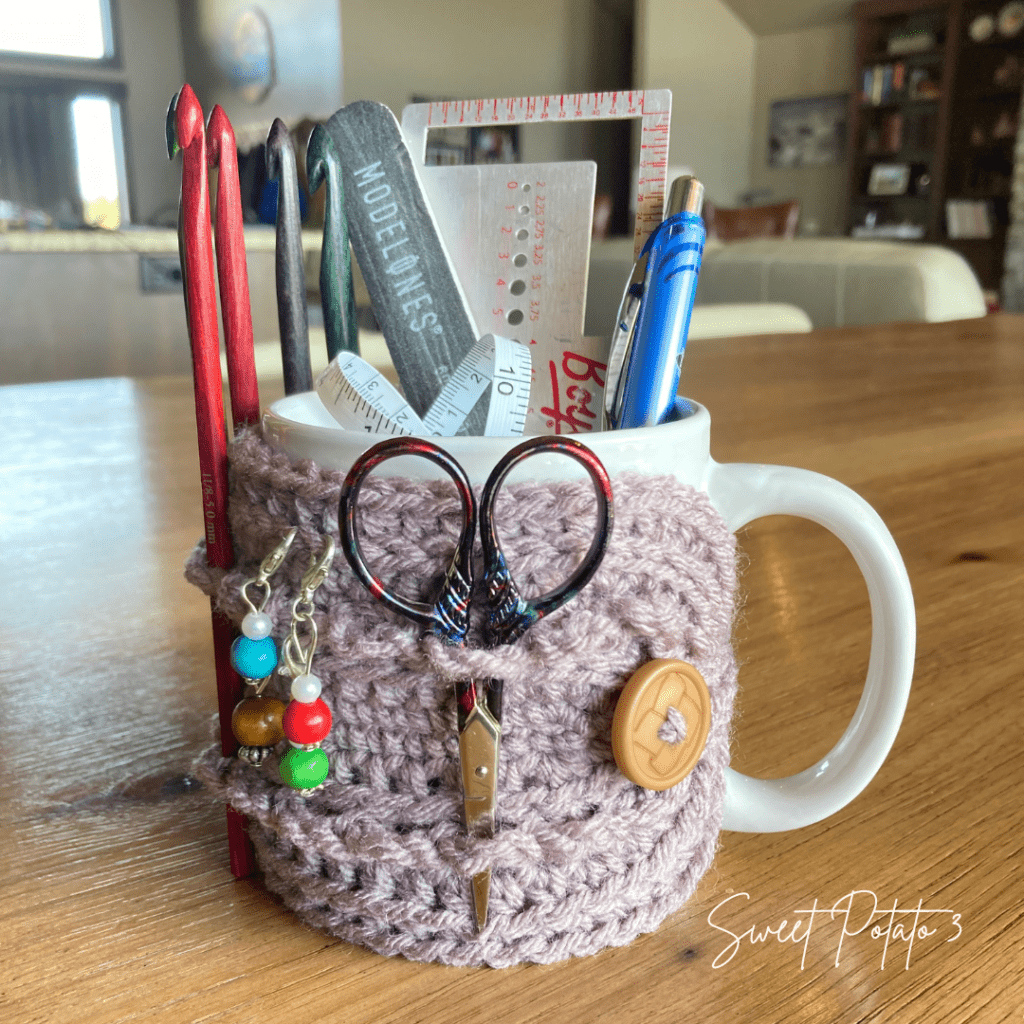
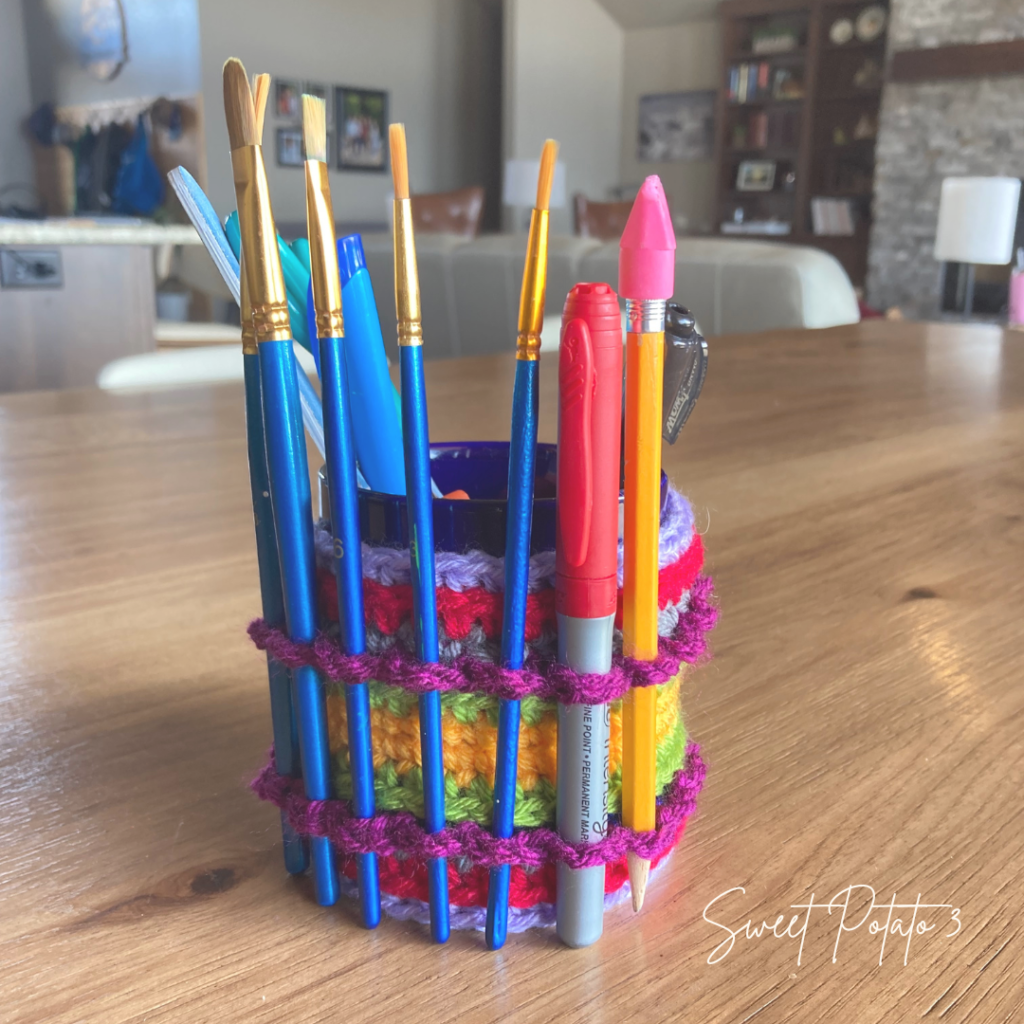
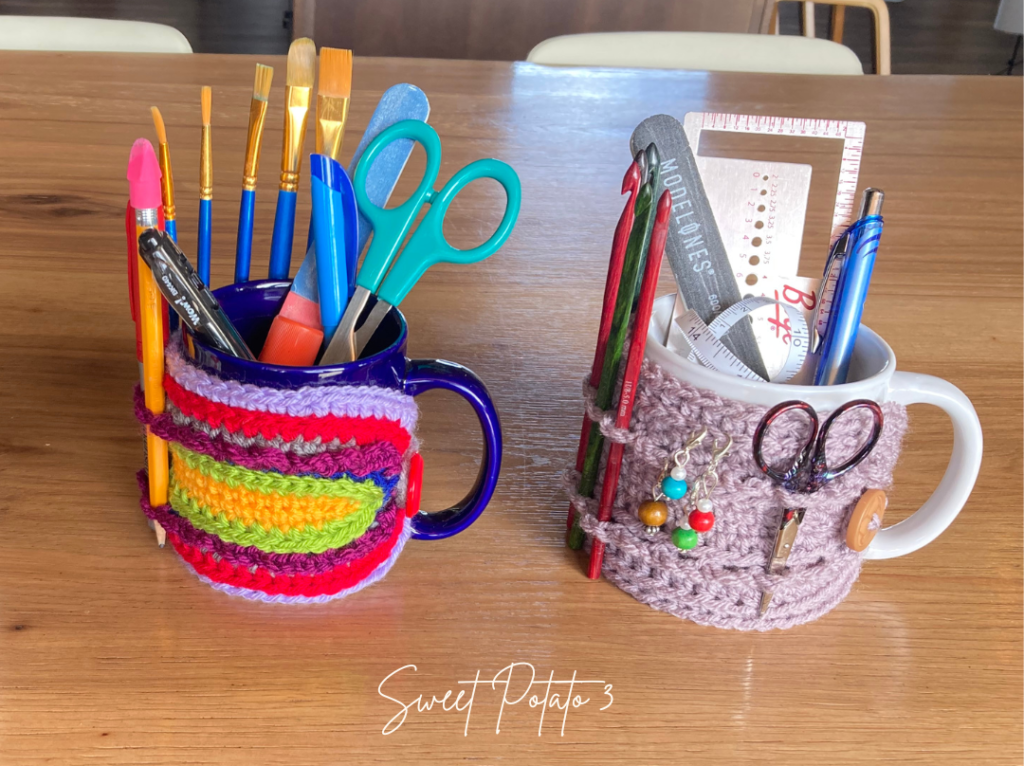
A few reasons that I love this mug organizer is that it is practical, easy to use, and an ideal project for small scrap or left over yarn. It is also very versatile and can be made for so many uses. Of course, as a crochet, I designed it to fit crochet hooks and all our favorite tools. It would fit numerous hooks, scissors, stitch markers and still has room to store larger items in the mug itself (gauge check tool, pen, measuring tape, nail file, etc.).
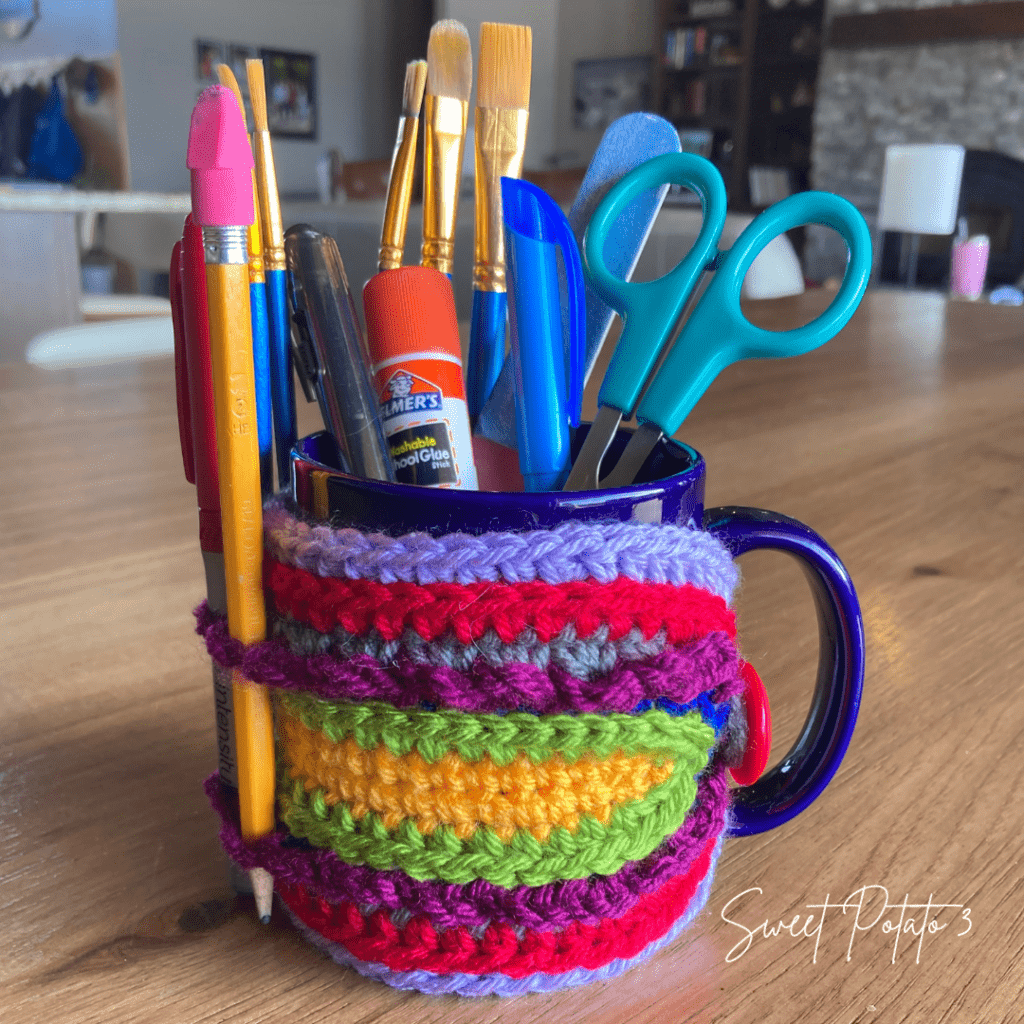
But, this little wrap can be used for craft supplies or office supplies. I already have cups holding all my pens, pencils, highlighters and such on my desk. So, I think I’ll make another one to give that cup a cute look too.
Mug Organizer Wrap Pattern: Materials
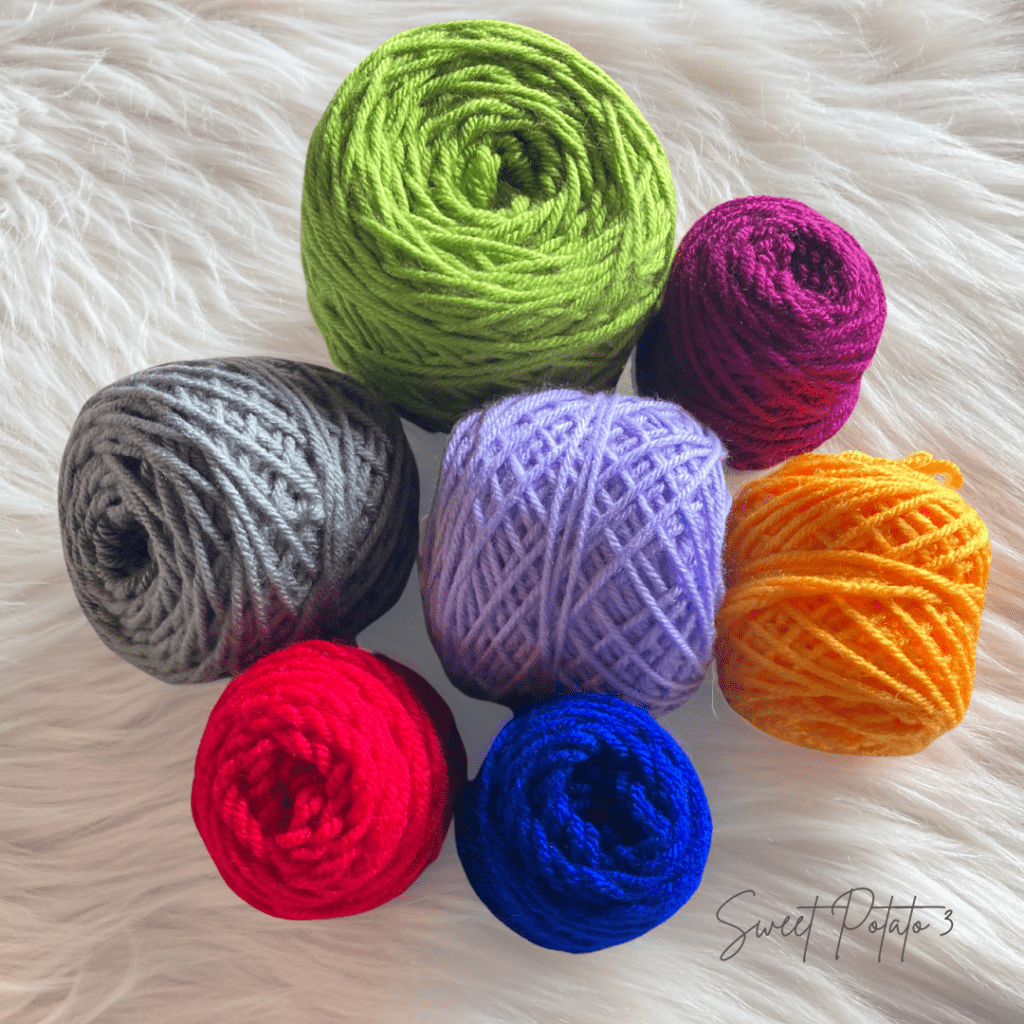
Let’s dive right into making a Mug Organizer Wrap. The materials are pretty simple-the toughest part is deciding if you want to use one color or multiple colors. But, the good news is that it works up so quick that you can make multiple combinations all day long. Grab your materials now, all you need is the following:
- Crochet Hook size I (5.50 mm)
- 50 yards of Scrap Worsted Weight Yarn (single color or multiple colors-totally up to you)
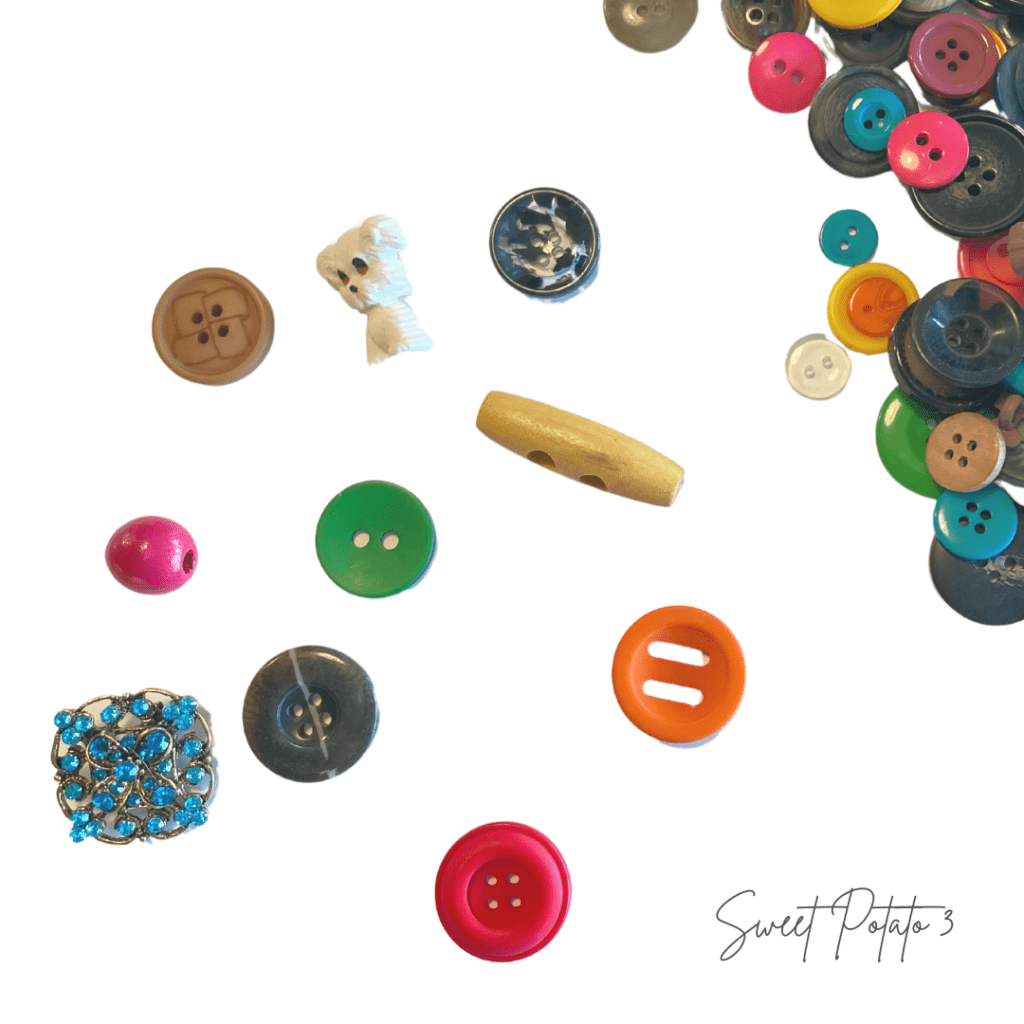
- Button about 1″ – 2″
- Measuring Tape, Scissors, Yarn Needle
- Coffee Mug, Pint Jar, empty/clean Food Can
Stitches and Abbreviations Used in pattern
- Hdc = Half Double Crochet
- Sc = Single Crochet
- Ch = Chain
- Slst = Slip Stitch
- St(s) = Stitch(es)
- R = Row
- Beg = Beginning
Pattern Size, Gauge and Other Notes
The completed size of the wrap (not counting the button loop) is 3 inches tall and a10 inches wide. Gauge is important to obtain the stated size but because this is such a quick project to make, I suggest just making the project and measuring when done. The time it takes to make a gauge swatch is about the same amount of time it will take to make a wrap, so just check as you go.

Use any traditional worsted weight yarn (a thin worsted weight may come out too small, so I suggest a regular to heavy #4 weight). You can also decide whether you want to use a single color or change colors at the end/beginning of each row. I recommend changing colors in the joining slip stitch of the prior row.
Do not count the beginning chain of the row as a stitch.
If you enjoy keeping all your patterns together on Ravelry for quick links, bookmark or favorite this pattern on Ravelry so you don’t loose the link:
The Pattern Instructions
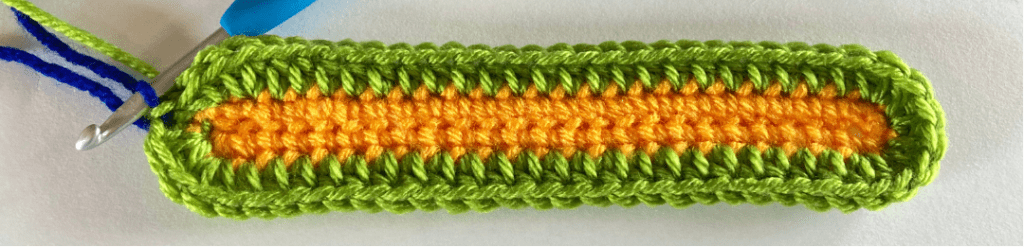
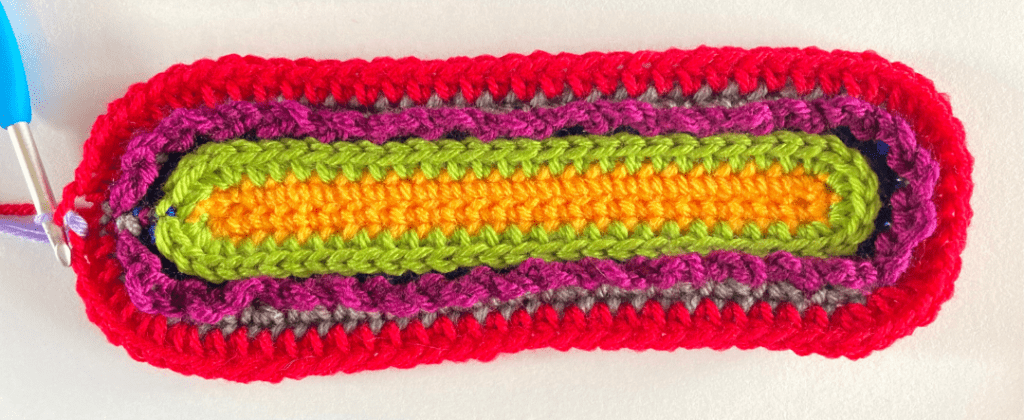
To begin, Ch 25, 2sc in 2nd ch from hook, [sc in next 22 sts, 2sc in last st], rotate the beg ch and work along the opposite side of the beg ch, 2sc in 1st st, repeat [ ] around, join, (52)
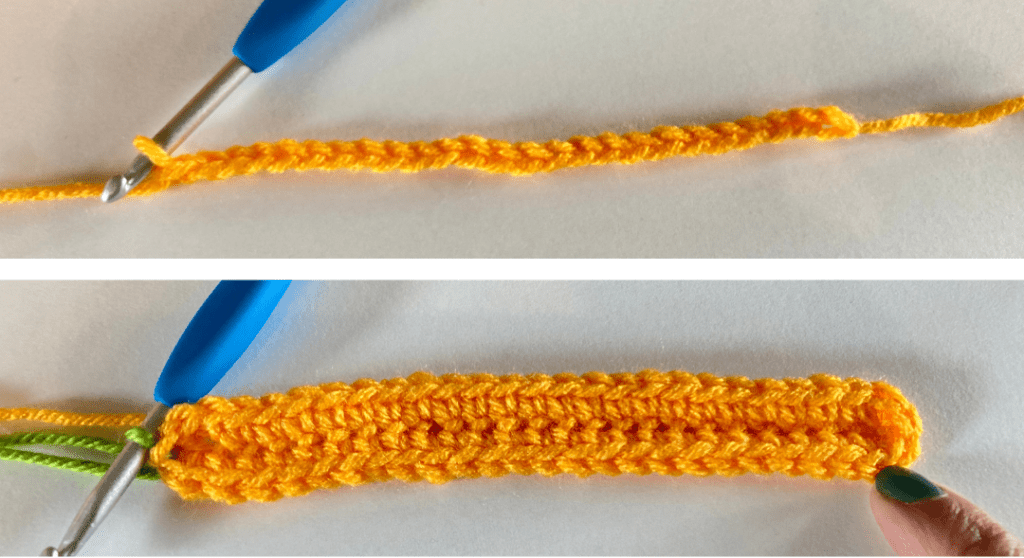
For the second round of the pattern you will: Ch 1, 2hdc in first 2 sts, [hdc in next 22, 2hdc in next 2 sts], 2hdc in next 2 sts, repeat [ ] around, join (60)
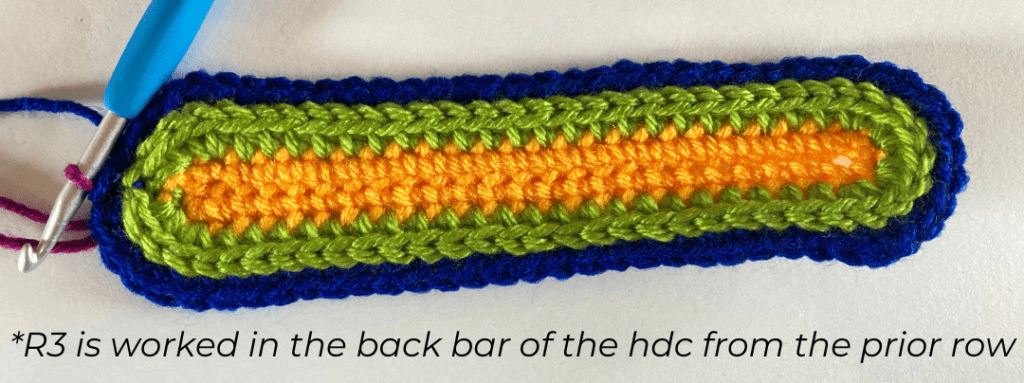
Round 3: Ch 1, work this entire row in the backbar of the hdc of the prior row, [sc in st, 2sc in each of the next 2 sts, sc in next 24 sts, 2sc in each of the next 2 sts, sc in next st], repeat [ ] around, join (68)
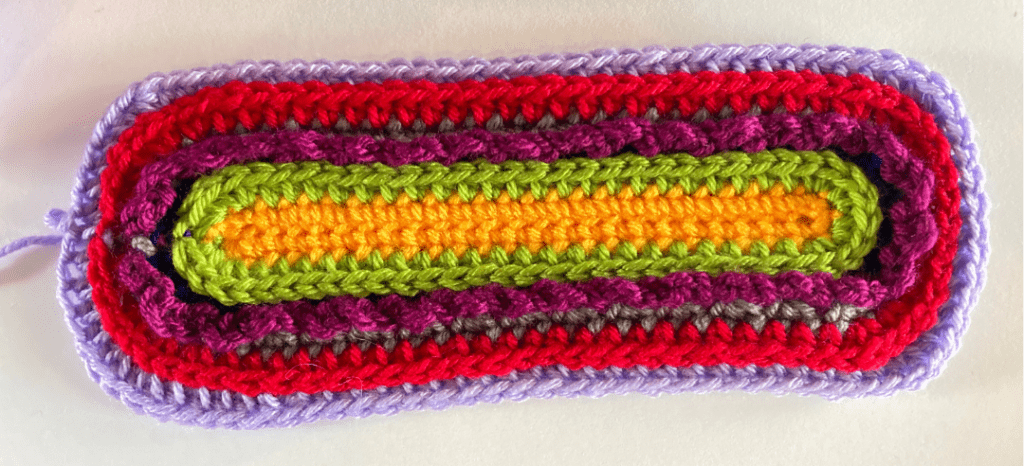
The next row will create the “loops” that hold the hooks or tools. For round 4: [ch 3, skip next st, slst in next st], repeat [ ] around, join in same st as join from prior row (34 slst + 34 ch sps)
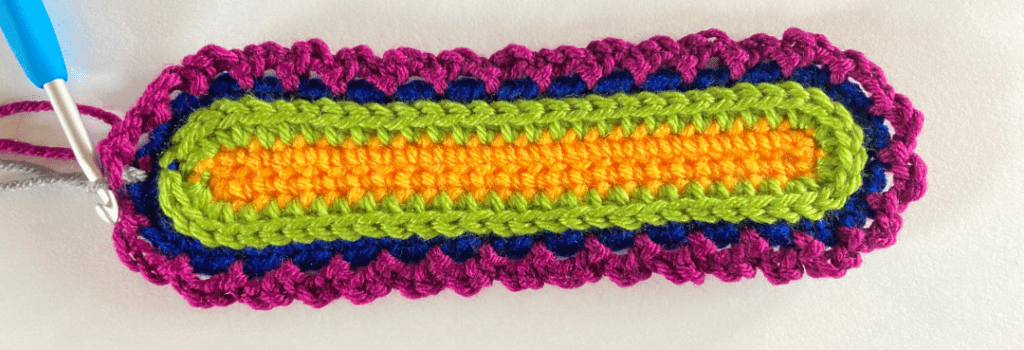
For the next row, you will work into the top of the skipped stitches from R3, keep the chain spaces to the front of your work and work round 5 as follows: Ch 1, 2sc in each of the skipped sts of R3, join (68)
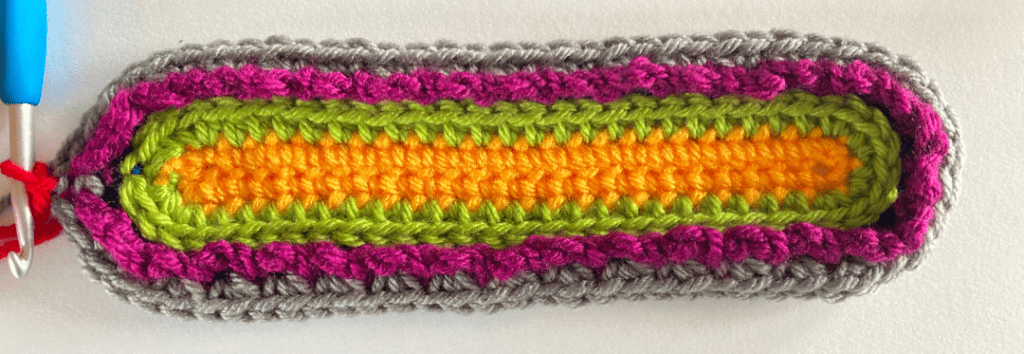
Round 6: Ch 1, hdc in first 2 sts, [2hdc in next 3 sts, hdc in next 24 sts, 2hdc in each of the next 3 sts], hdc in next 4 sts, repeat [ ] 1 more time, hdc in each of the last 2 sts, join (80)
For the final round of the project: Ch 1, work this entire row in the backbar of the hdc of the prior row, hdc in first 4 sts, [2hdc in each of the next 2 sts, hdc in next 28 sts, 2hdc in each of the next 2 sts], hdc in next 8 sts, repeat [ ] 1 more time, hdc in last 4 sts, join (88) do NOT fasten off.
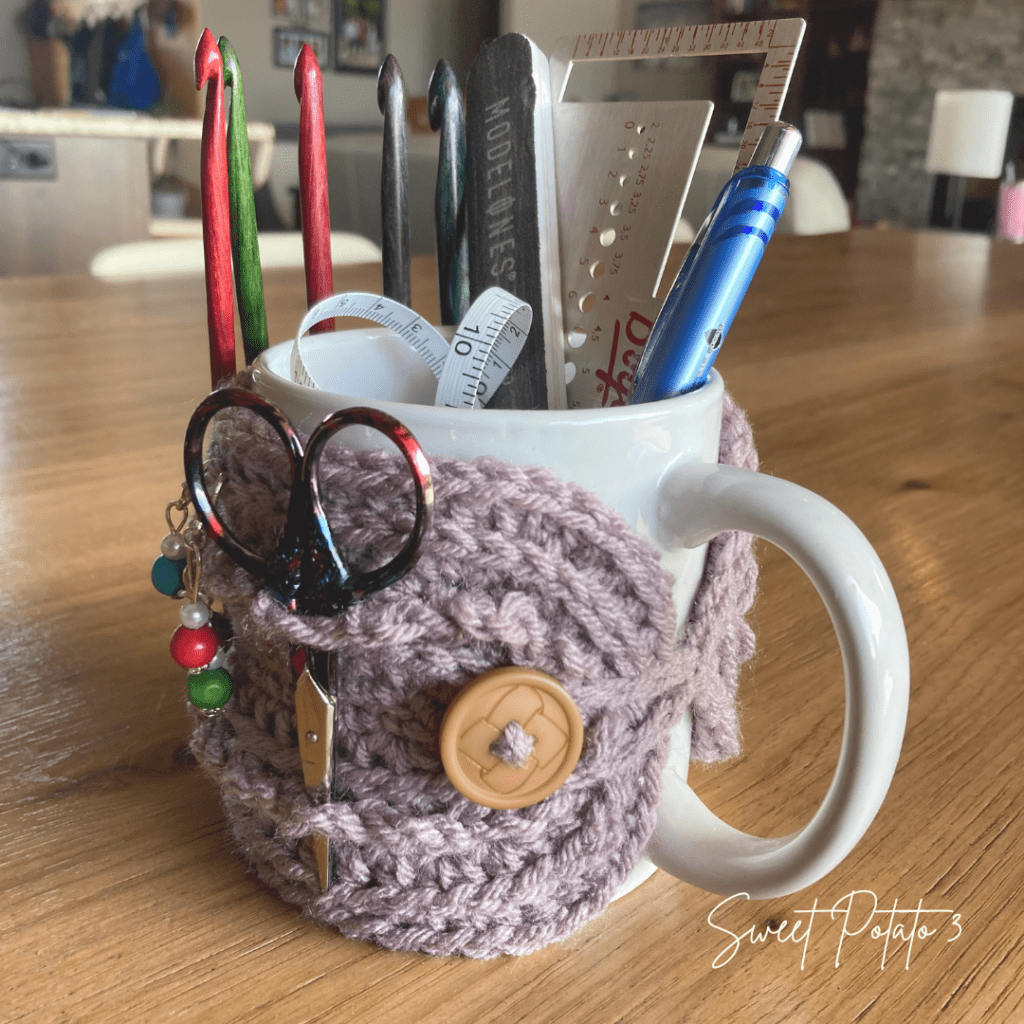
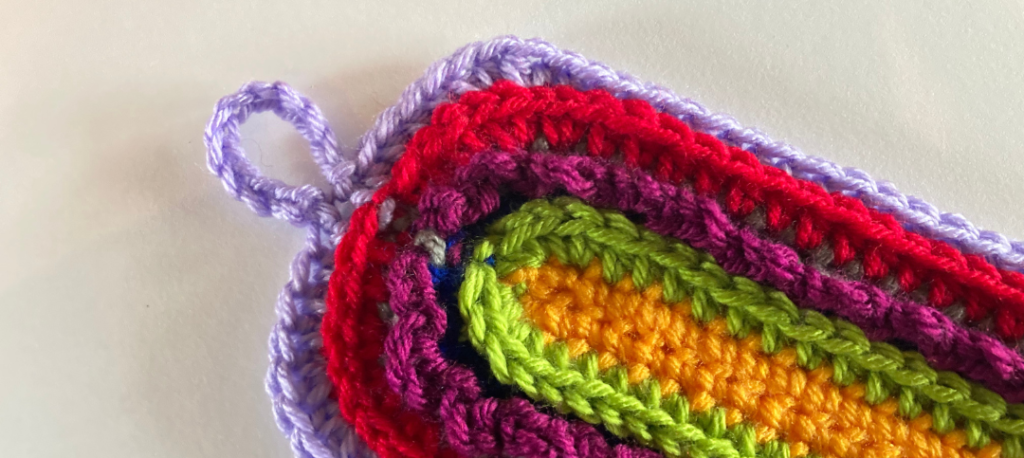
To crochet the button loop, you will just continue immediately after you have completed the final round (round 7) above. After you join with a slip stitch, chain 12, then slip stitch into the same stitch you joined the round in. Fasten off and weave in all ends. Next Sew the button on, to find the correct placement, locate the row of loops opposite of the button loop you just made. Sew the button on over the row of loops and weave in all ends to complete the project.
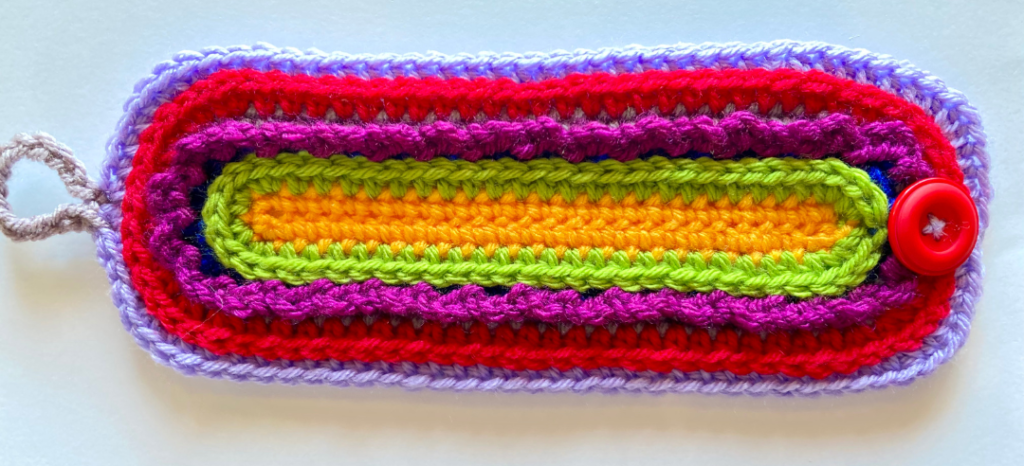
Now Wrap and enjoy!
Now that your Mug Organizer has been completed you just need something to wrap it around. It was designed to fit around a standard sized coffee mug. I realized it also fit around a standard sized can of food. One of my testers mentioned that it worked perfect around a pint jar as well. I am sure there are so many other options as well. Just wrap it around, button and your done!
Do you prefer following along visually
I like to have something in writing to refer to but I also love watching something, especially if I just need to see something to figure it out. So, I created a YouTube tutorial that will walk you through each row and each step to create this Mug Organizer Wrap. You can watch it by click HERE or just watch the video below:
More Scrap / Left Over Yarn Projects
If you love this project and want to discover more quick projects to use up your scrap yarn, be sure to check out the 60 Minute or Less crochet pattern round up, just click the image below.
More Crochet Fun
Follow Sweet Potato 3 on Facebook to see more pattern releases, sales and crochet fun, just click HERE.
Want a more interactive group experience, you need to join my Crochet & Conversations facebook group. To join the group, click HERE. It is a ton of fun and I encourage everyone to share their projects, WIPS (works in progress) and inspirations. Plus get exclusive deals, be the first to see new releases, give input on designs and have opportunities to win patterns. Join now and get to know others who also enjoy the art of crochet.