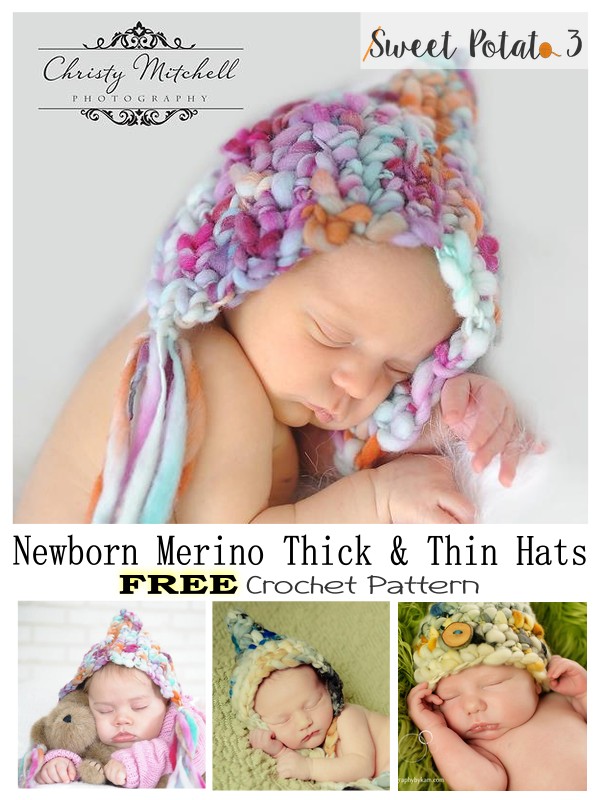
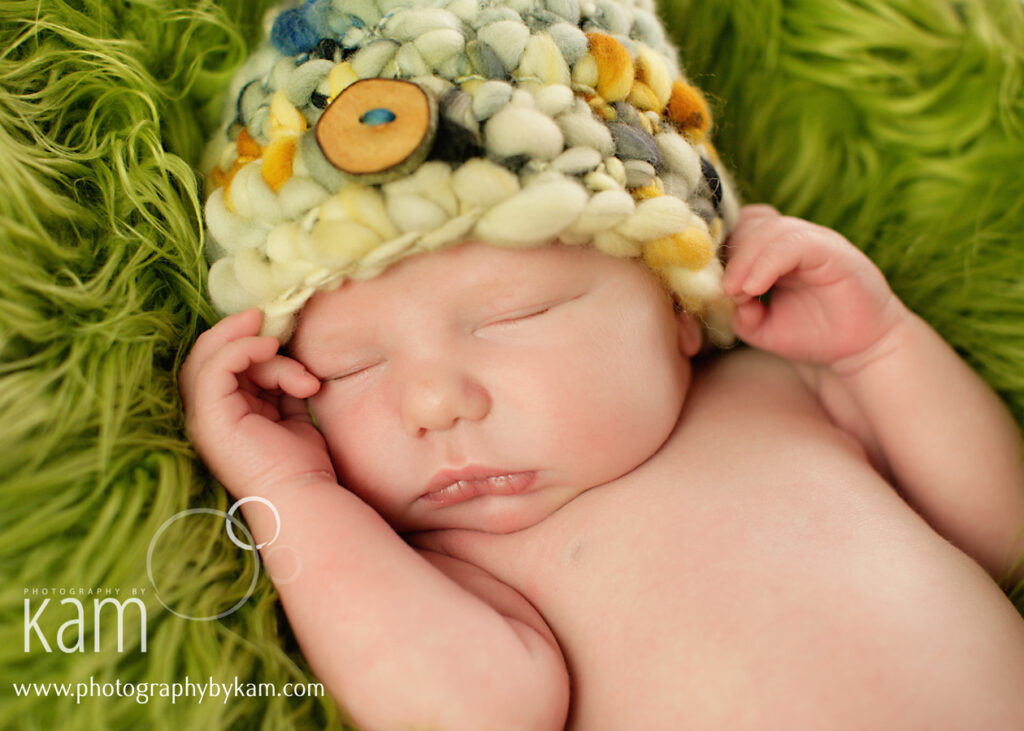
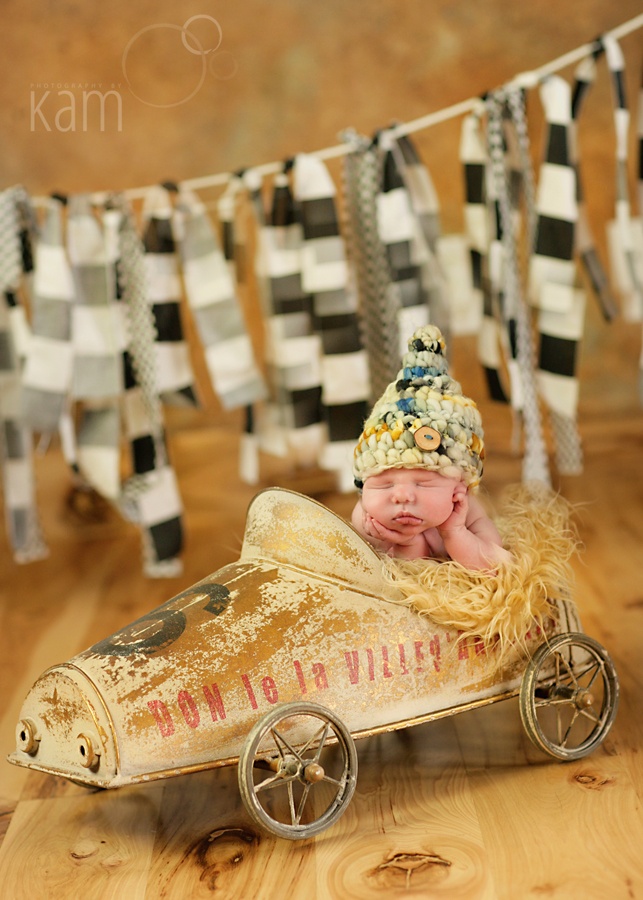
Newborn photographs are one of the most treasured keepsakes you will ever have so you must have the right props. The fresh and delicateness of newborn life is embraced with the uniqueness of Merino Thick & Thin yarn but it doesn’t take away from the focus of the newborn.
Crocheting with custom dyed yarn will not only result in a new love of yarn to crochet with, but you will also find these hats to work up quick. As you crochet you will feel the luxuriousness of the yarn in your fingers and be so excited to put it on a newborn baby.

Three Different Merino Hat Styles To Choose From
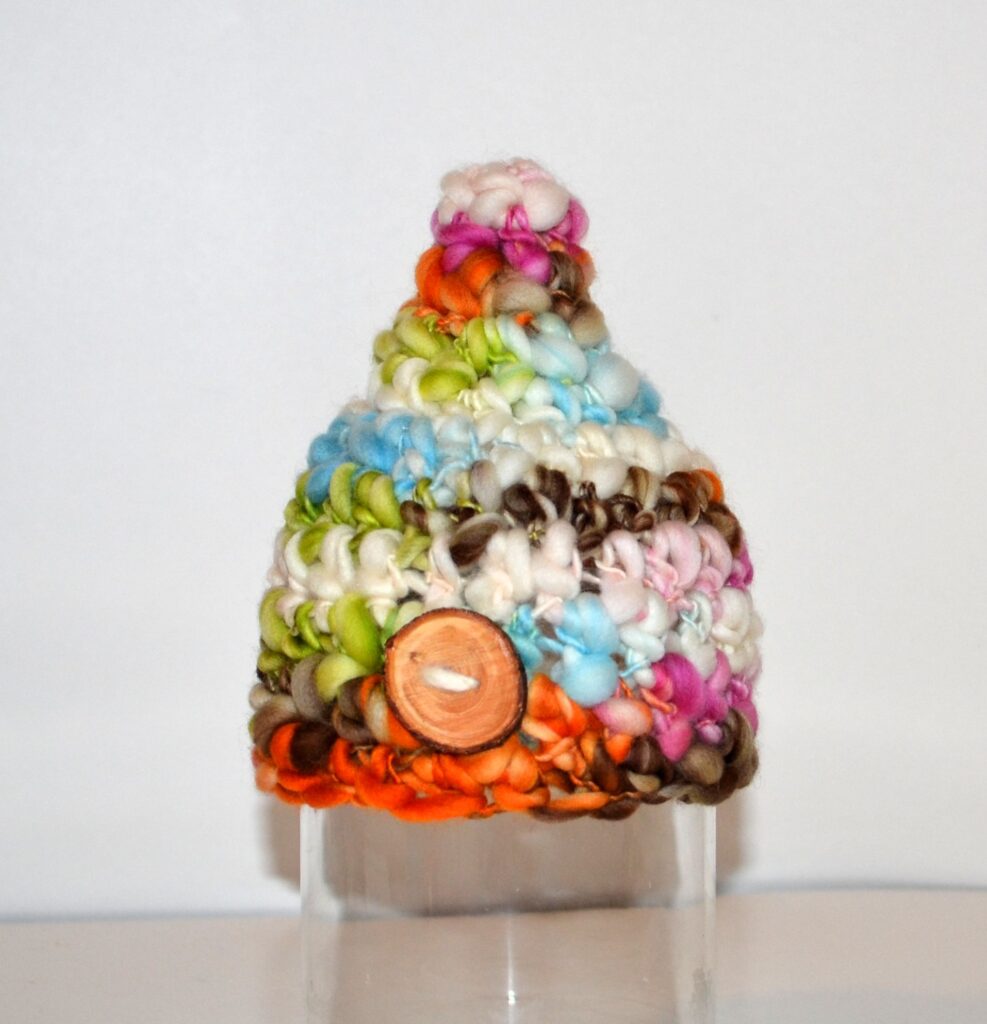
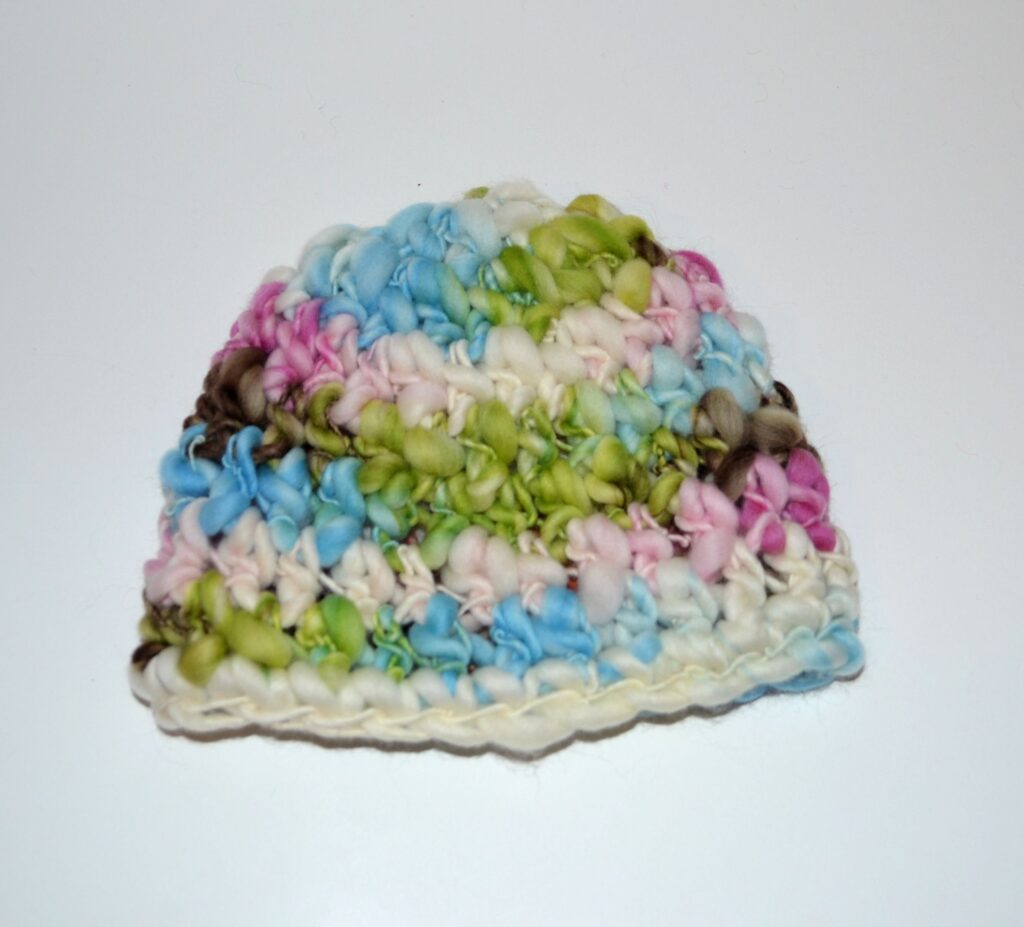
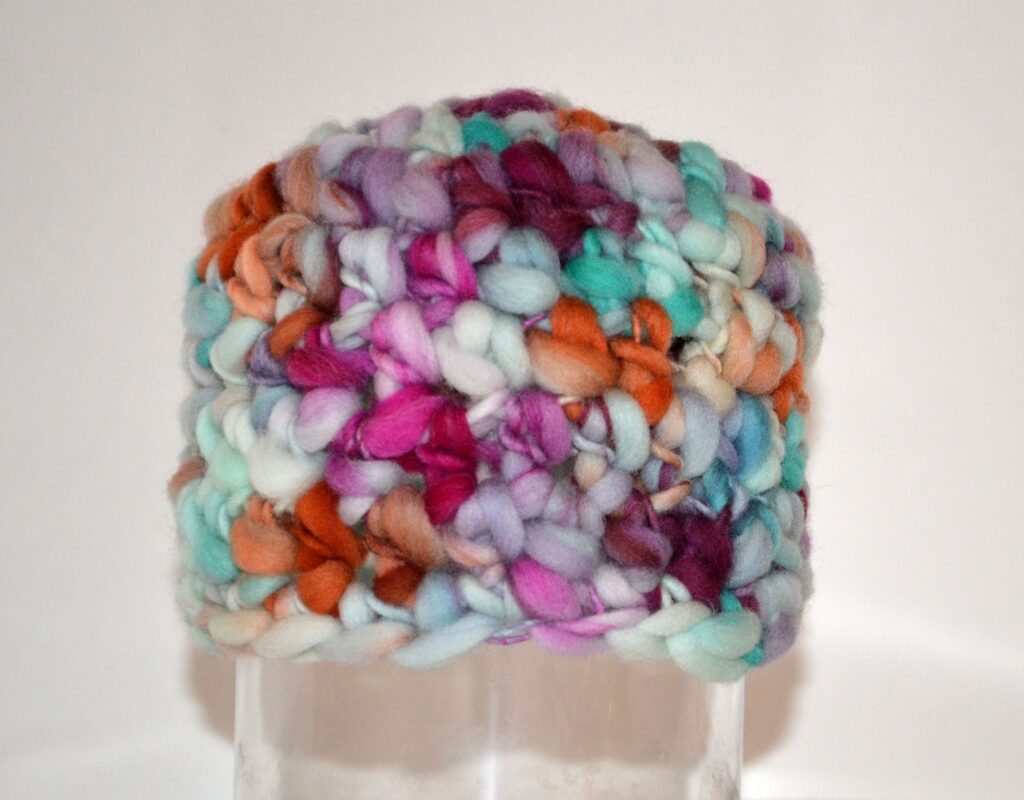
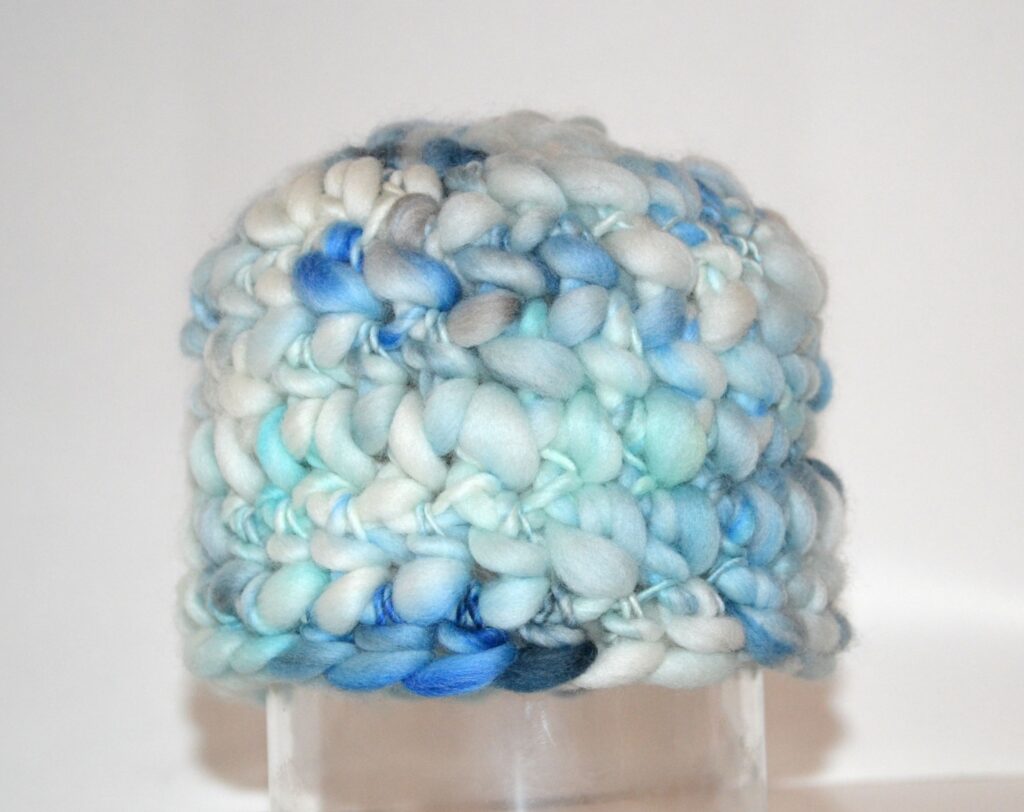
Each hat design has a different personality, but they all share the sweet look to them. The uniqueness of the thick and thin yarn creates almost a bubble like look to the fabric that is crocheted. It naturally tightens and loosens between each stitch.
The Merino Thick & Thin Hat pattern styles that I will be sharing with you include a Pixie Hat, a traditional Beanie and a Pixie Bonnet style.
Which style do you want to make? The great thing about these patterns is the minimal amount of thick & thin yarn they use. For Instance, with one 90 yard skein, I was able to make one hat of each design.
Newborn Merino Pixie Hat Pattern
You will need the following supplies:
- about 28 yards of Merino Thick & Thin Yarn
- Crochet Hook N (9.00 mm)
- Measuring Tape, Yarn Needle, Scissors
- Optional: Button
Crochet Pattern for Pixie Hat
- Ch 3, 4 hdc in 3rd ch from hook, join in the top of beginning ch 2 (5 st counting beginning ch 2 as a stitch now and throughout pattern)
- Ch 2, hdc in same st as join, hdc in each st around, join (6 sts there was a 1 stitch increase)
- Ch 2, hdc in same st as join, hdc in next st, [2hdc in next st, hdc in next st], repeat [] around, join (9)
- Ch 2, hdc in same st as join, hdc in each of next 2 sts, [2hdc in next st, hdc in each of the next 2 sts], repeat [] around, join (12)
- Ch 2, hdc in same st as join, hdc in each of next 3 sts, [2hdc in next st, hdc in each of the next 3 sts], repeat [] around, join (15)
- Ch 2, hdc in same st as join, hdc in next st, [2hdc in next st, hdc in next st], repeat [] until 1 st remains, hdc in last st, join (22)
- Ch 2, hdc in same st as join, hdc in each of next 6 sts, 2hdc in next st, hdc in each of the next 7 sts, 2hdc in next st, hdc in each of the next 6 sts, join (25)
- Ch 2, hdc in each st around, join (25)
- Ch 2, hdc in each st around, join (25)
- Ch 2, hdc in each st around, join (25)
- Ch 2, hdc in each st around, join (25), fasten off and weave in all ends
- Optional: add button
Hat dimensions / folded flat: Width = 6 inches, Height = 7 inches
Newborn Merino Basic Beanie Hat Pattern
You will need the following supplies:
- About 25 yards of Merino Thick & Thin Yarn
- Crochet Hook N (9.00 mm)
- Measuring Tape, Yarn Needle, Scissors
Crochet Pattern for the Basic Beanie:
- Ch 3, 9 hdc in 3rd ch from hook, join in the top of beginning ch 2 (10 sts counting beginning ch 2 now and throughout pattern)
- Ch 2, hdc in same st as join, 2hdc in each st around, join (20)
- Ch 2, hdc in same st as join, hdc in each of next 2 sts, [2hdc in next st, hdc in each of the next 2 sts], repeat [] around, join (25)
- Ch 2, hdc in each st around, join (25)
- Ch 2, hdc in each st around, join (25)
- Ch 2, hdc in each st around, join (25)
- Ch 2, hdc in each st around, join (25)
- Ch 1, sc in each st around, join (25), fasten off and weave in all ends
Hat dimensions / folded flat: Width = 6 inches, Height = 5 inches
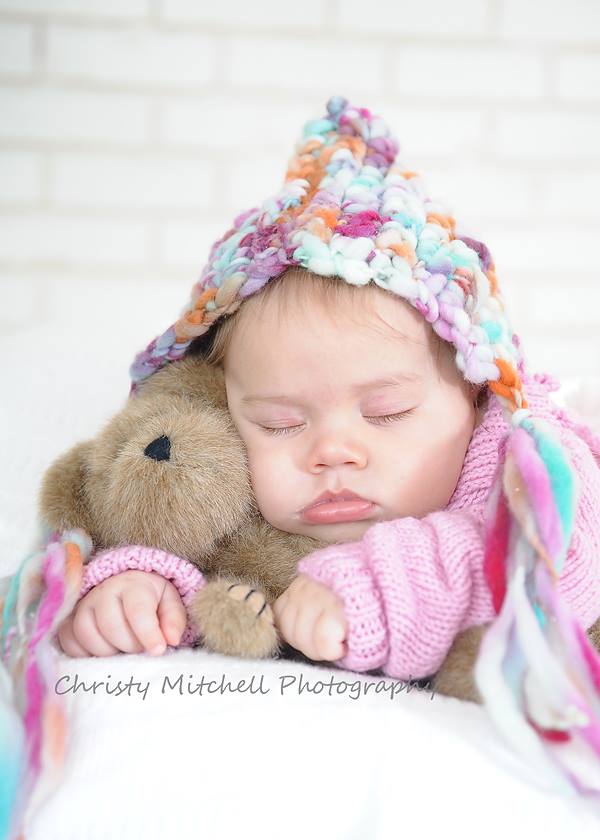

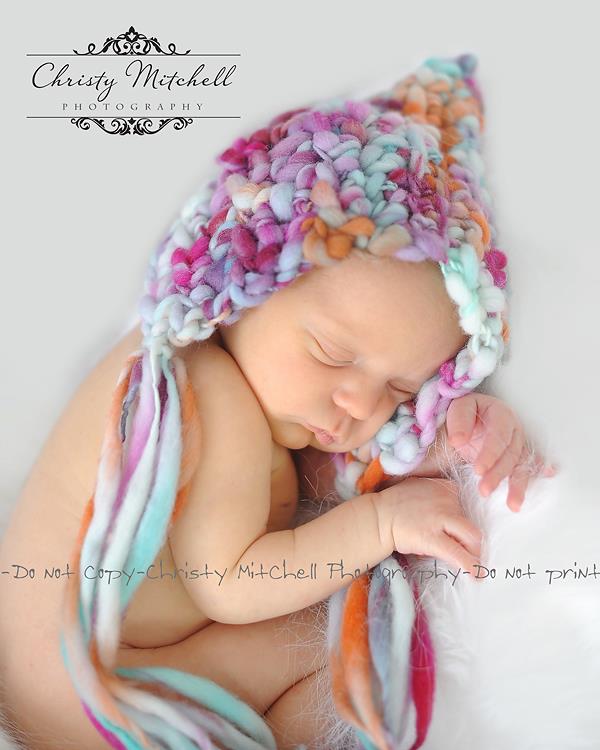
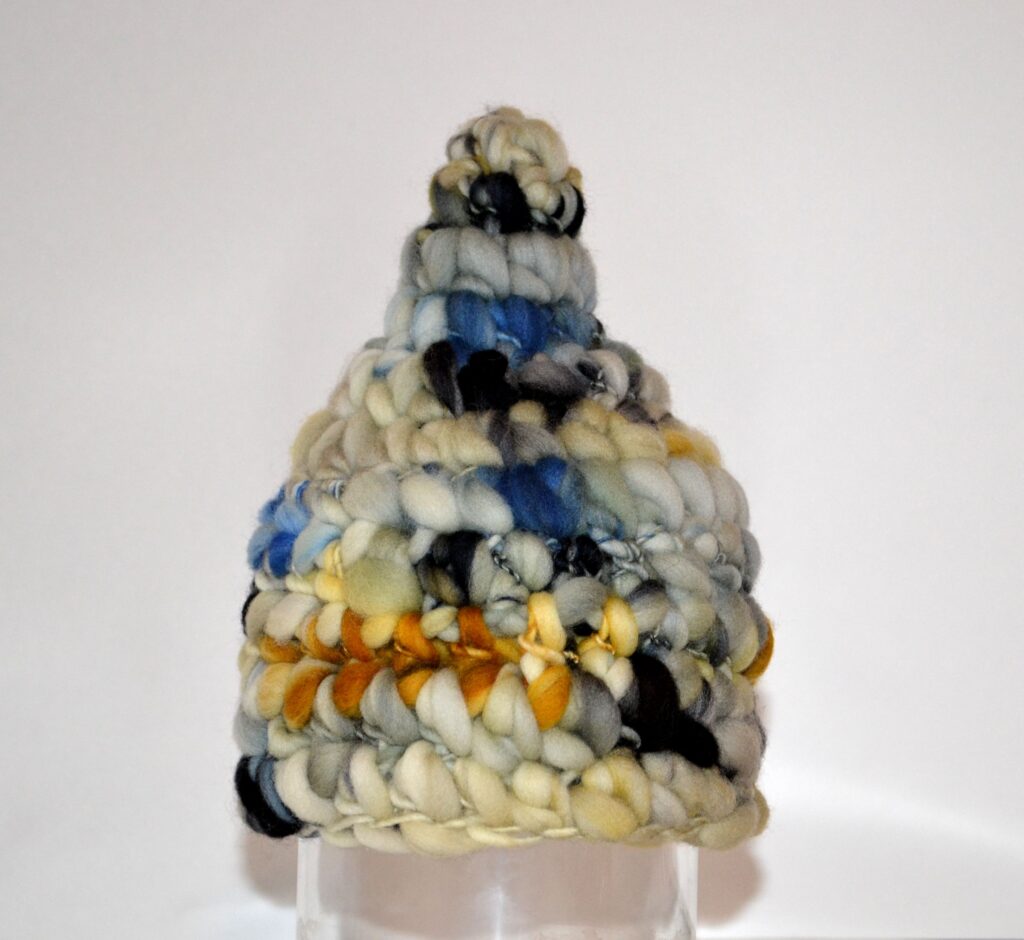
Newborn Merino Bonnet Pattern
You will need the following supplies:
- About 35 yards of Merino Thick & Thin Yarn
- Crochet Hook N (9.00 mm)
- Measuring Tape, Yarn Needle, Scissors
Crochet Pattern for the Bonnet
- Ch 14, hdc in the 3rd chain from hook, hdc in each remaining ch, rotate work (you will now continue your hdc in the opposite side of the ch), hdc in each ch to end, turn (26 counting beginning ch now and throughout hat)
- Ch 2, hdc in each st to end of row, turn (26)
- Ch 2, hdc in first 11 sts, dc3tog, hdc in remaining 11 st, turn (24)
- Ch 2, hdc in next 9 sts, sc2tog, sc2tog, hdc in remaining 10 st, turn (22)
- Ch 2, hdc in each st across, turn (22)
- Ch 2, hdc in each st across, turn (22)
- Ch 2, hdc in each st across, turn (22)
- Ch 2, hdc in each st across, fasten off and weave in ends
- Continue to tassel instructions
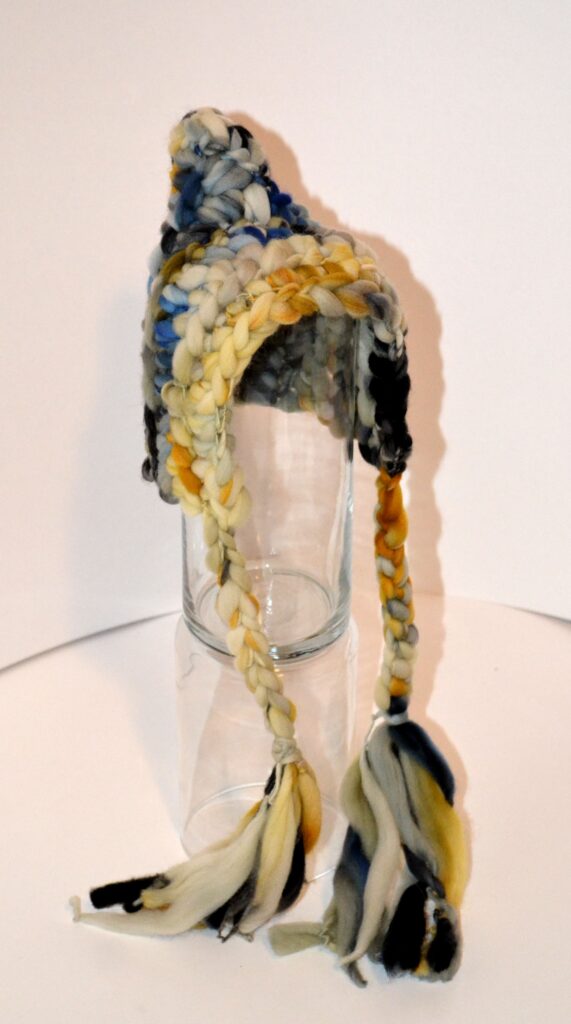
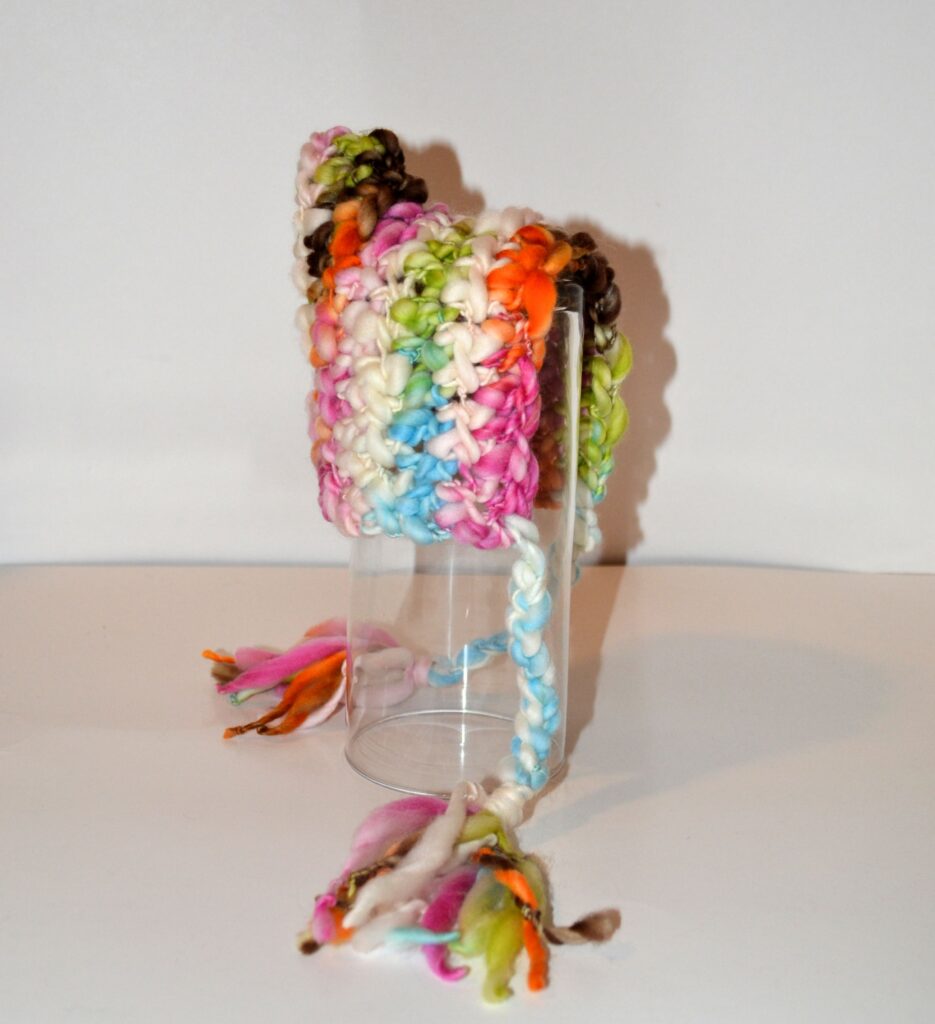
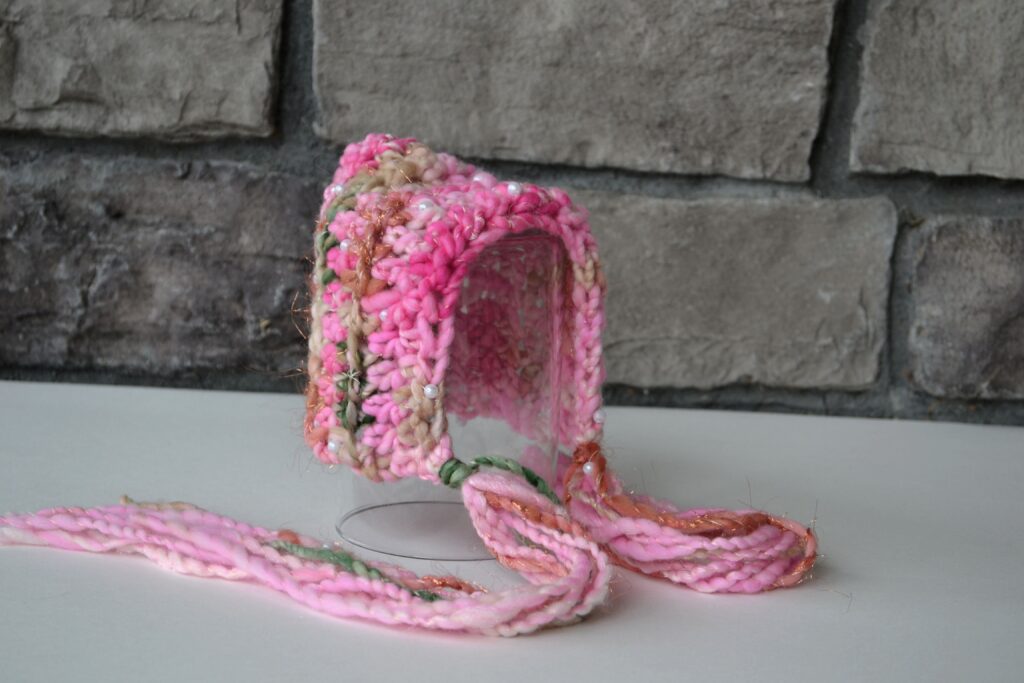
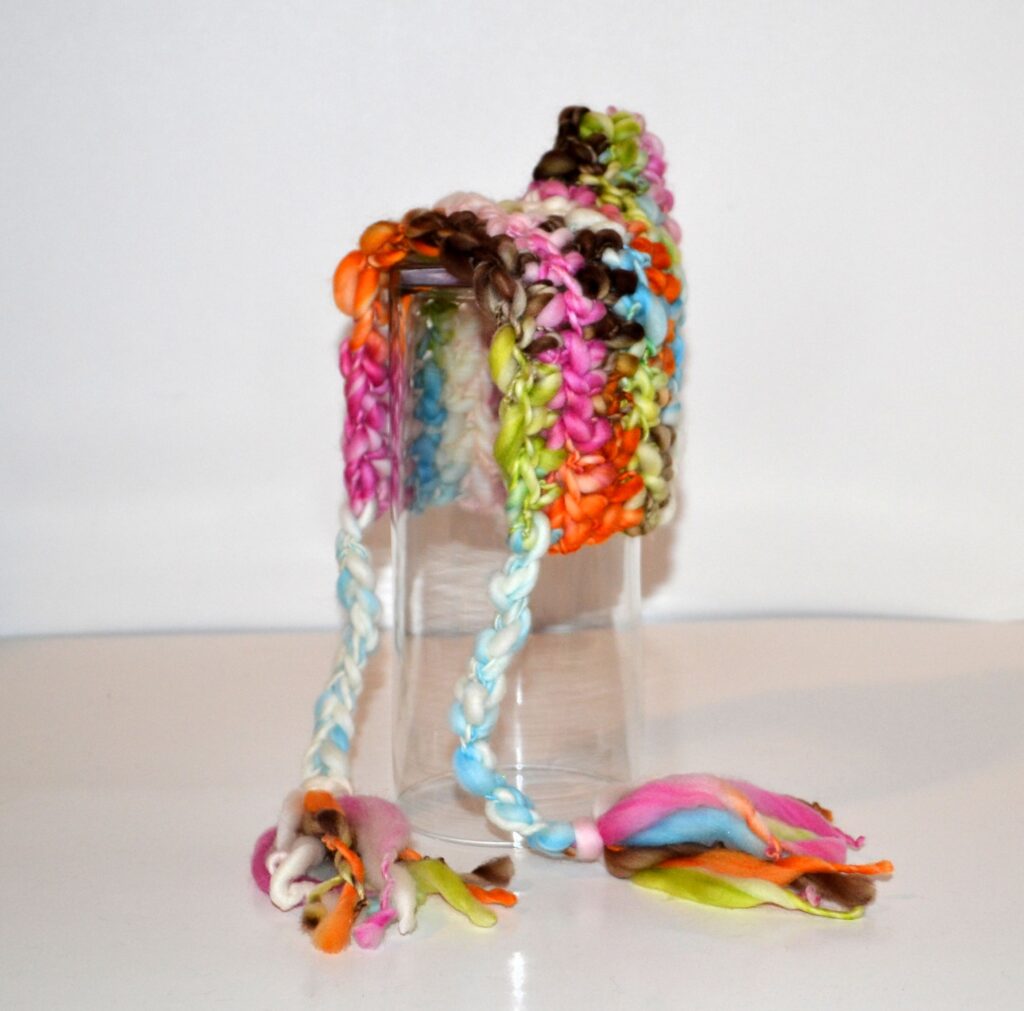
Adding Braid / Ties & Tassels to the Bonnet
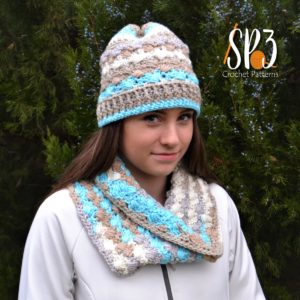
There are 2 options that I have used for the ties and/or tassels. I usually use whichever one I have enough yarn for. If you are running short of yarn, check out the top row of images in the above graphics. Those hats demonstrate the ties/braid option resulting in using less yarn because they feature a small braid and small tassels. However, in the bottom image there are longer tassels with no braid.
Ties / Braid Option: Begin to create this option by taking 2 strands of yarn and measure about 3 feet long, then fold the yarn in half. At the fold, join with a slst in the front lower corner of the bonnet. After that step, complete as many chains as possible leaving enough yarn for a small tassel (usually about 15-22 chains), tie them off and trim up the tassels to have even ends.
Tassel Only Option: To complete the longer tassels, take the remaining yarn and fold it in half, continue folding in half until you have about 4, 6 or 8 strands, just make sure it is an even number. Split them in half and then place them in 2 separate piles. Take the first pile and fold those strands in half, now, at the fold, pull through the front lower corner of the bonnet. Continue by tying tightly with a scrap piece of yarn around the folded area and then repeat on the other side with the second group of measured out strands.
More Newborn Pattern You May LOVE
- Precious Newborn Romper, click HERE
- Trellis Newborn Hat & Cocoon, click HERE
- Triangle Twist Newborn Bowl, click HERE
More Crochet Fun
Follow Sweet Potato 3 on Facebook to see more pattern releases, sales and crochet fun, just click HERE. But, if you want more, I have created an interactive group just for you!
However, if you would enjoy a more interactive group experience, you need to join my Crochet & Conversations facebook group, click HERE. The group is a ton of fun and I encourage everyone to share their projects, WIPS (works in progress) and inspirations. In addition to being a member, you get exclusive deals, are the first to see new releases, give input on designs and have opportunities to win patterns. Join now and get to know others who also enjoy the art of crochet.