
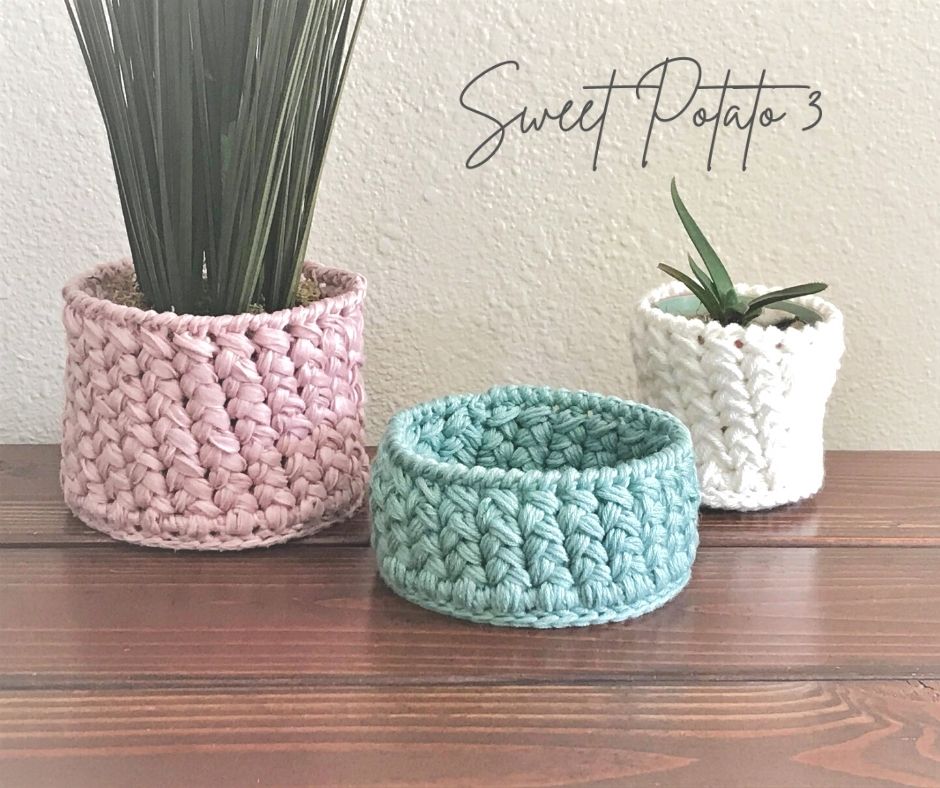
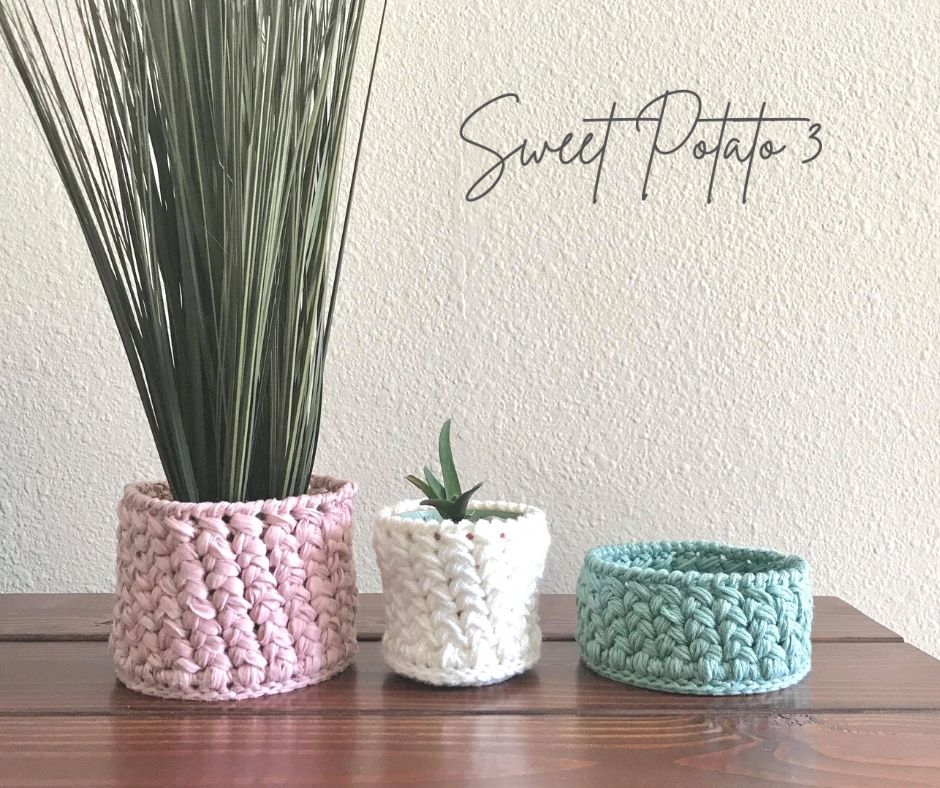
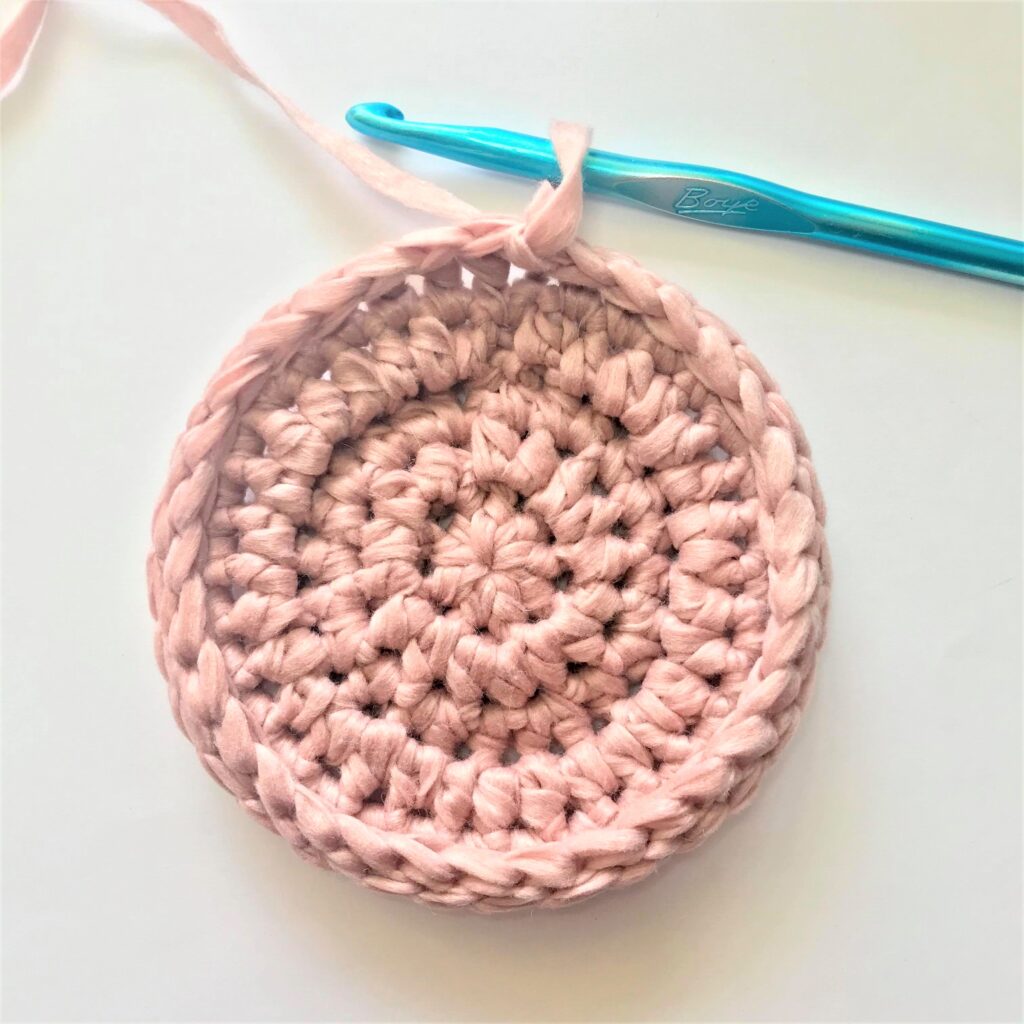
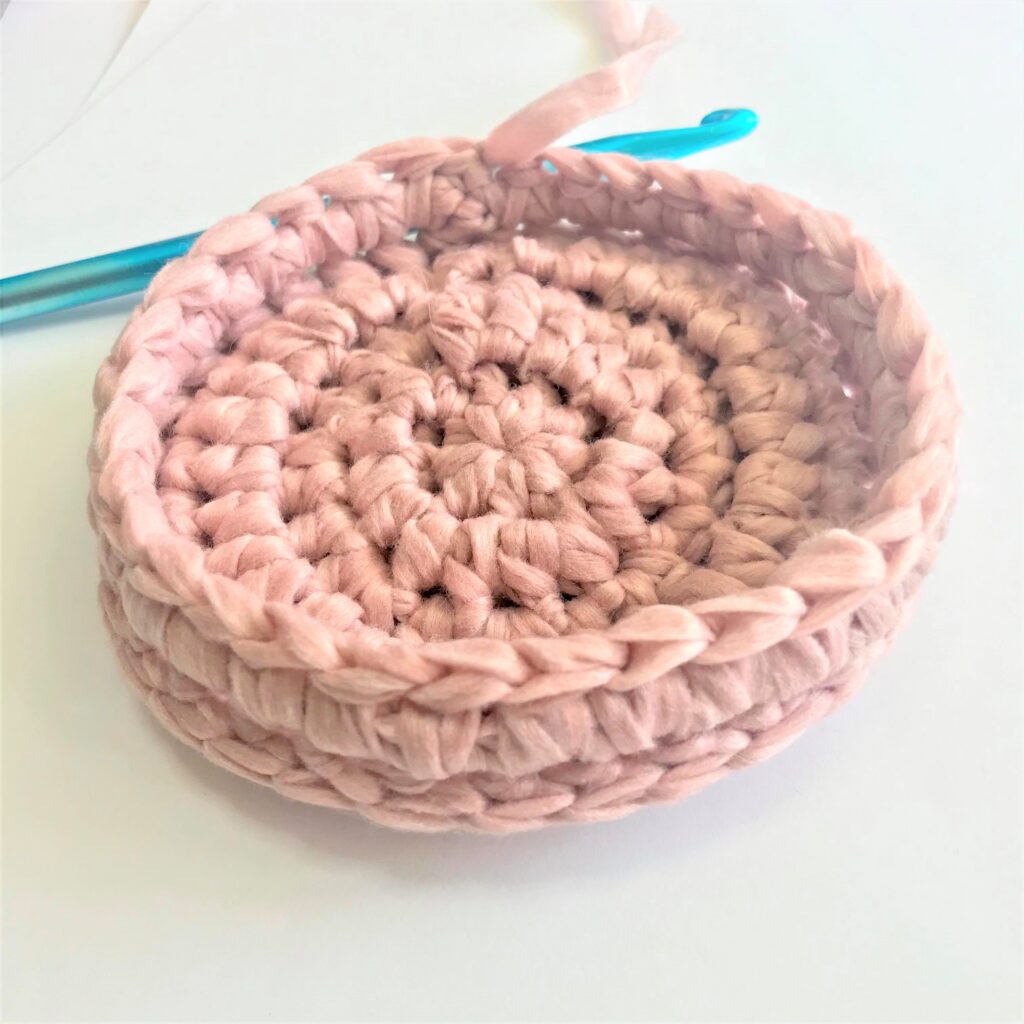
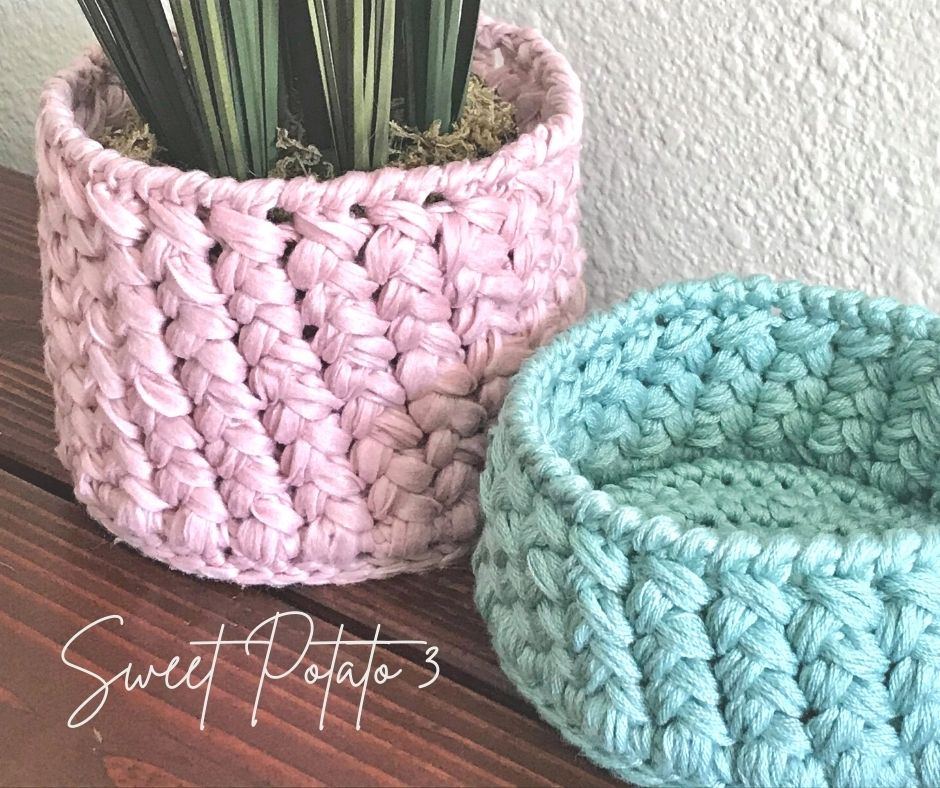
Crocheting home décor items are a perfect way to showcase your love for working with yarn. However, it can be challenging to find modern designs that add a little texture and warmth without making your display to cluttered. The Woven Basket/Pot Holder is just that, it doesn’t add an extra object (clutter), it just adds that missing piece of texture you’ve been longing for.
I created a full tutorial that will walk you through how to customize this design to suit your need. It can be made as a plant pot cover, for any sized plant, or you can create a shallow basket as a catch all. You could even crochet it smaller to work as a crochet hook holder or can cozy. If you can think of a fun idea, this tutorial will work!

The Accident that lead to the woven basket design
I had a plant that was displayed in my entryway. One afternoon my daughter was goofing off with her brothers and threw something (I honestly can’t even remember what it was) and it bounced off one of the boys, hit the plant which crashed to the floor. The pot completely shattered. Now, all I had was a cute plant with an ugly Styrofoam base.
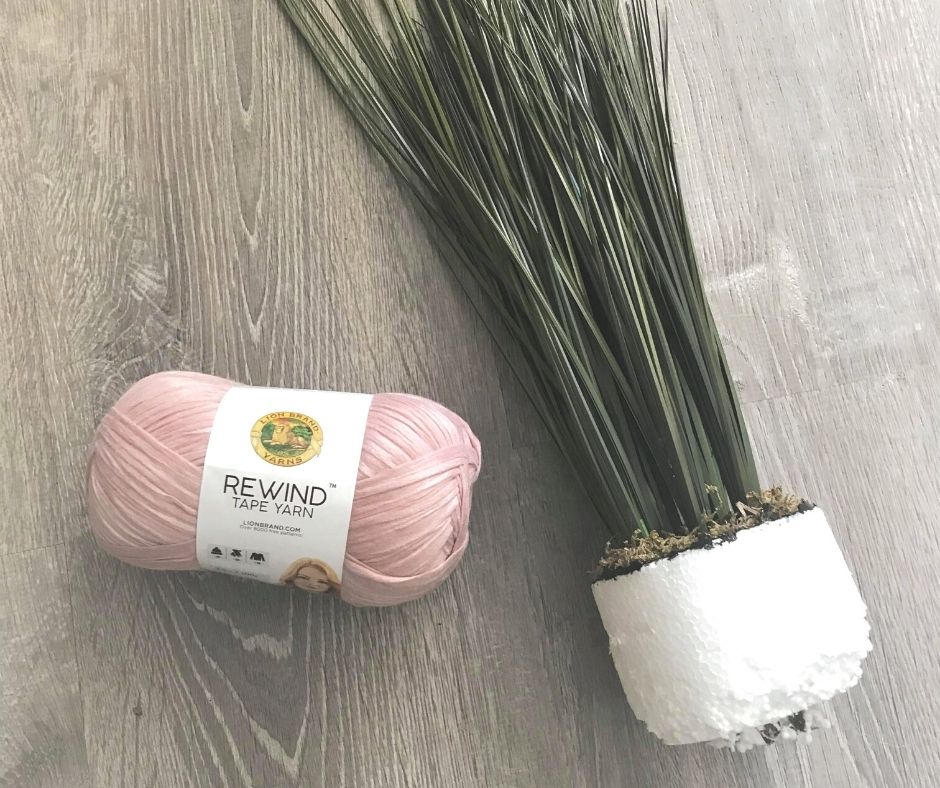
I had some leftover home decor yarn from a project I had previously worked on (a whole book on home décor you can find it HERE… link coming soon) and thought the yarn would be fun to use to create a new base for the plant.
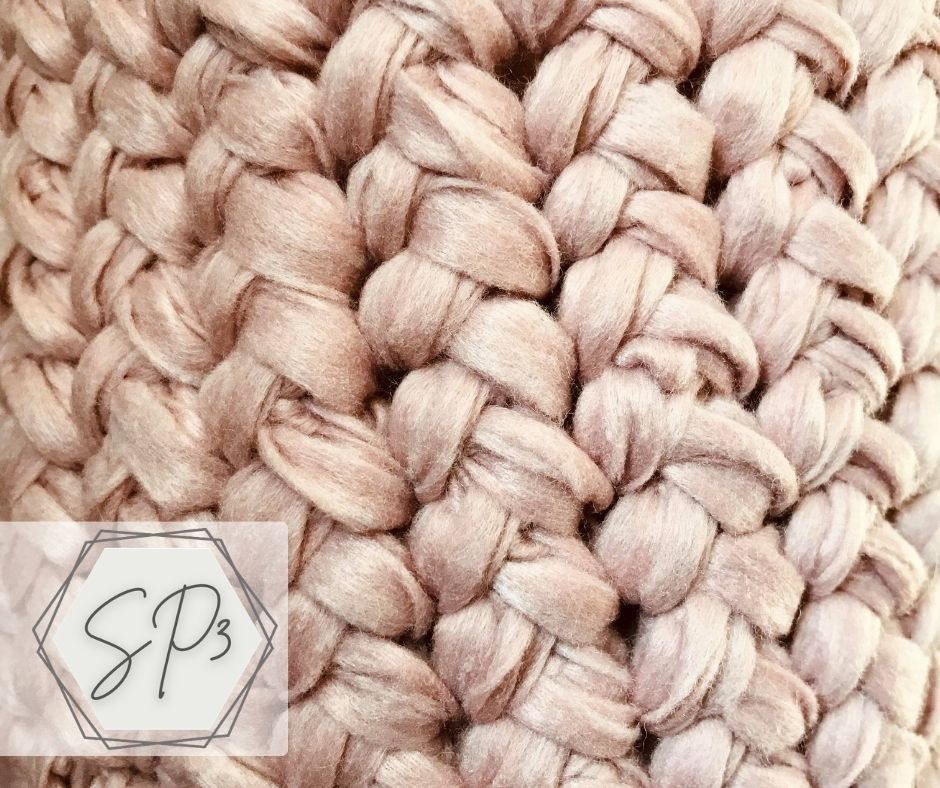
The Woven Look of the Stitch
When I stumble upon a new stitch my mind usually starts to buzz with ideas on how to incorporate it into a new design. When I saw this gorgeous woven stitch, I knew right away it had be worked into a basket design. Isn’t this stitch amazing?
Materials Needed
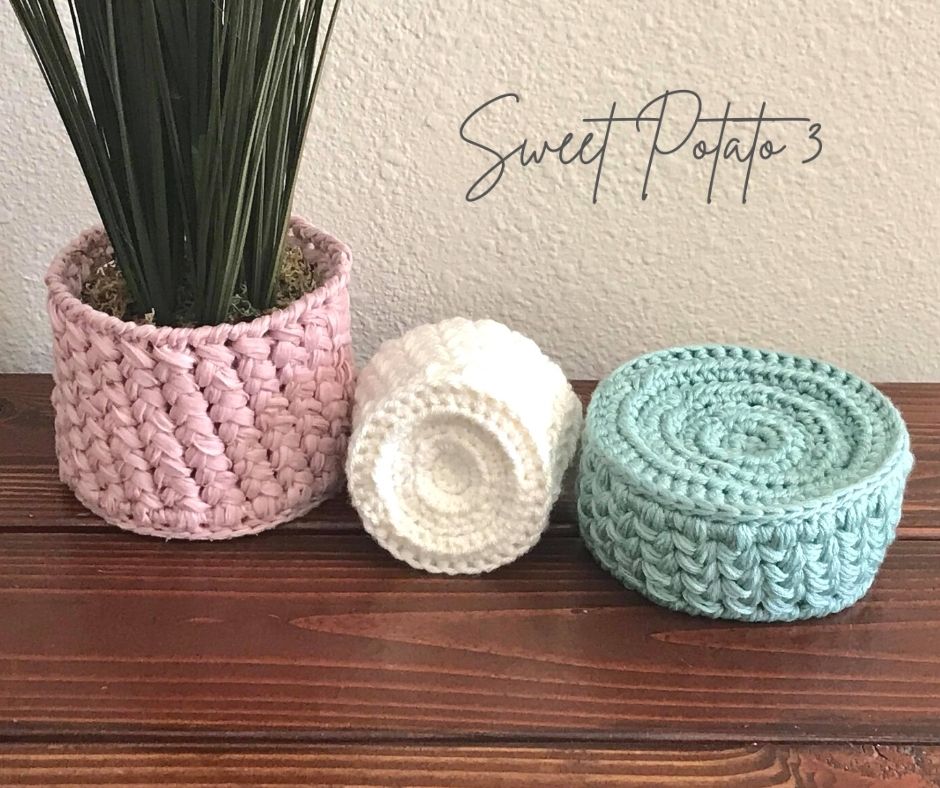
Honestly, this is the fun part about woven basket design. The pattern is designed so you can customize it to the size you want. I encourage you to go to your yarn stash and grab the color of yarn you really want to use. Don’t worry about the weight of the yarn, just estimate if you will have enough. I made 3 samples, seen below, in the next paragraph I will let you know how much yarn I used for each one.
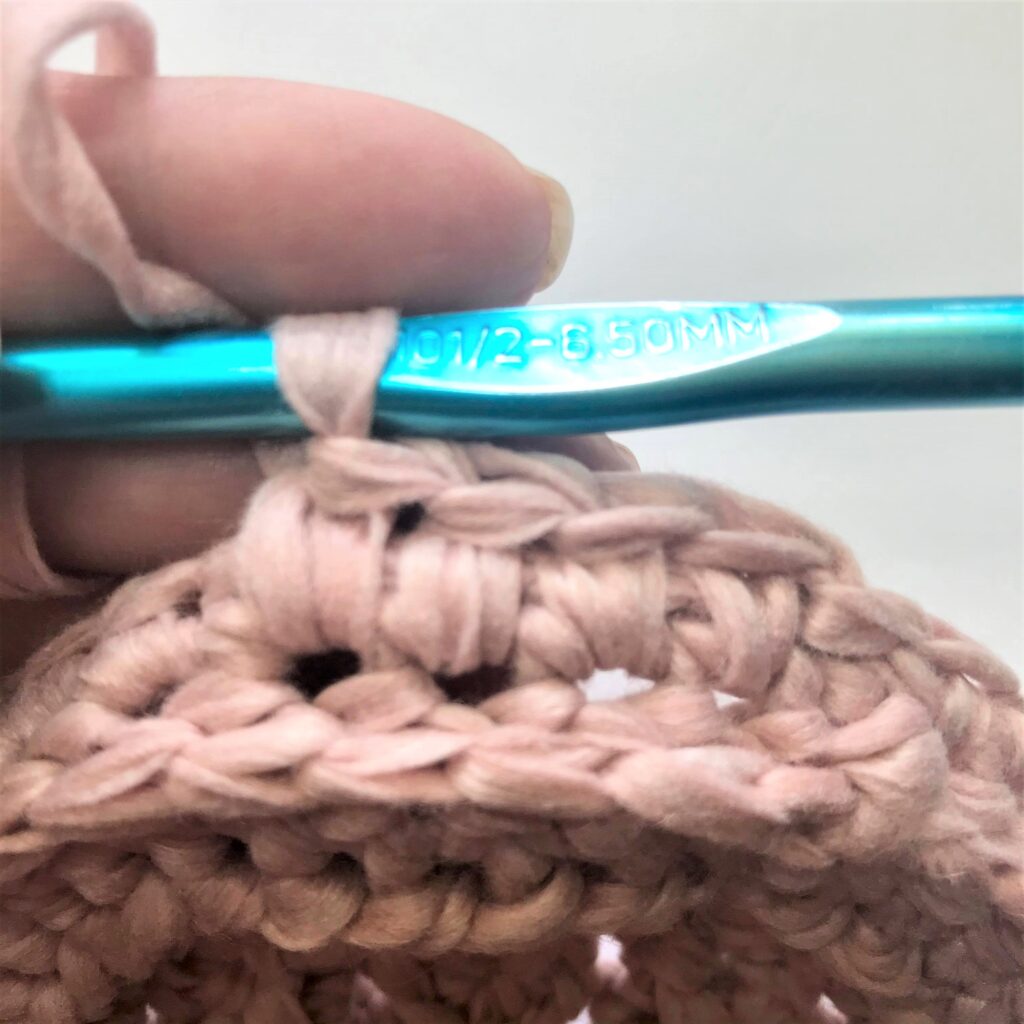
The short basket that I left empty (we use it as a catch all for keys) uses Berroco Comfort Yarn (color: 9709). This yarn was in my stash and was left over from my Bella Borsetta Clutch pattern, you can find that by clicking HERE. The Berroco yarn is a finer worsted weight yarn. Therefore, I decided to crochet the basket holding 2 strands together and used about 80-100 yards total. For this sample I used a crochet hook size K (6.50 mm).
I used Hobby Lobby’s I Love This Yarn in the smallest sample in the color, Ivory. I used 1 strand of yarn (crochet hook size I (5.50mm) ) and the entire pattern worked up in about 60 yards.
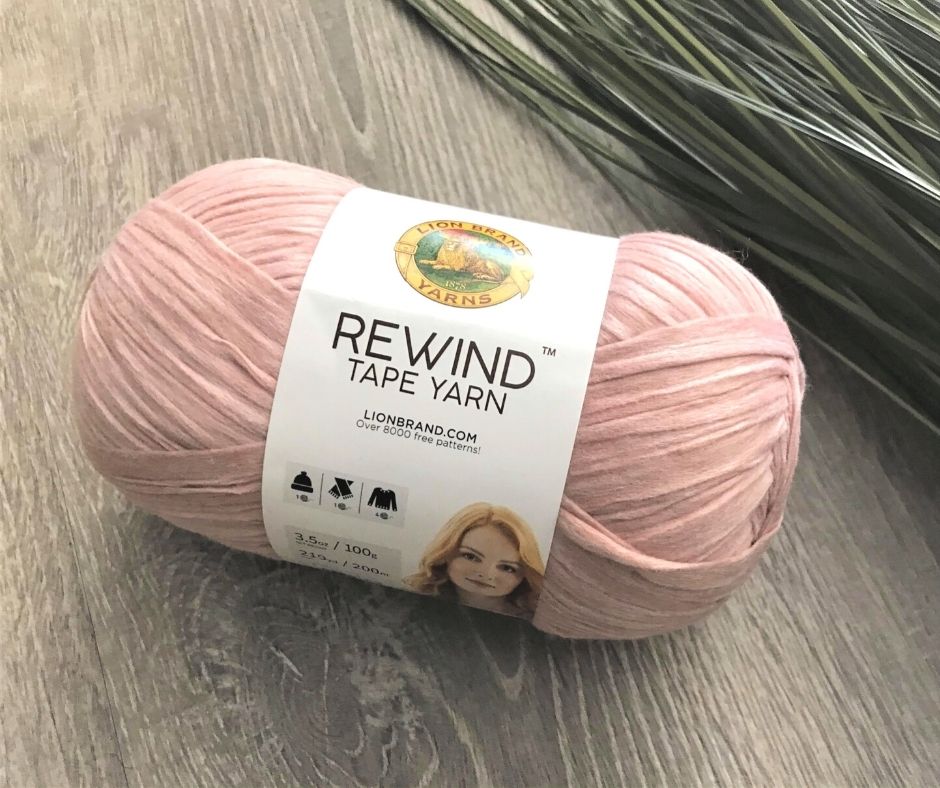
For the larger pink basket I used Lion Brand Rewind yarn which is a (finer) bulky home décor yarn. I used about half of a skein, or 100 yards, and used a crochet hook size K (6.50 mm). The Mahogany Rose color is very soft and muted.
Other items you may want to have on hand are a stitch marker, scissors and yarn needle.
Stitches and abbreviations Used
- Ch(s) = Chain(s)
- St(s) = Stitch(es)
- Sc = Single Crochet
- Hdc = Half Double Crochet
- Spike Sc = Spike Single Crochet
- Reverse Sc = Reverse Single Crochet (also known as the Crab Stitch)
- FP = Front Post
- BL = Back Loop Only
- FL = Front Loop Only
- R = Row/Round
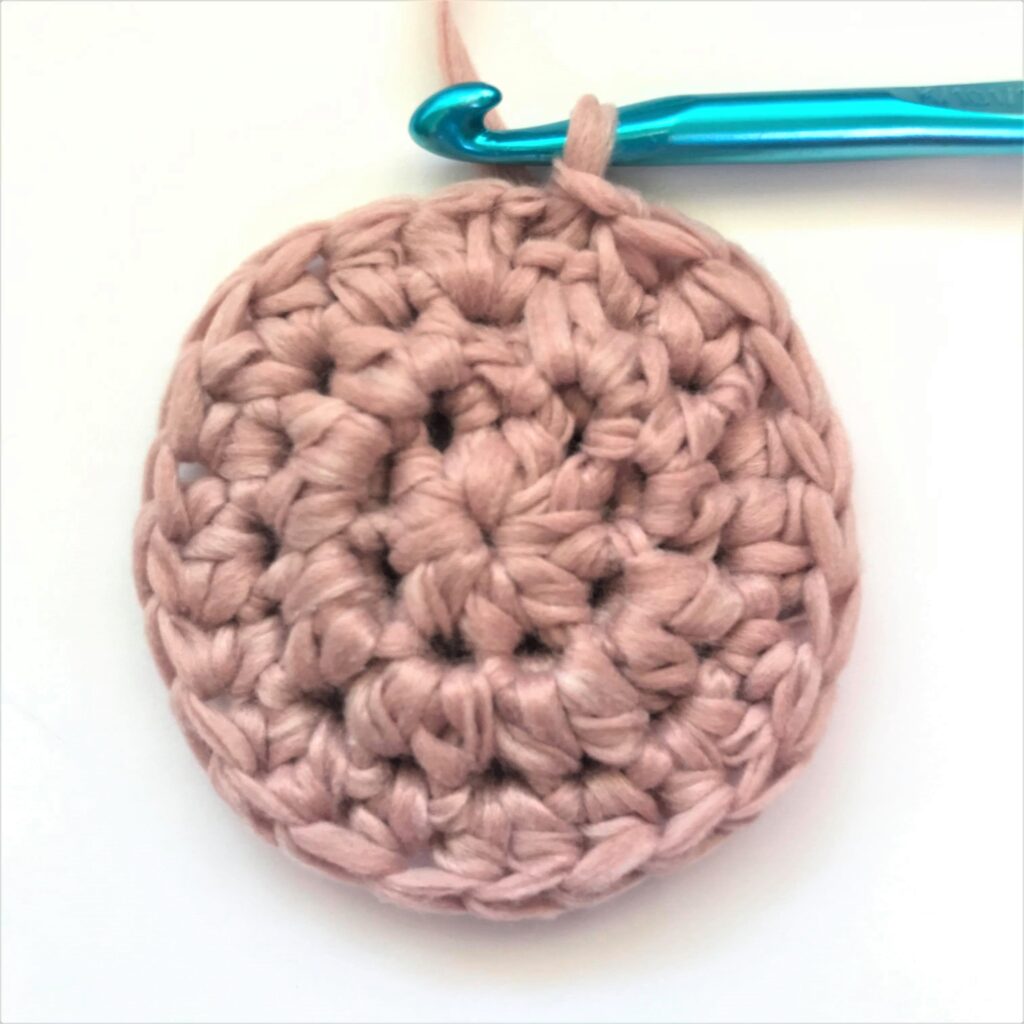
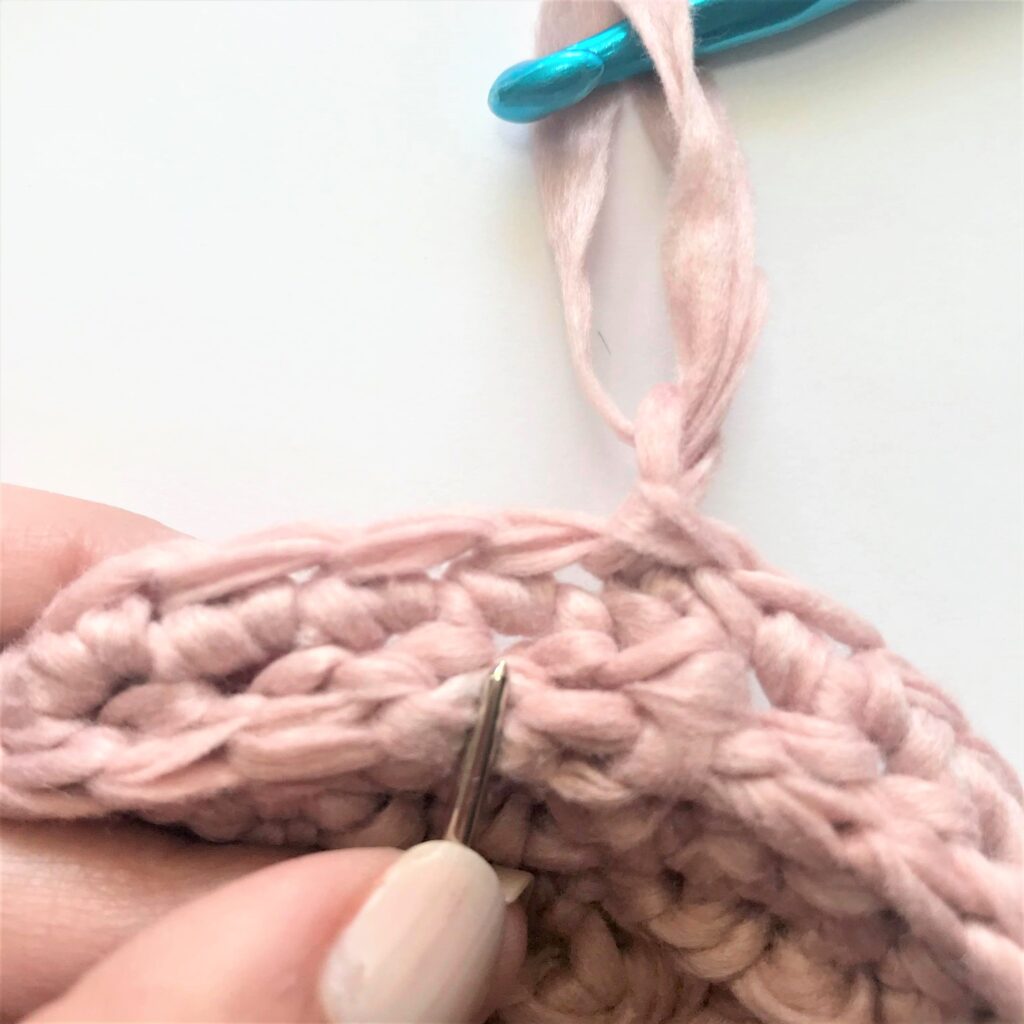
The ridged bottom of the Woven Basket
The woven stitch creates a nice thick fabric which holds up great for sides of a basket. However, when you create something with sides are are thicker/heavier it is important to have a sturdy base. This took some trial and error but I eventually came up with a fun way to do just that.
Plus, the technique I used created a ridge on the basket bottom/base which helps keep the circular shape of the basket.
Gauge Check
This pattern is very unique since it can be customized to any size and can be made with any type of yarn. Due to all the customization available, you do not need to check your gauge. Just follow the instructions to make the basket the size you want. Make sure you use the recommended hook size on your yarn label.
A step by step video
Beginning your custom basket or pot holder
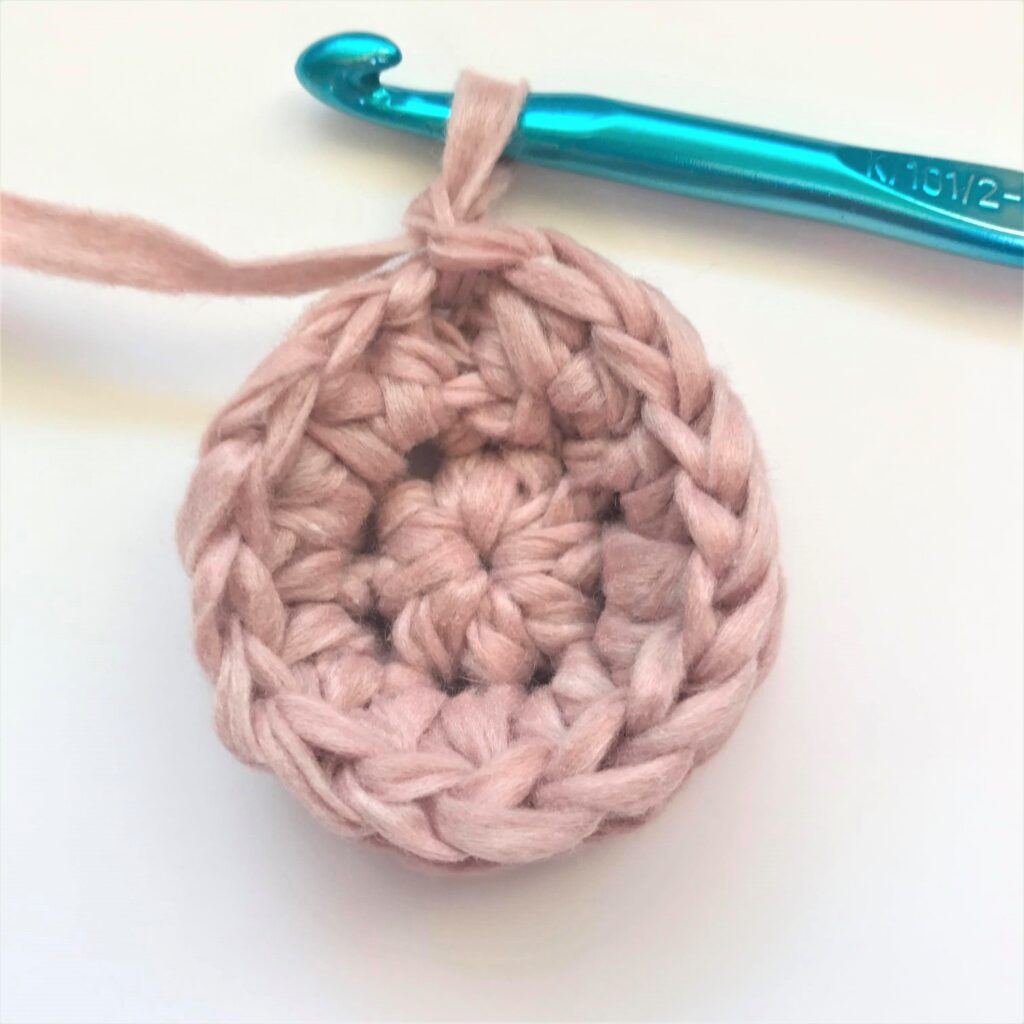
R1: Ch 2, 8hdc in 2nd ch from hook, join with a slst in the top of the 1st hdc of the round (8) pull beginning strand of yarn to close hole *note: you may begin with a magic circle if you prefer
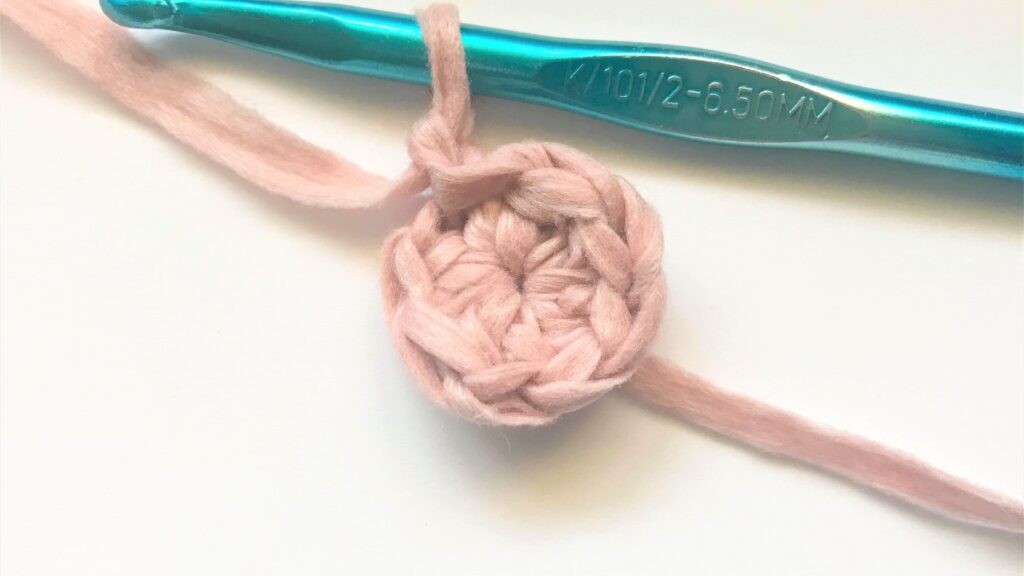
Part 1 of R2: you will crochet 2 layers in this round, Ch 1, work this section in the BL only, 2hdc in each st around making sure not to work into the joining slst of R1 (16), do not join
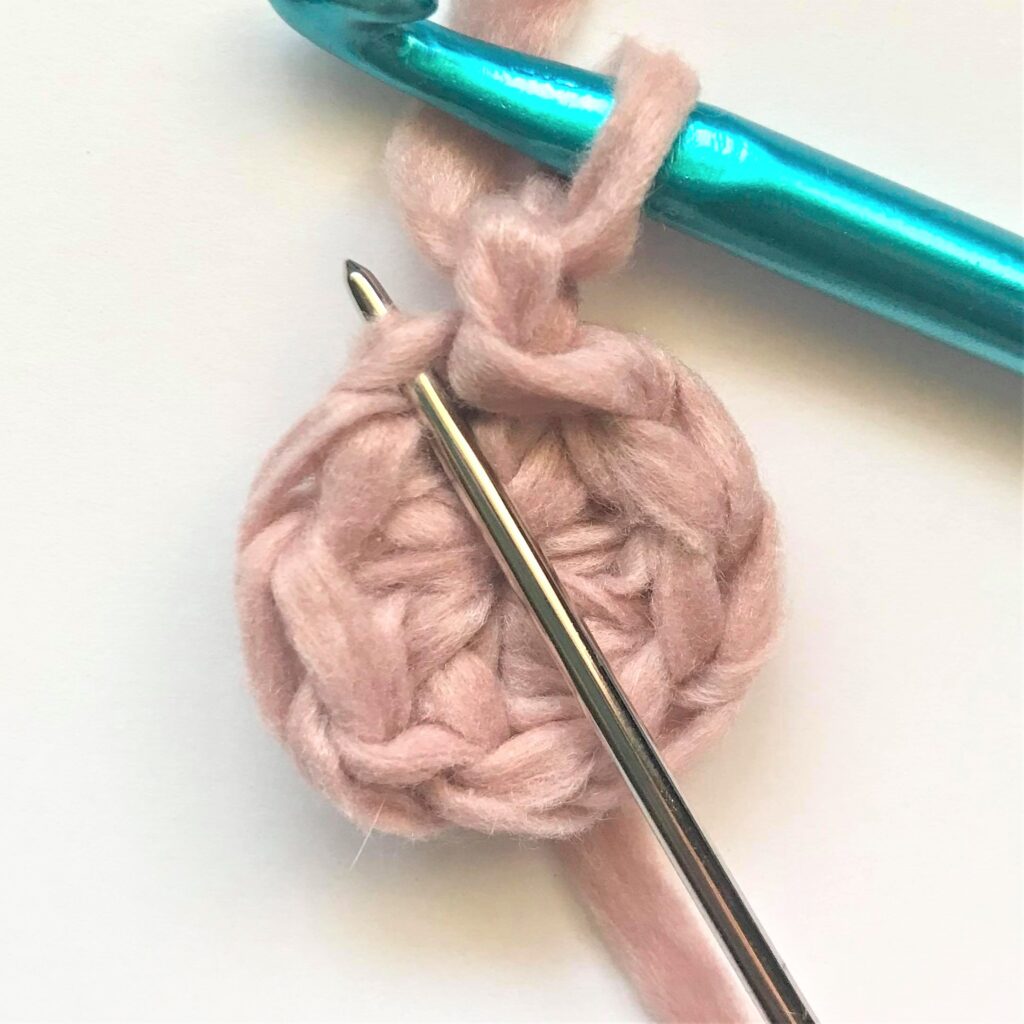
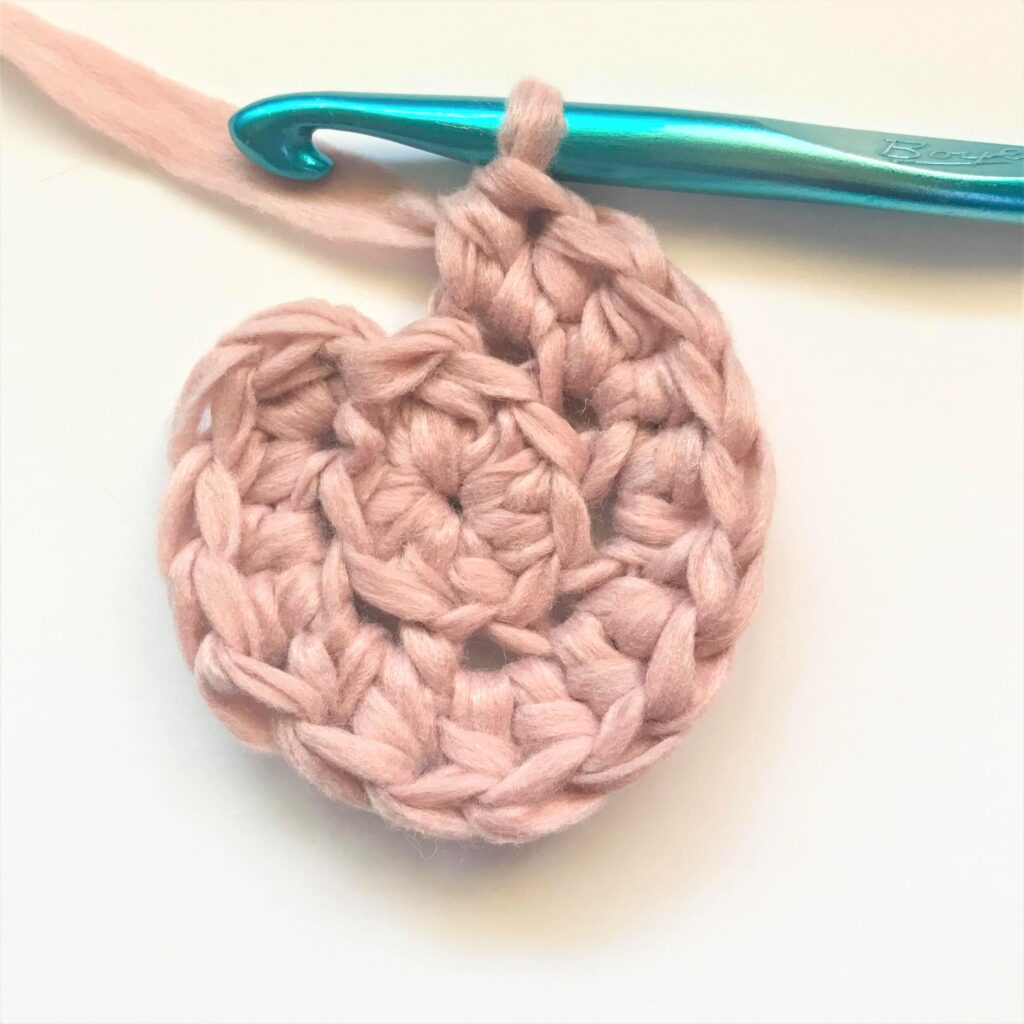
Part 2 of R2: you will now work a round in the unworked FL (1st image) repeating the 2hdc in each st around, this will create a 2nd layer (2nd image) join in both of the 1st stitches from both layers (3rd image) to complete the round (4th image)
R3: Ch 1, work this round working through both layers of R2, 2hdc in 1st st, hdc in next st, [2hdc in next st, hdc in next st], repeat [] around (24)
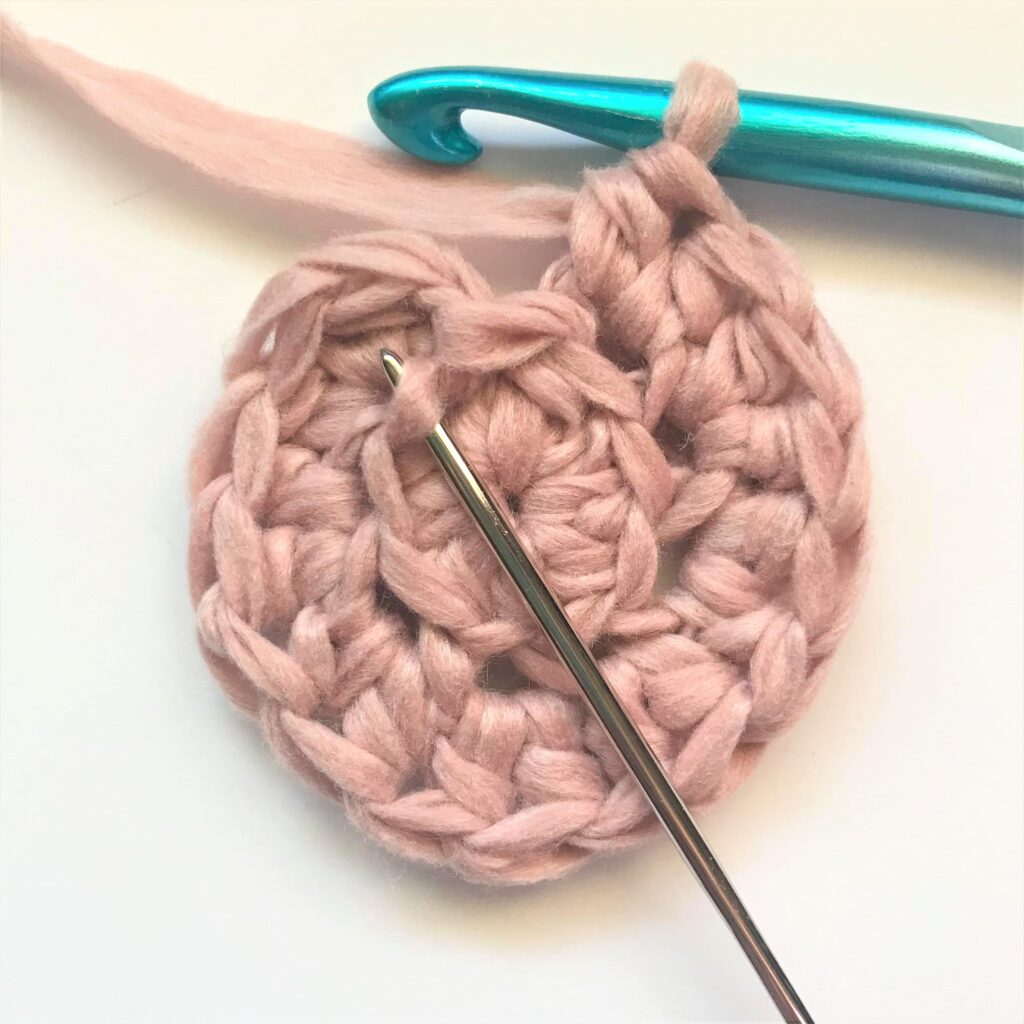
R4: using the same technique you used on R2, crochet 2 layers in this round, Ch 1, work this section in the BL only 2hdc in 1st st, hdc in each of the next 2 sts, [2hdc in next st, hdc in each of the next 2 sts], repeat [] around (32) do not join, you will now work a round in the unworked FL repeating [] around, join in both of the 1st stitches of each layer in this round
R5: Ch 1, work this round working through both layers of stitches from R4, 2hdc in 1st st, hdc in each of the next 3 sts, [2hdc in next st, hdc in each of the next 3 sts], repeat [] around (40)
*note: at this point you will continue to crochet increase rounds working every even rows with a double layer. Odd rows crochet as a single layer while working through the double layer of the previous row. Continue this pattern until the bottom of your basket in your desired size. You can end on either an even or an odd row.
Final Round: Ch 1, sc in each st around, join
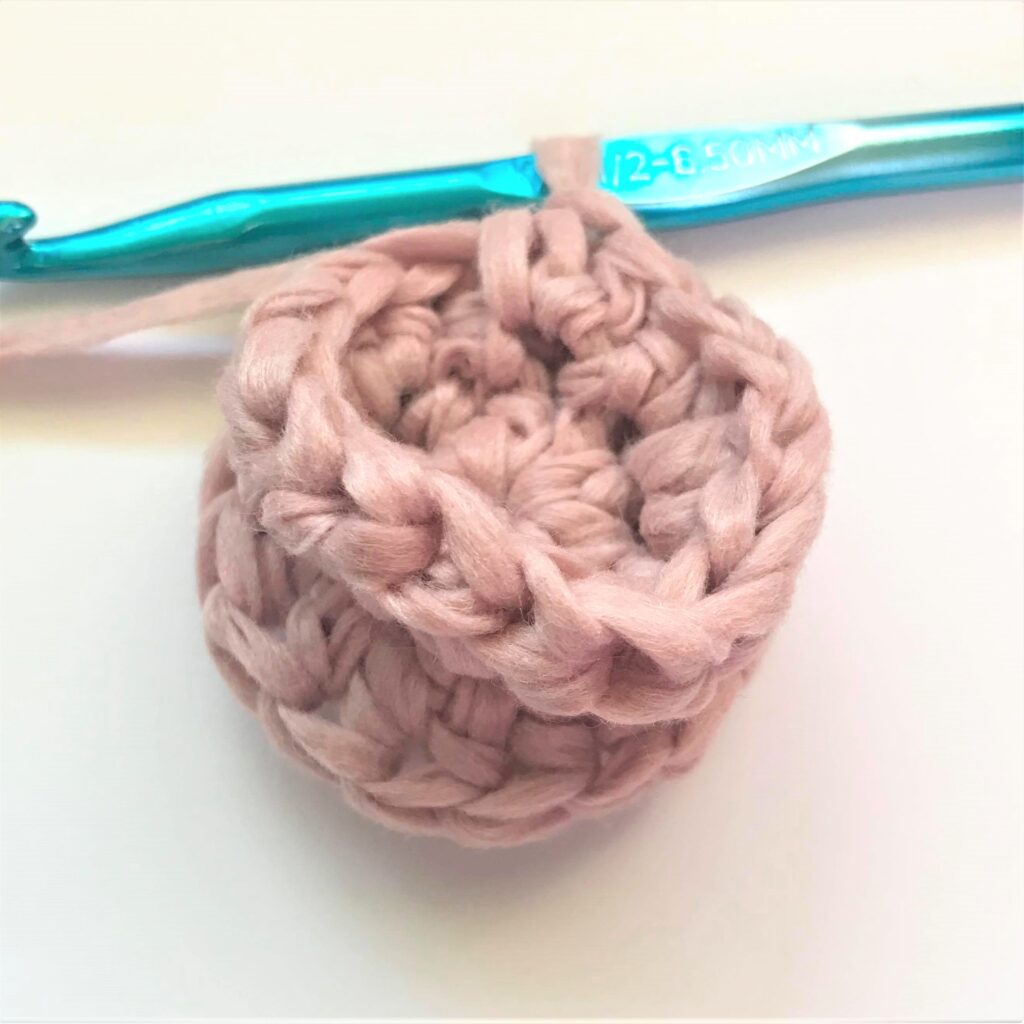
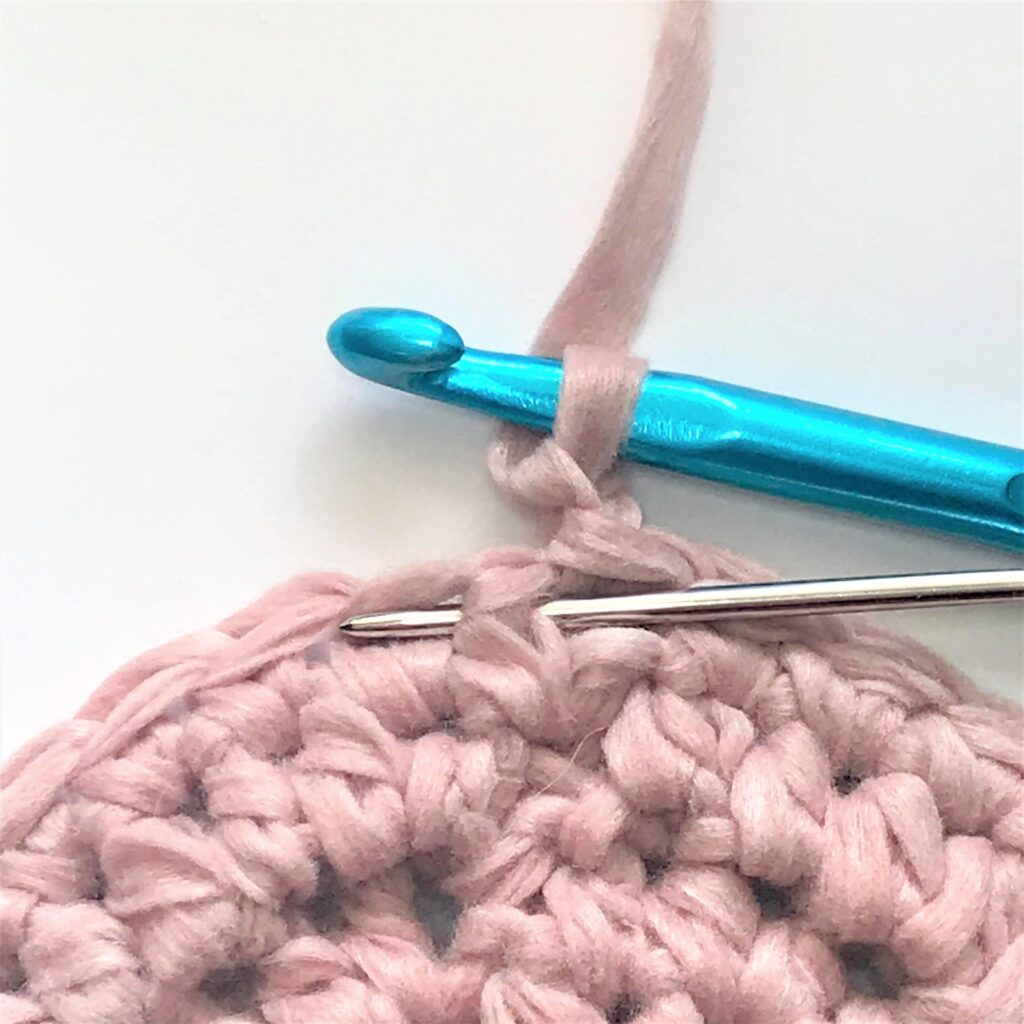
Creating the turn from bottom to side of basket
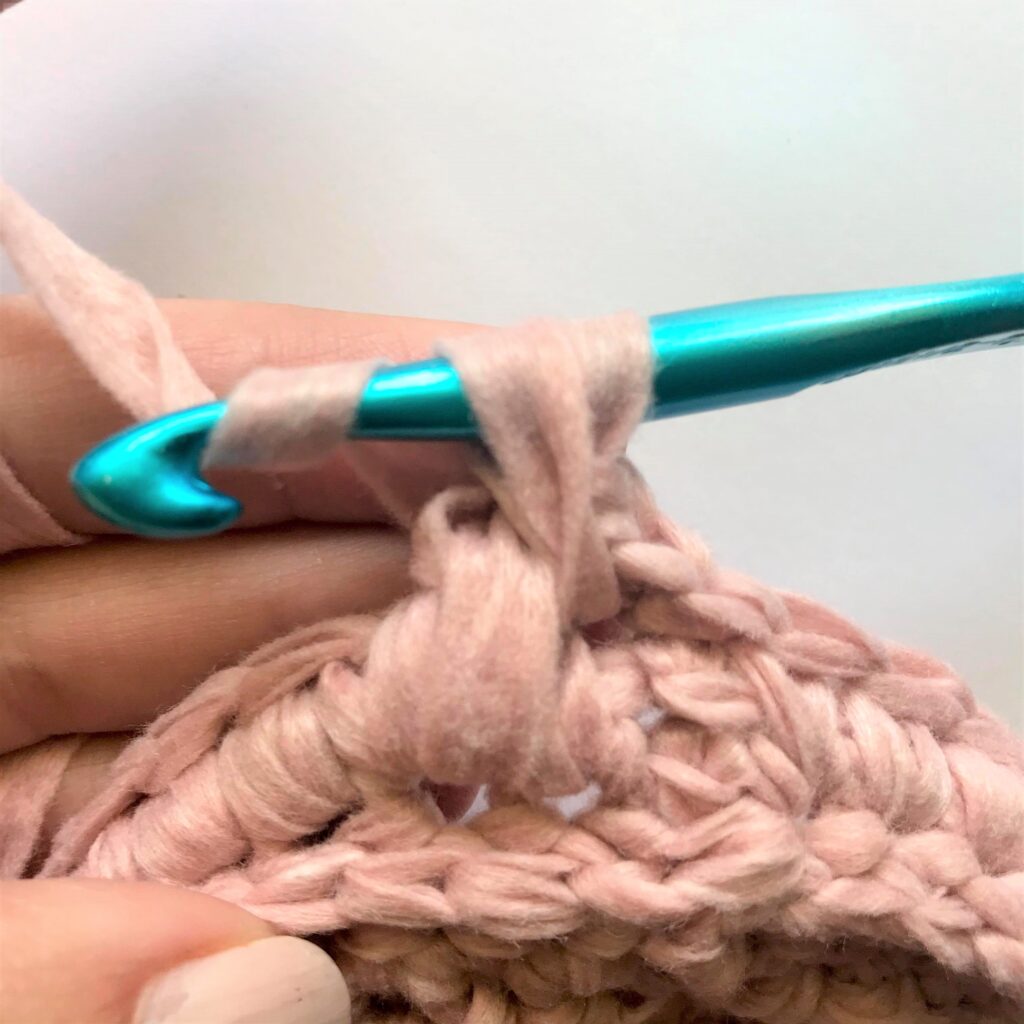
R1: Ch 1, loosely FPsc in each st around, join and turn
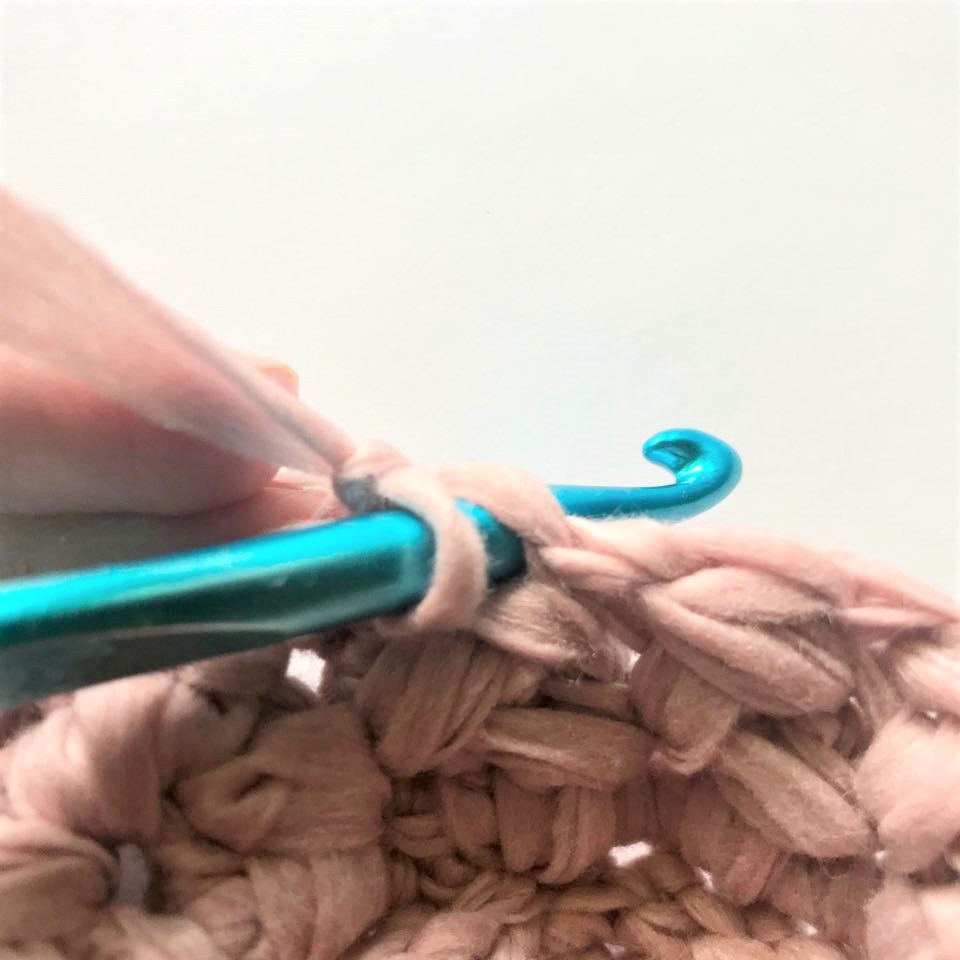
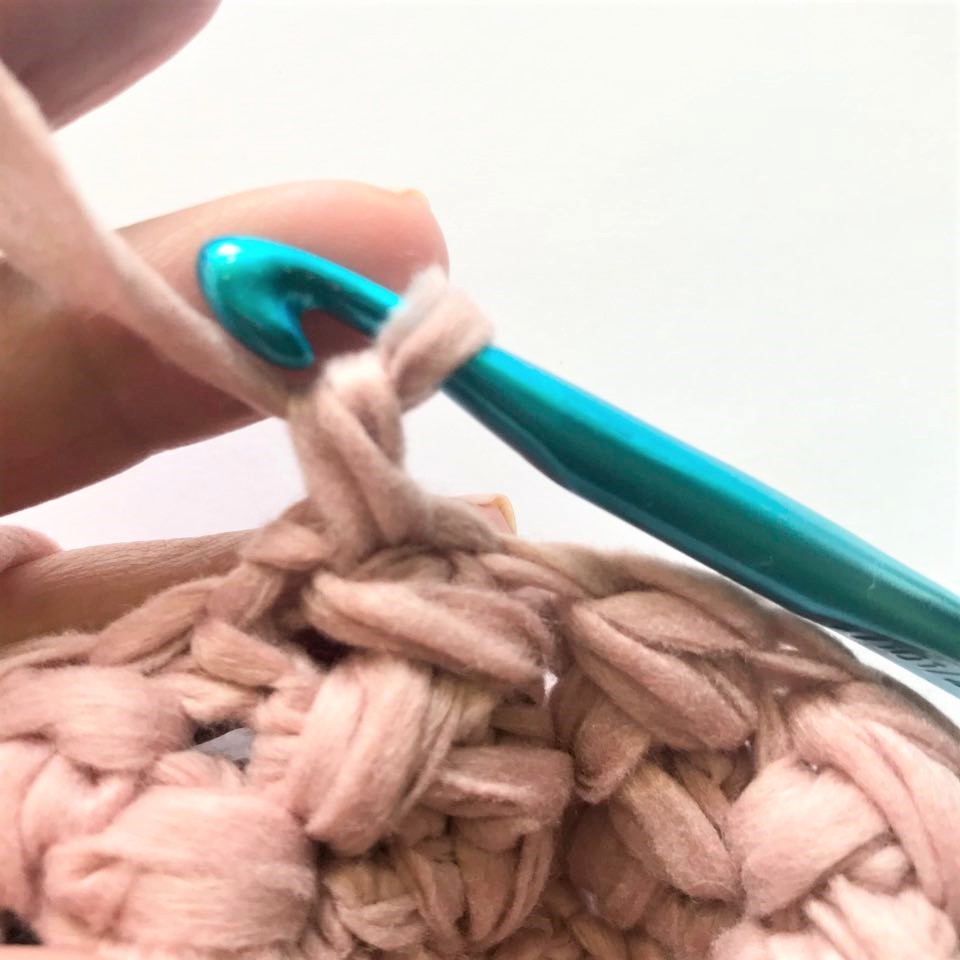
If you are wondering what a FP (front post) single crochet is, take a look at the photo tutorial below: Ch 1, insert hook around the post of the st from the prior row (see image 1 & 2), yarn over and pull up a loop (image 3 & 4), yarn over pull through both loops on hook to complete the FPsc (image 5), repeat around row (image 6).

R2: Ch 1, sc in each st around, join
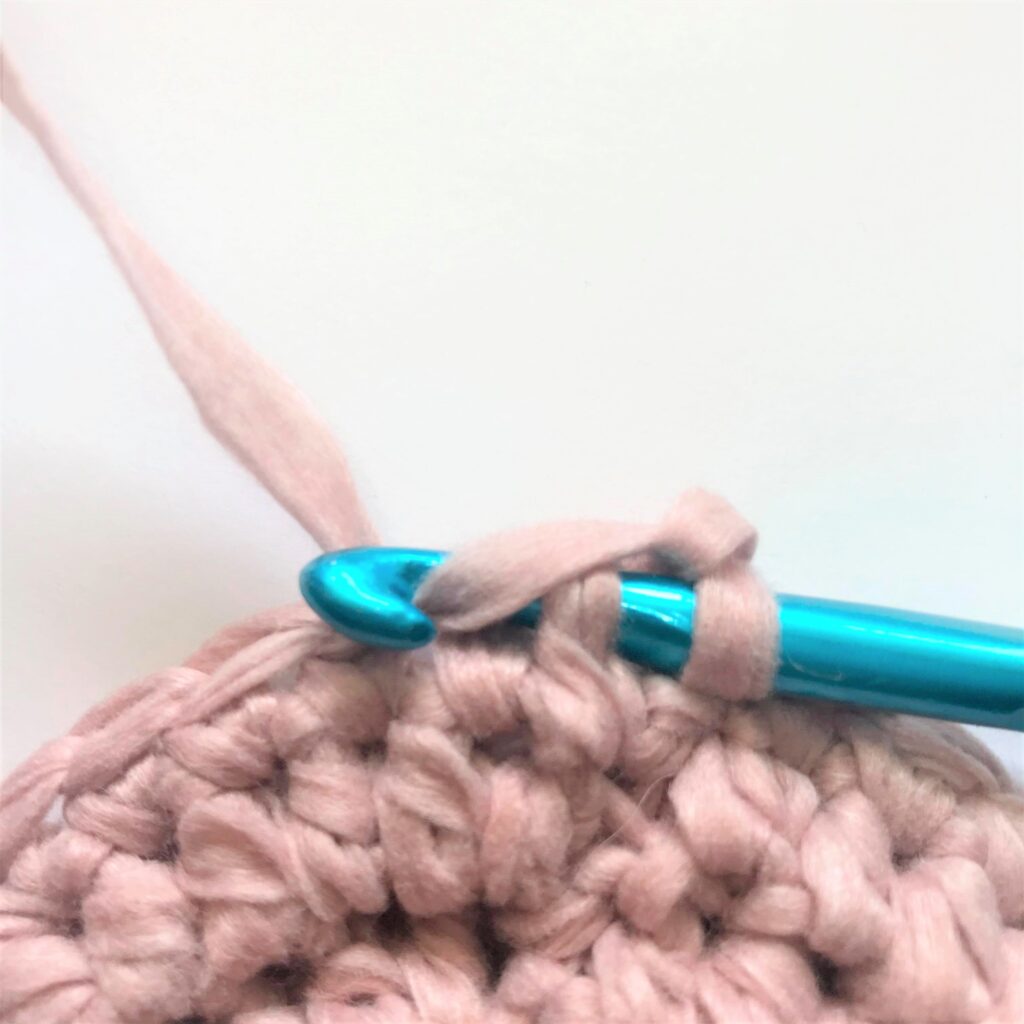
R3: Ch 1, spike st in each st around, join
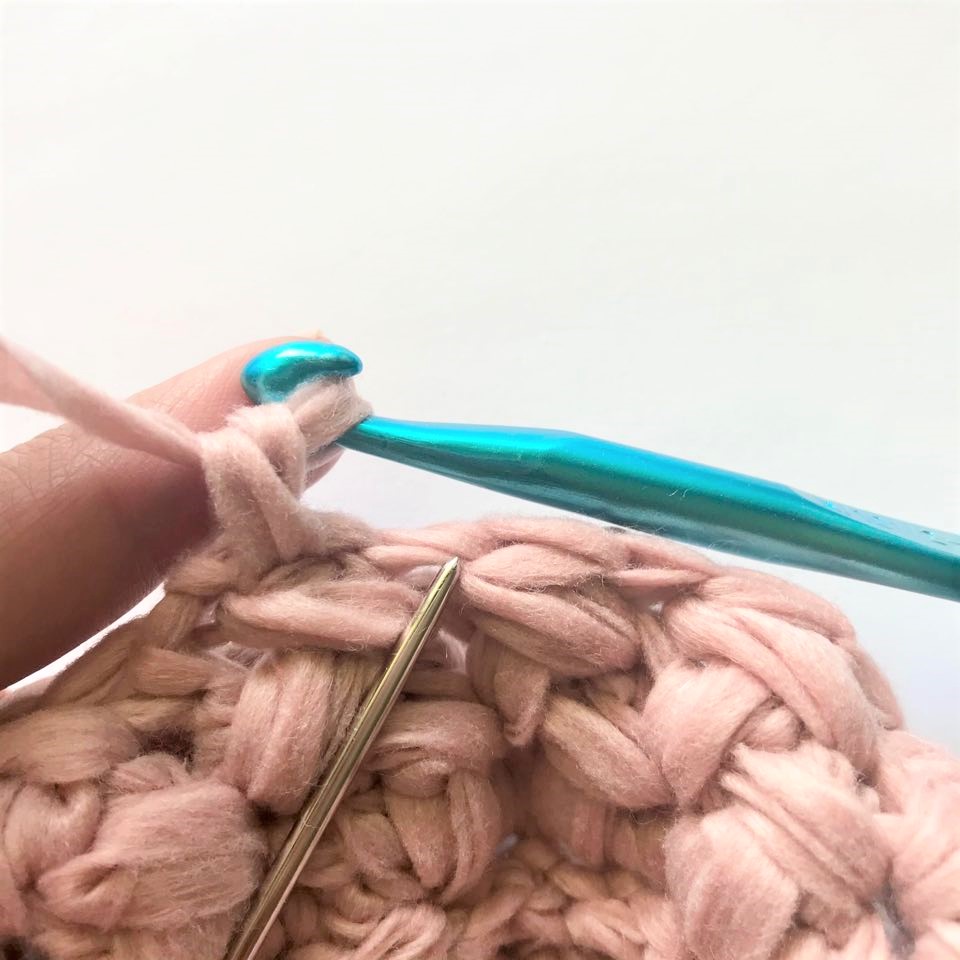
See the tutorial below for the spike stitch: Begin with a ch 1, insert your hook into the base of the sc from the prior row (image 1 & 2), pull up a loop (image 3), yarn over, pull through 2 loops on hook to complete the spike st (image 4), continue working a spike stitch (image 5) around entire row, join (image 6).

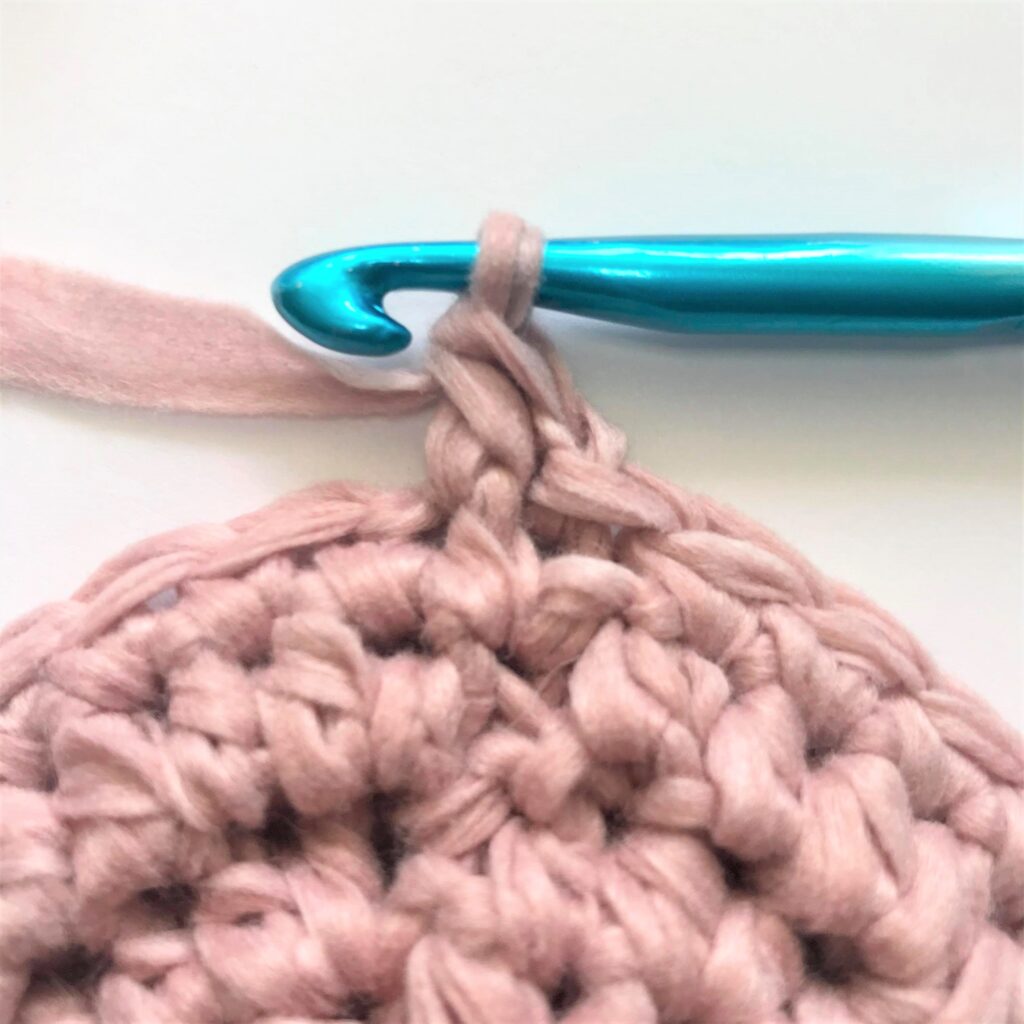
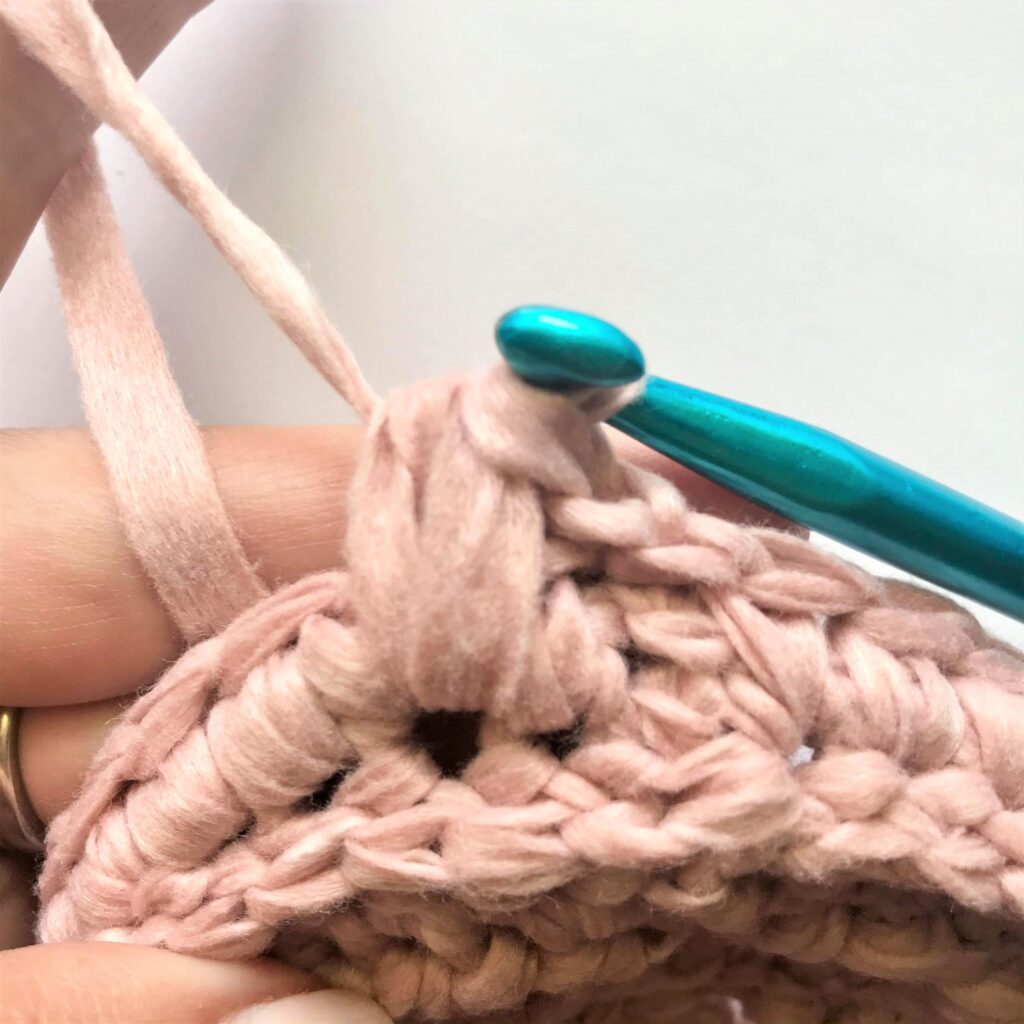
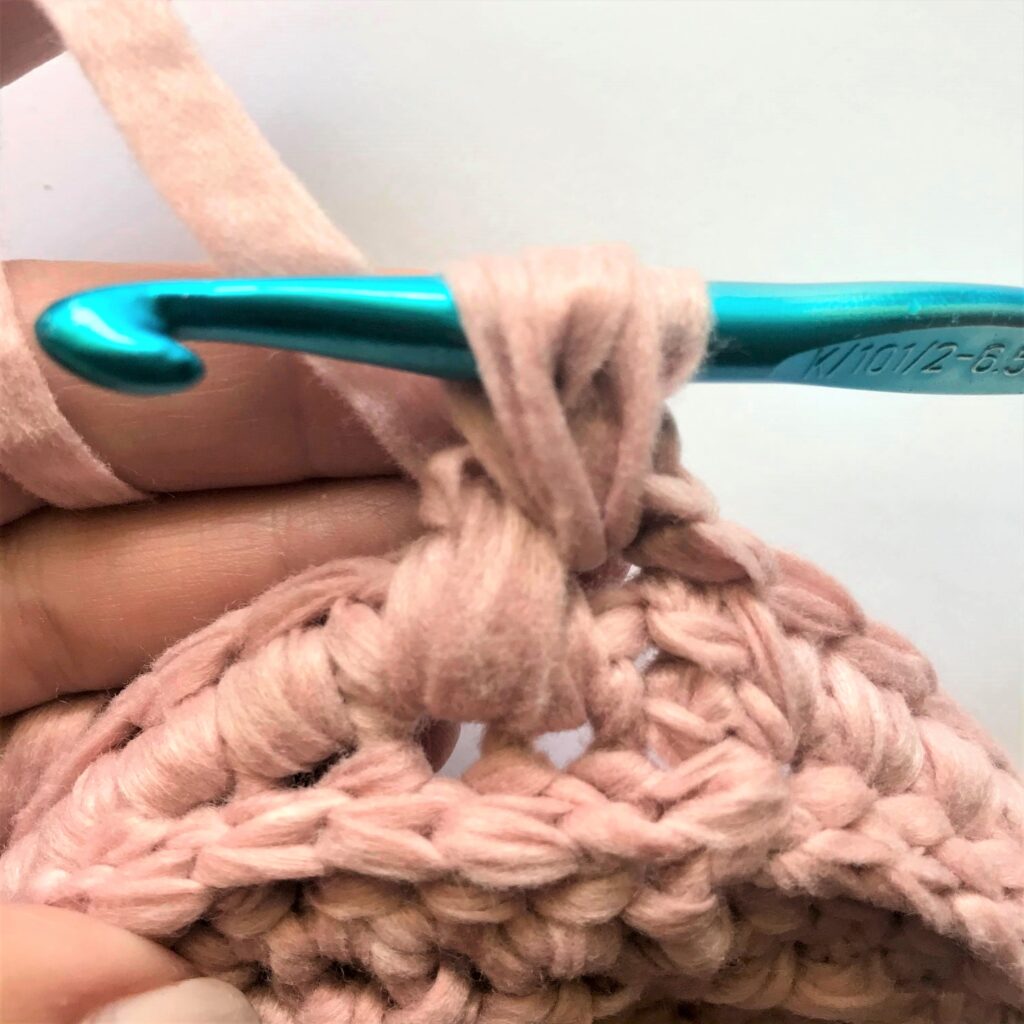
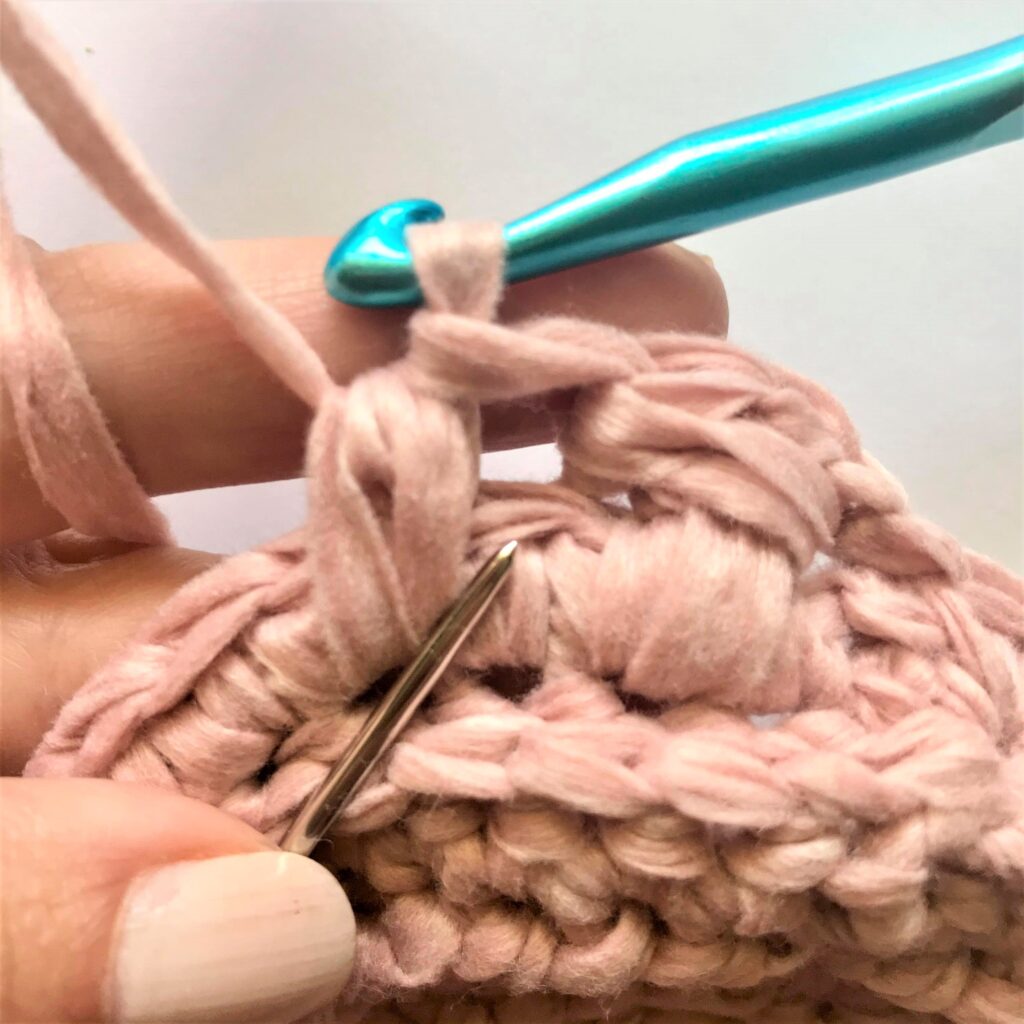
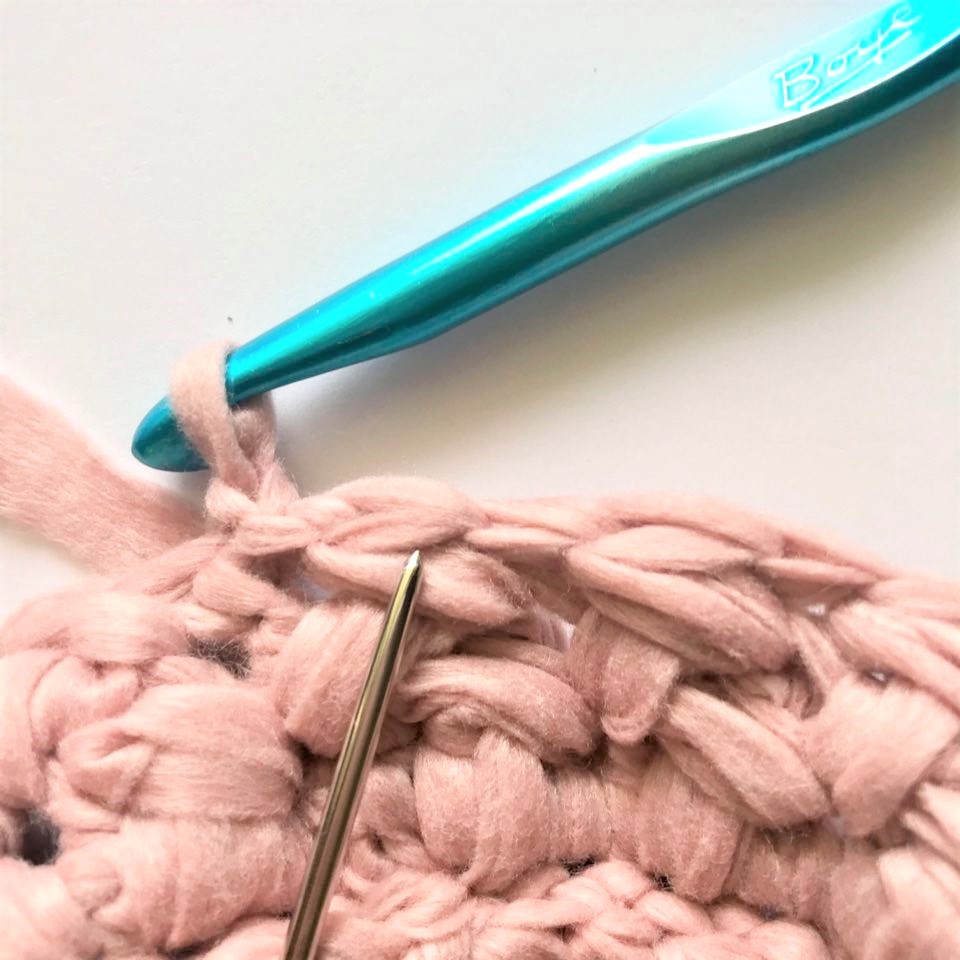
The Woven Stitch / Side of Basket
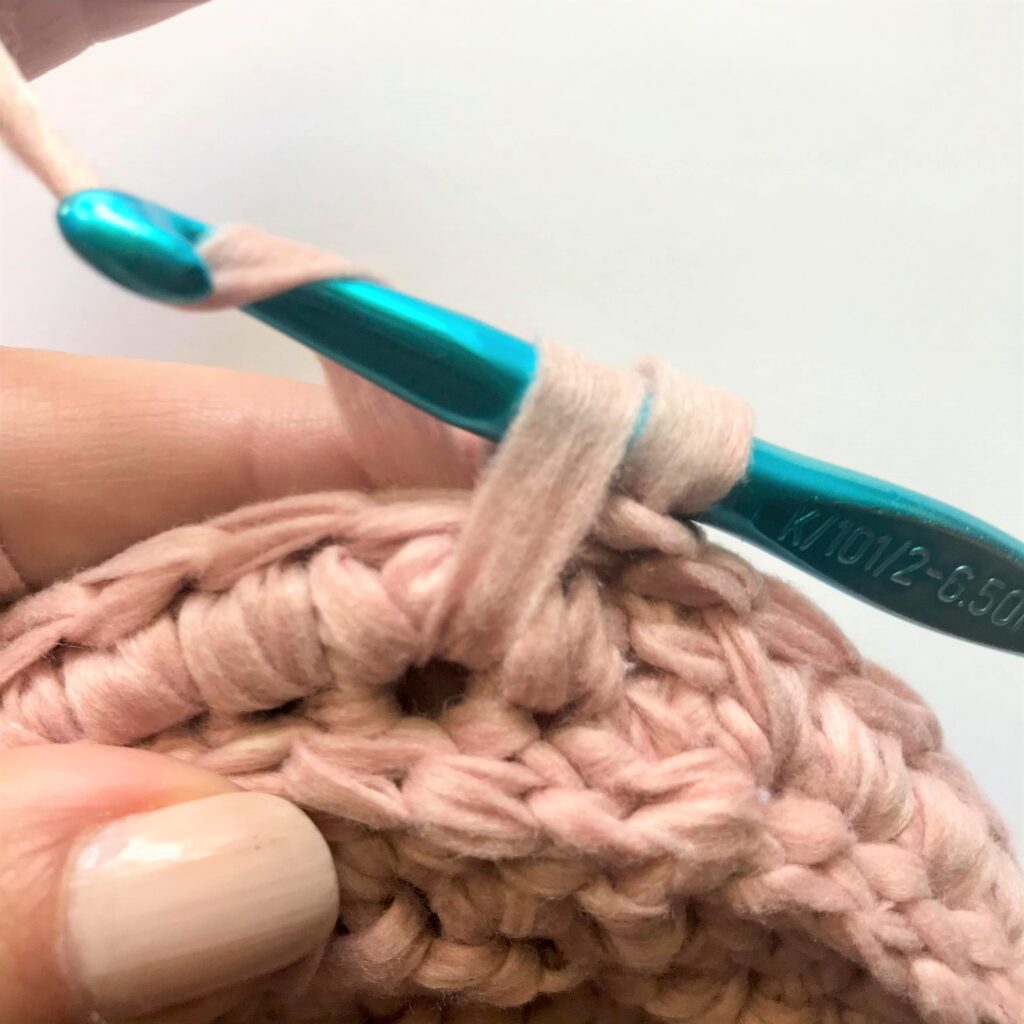
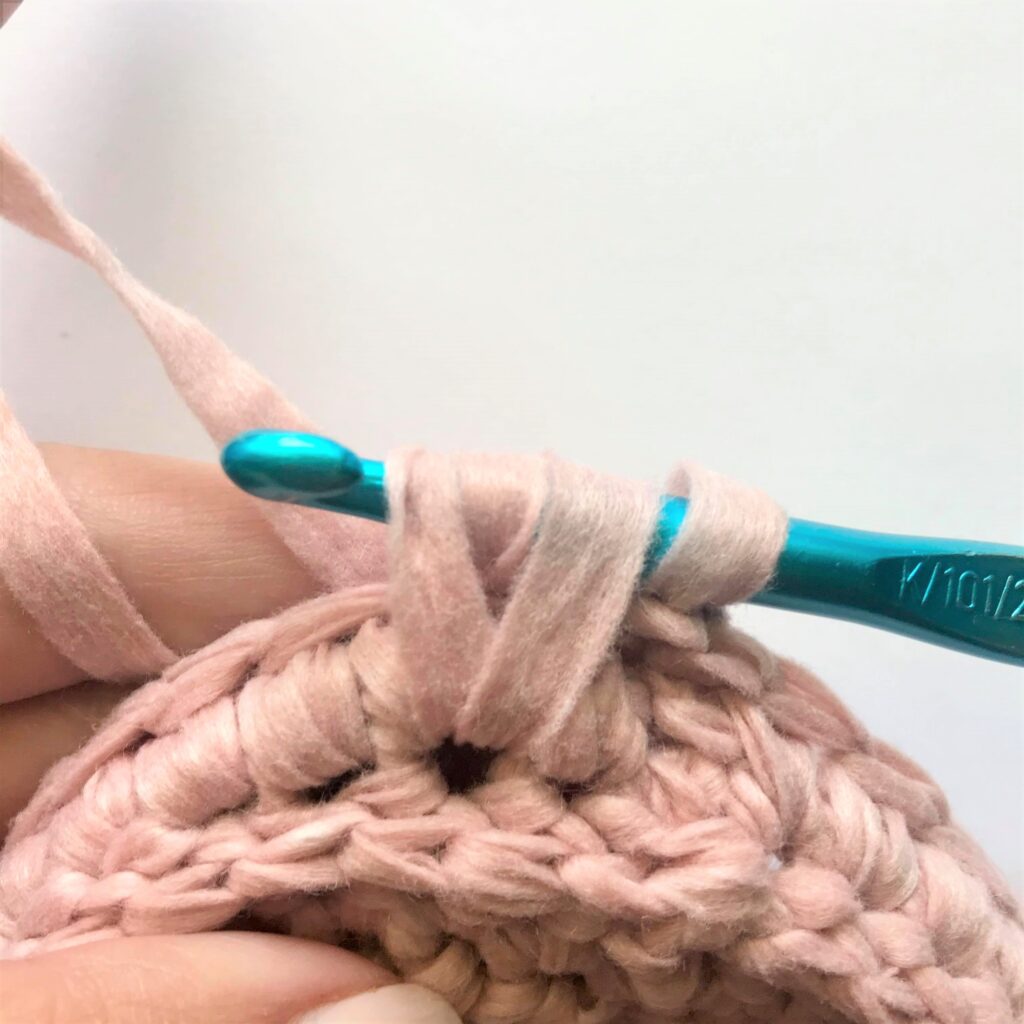
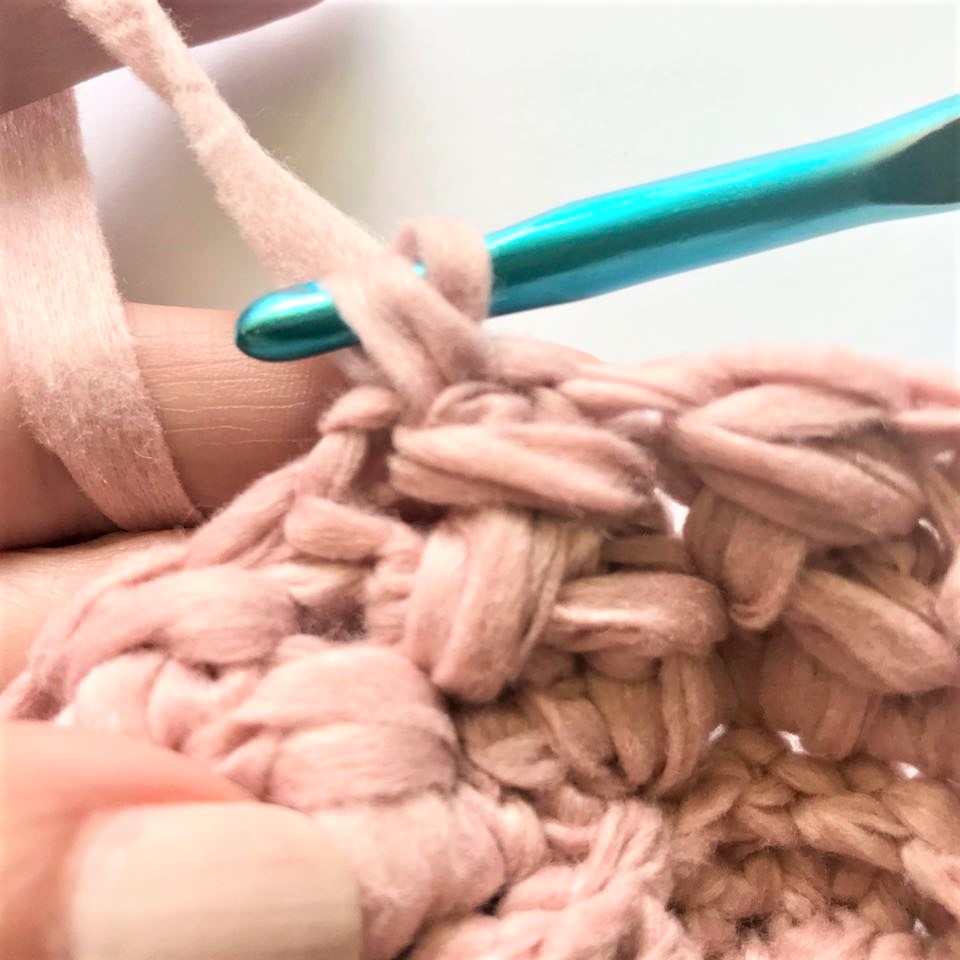
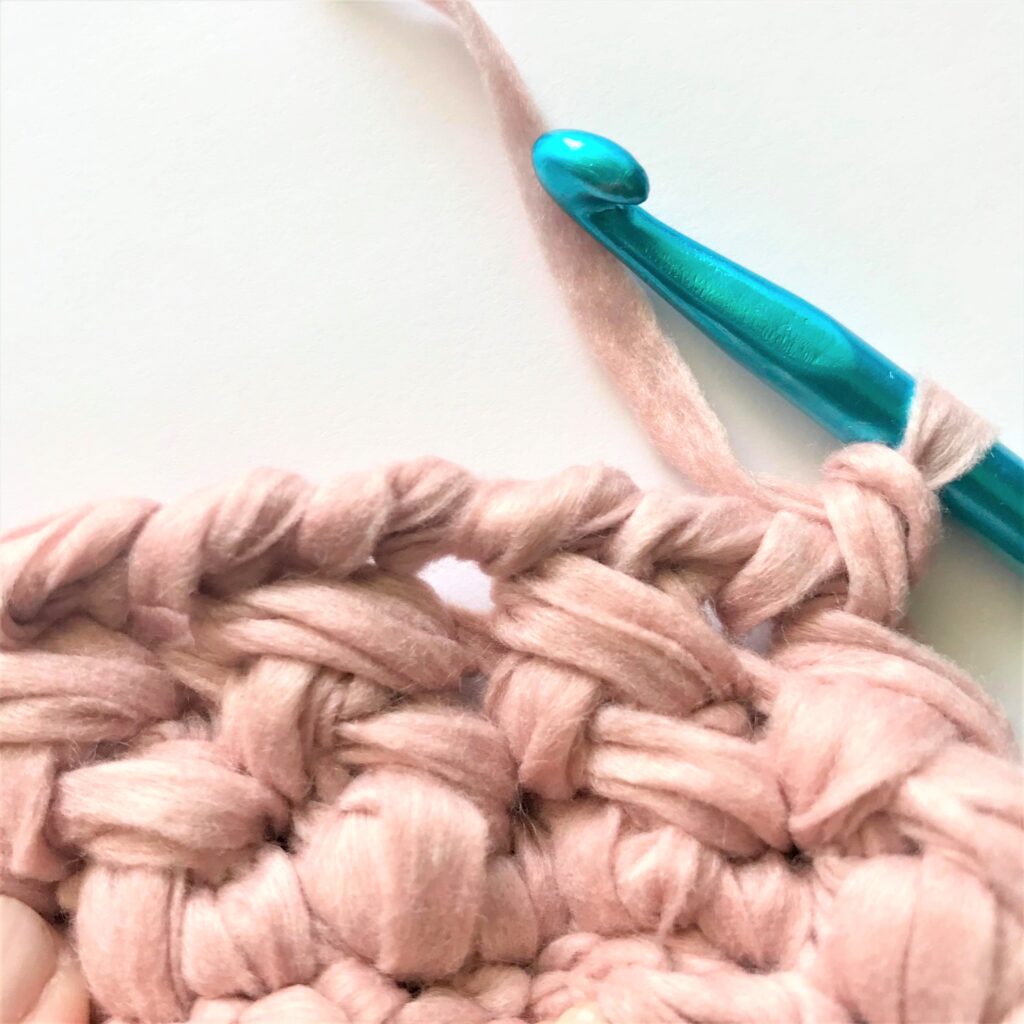
R4: Ch 1, skip first st, in next st work 1 row below [insert hook, pull up a loop, yarn over, insert hook into same st and pull up a loop, yarn over, pull through all 4 loops on hook], working into the skipped st of current row repeat [], {skip next st, in next st work 1 row below repeat [], working in the skipped st of the current row repeat []}, repeat {} around, join (see photo tutorial below).
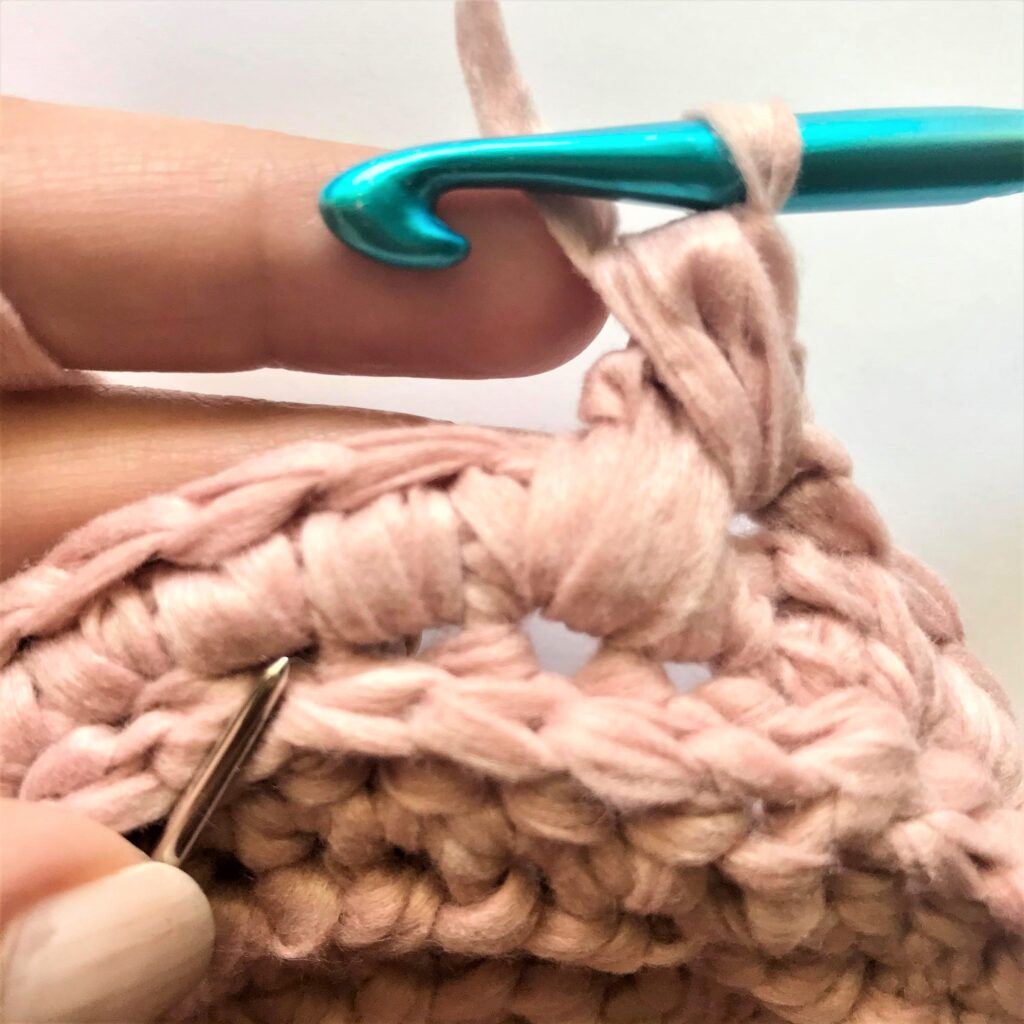
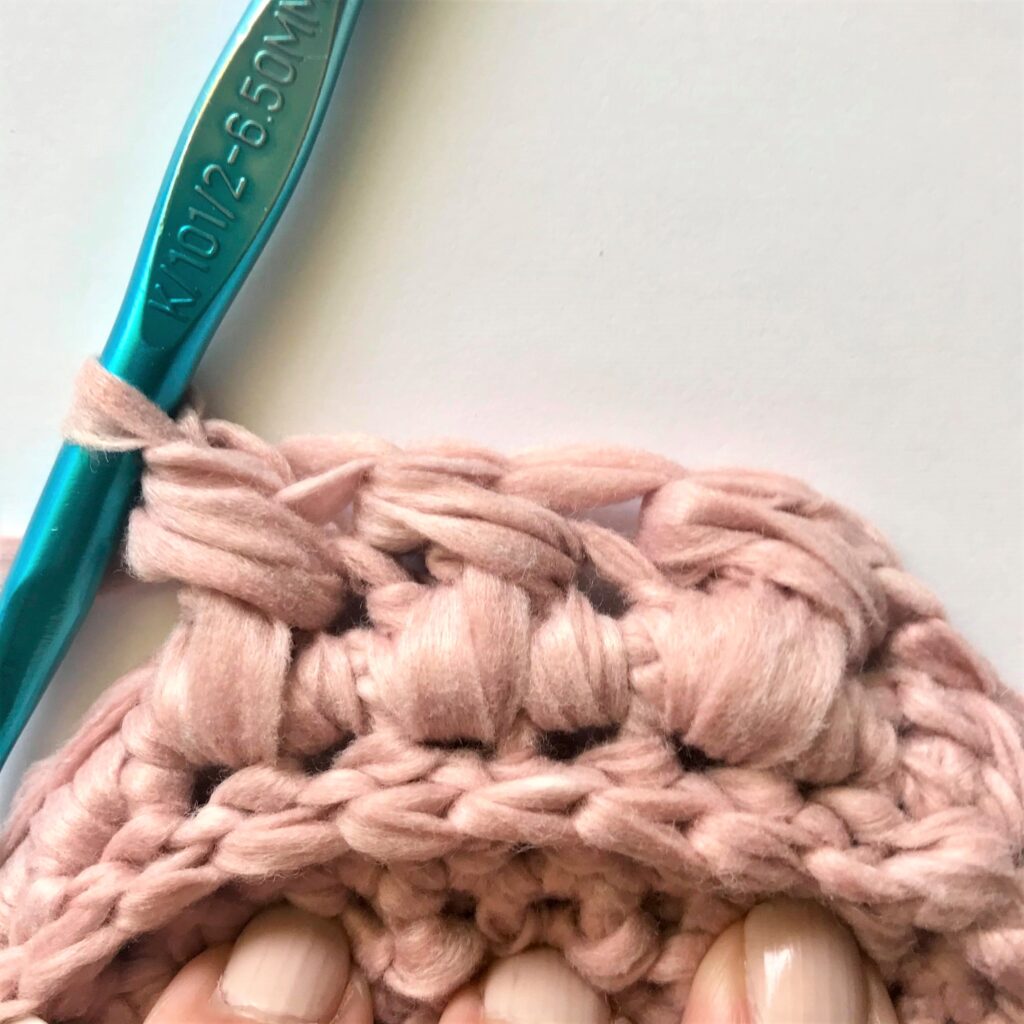
Repeat R4 to desired height – I recommend watching the video to see stitch placement. It is much easier to show than try to explain. Video is further up in the blog post.
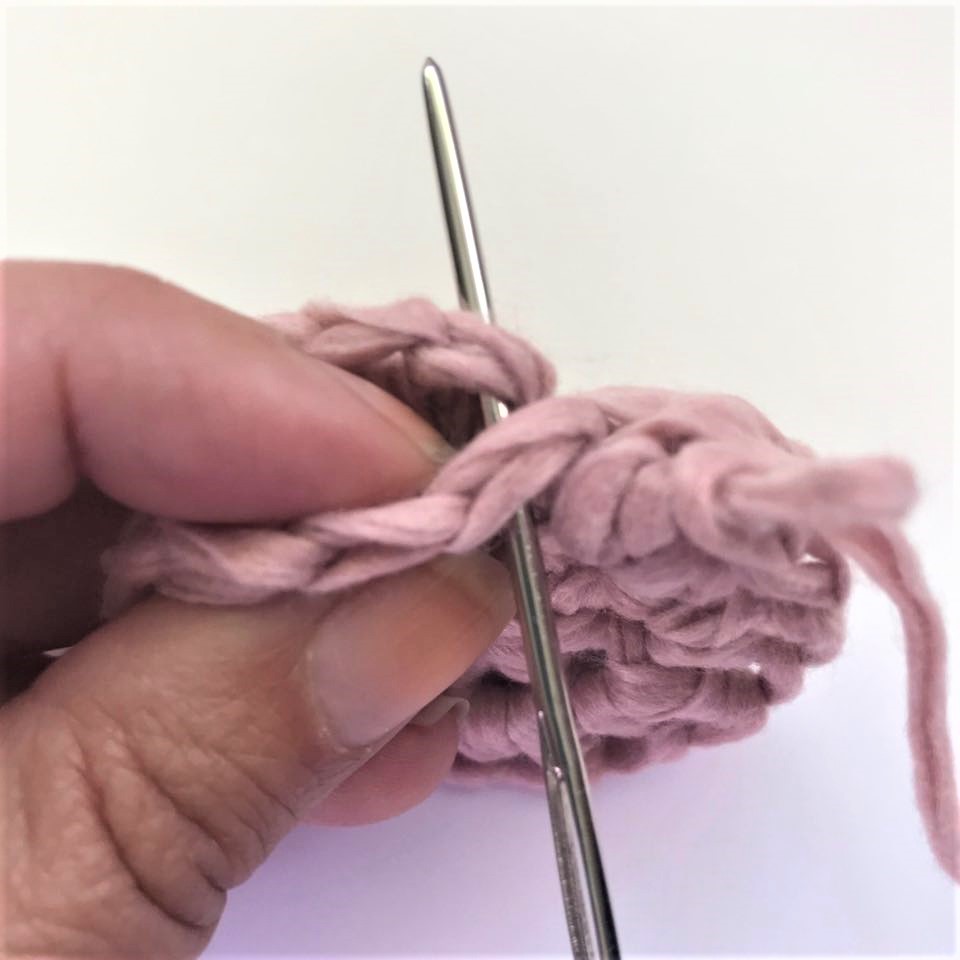
A Rolled Finished Edge
Once you finish the sides of your basket it is nice to have an easy and clean edge. I love the rolled look of the last round. It helps create a clean and professional edge that doesn’t take away from the beautiful stitching throughout the design.
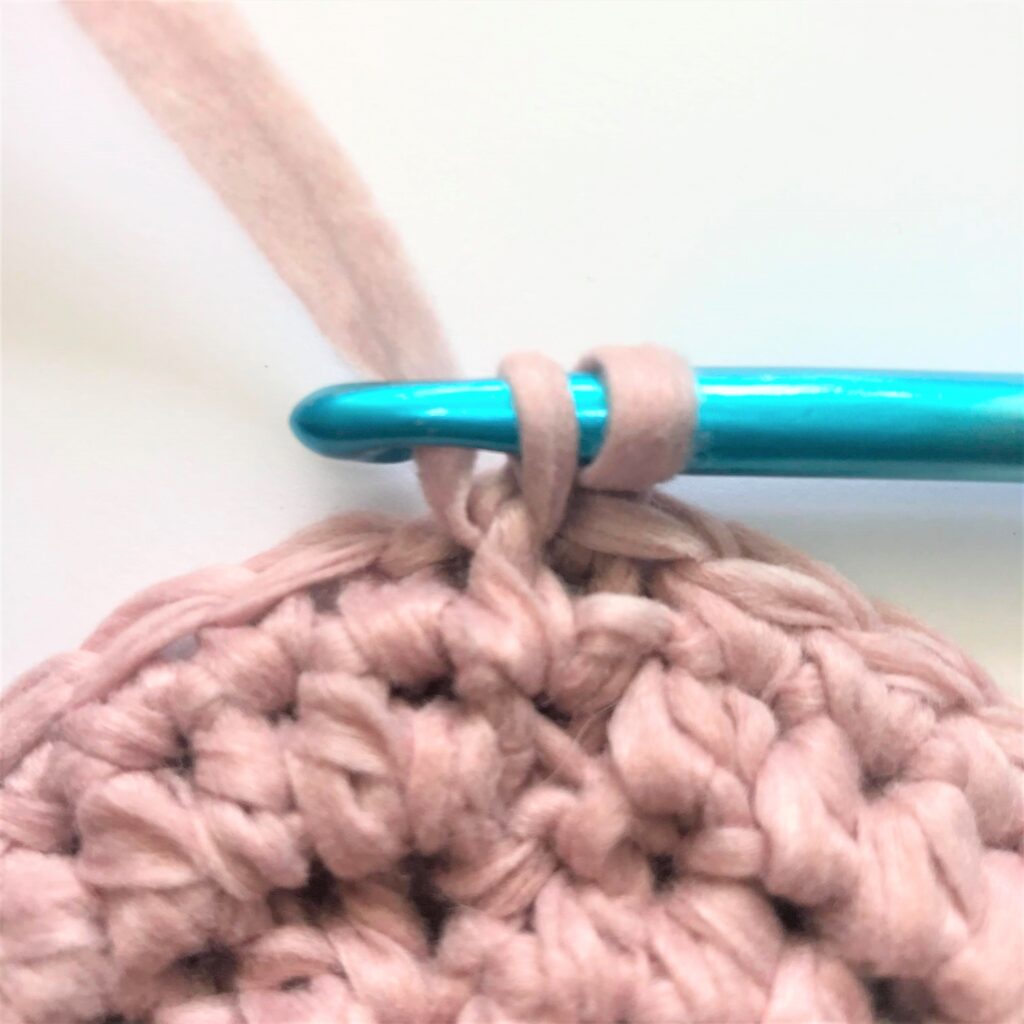
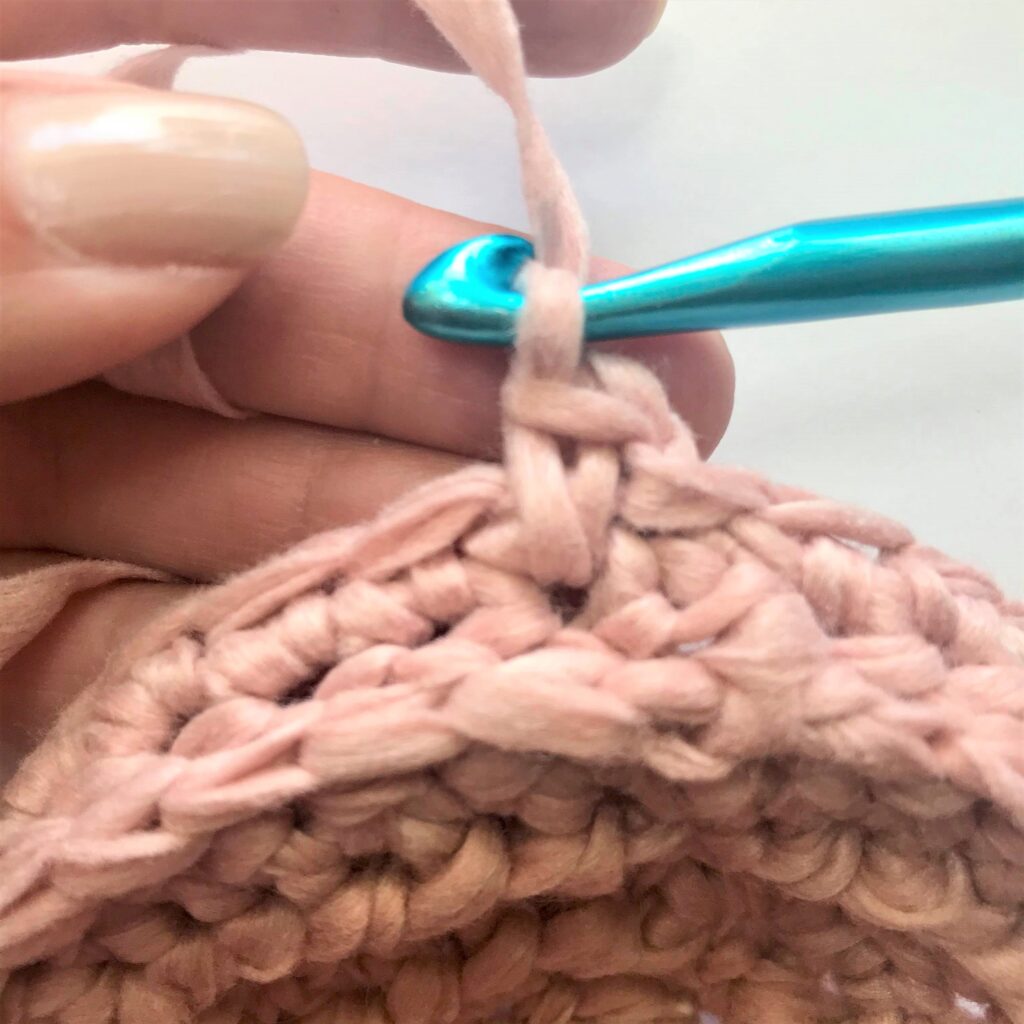
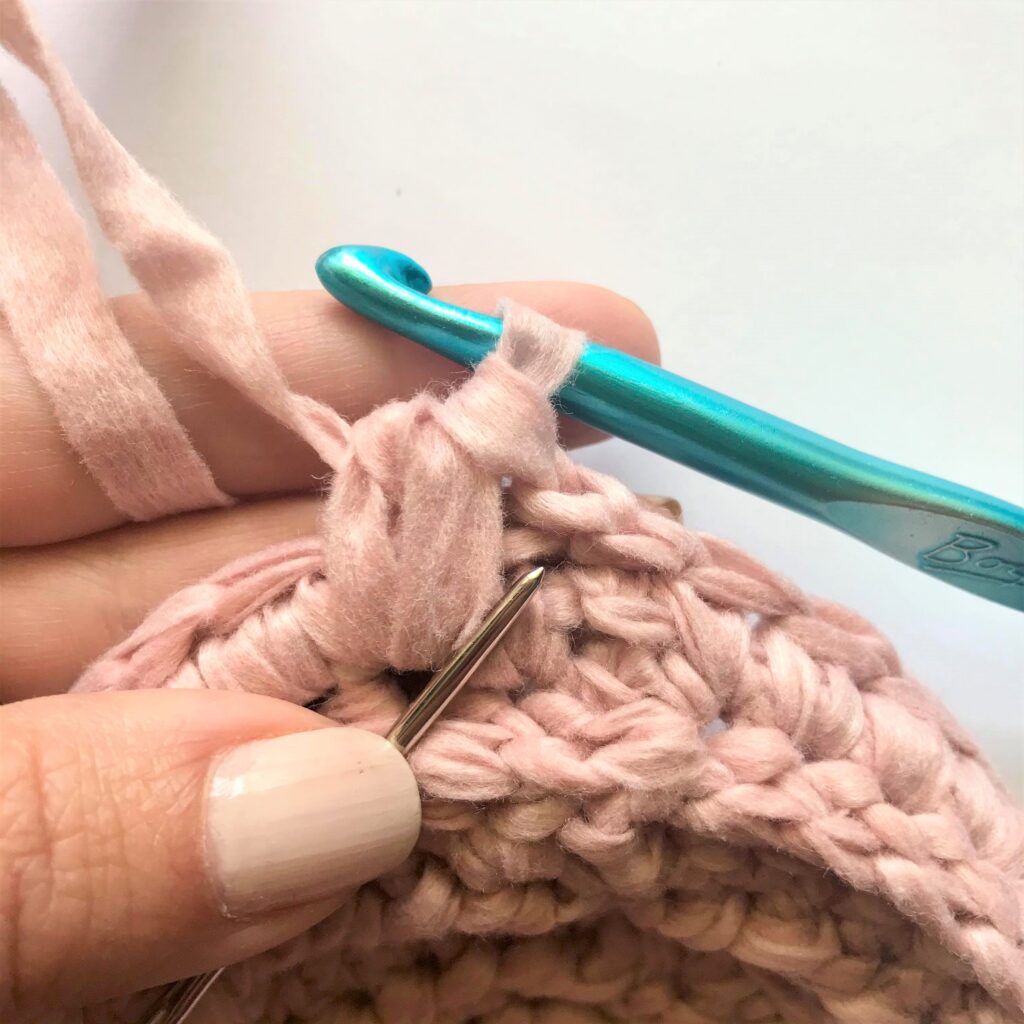
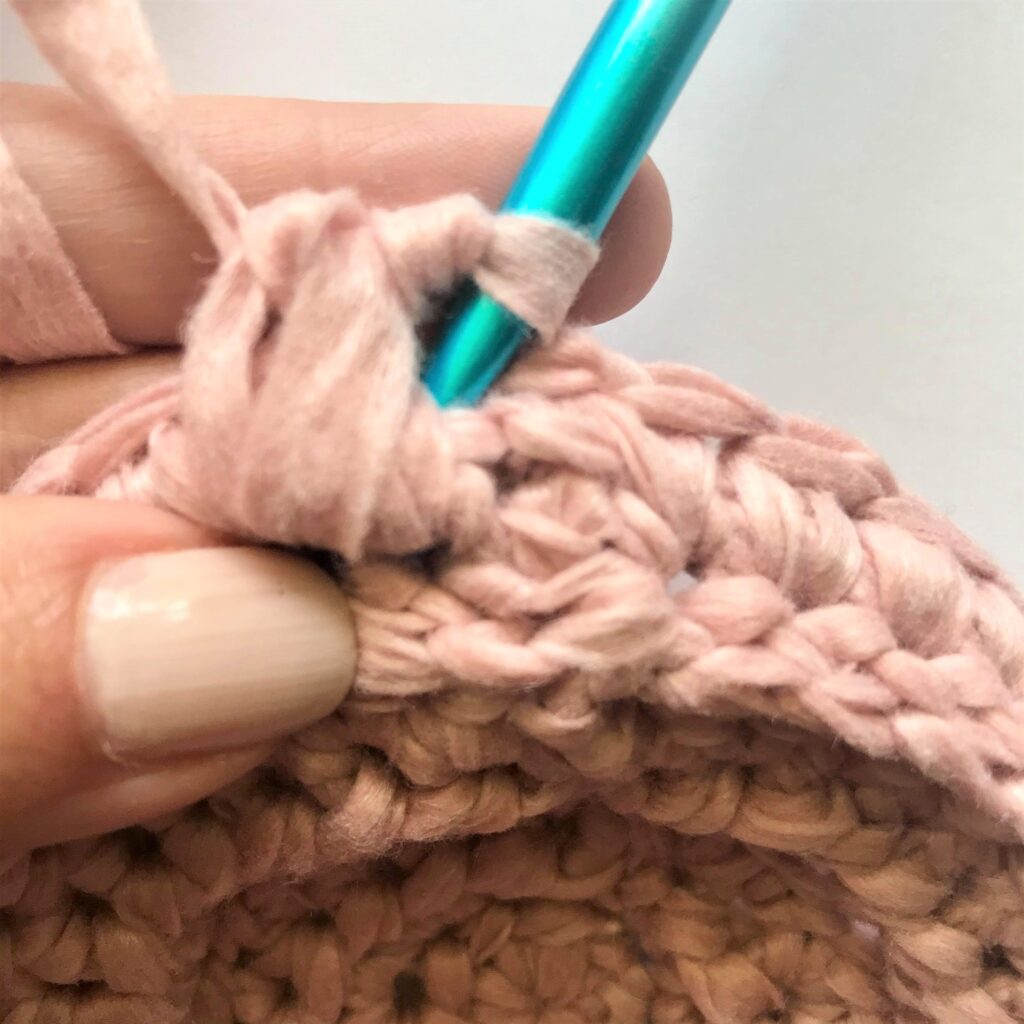
R1: Ch 1,reverse sc (crab st) in each st around, fasten off and weave in all ends.
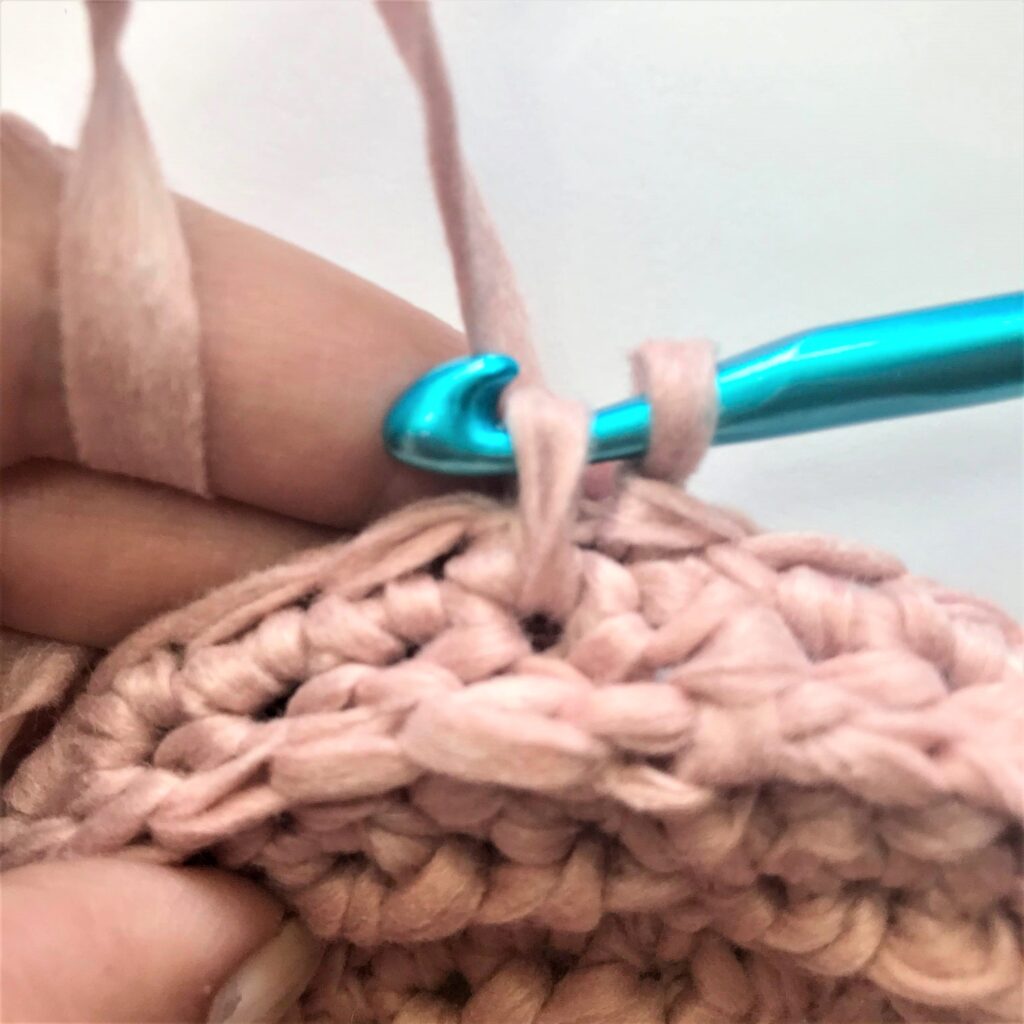
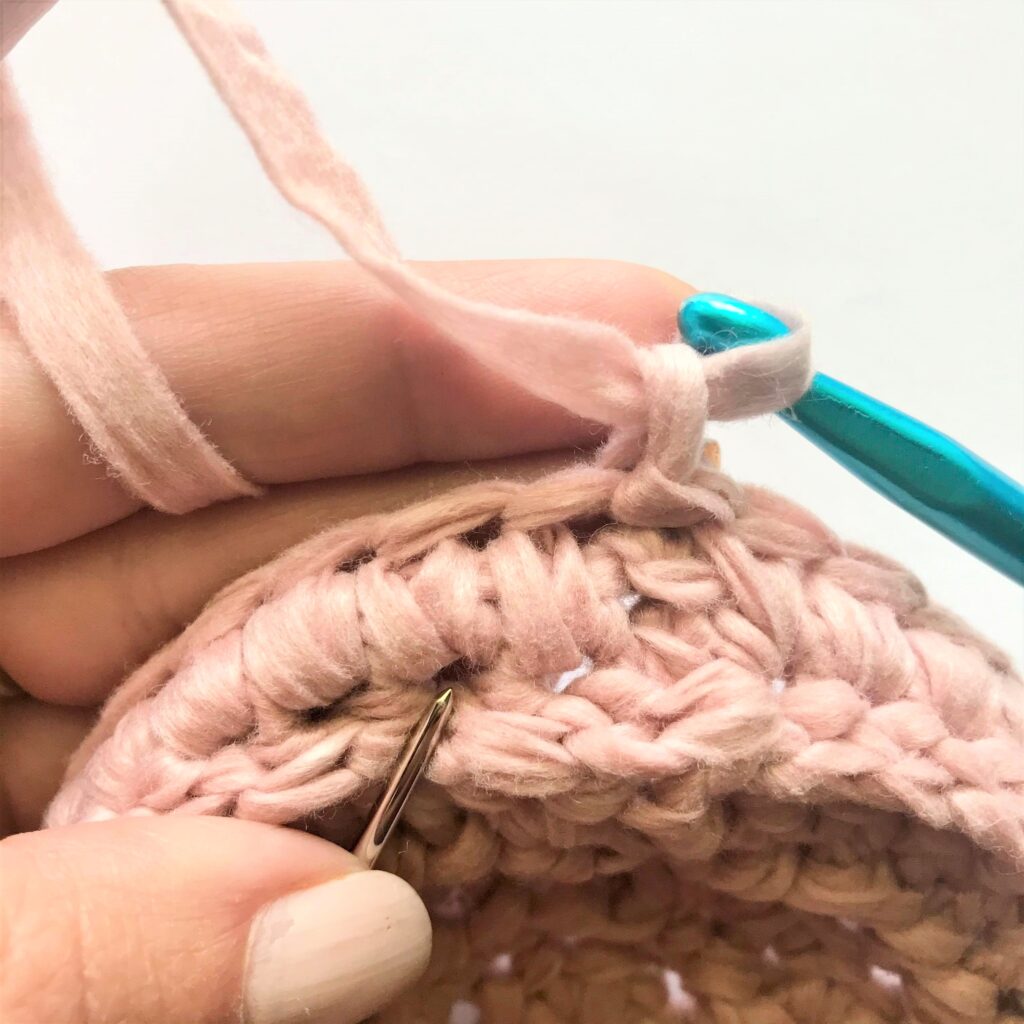
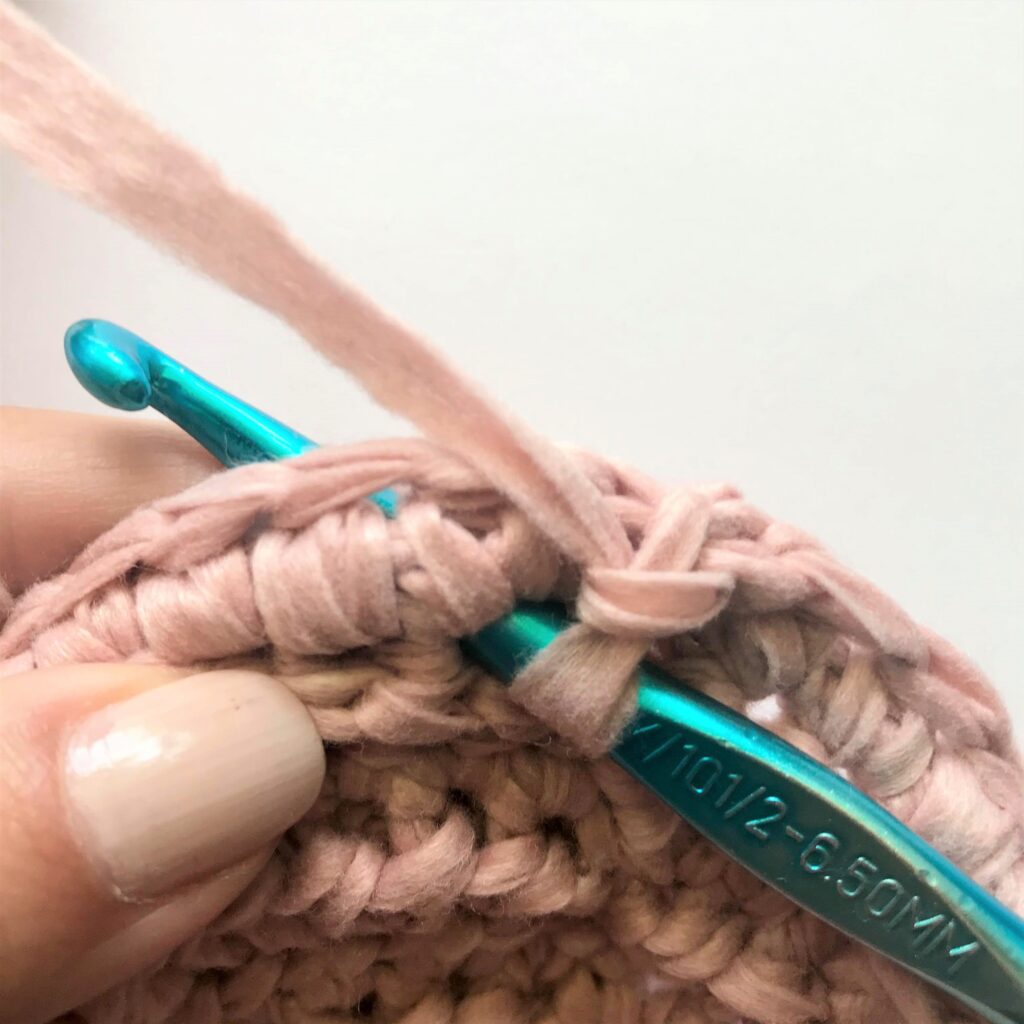
Reverse Single Crochet Tutorial: You will work backwards going from left to right. Insert hook into 1st st (image 1 & 2), pull up a loop (image 3), you now have 2 loops on your hook.Yarn over and pull through both loop on hook to complete your first reverse sc (image 4), insert your hook into the next st to your right, remember you are working backwards (image 5-see where needle is pointing), repeat in each st (image 6).
Other patterns I think You’ll like
- Free Simple Basket Pattern – click HERE
- Free Coffee Cozy Patterns – click HERE
- Free Hot Pad & Scrubby Pattern with Free Gift Tag Printable – click HERE
For an interactive group of fellow crochet enthusiast, I invite you to come and join my Facebook group.


I love this basket. Can you tell me how to keep it from curling when making bigger?
If it is curling out (kind of like a wave) then you are crocheting too loose, tighten up those stitches. If it is curling in towards the center, you are crocheting too tight and need to relax the stitches slightly. I hope that helps.