
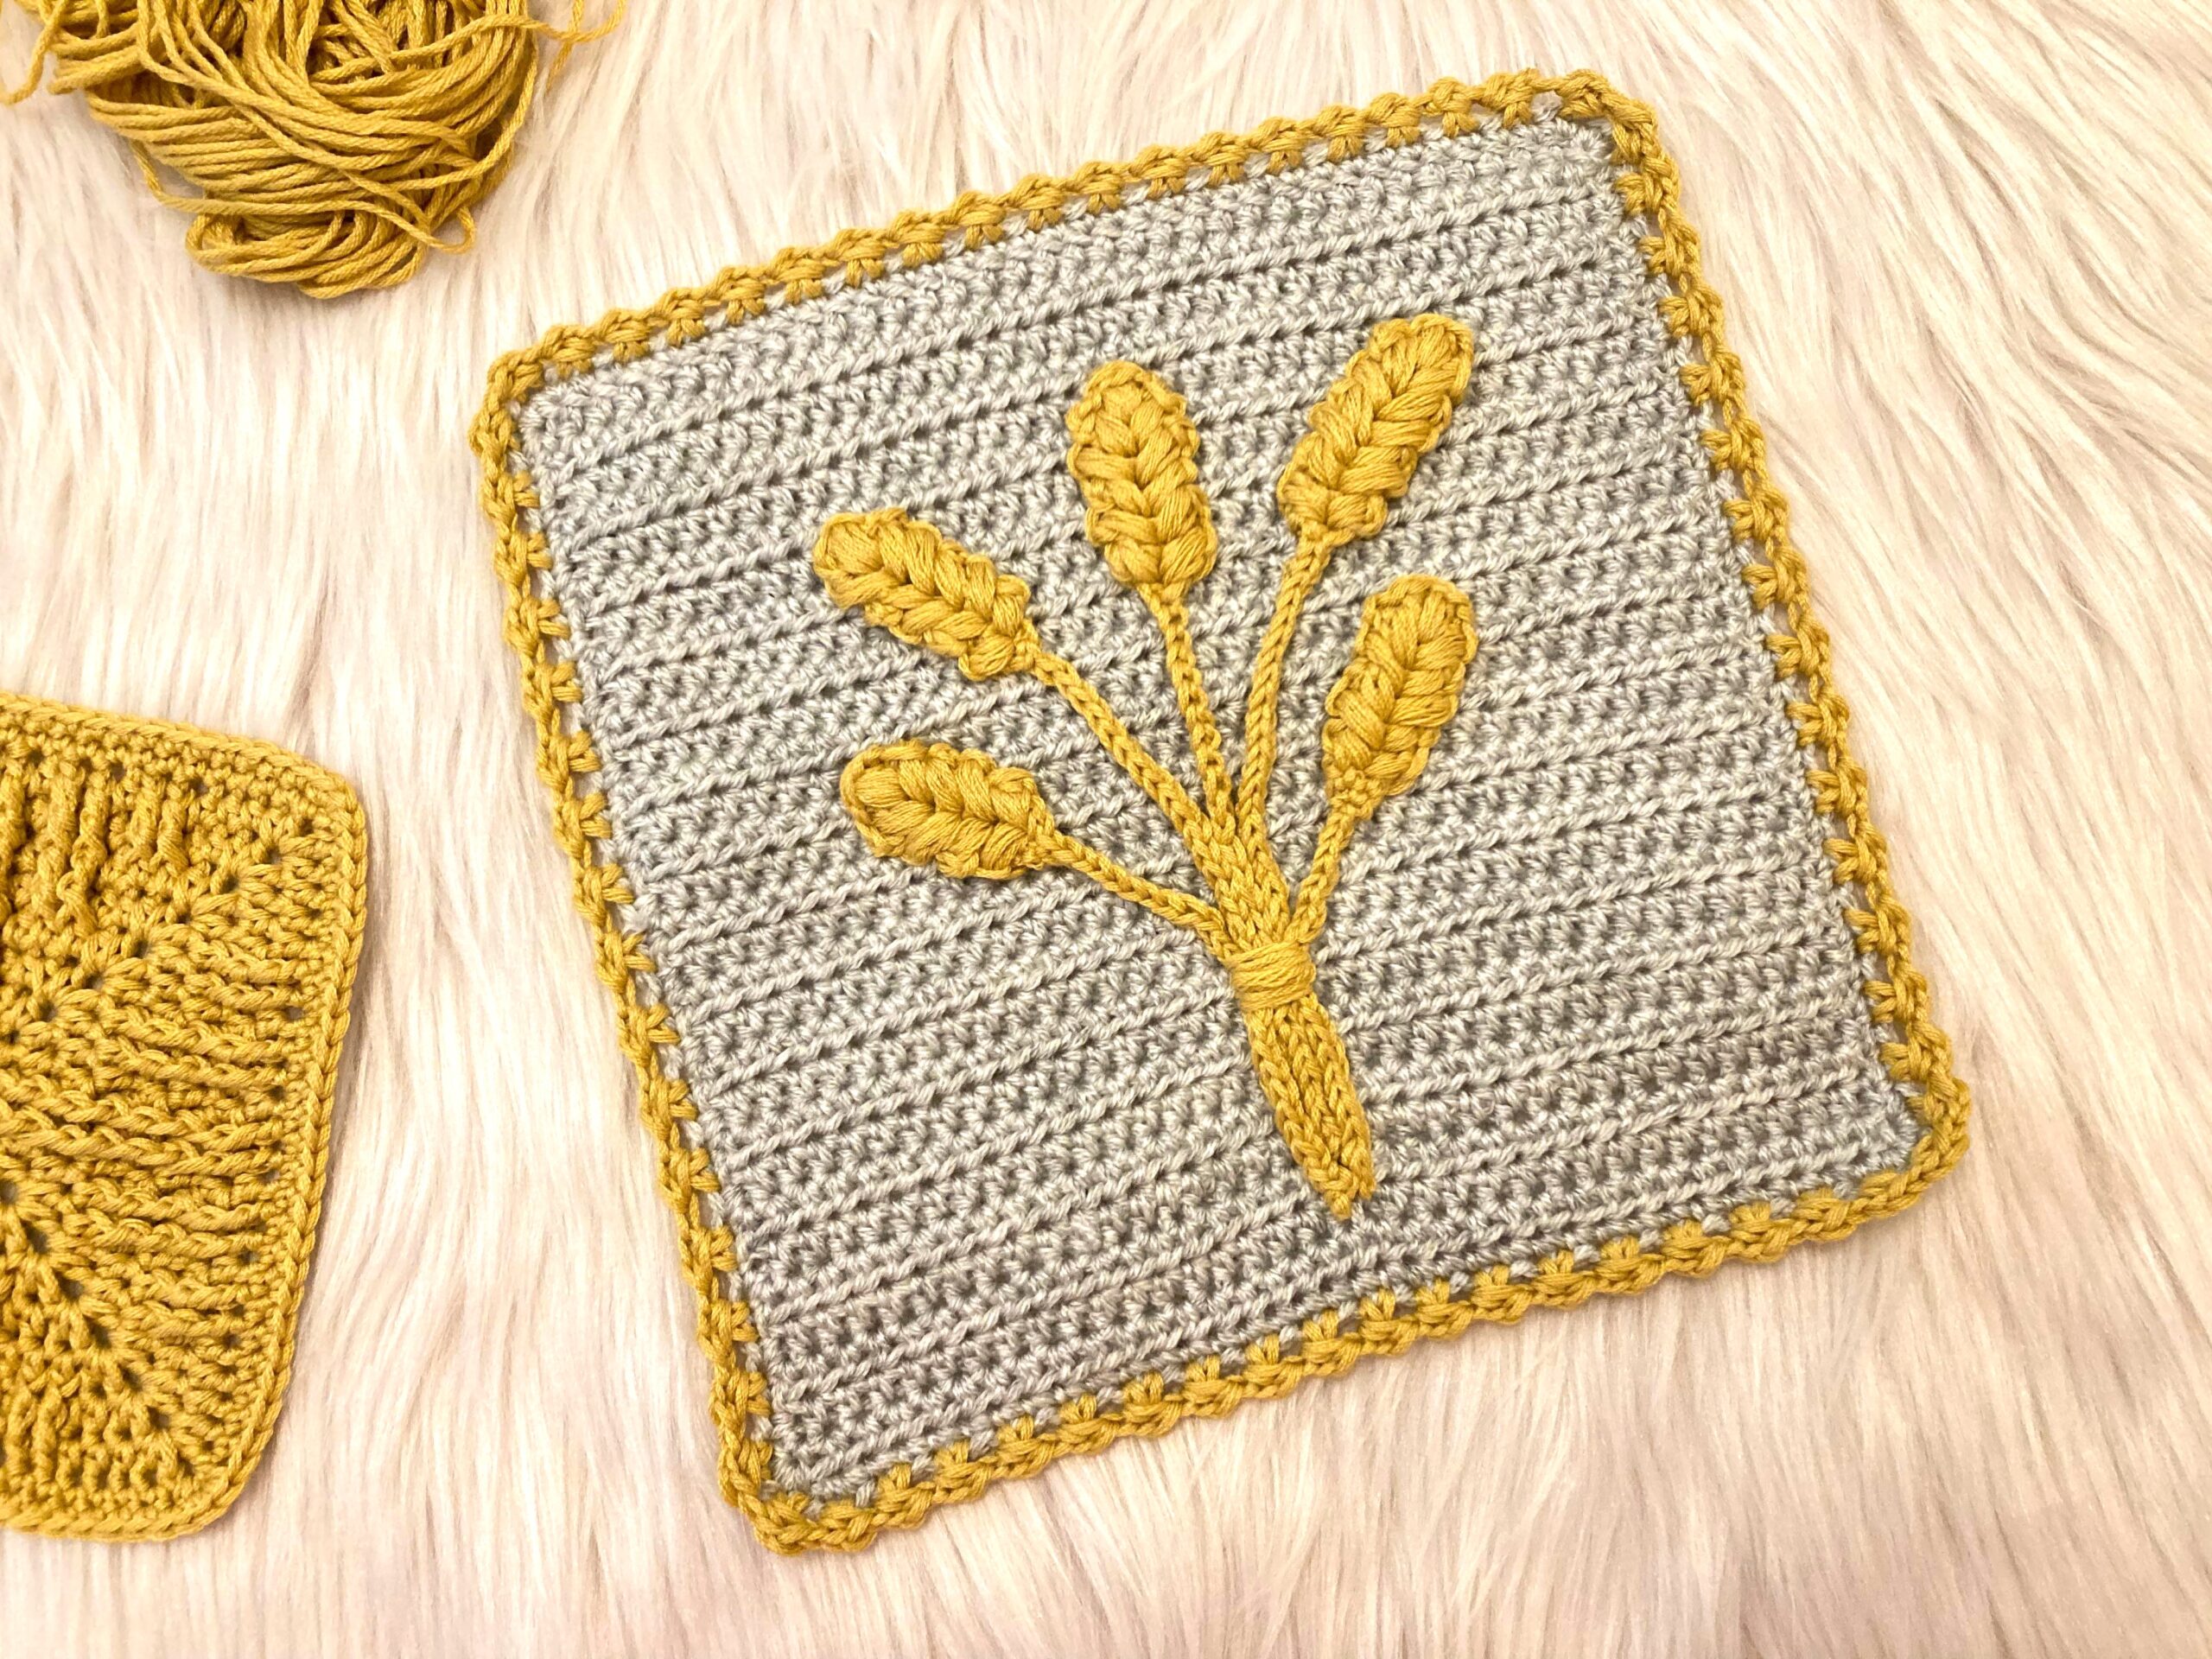
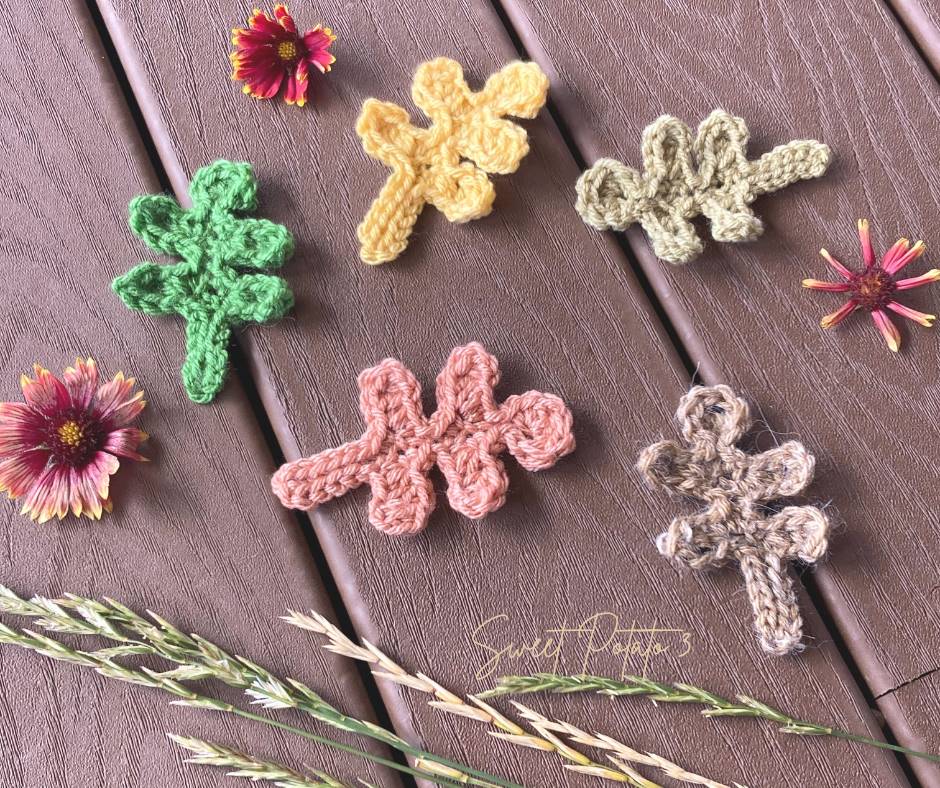
I was working on a blog post about appliques and decided to design a fall applique pattern. As I was searching for inspiration, I realized that all the crochet fall appliques are either Halloween or Thanksgiving themed. I wanted something that would work all season long, so I asked my group of crochet testers. Once of them came up with an idea for a wheat stalk and I knew I had to design one right away.
If you didn’t know this, I grew up on a farm in Southeastern Idaho. My Dad grew potatoes and wheat, so designing some a bunch of wheat stalks was perfect to add to my pattern collection.


This fun design is made with individual wheat stalks so you can make just one or make a group of 3 or 5 to create a little bundle.
This applique can be added to anything crochet to give it a sense of Fall. The first items that pop into my mind are a crochet tote, pillow, table runner, or the ends of a scarf. However, the possibilities are endless. I’d love to hear what you added your applique too, please leave a comment at the end of this blog post or tag me on social media so I can see your creation. My tag on IG and FB is @SweetPotato3Patterns.
Materials to make a wheat stalk:
- 6 yards of Worsted Weight Yarn in a Gold color for each stalk
- Crochet Hook H (5.00 mm) or Crochet Hook G (4.00 mm)
- Measuring Tape, Yarn Needle, Scissors
- Something to crochet the applique onto (pillow, blanket, tote, scarf, anything creative)

Helpful tip: using a rounded tip crochet hook and yarn that does not split easily. This will make crocheting these appliques much easier.
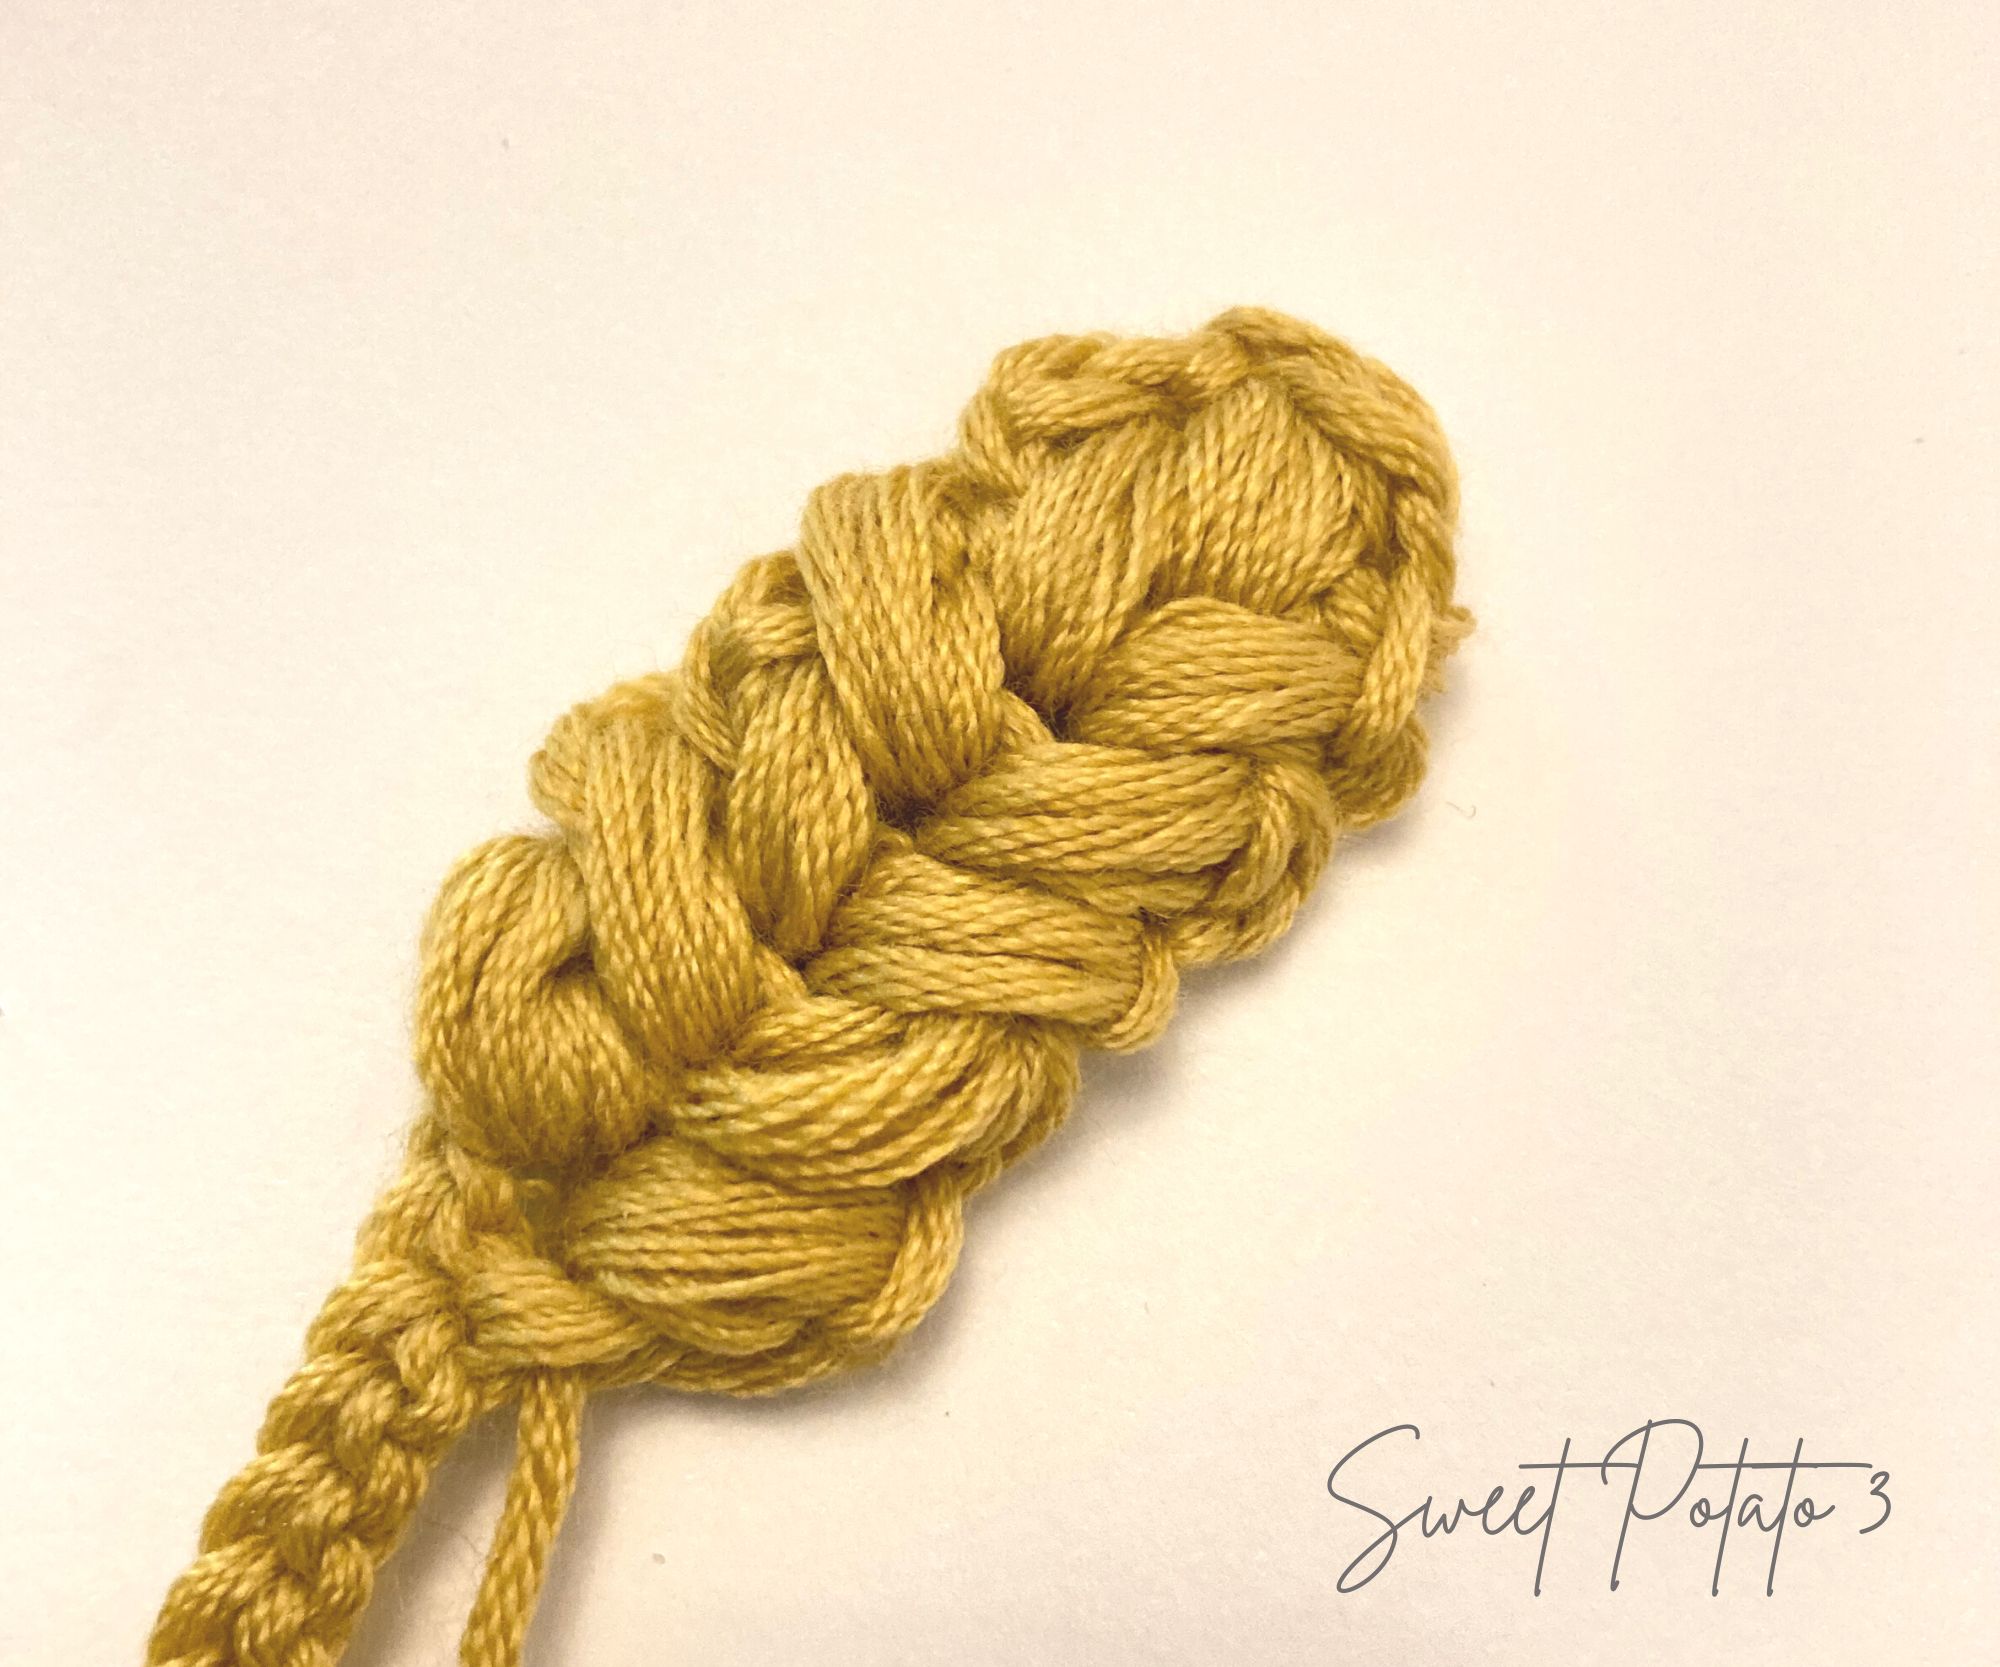
Begin by Crocheting the Stem
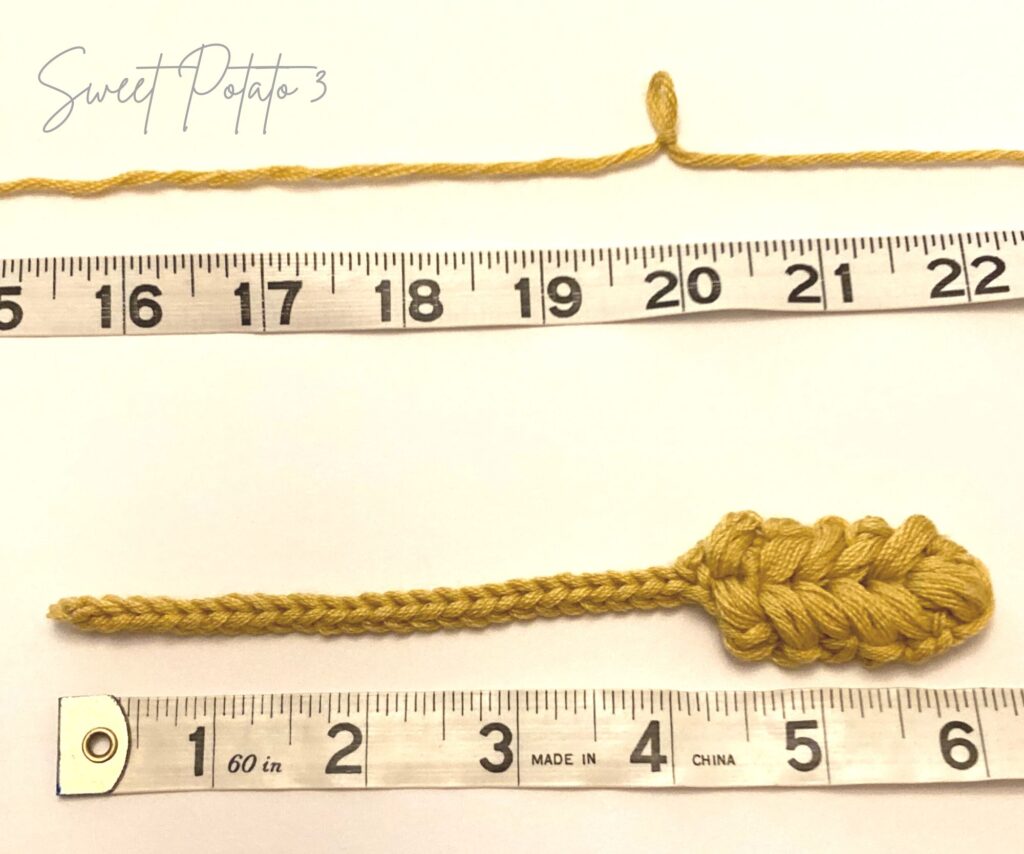
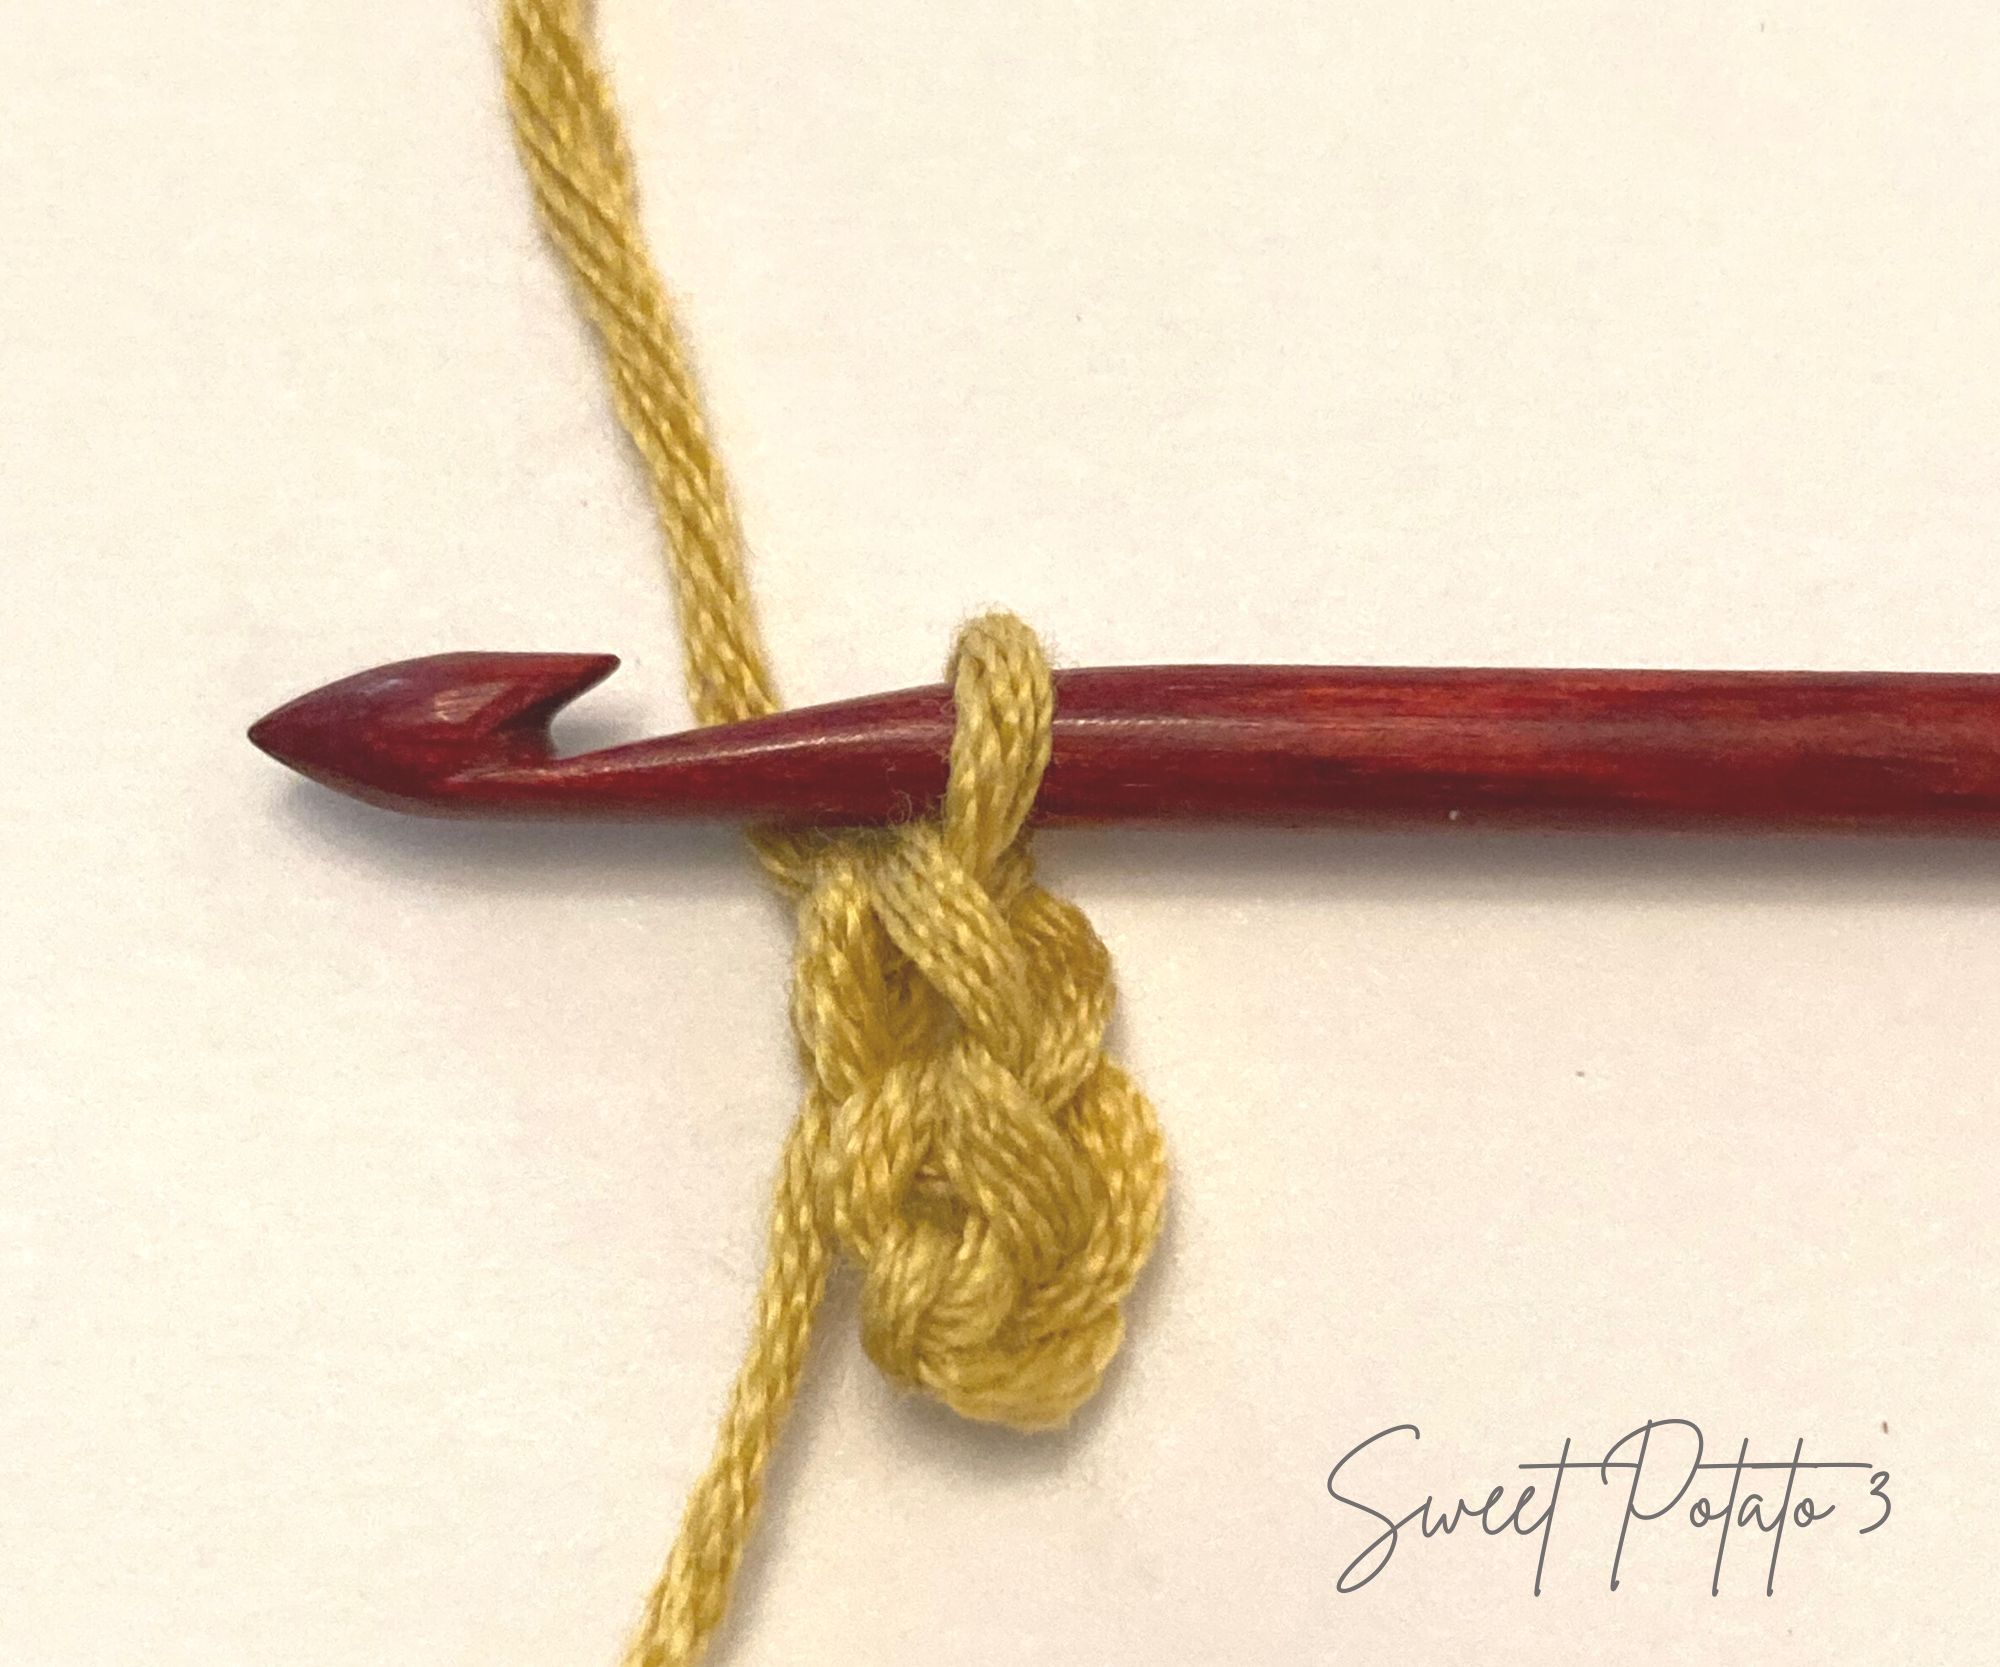
To make the stem of the wheat, you will crochet a simple cord. To begin the stem, you will need to find the right location for your slip knot to begin. Take the length of the stem and times that by five (5). For example, the wheat I want to crochet has a 4-inch stem, so I will take 4 and multiple it by 5 which results in 20 inches. Measure the end of your yarn up 20 inches and tie your beginning slip knot.
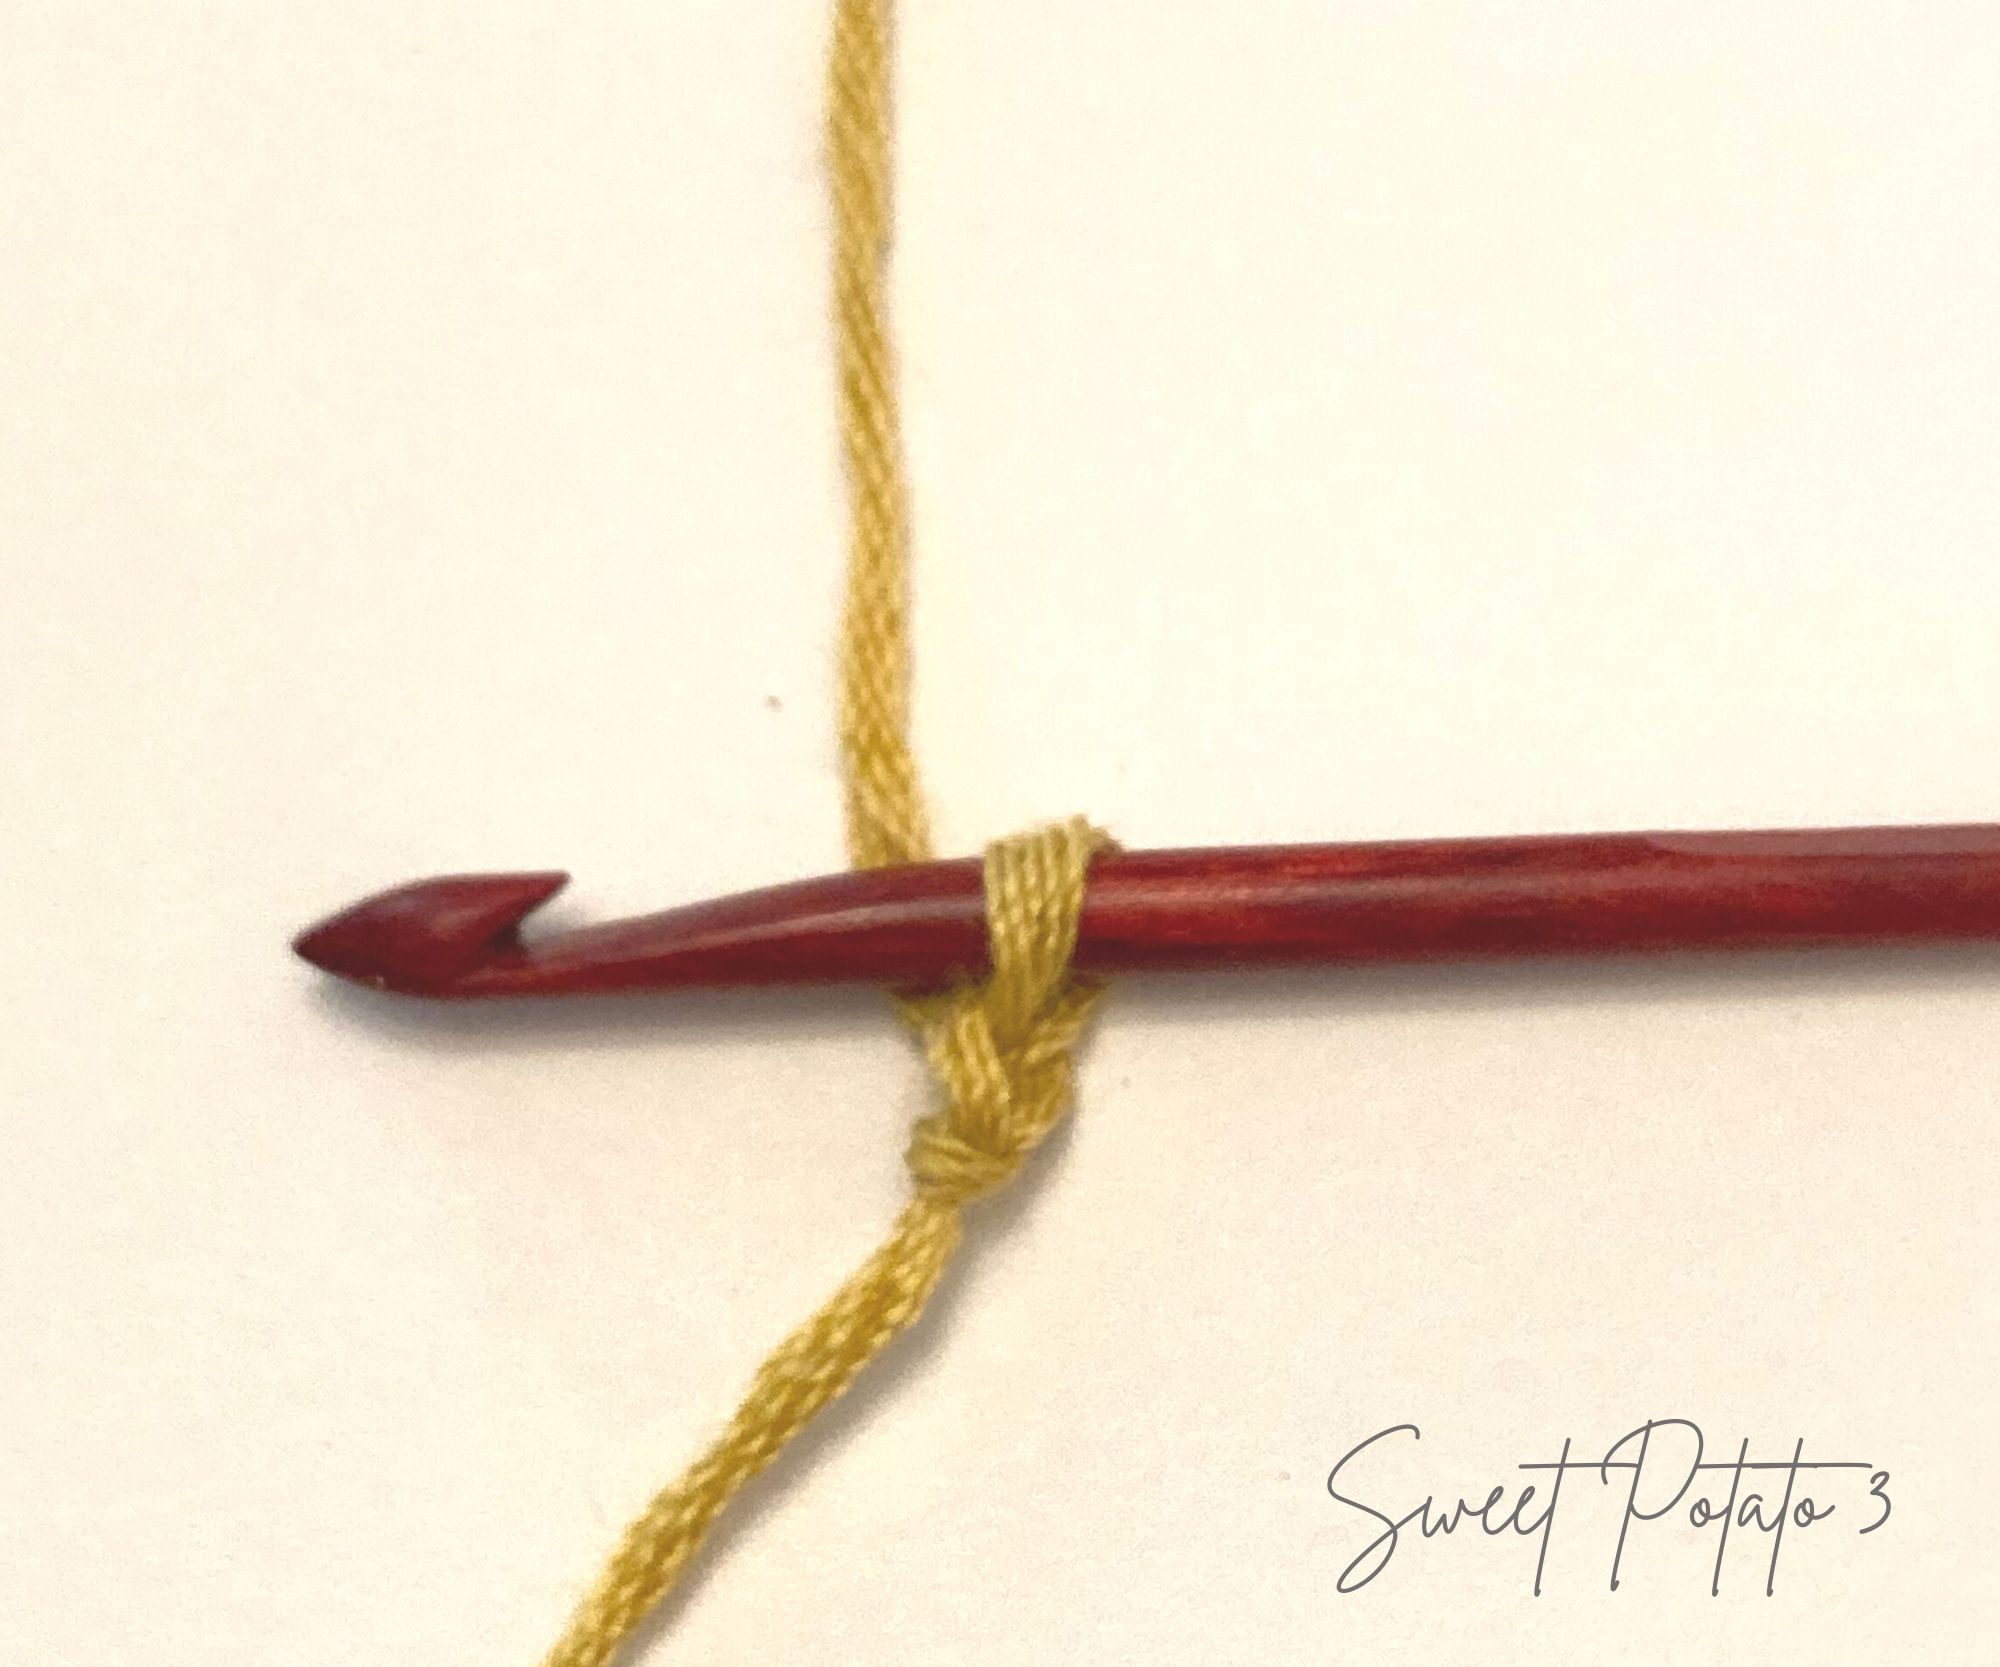
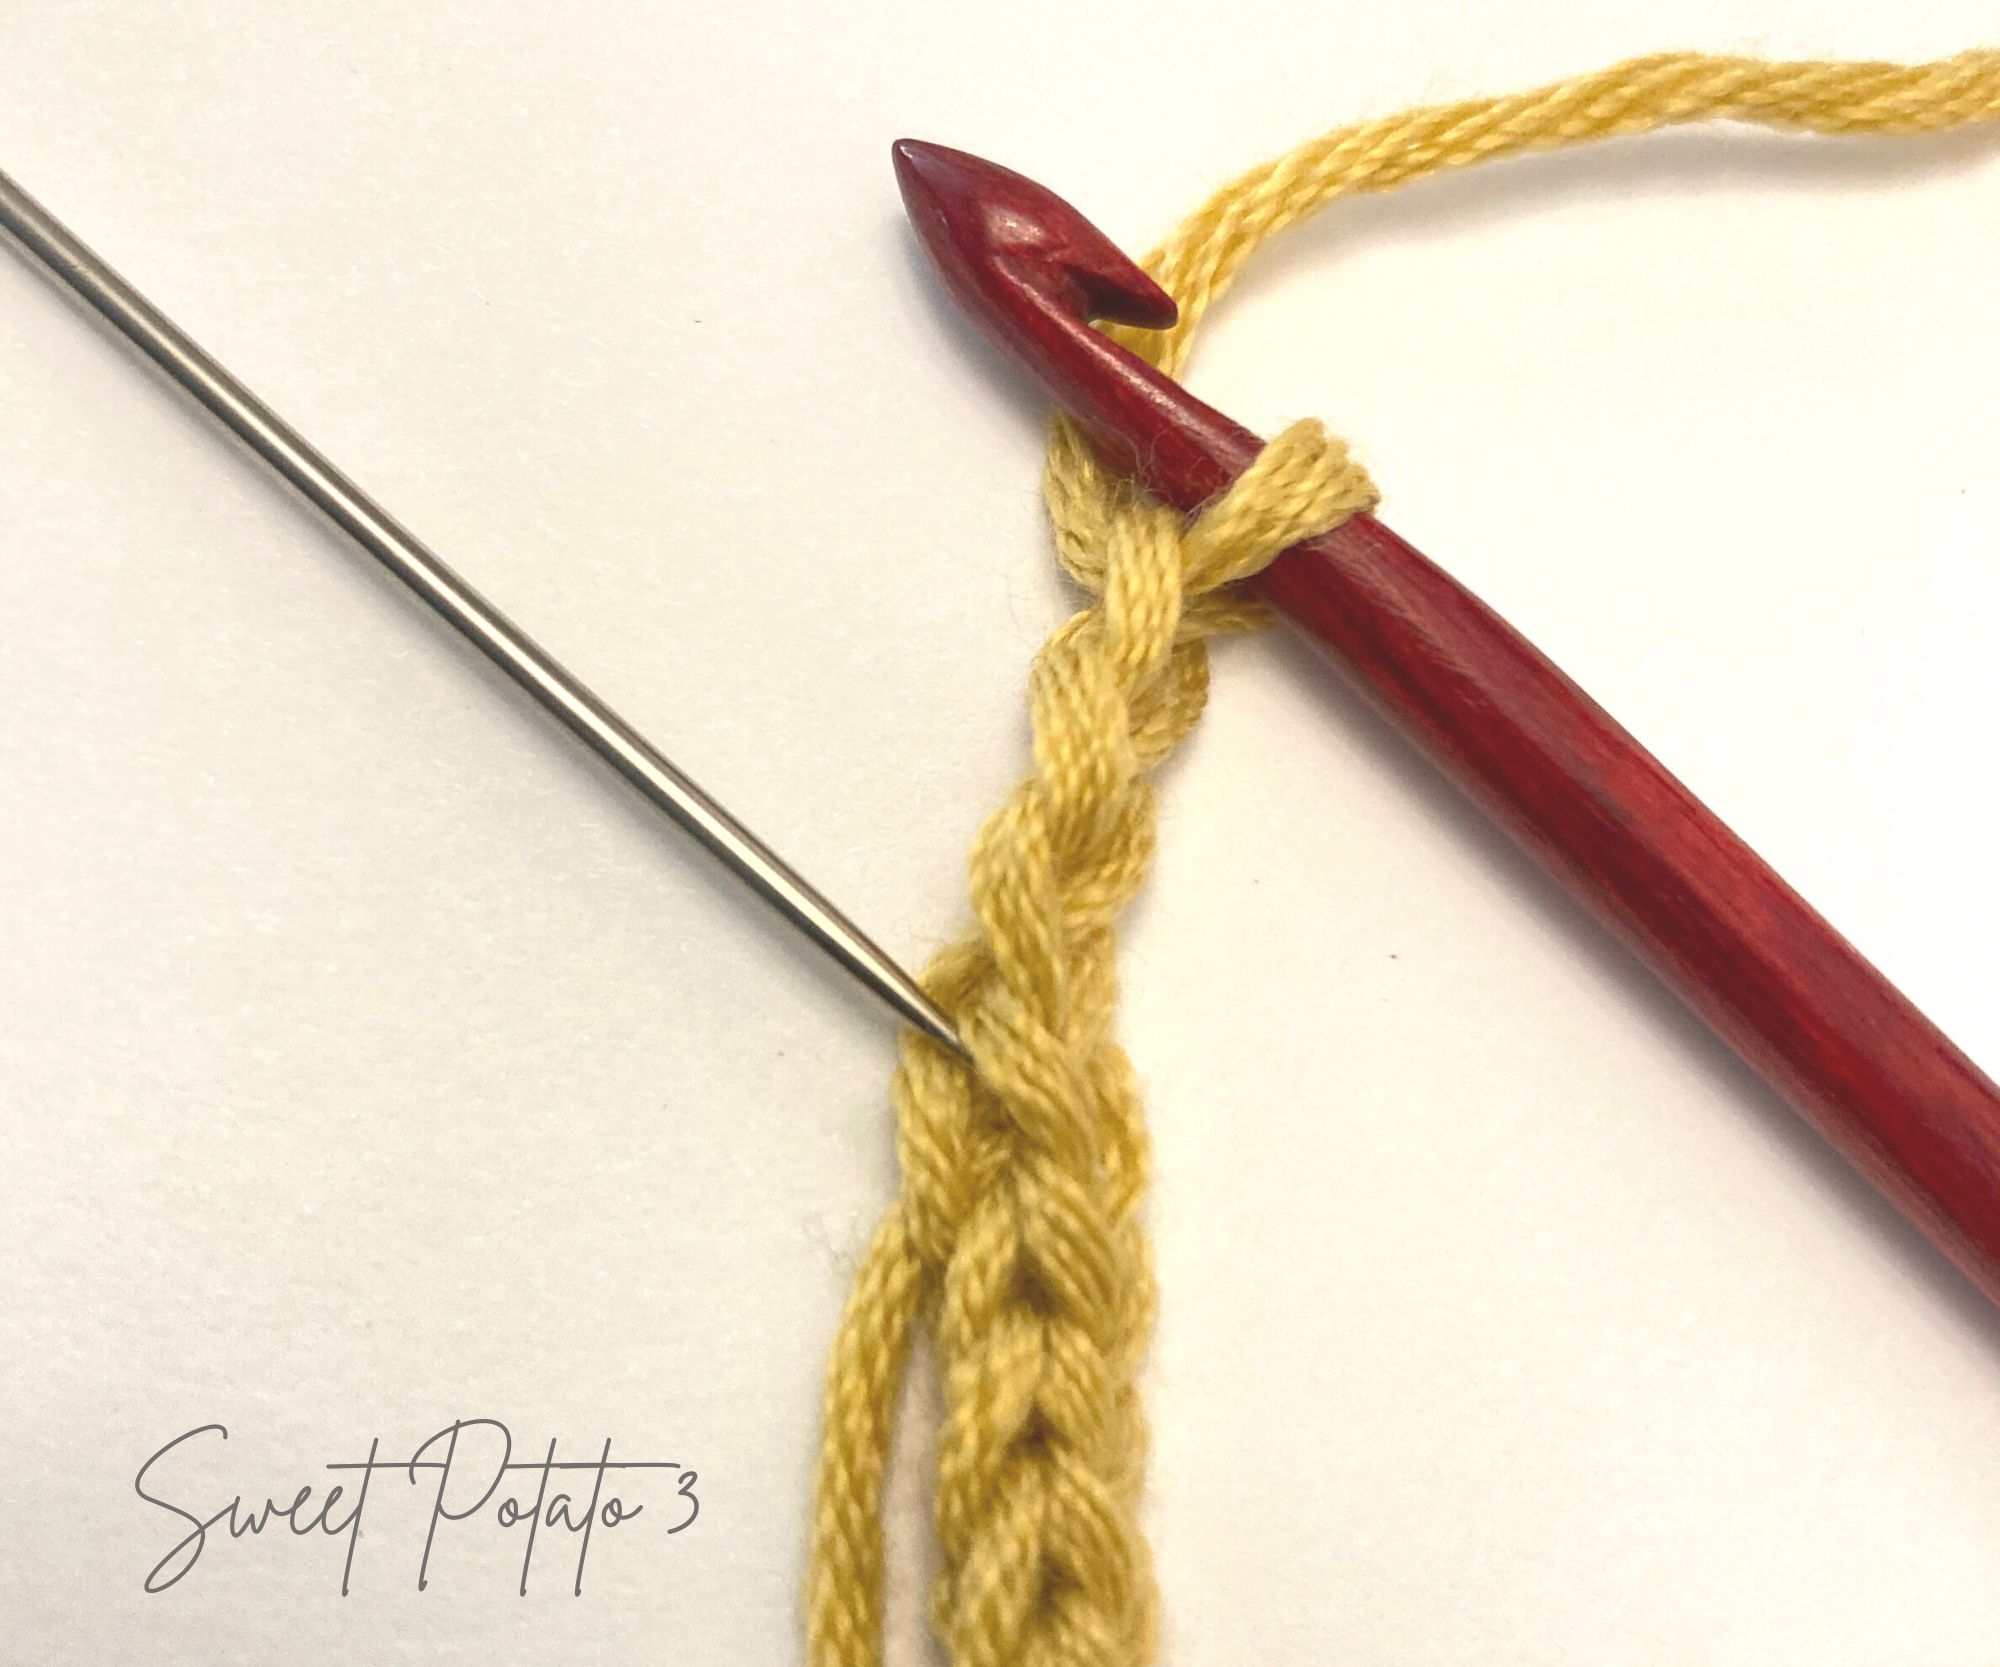
To crochet a simple cord, insert your hook into the slip knot and chain 1 (see 1st photo below-top piece of yarn is working yarn and lower piece of yarn is the beginning tail). Take the beginning tail and wrap it around the hook from front to back (2nd image), using your working yarn, yarn over and pull through both loops on hook. One stitch has been completed.
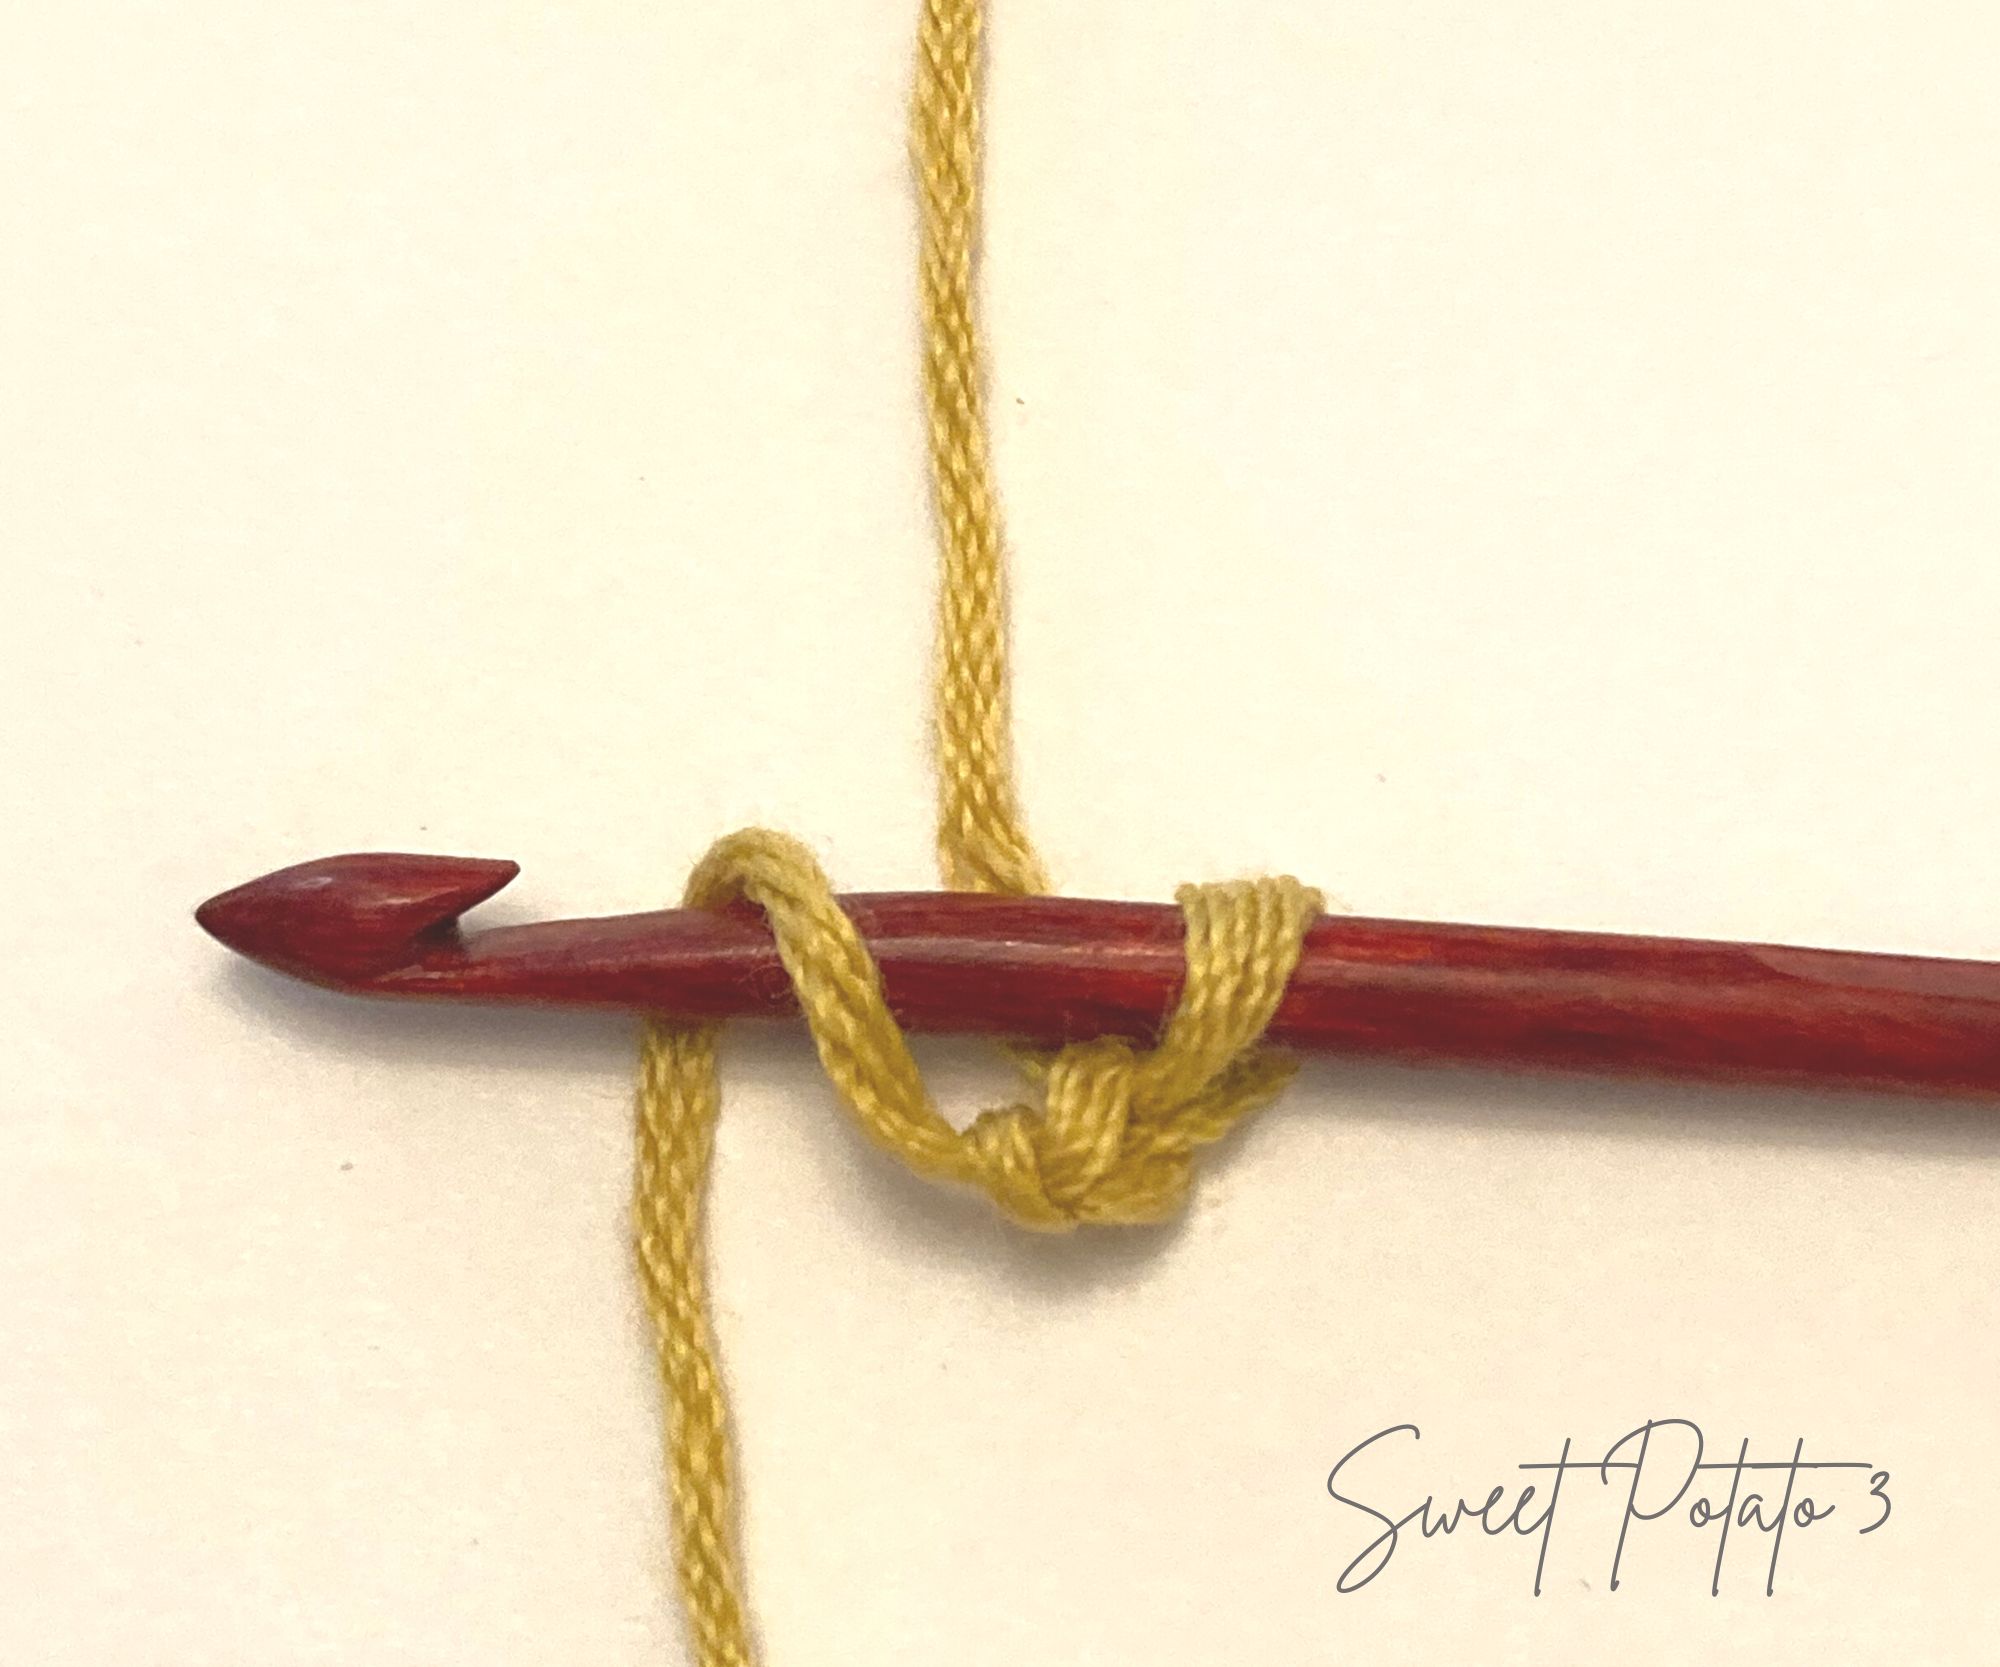
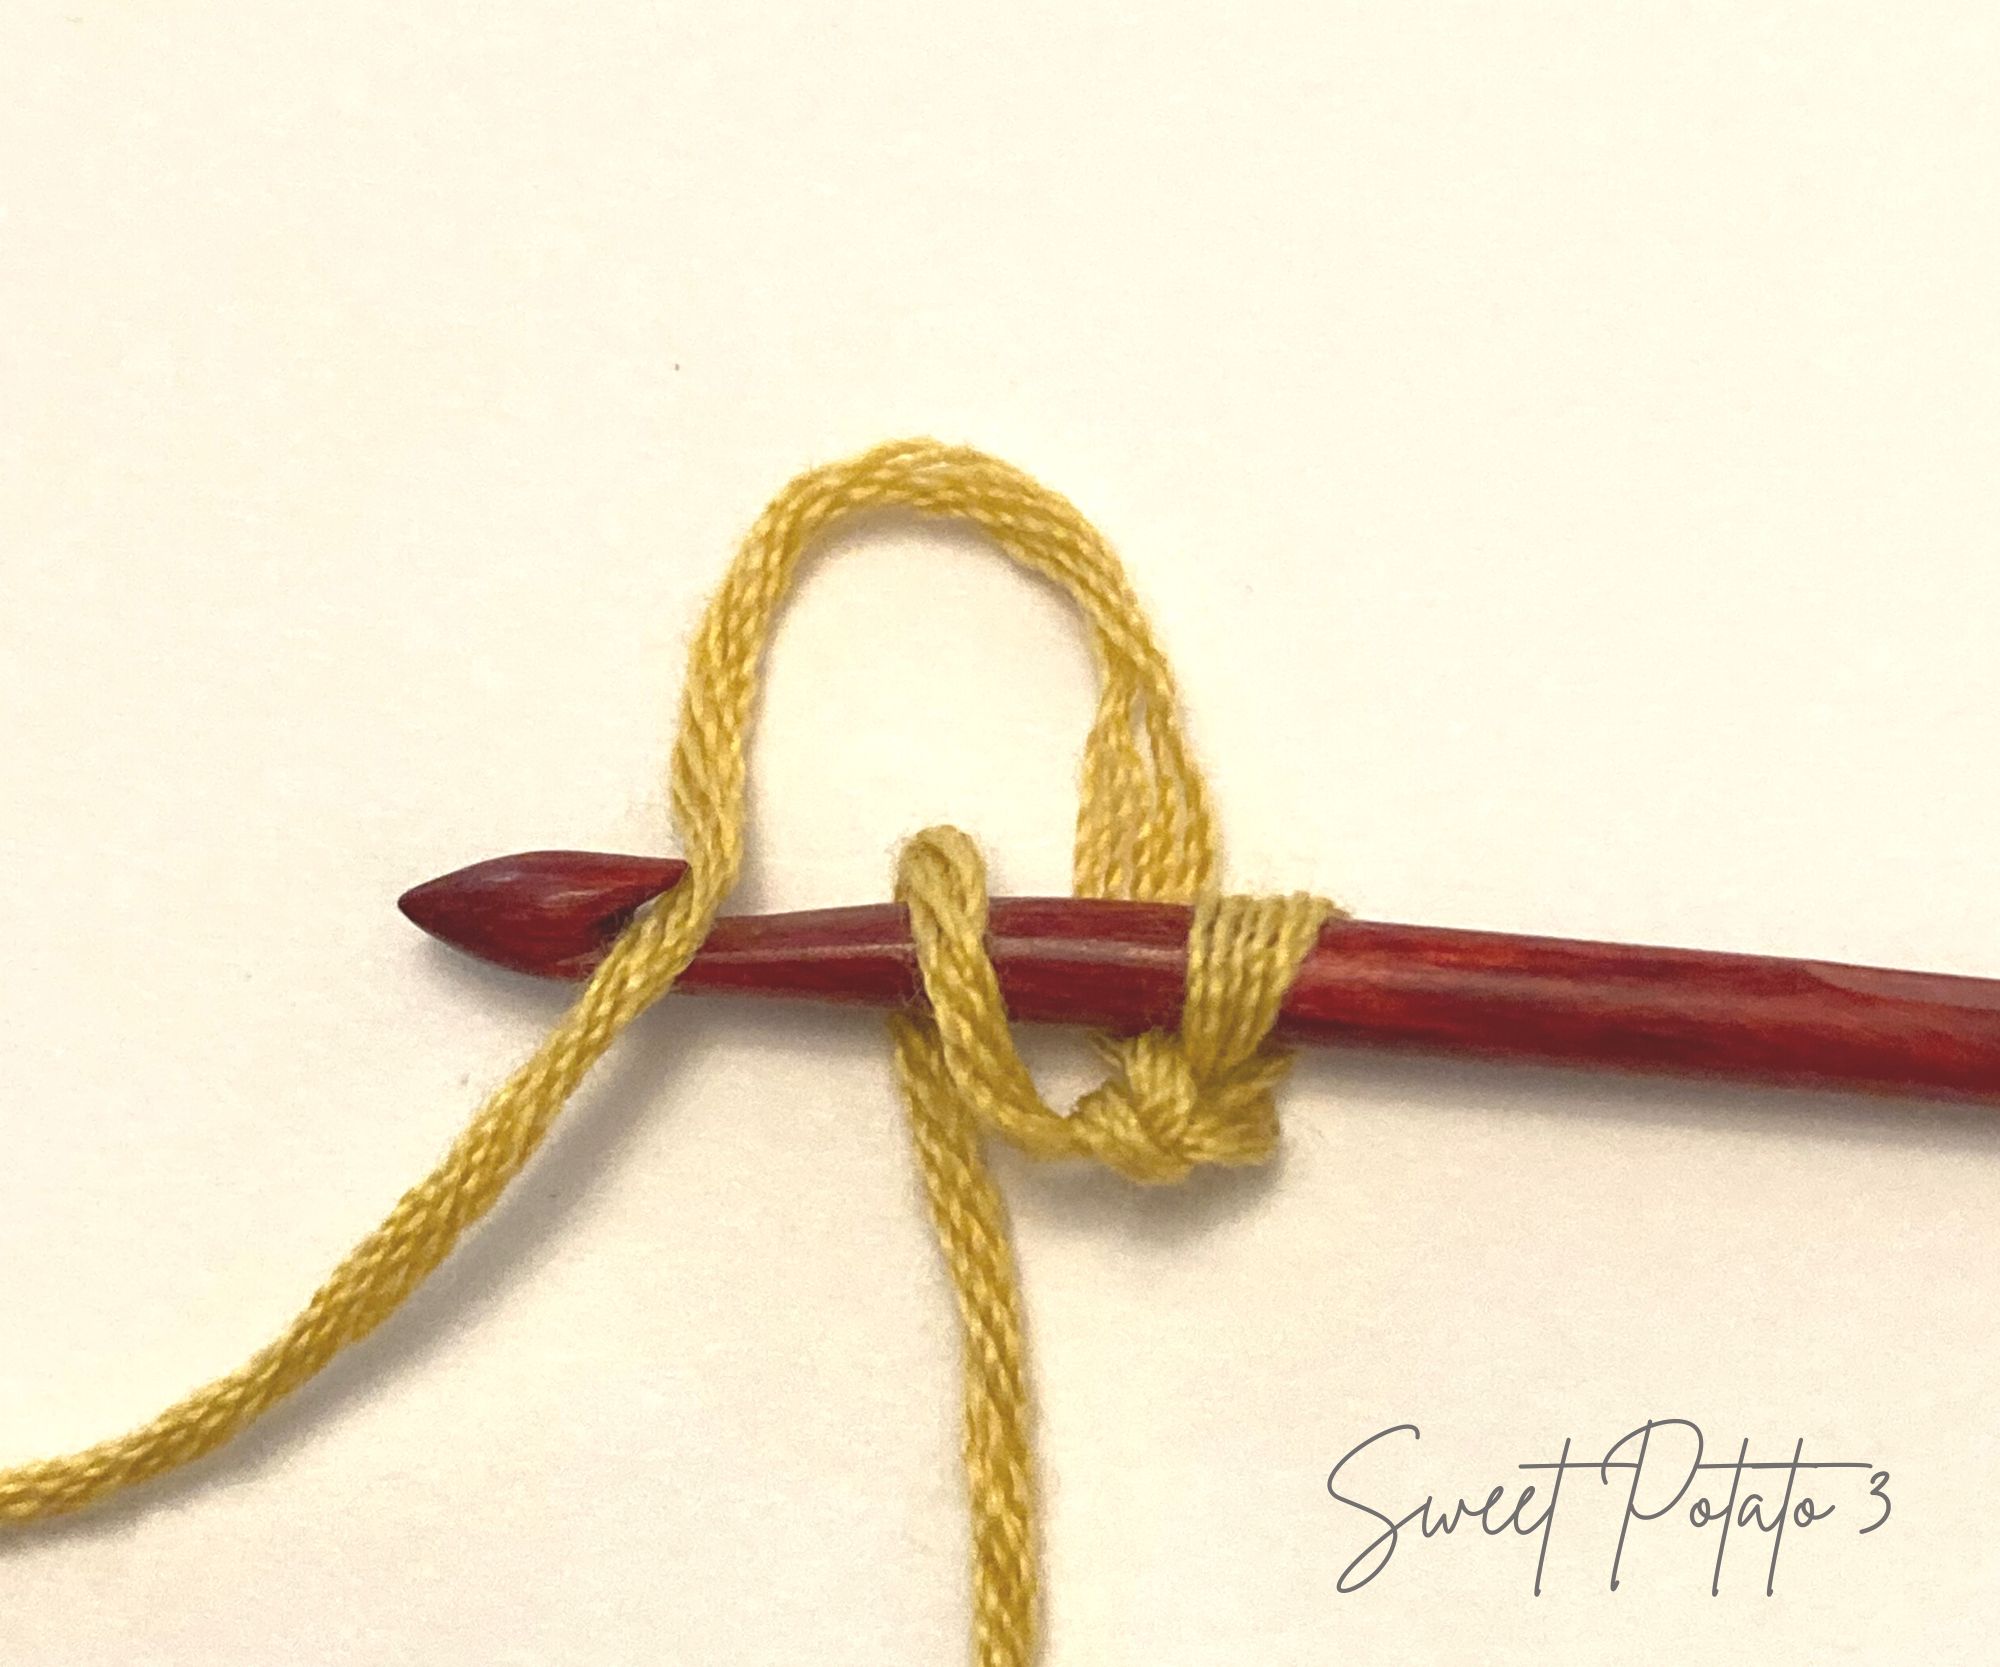
The top piece of yarn will always be your working end and the bottom piece of yarn is your beginning tail. Continue to repeat the same process. Take the beginning tail and wrap it around the hook from front to back (going over your hook). Take working yarn and yarn over and pull through both loops on your hook.
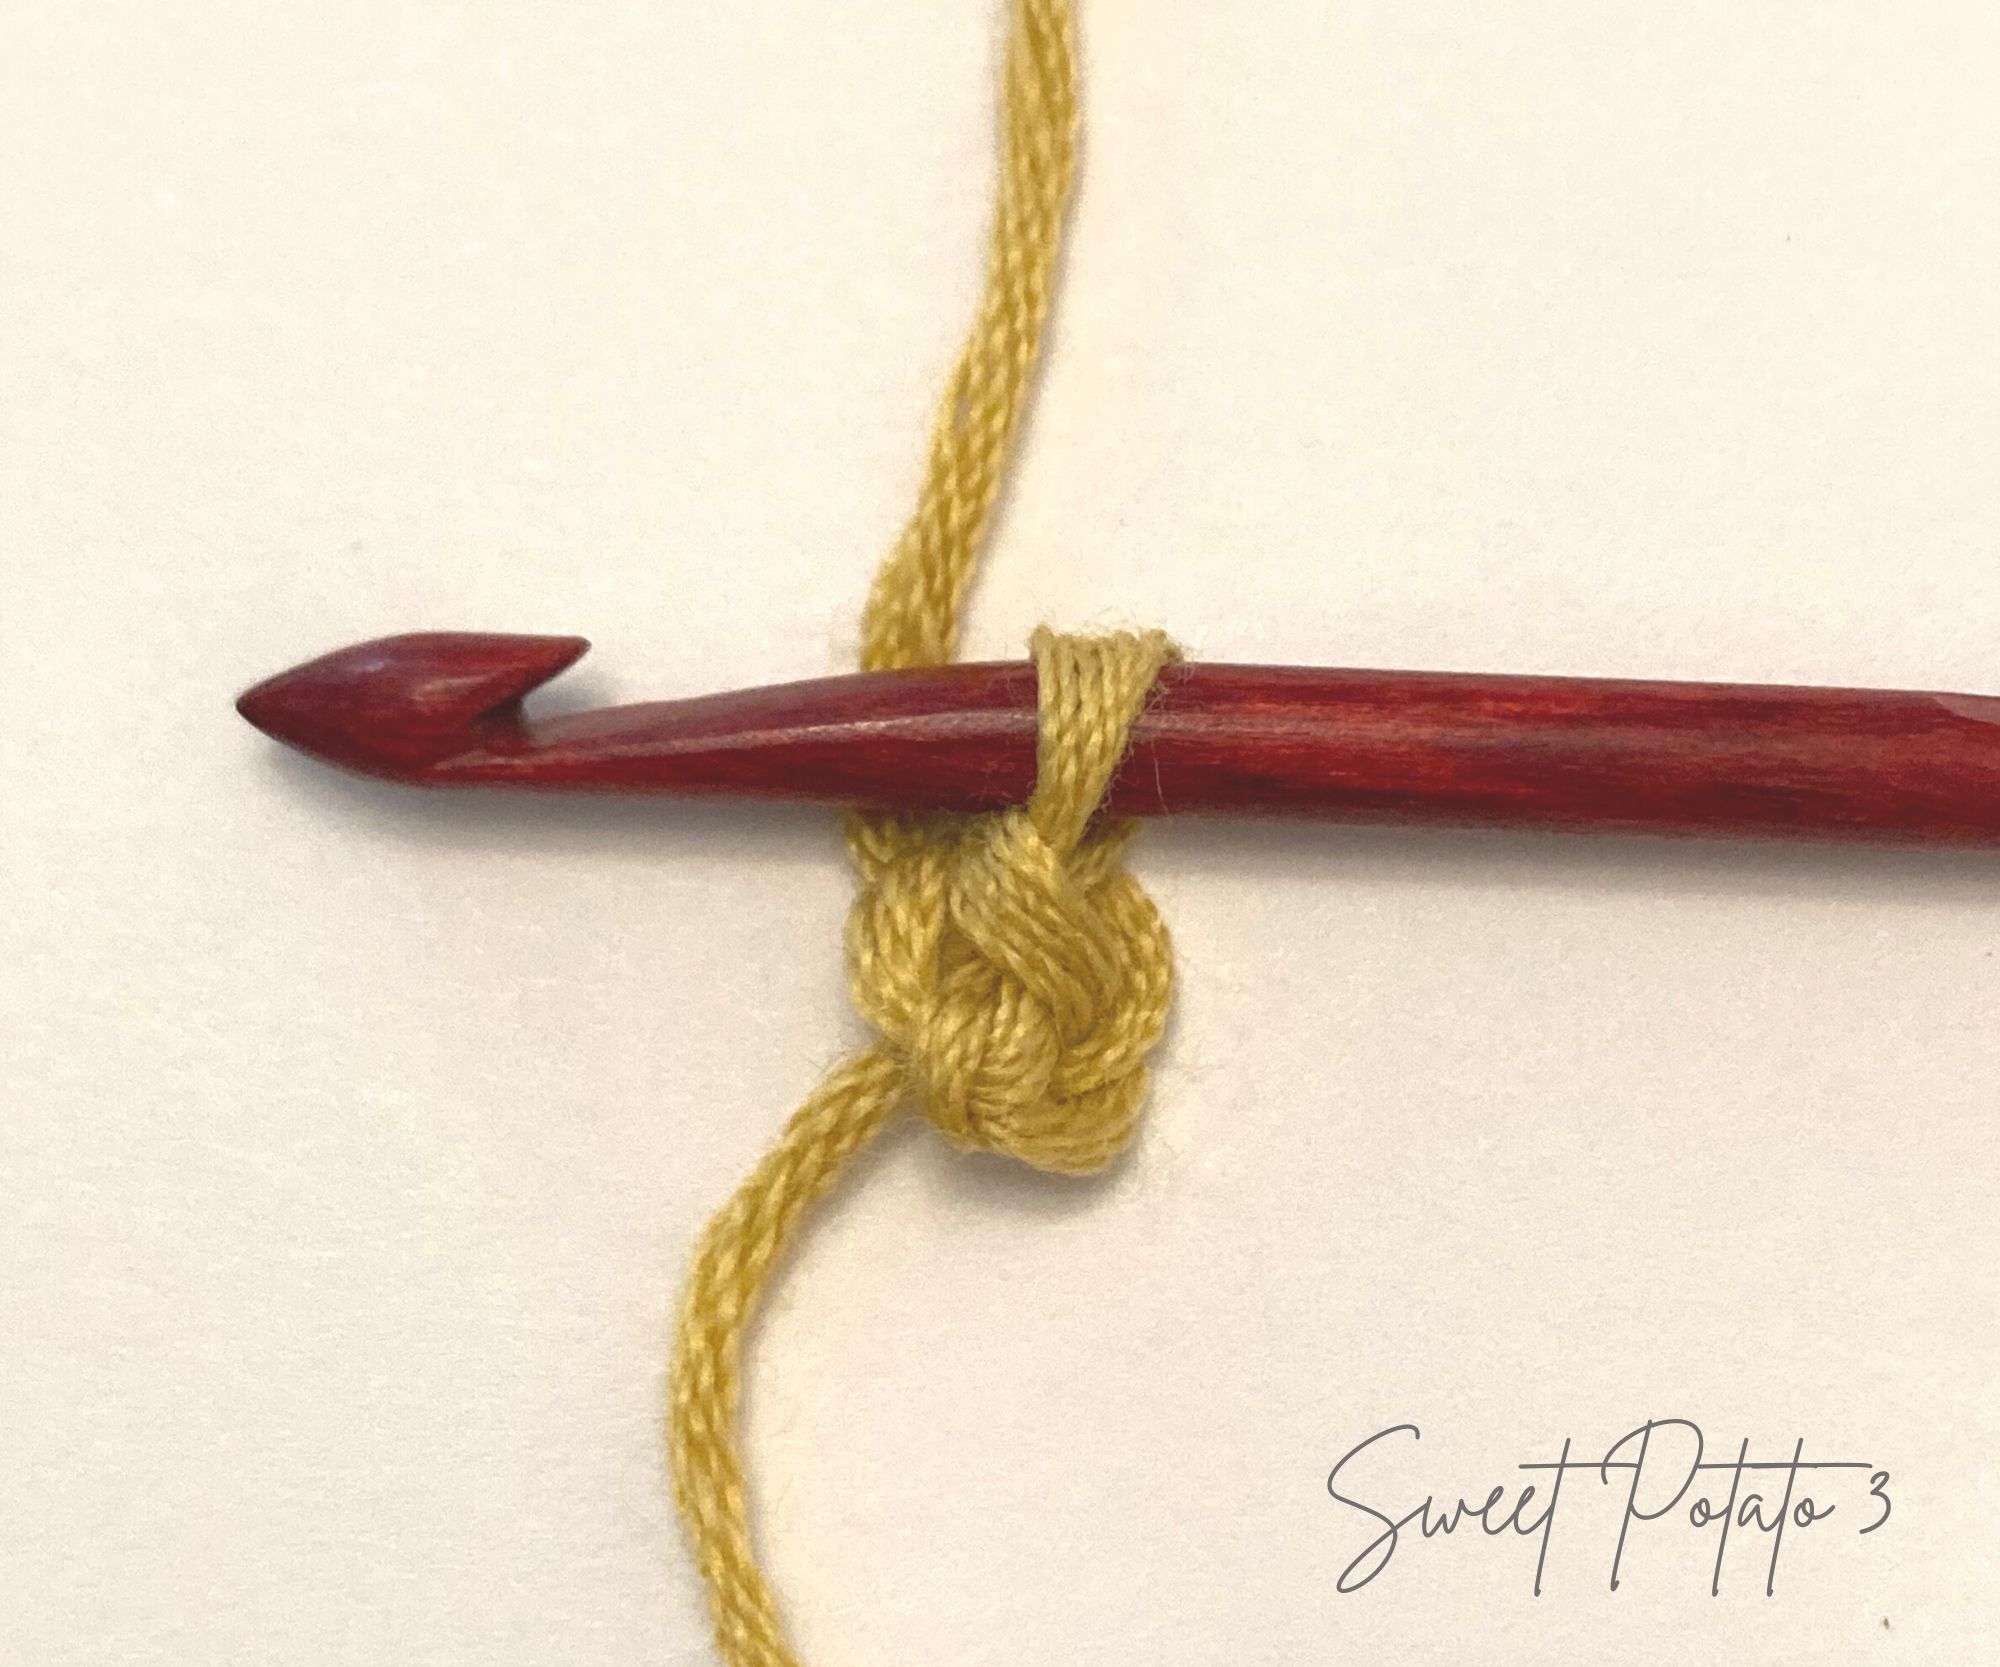
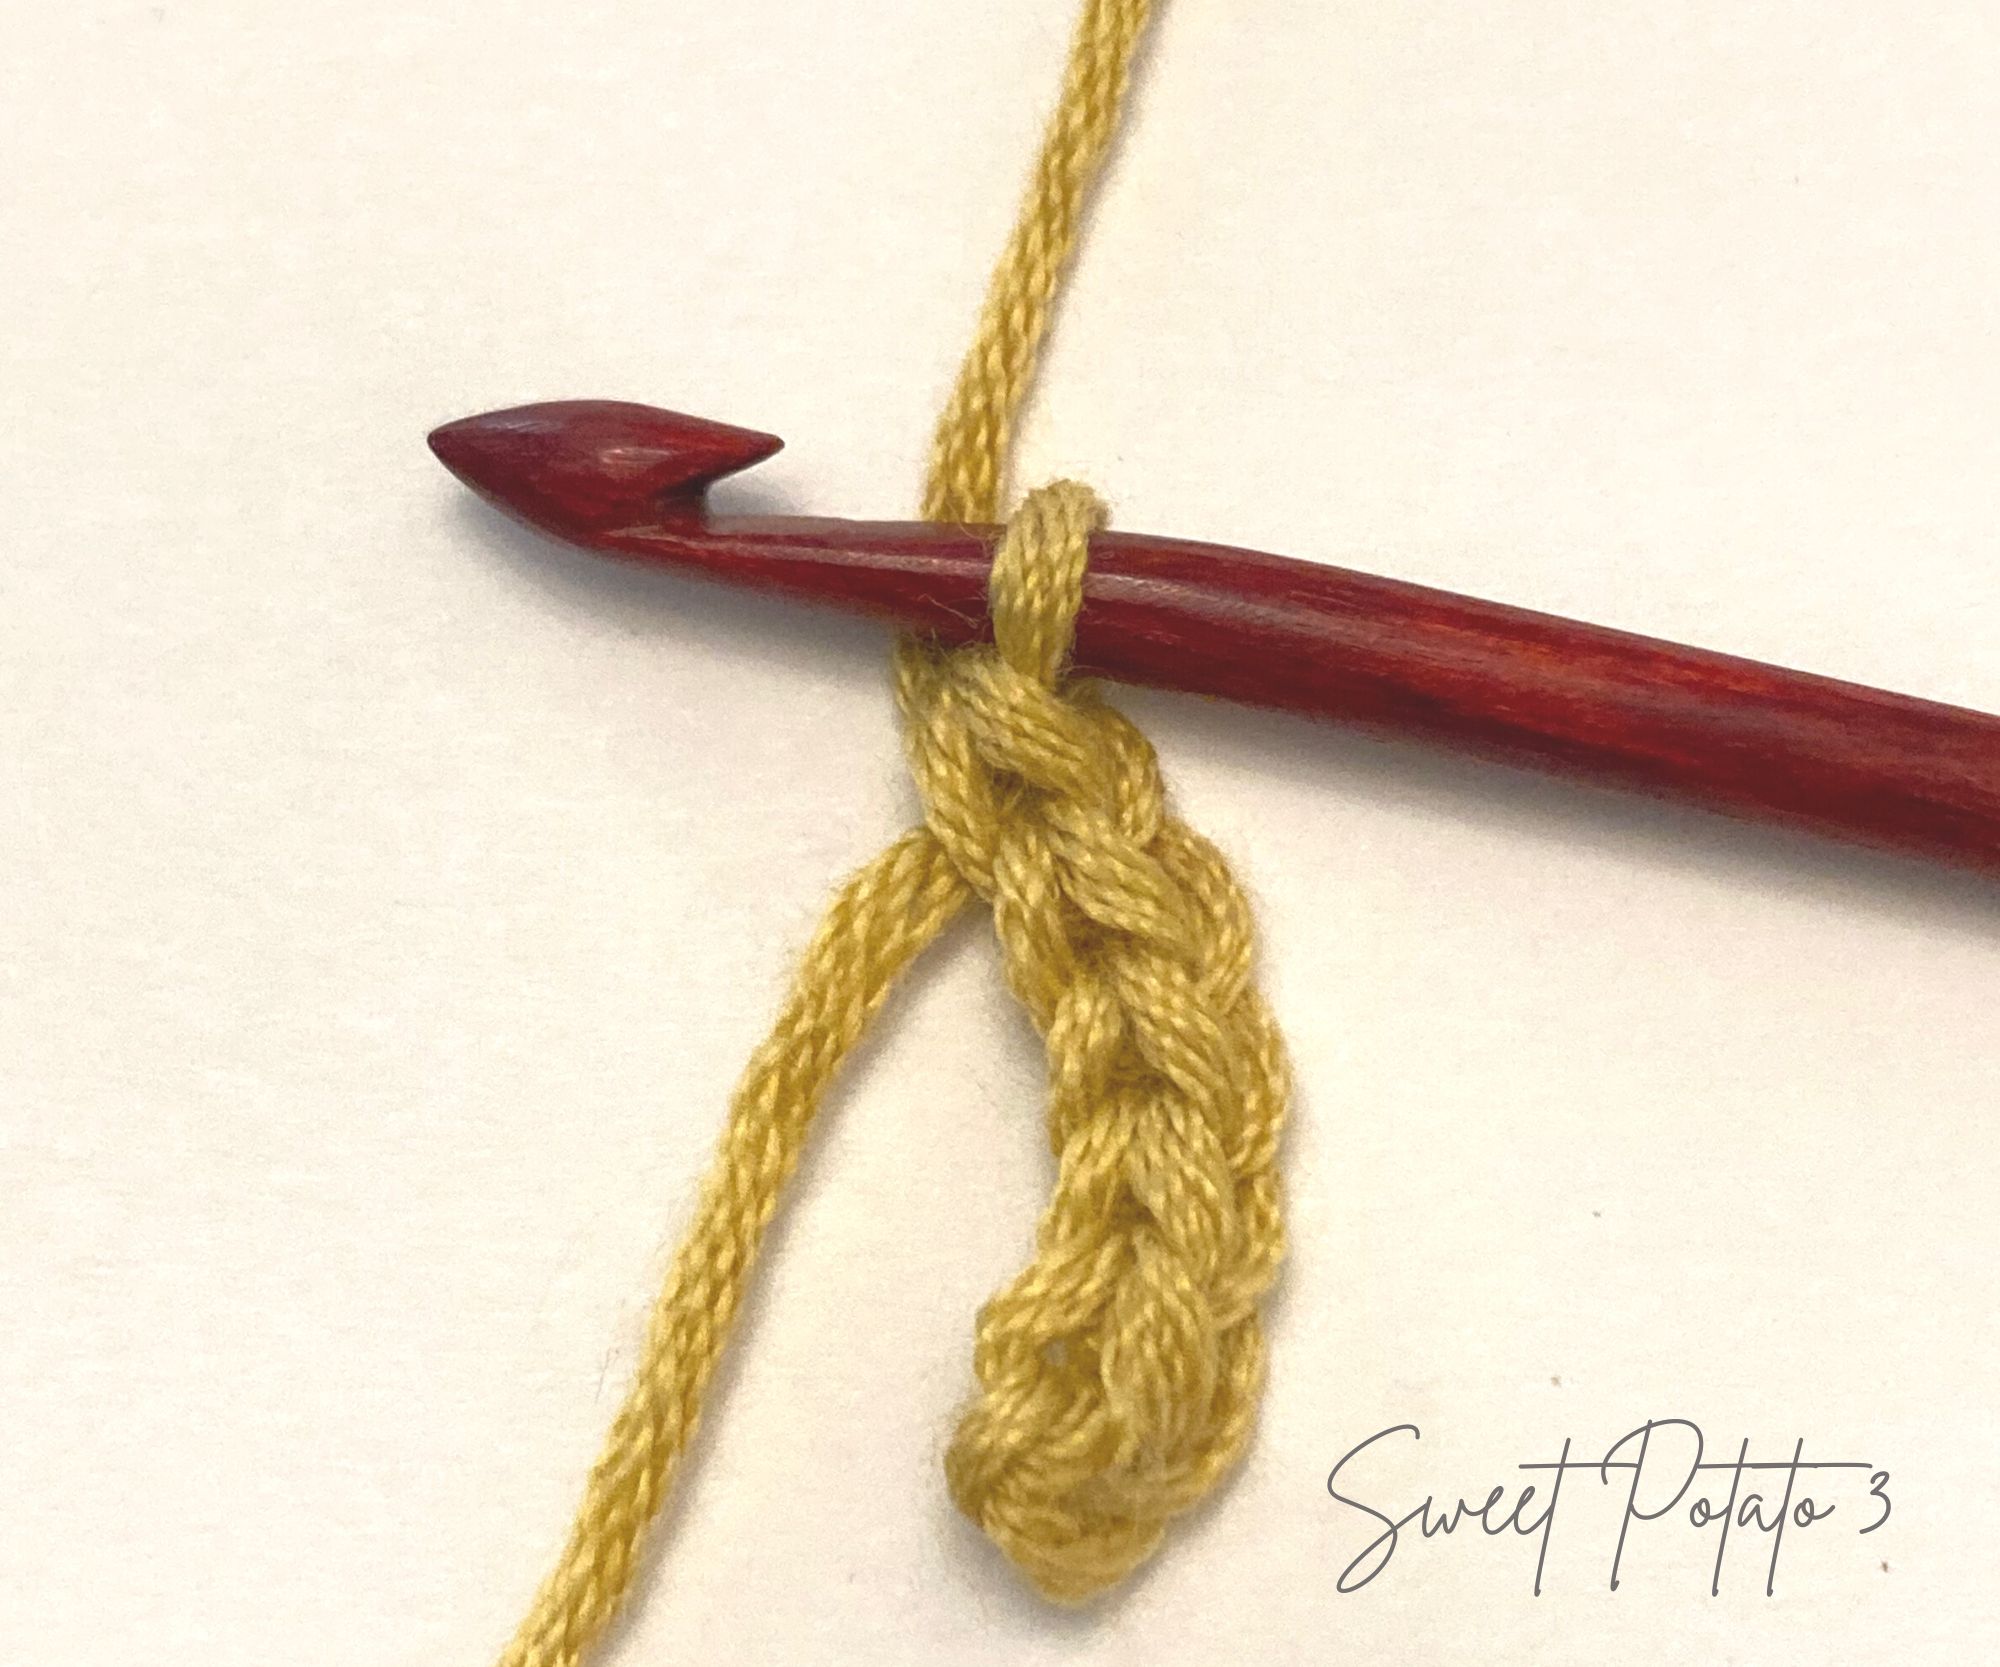
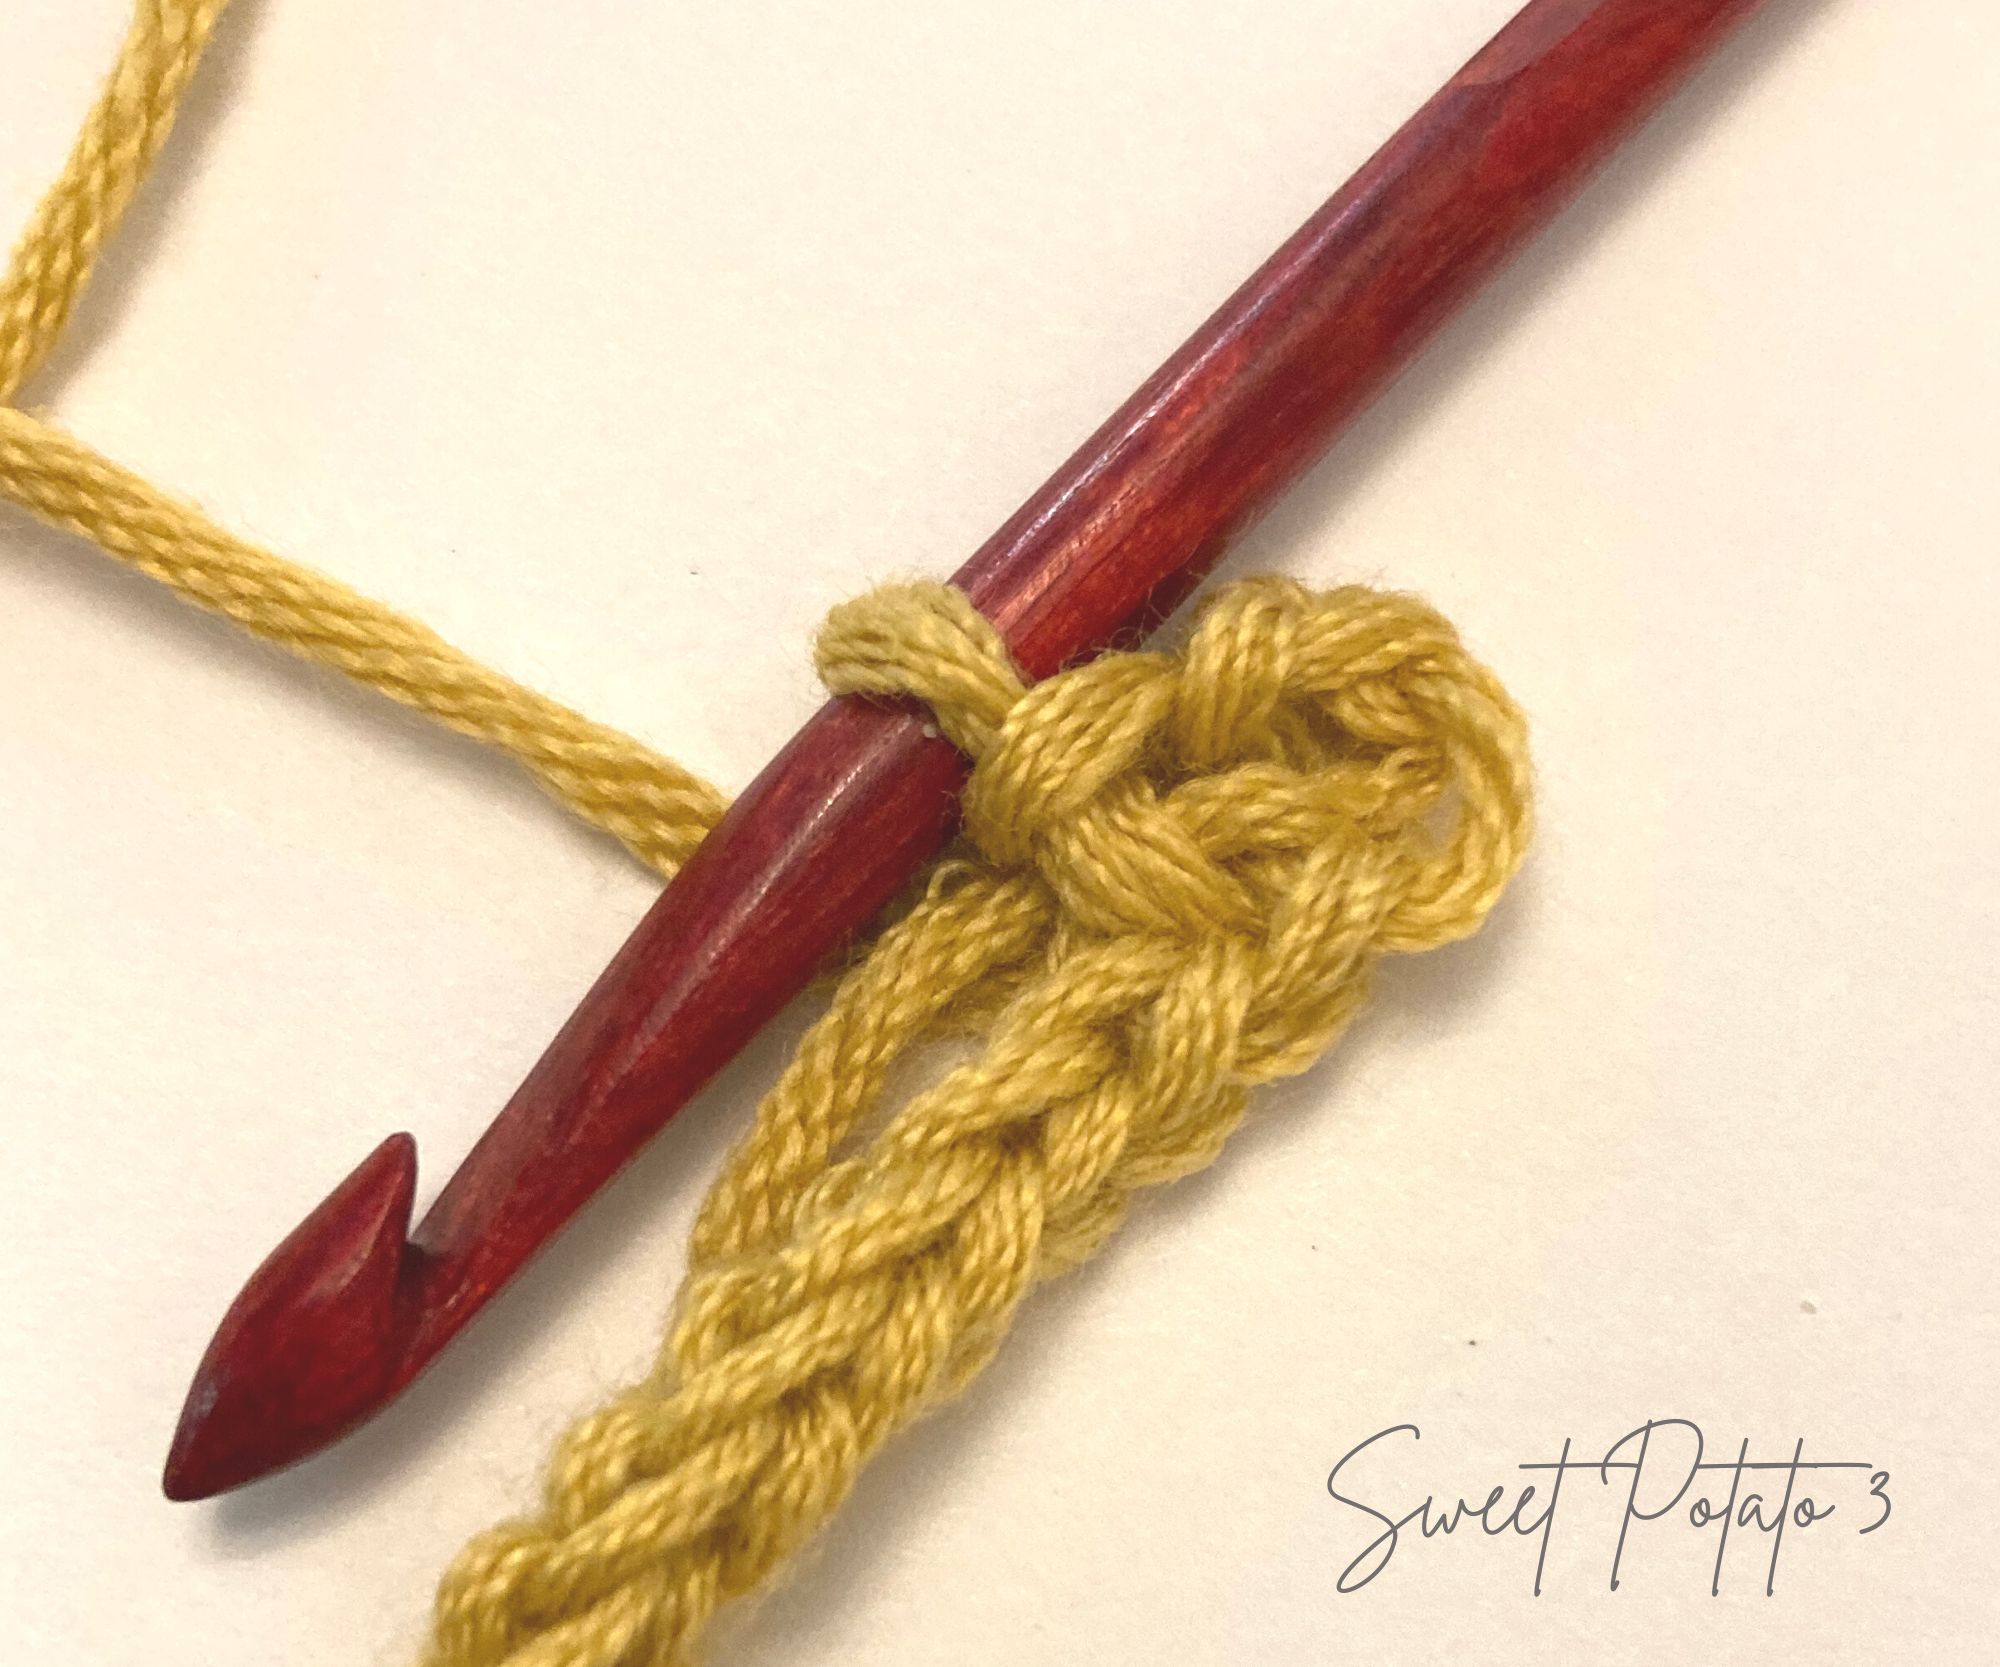
You will repeat this process until your cord reaches 4 inches long, this will be about 26 stitches. At this point just drop the beginning tail of yarn until you are done with the applique. Only use the working yarn from this point forward.
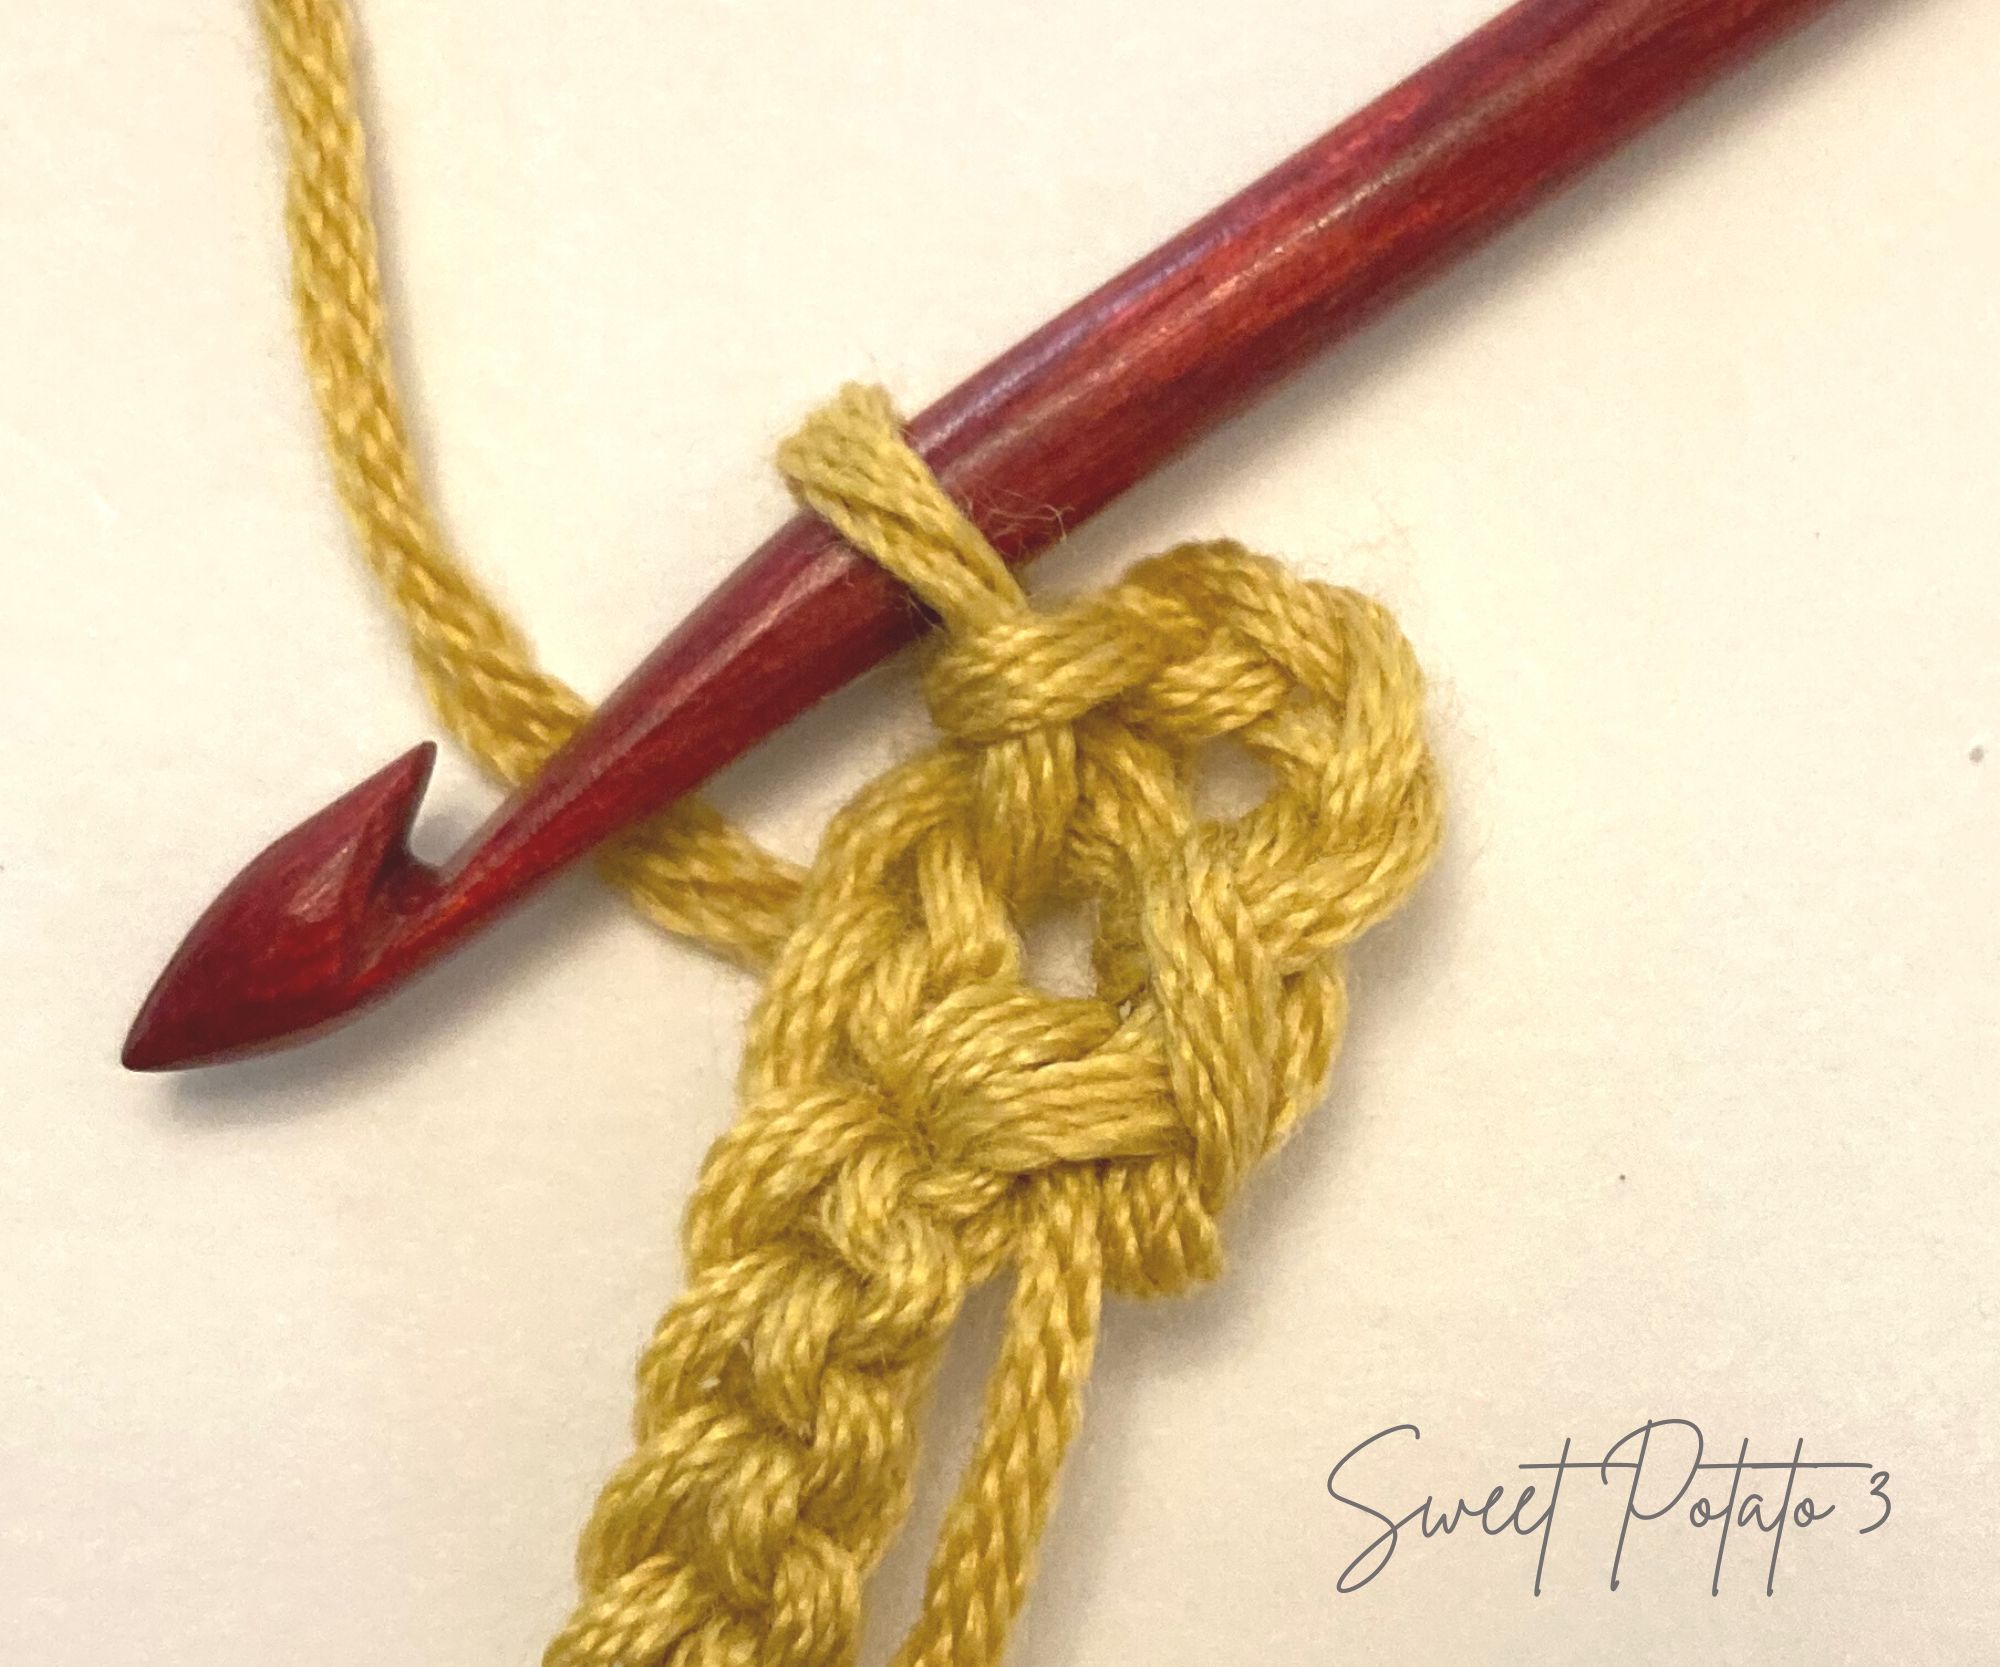
The Head of Wheat Stalk
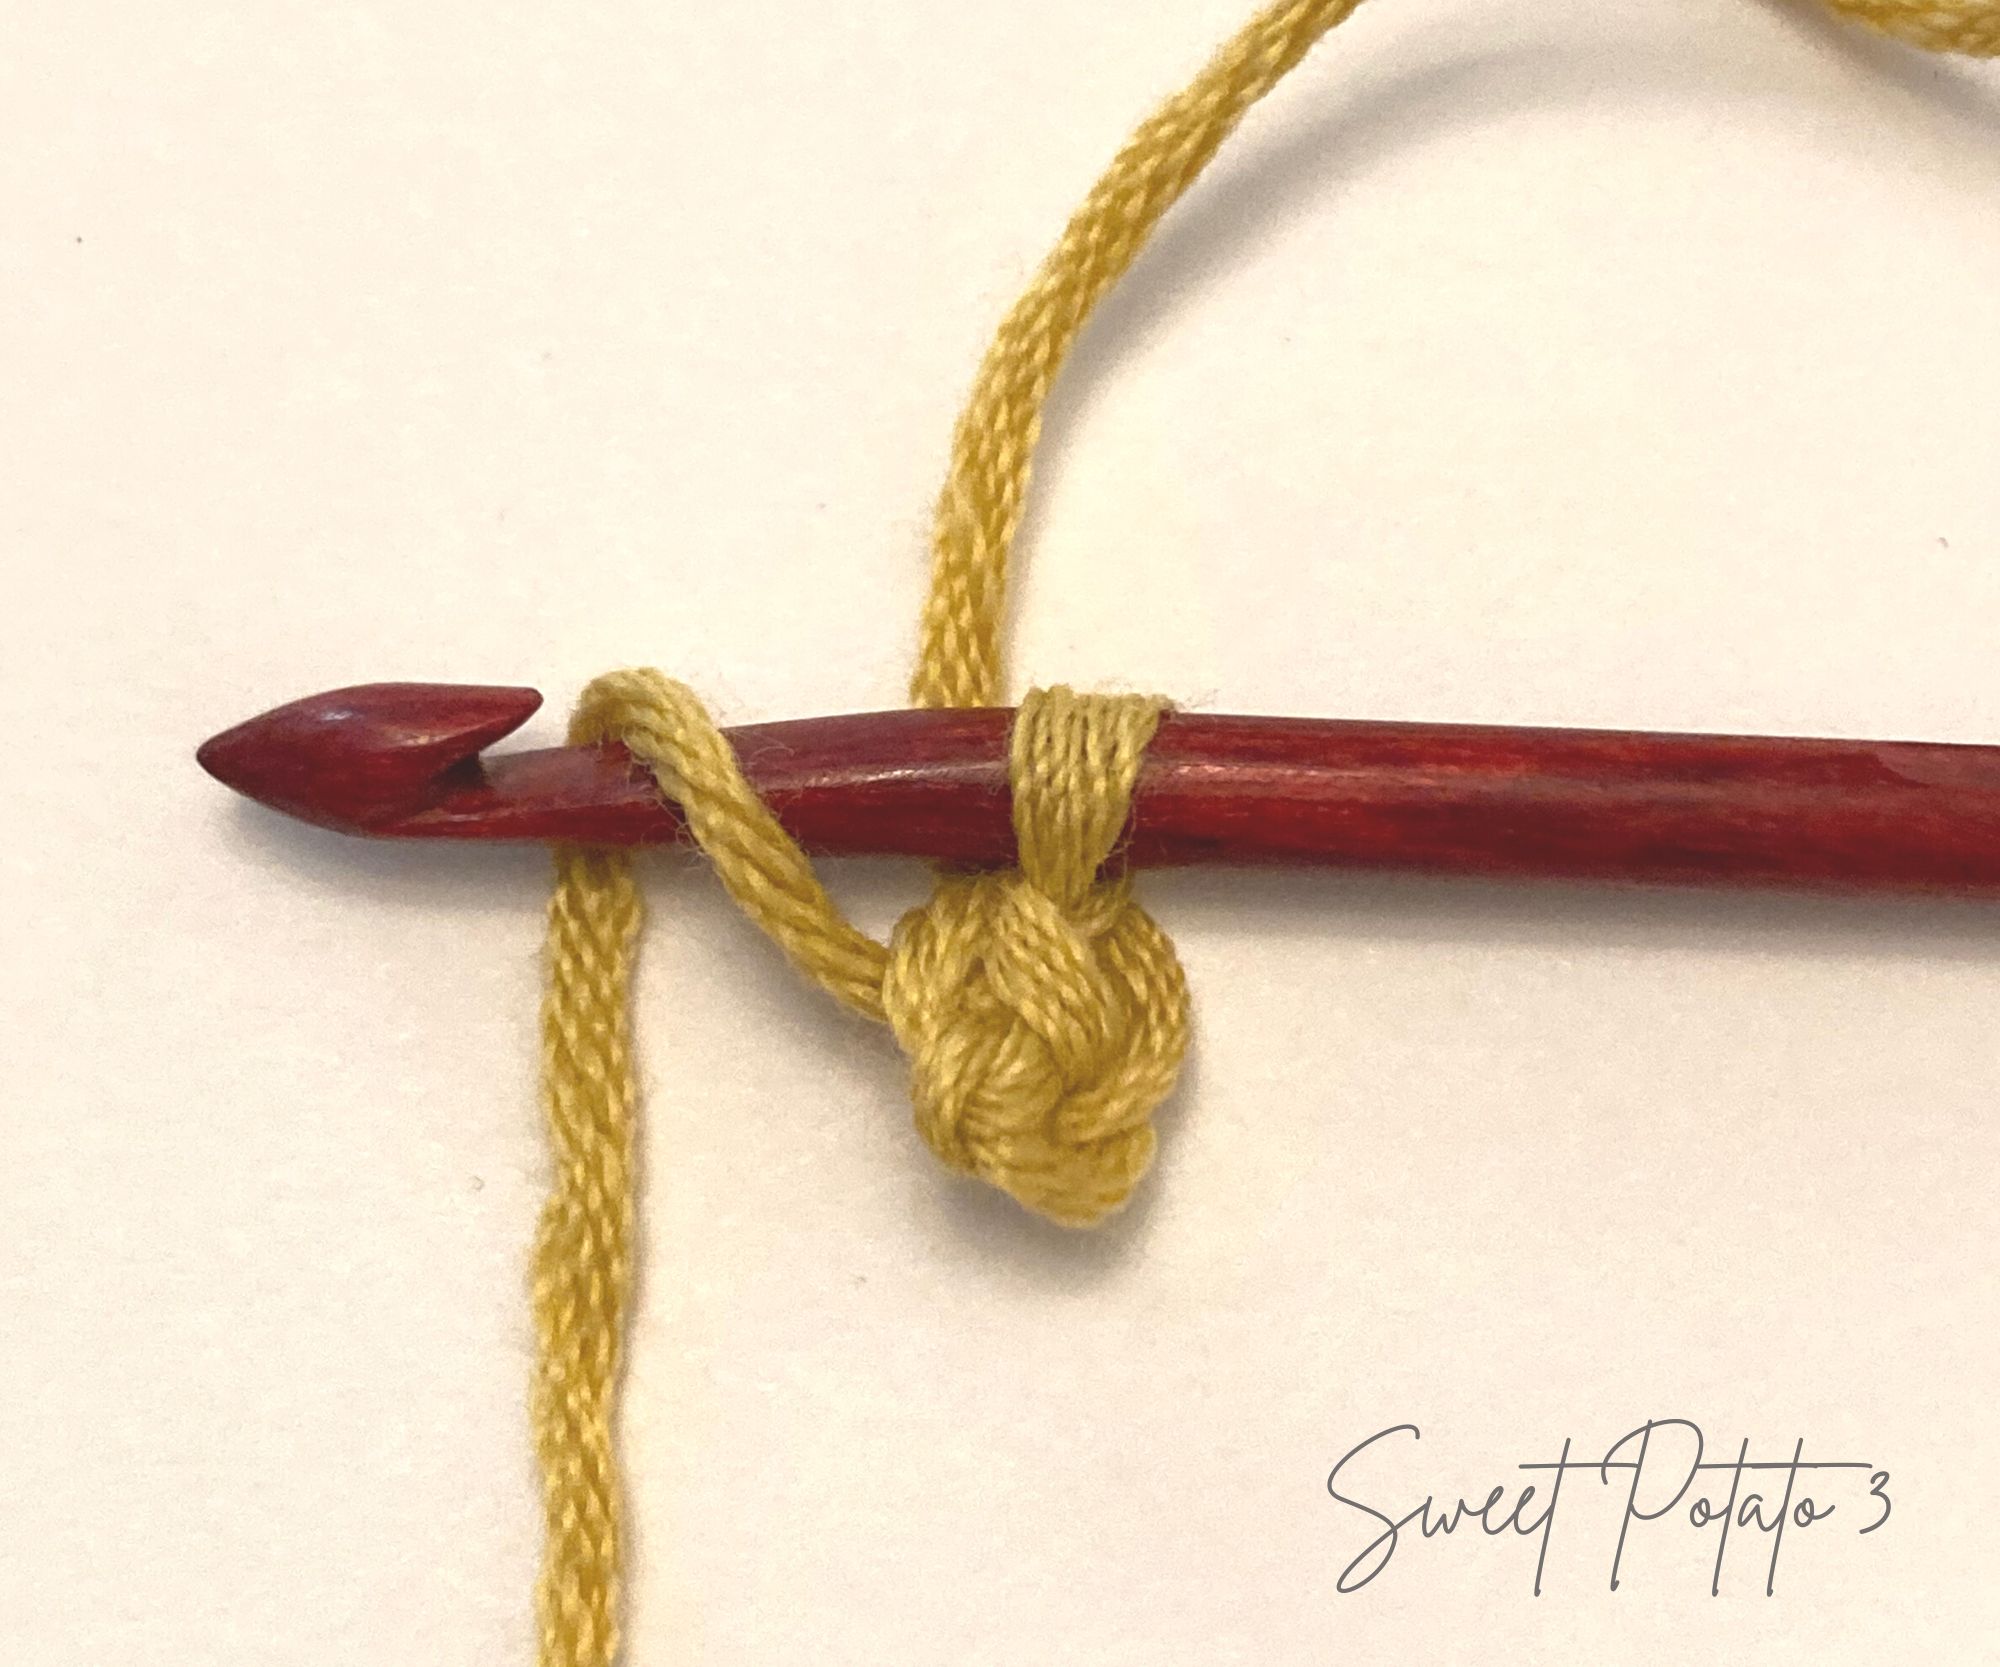
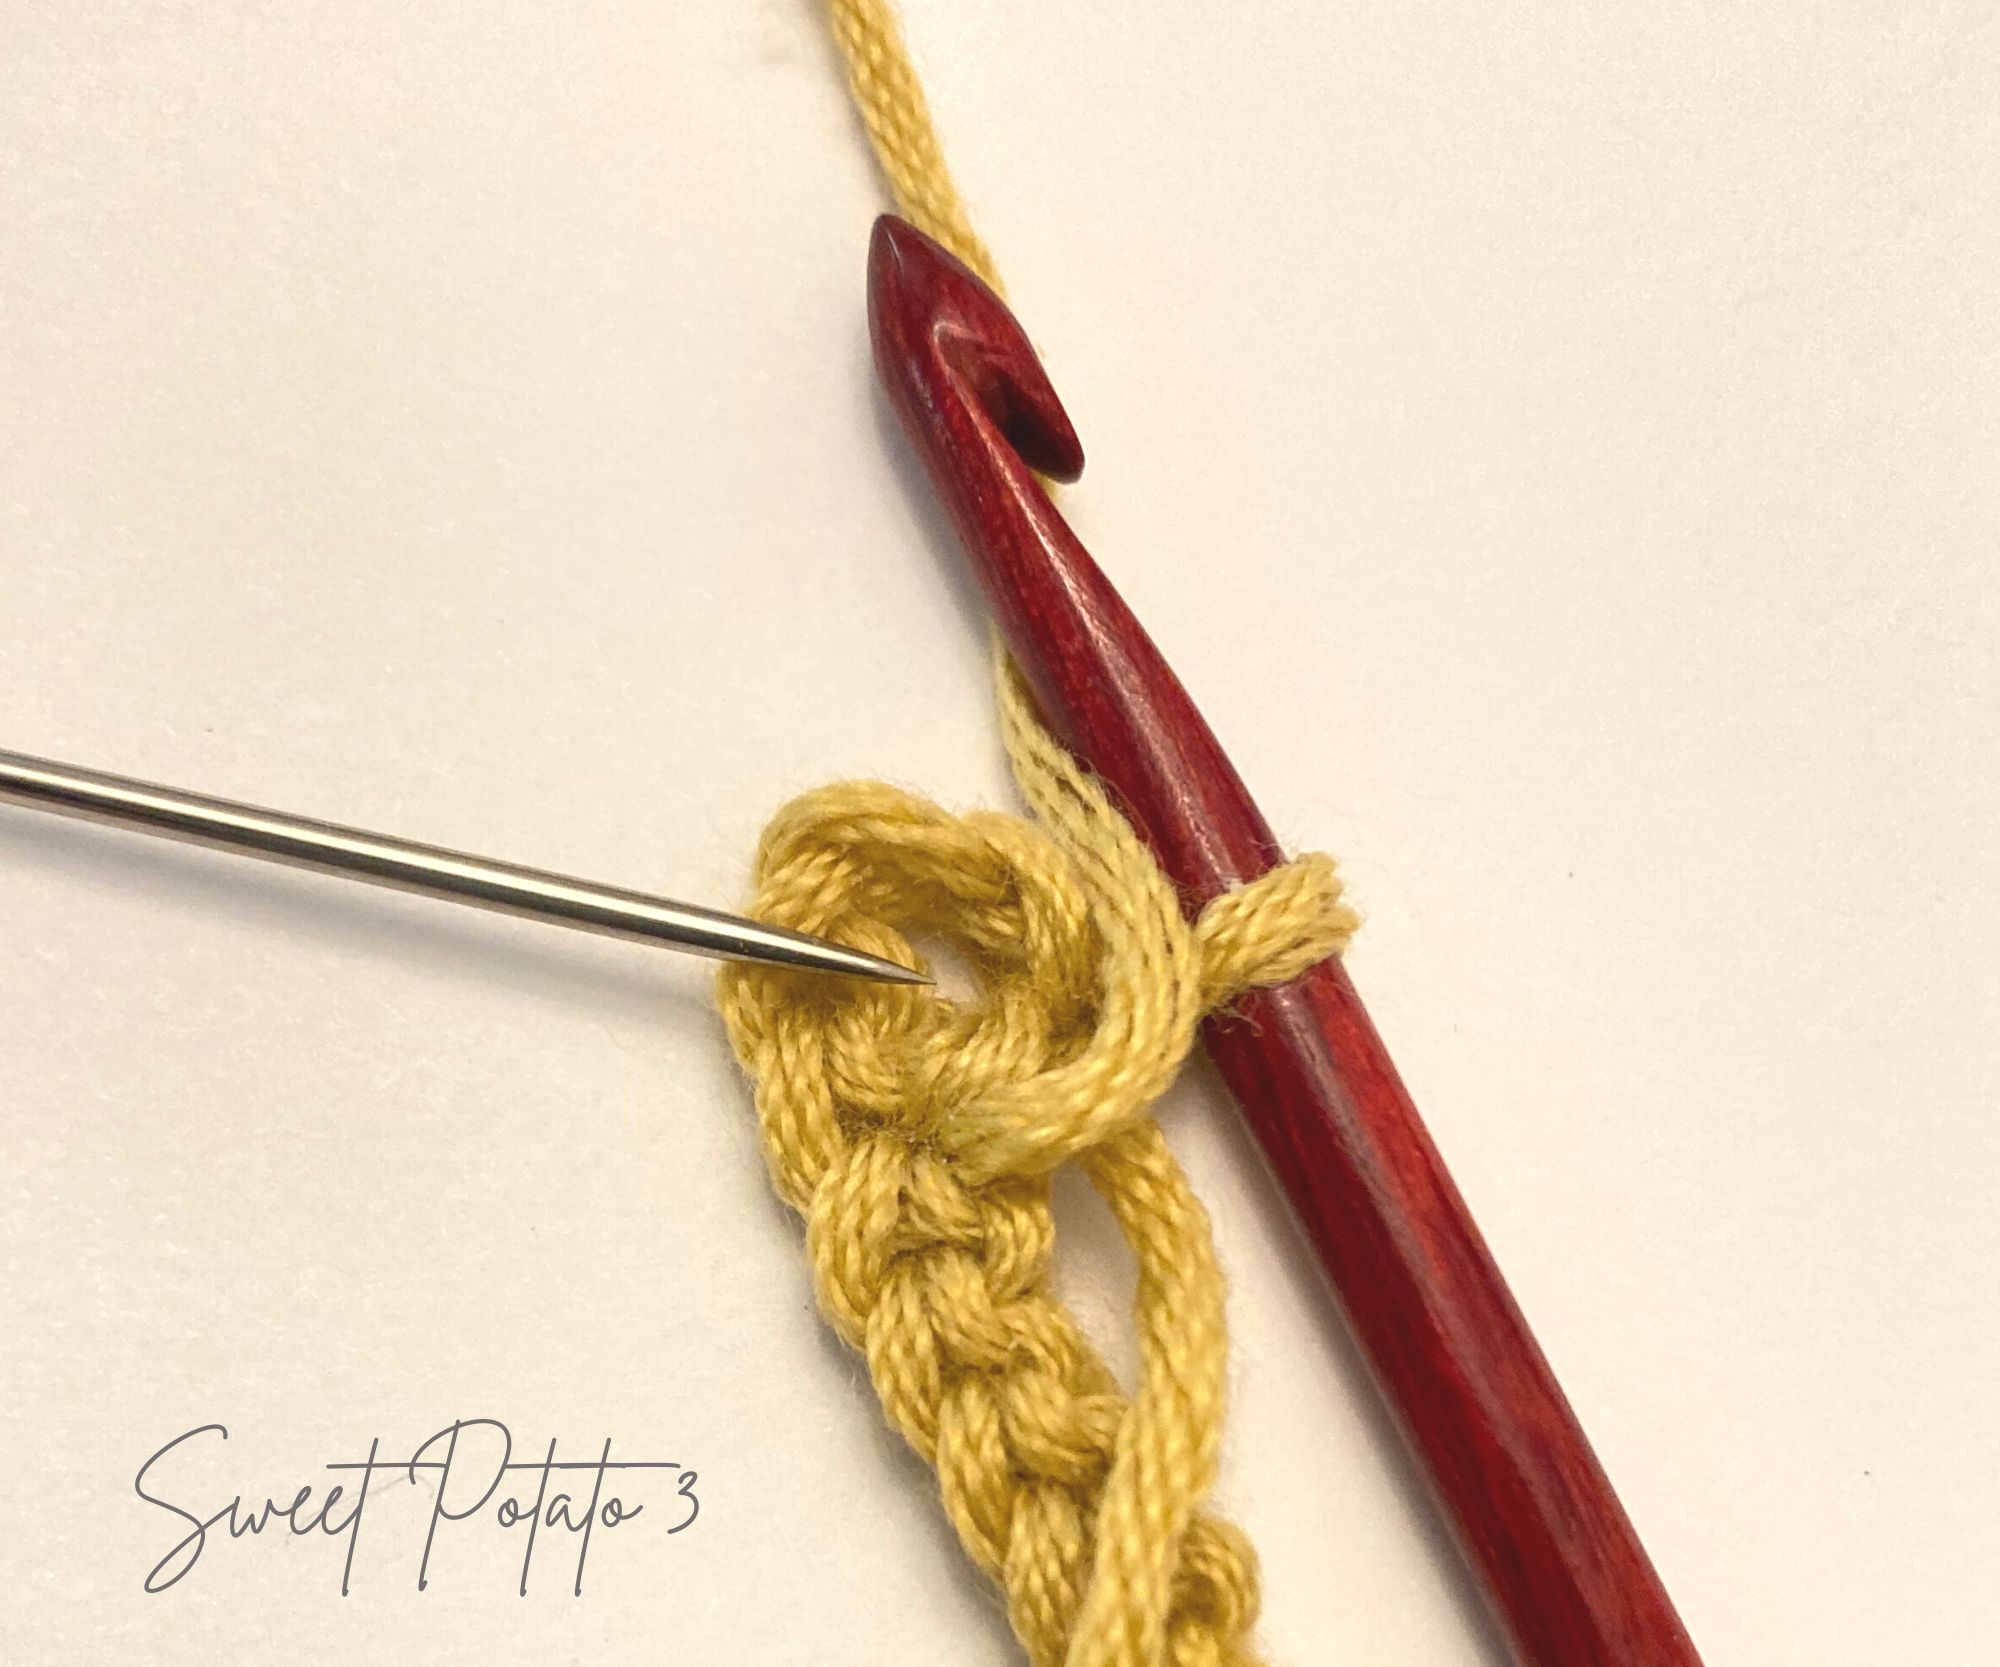
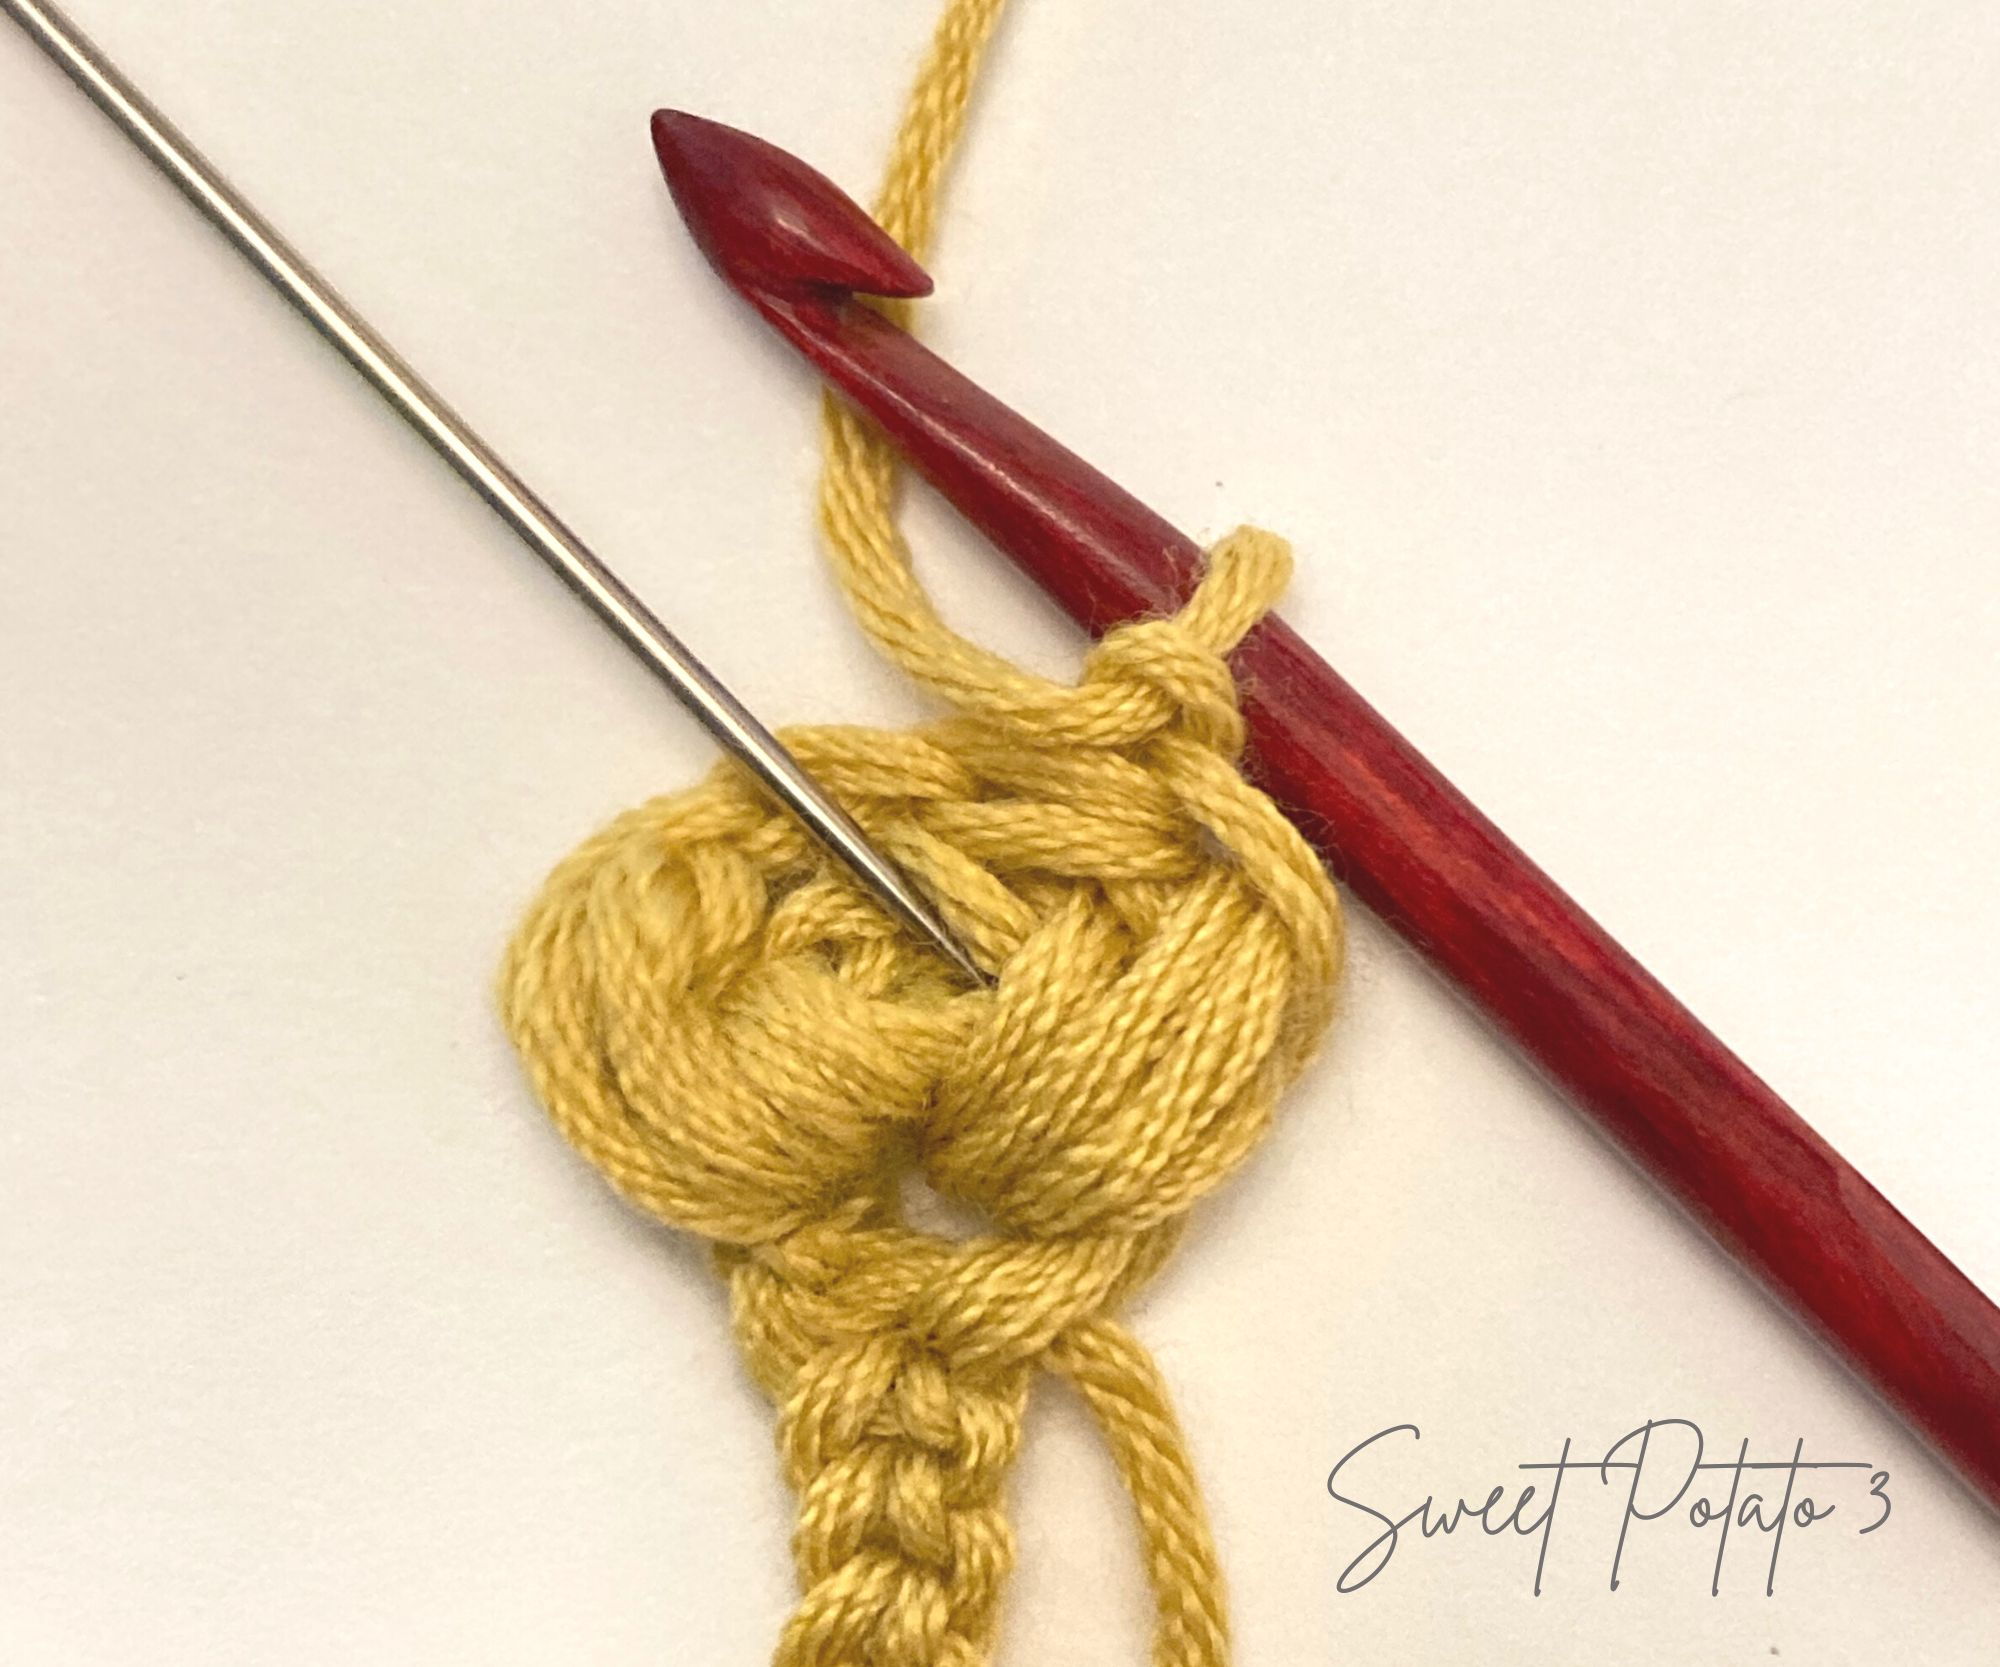
To begin the head of the wheat, identify the side of the last stitch made, rotate your cord and see where the needle is pointing in the photo below. Chain 3 then slip stitch in the side of the last stitch made (where needle was pointing) to create a small loop.
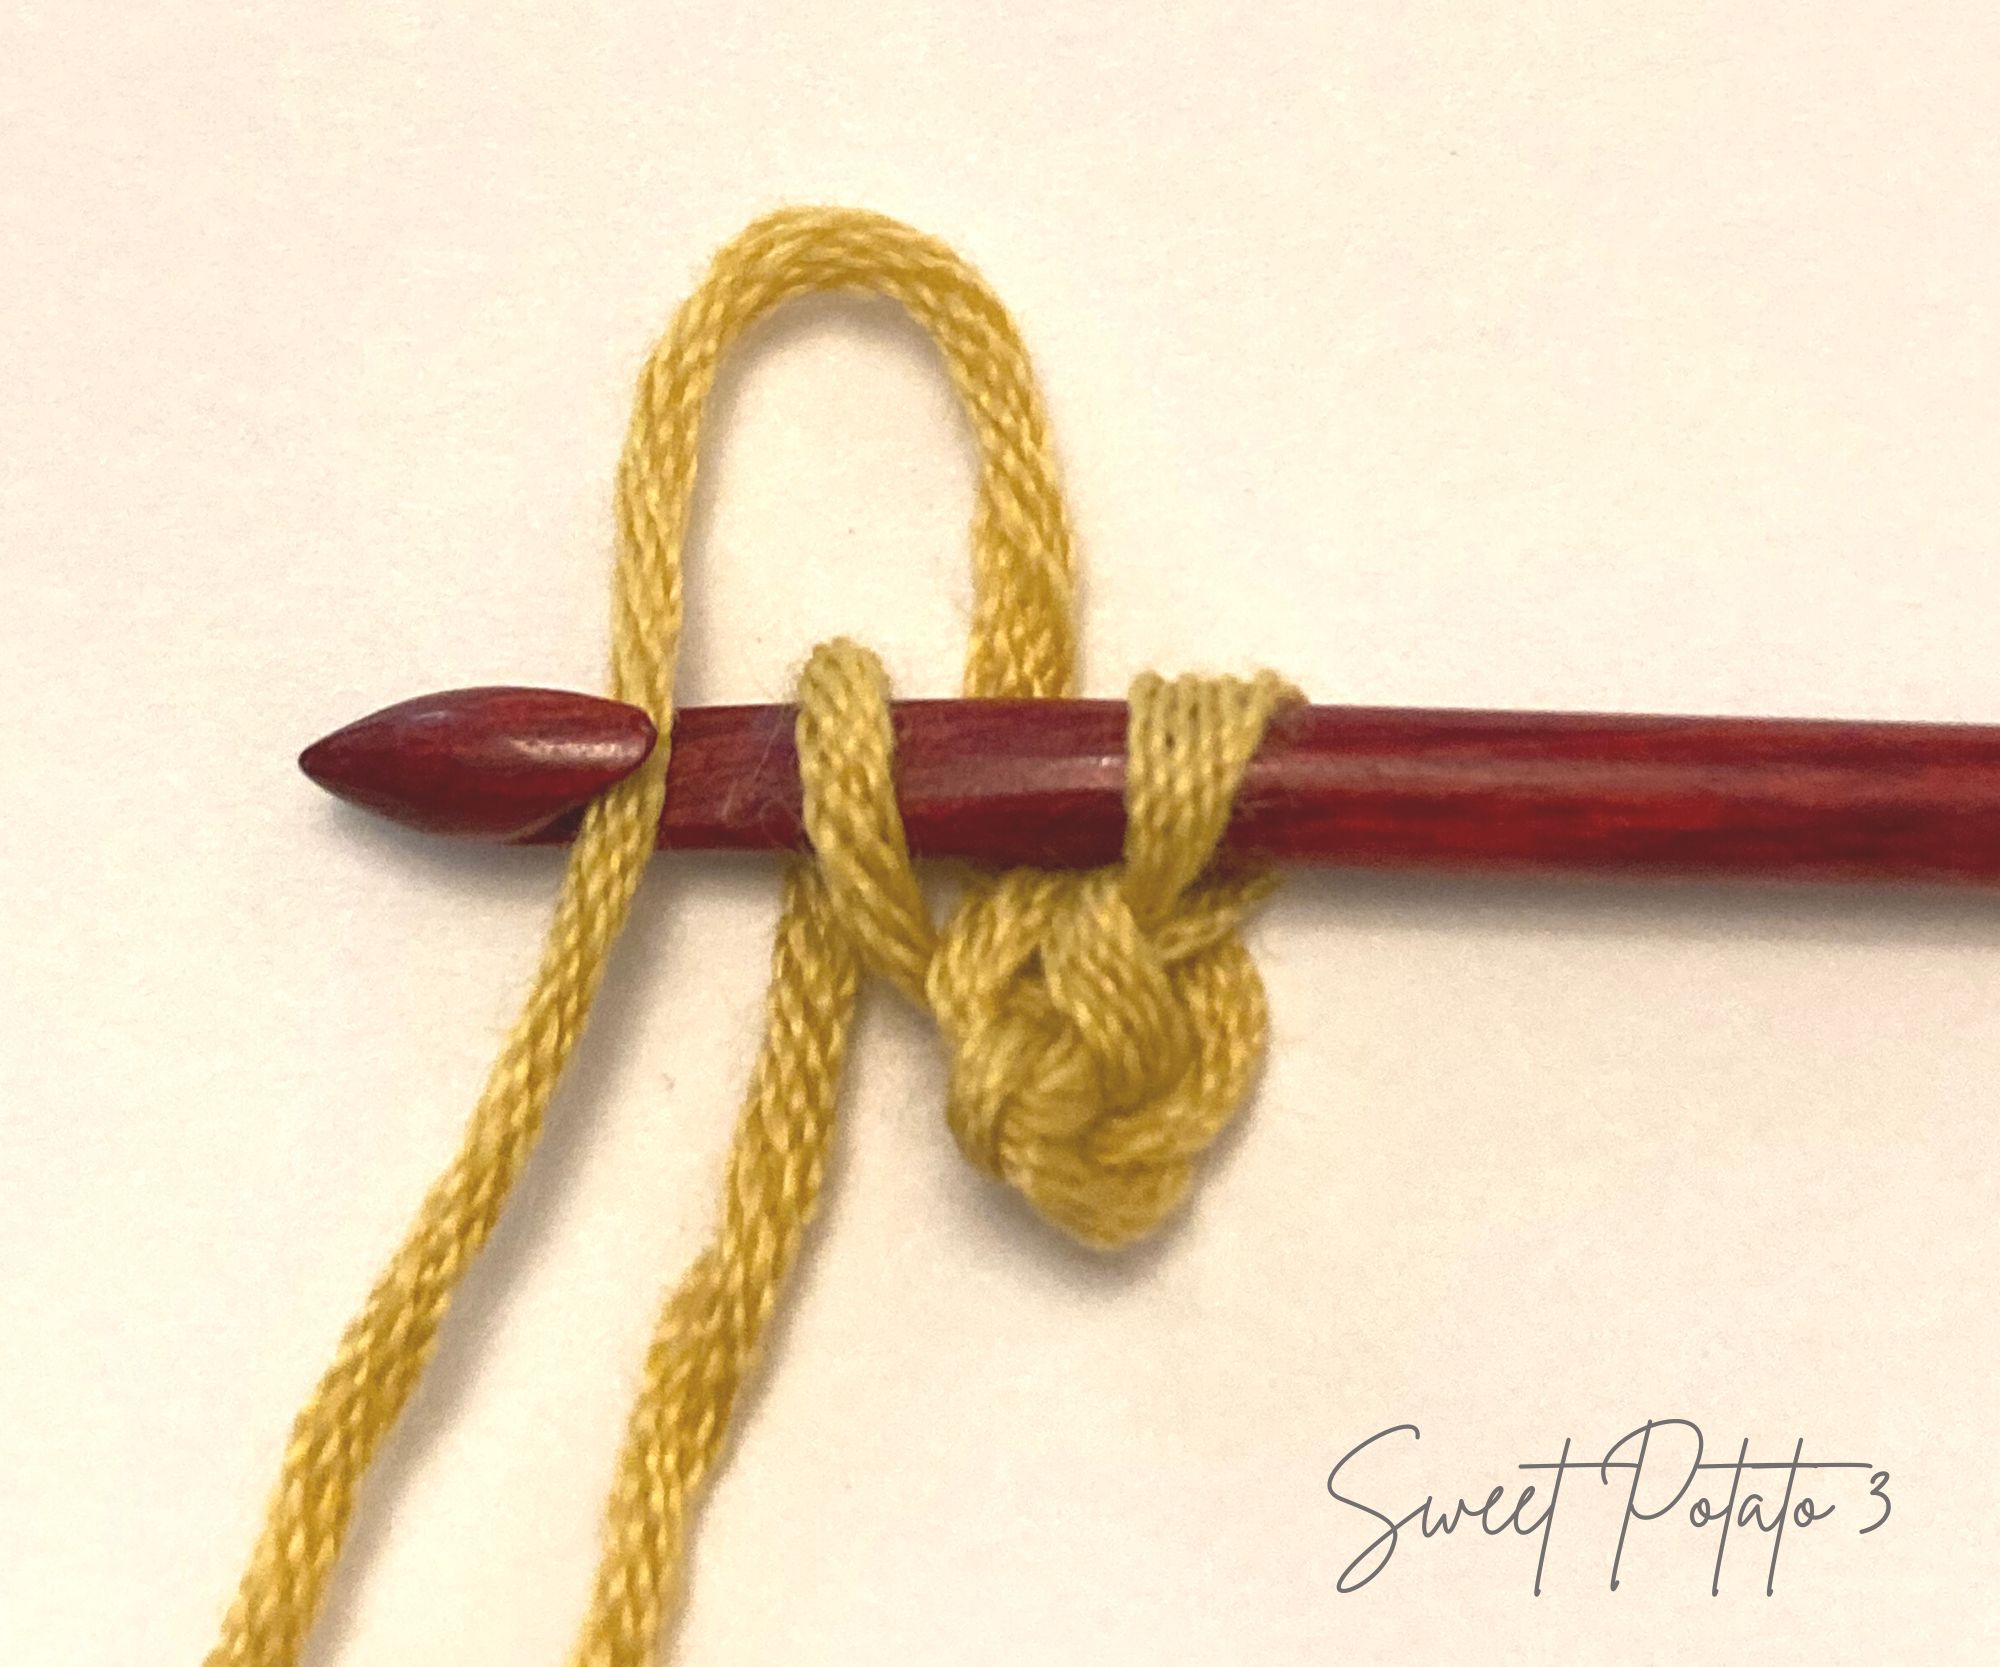
Turn your work and slst into the loop made. Chain 3 and slst into that same loop. You now have 2 loops stacked on top of one another.
Helpful Tip: you will be working in these loops in the following steps, one of my pattern testers found it helpful to use a stitch marker to mark these loops to assist in finding them as you crochet more rows on top of them.
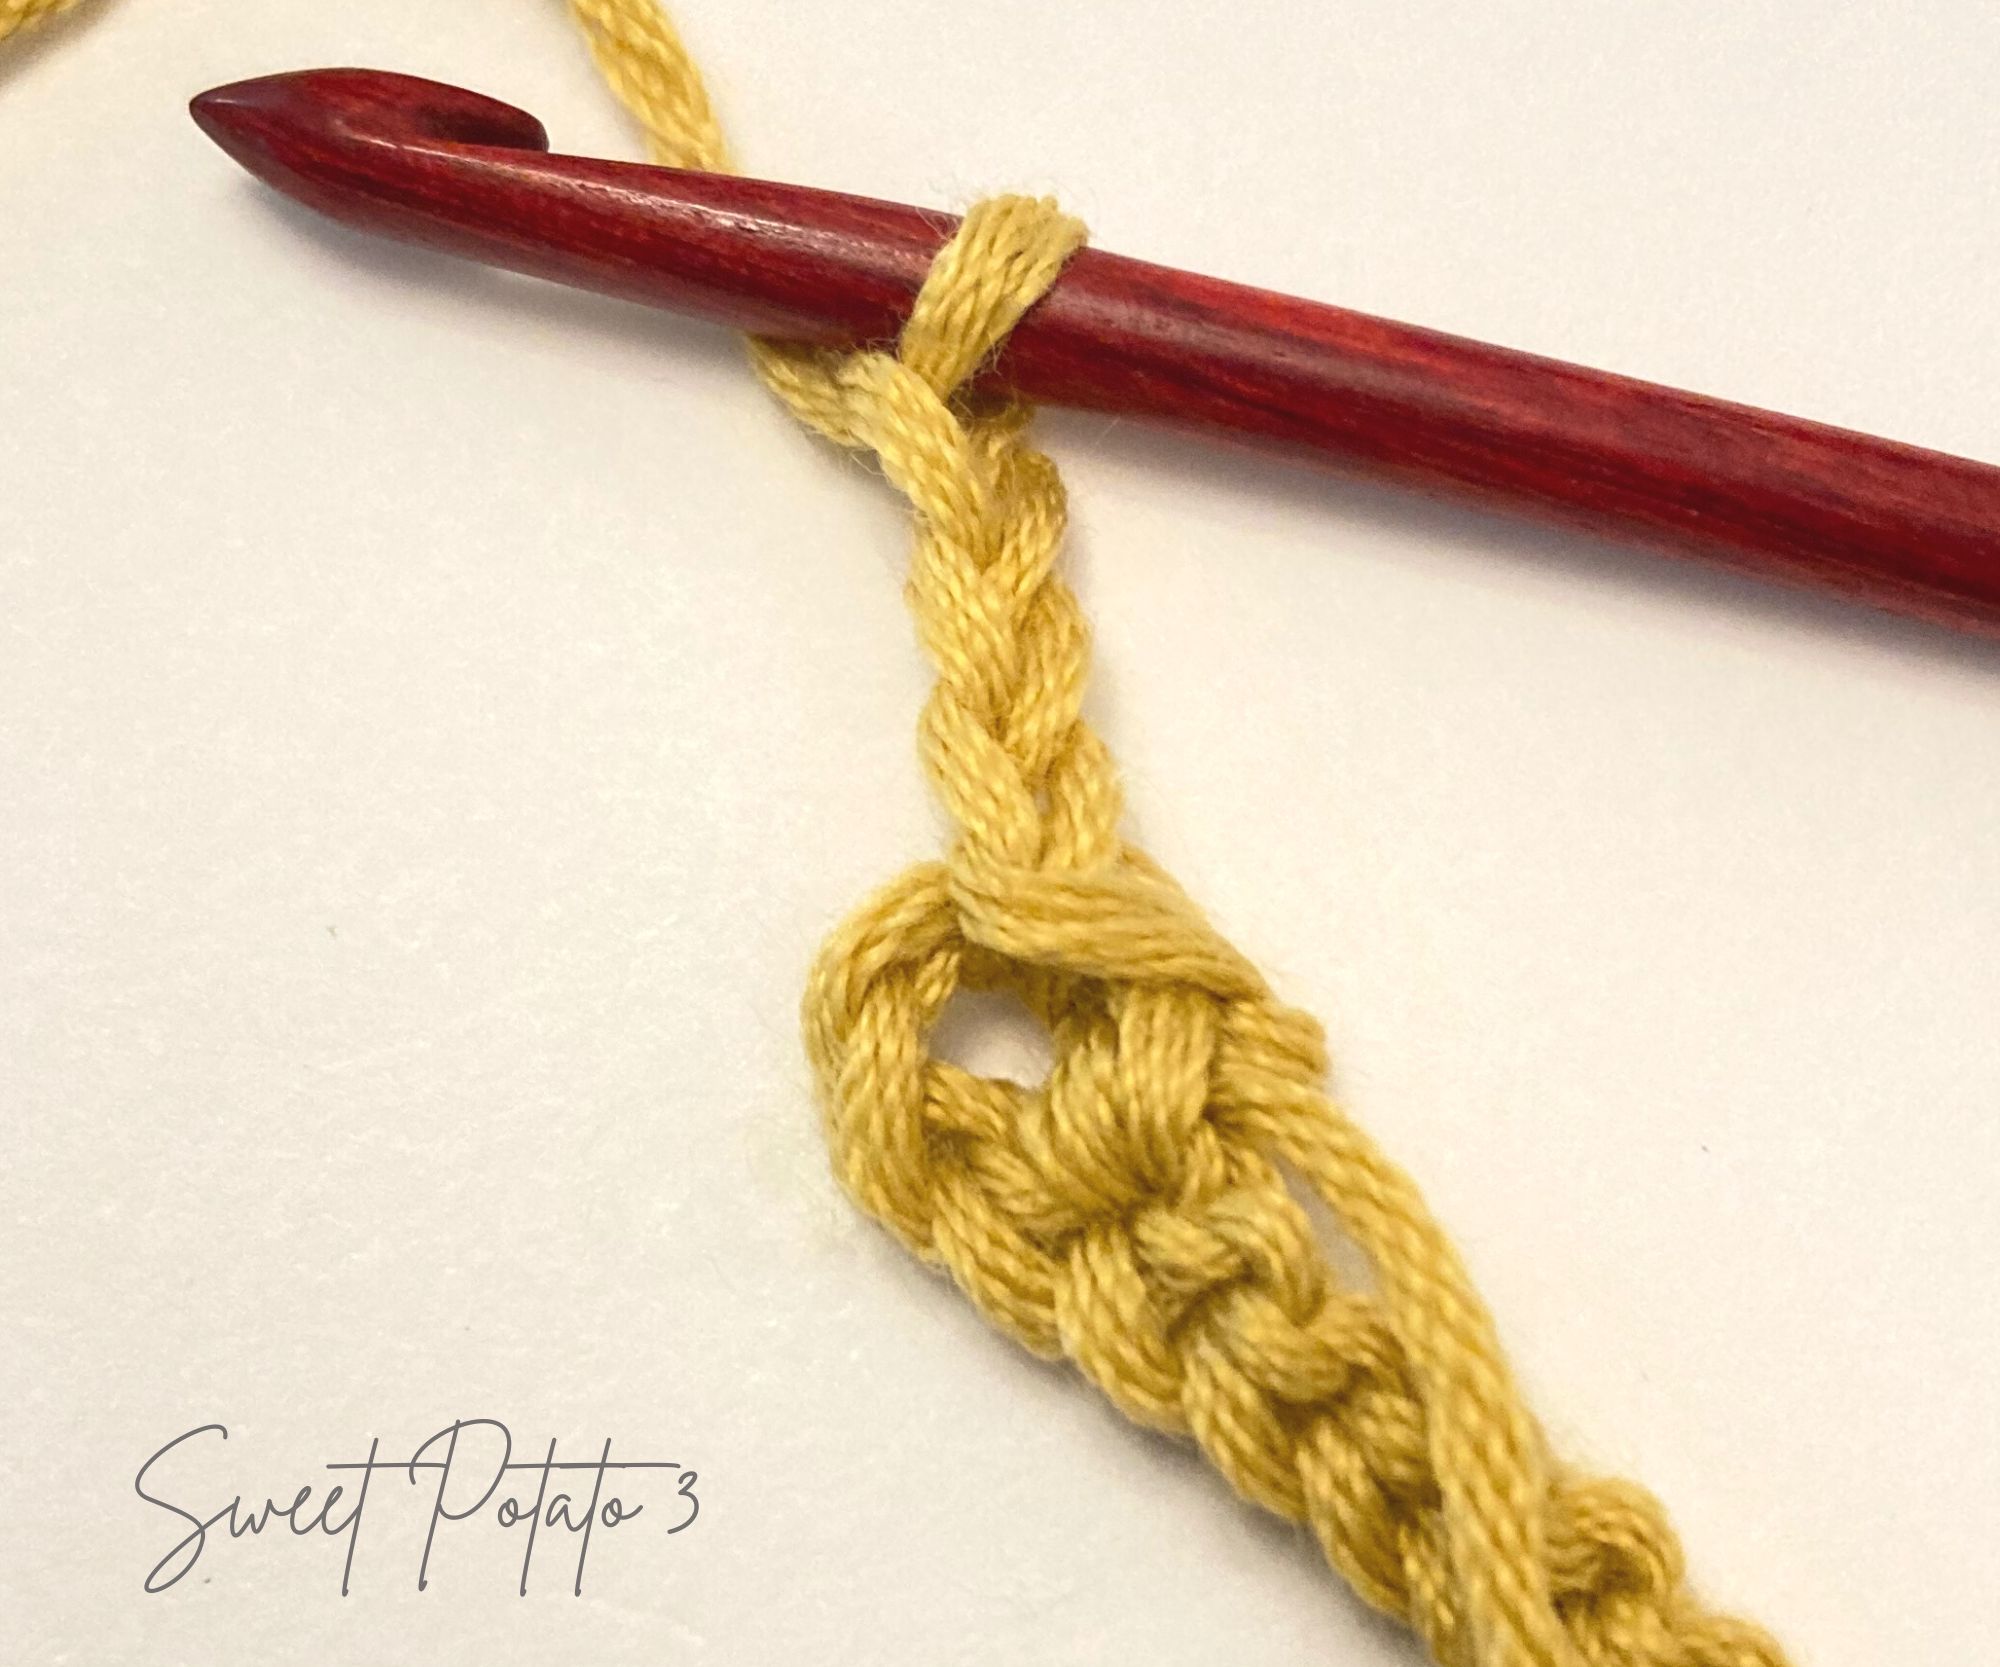
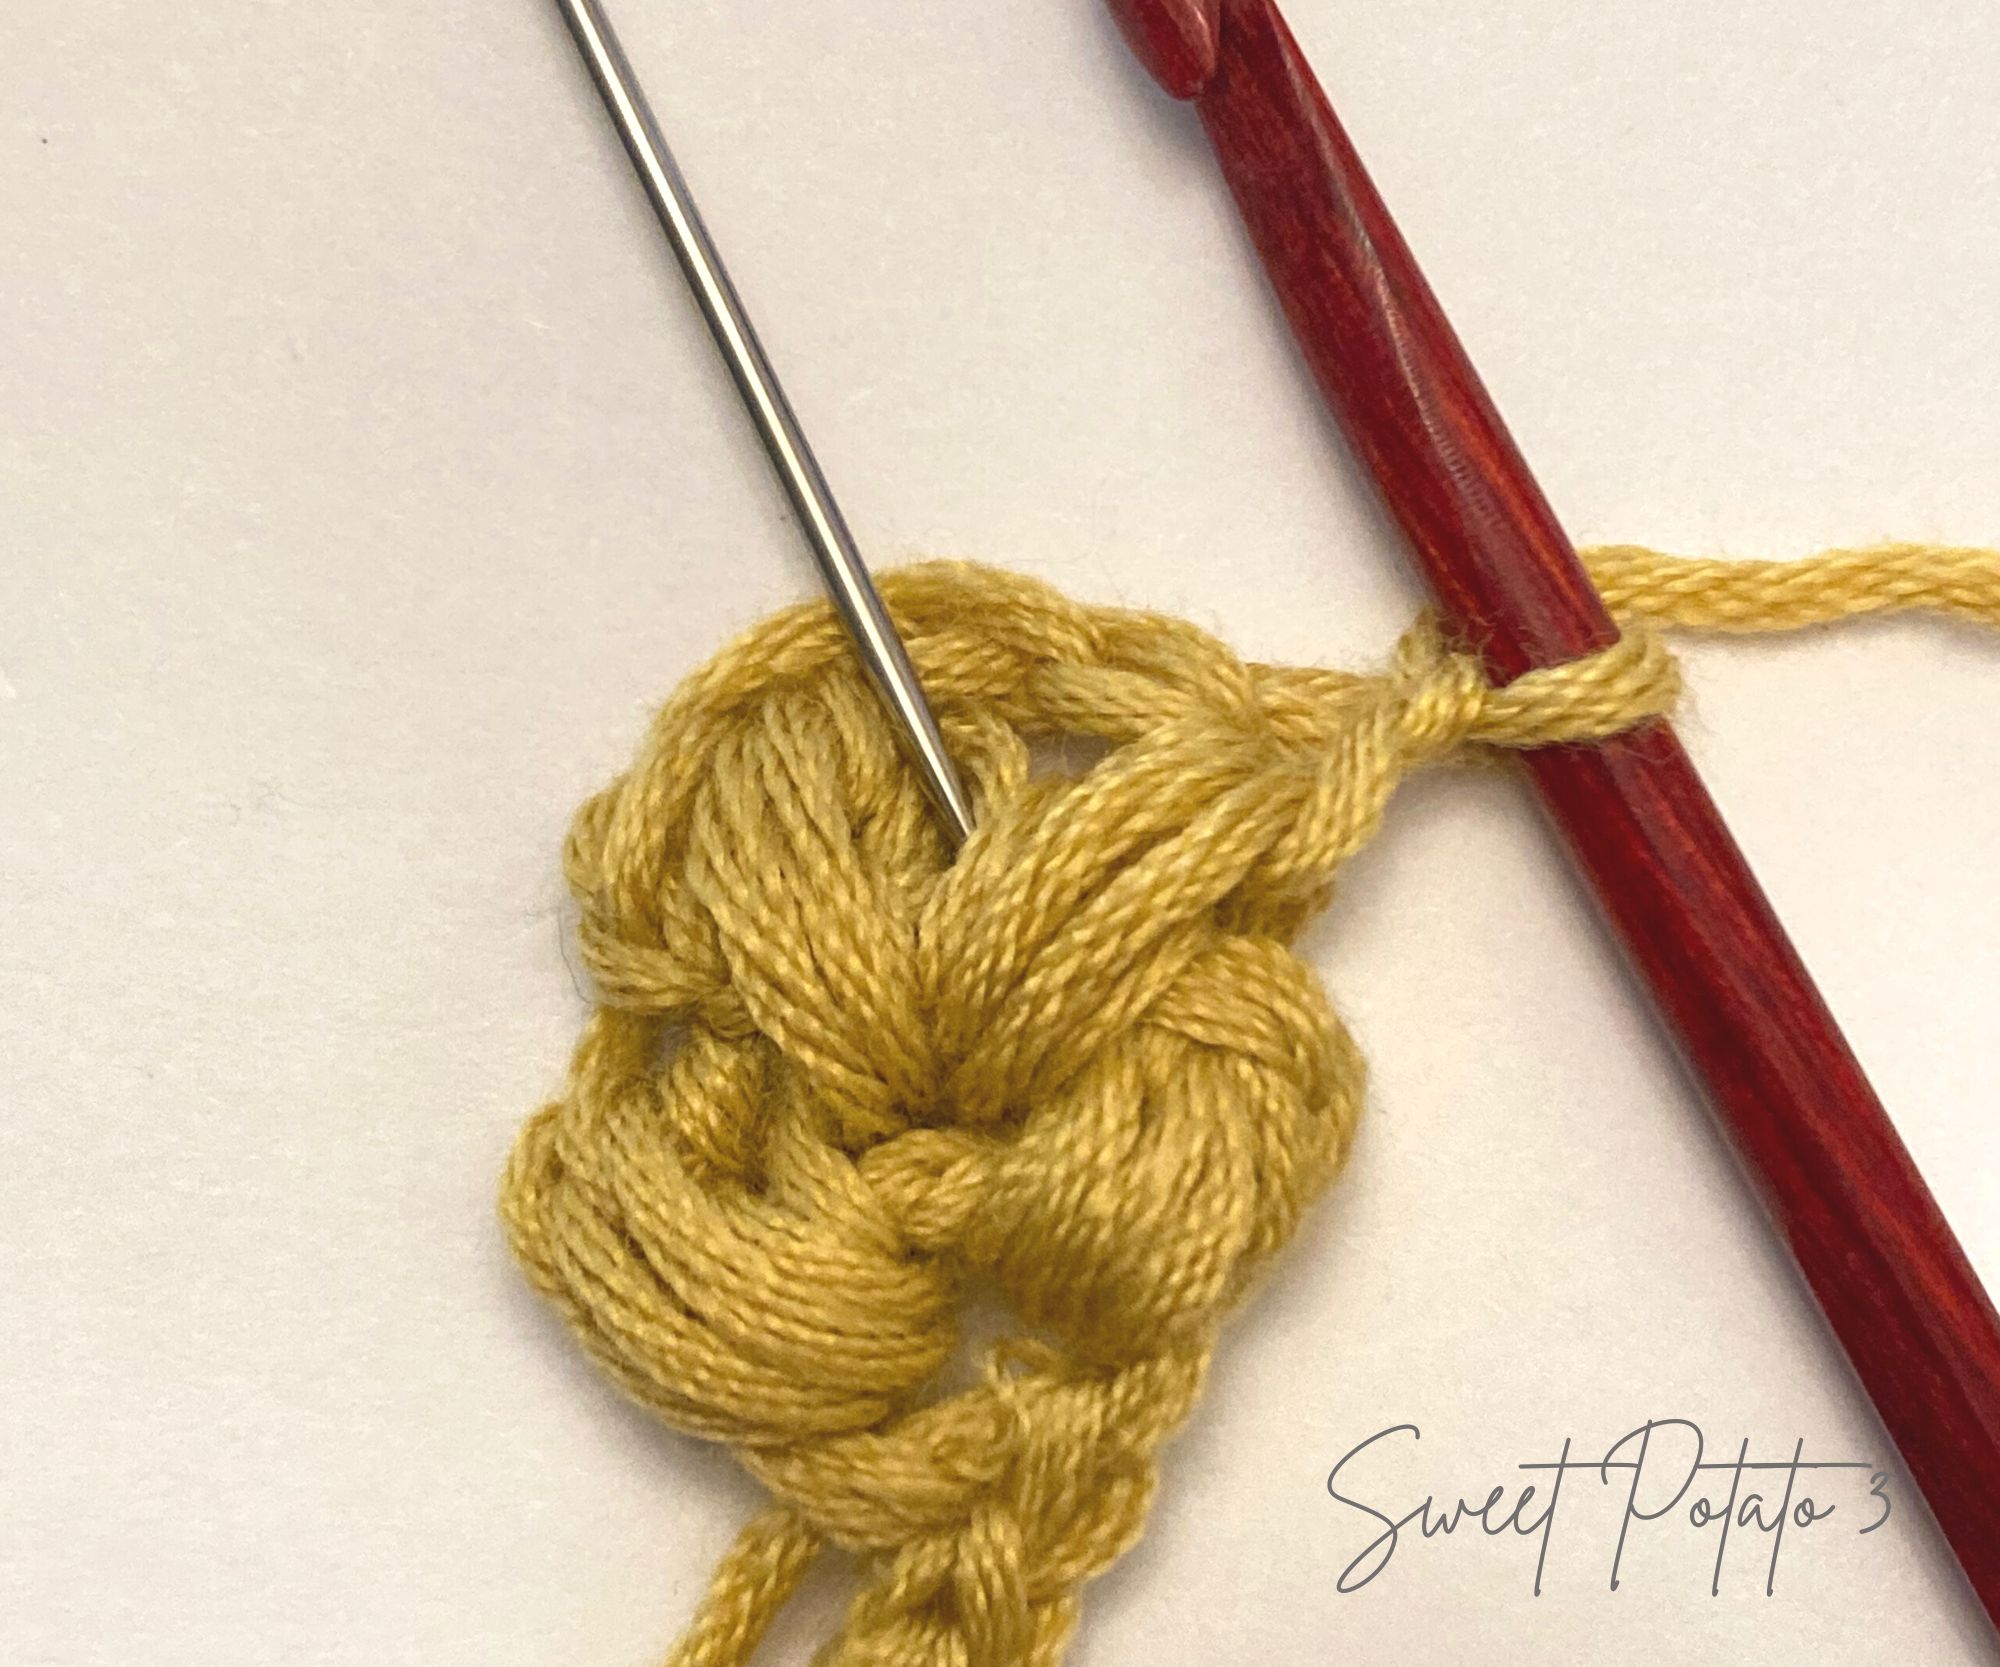
Turn and chain 1, you will work into the first loop made (the loop on the bottom). In the bottom loop you will crochet a V Puff Stitch, encasing the top loop, if needed place a stitch marker in the top loop to help you find it later.
To crochet a V Puff stitch: [yarn over, insert your hook and pull up a loop], repeat [ ] 2 more times, yarn over and pull through all 7 loops on your hook, chain 2, repeat [ ] for a total of 3 times in the same space, yarn over and pull through all 7 loops on your hook, your V Puff stitch is now completed.
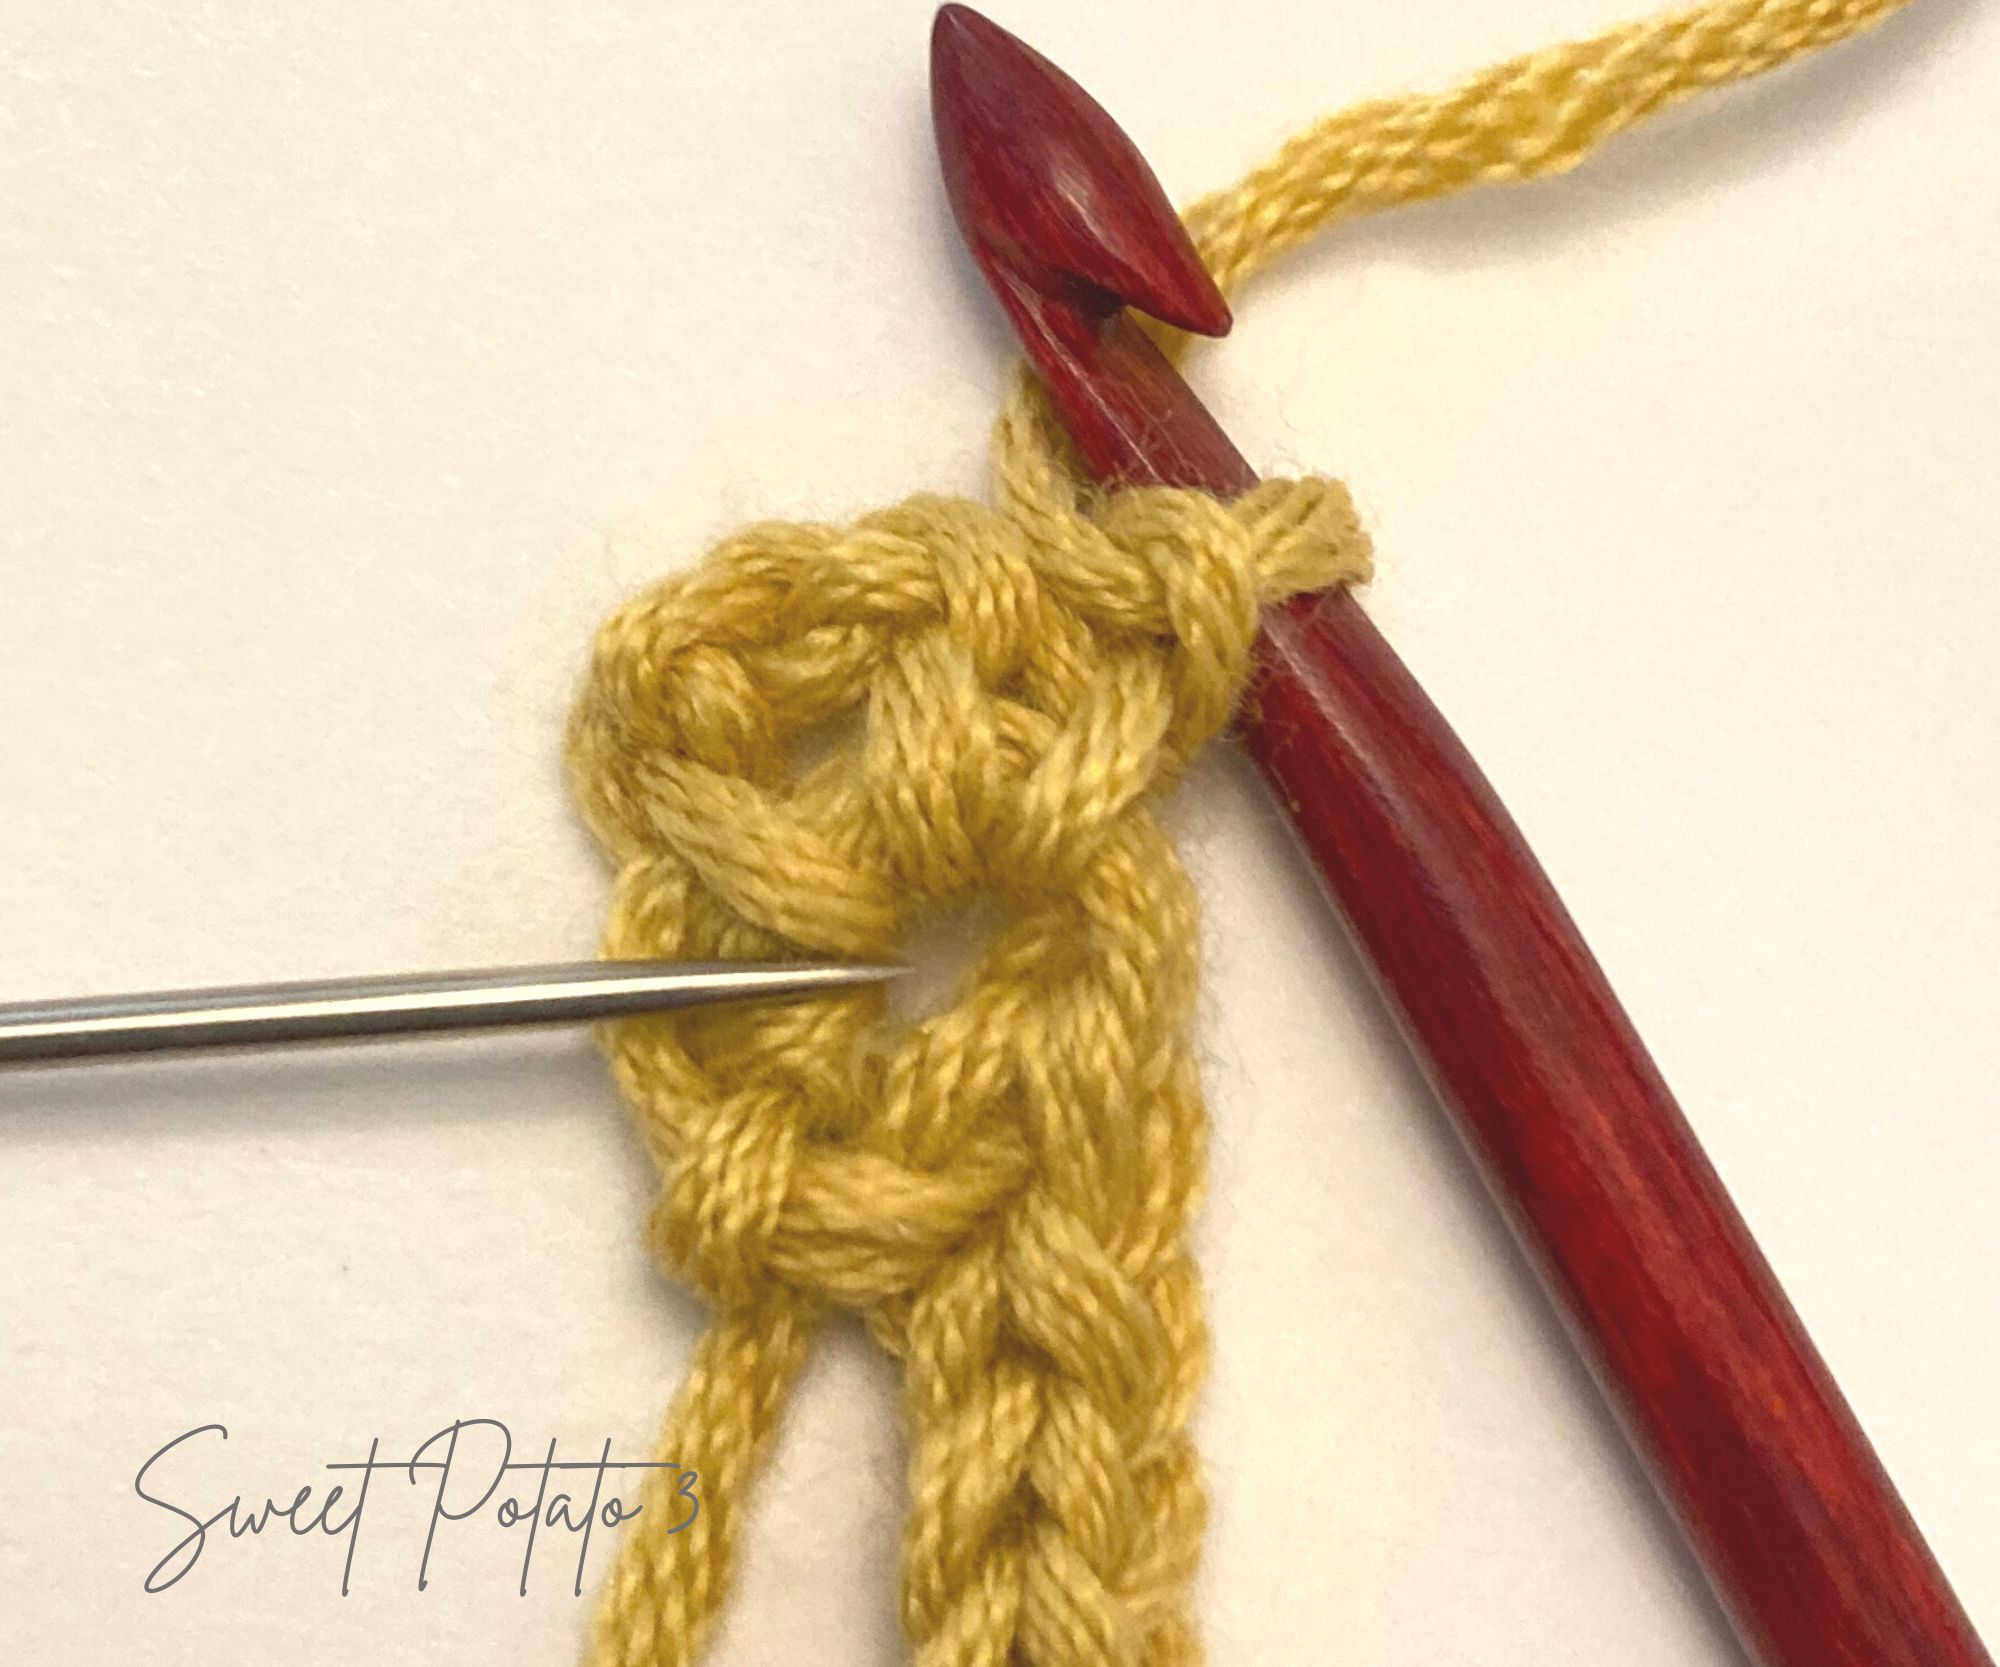
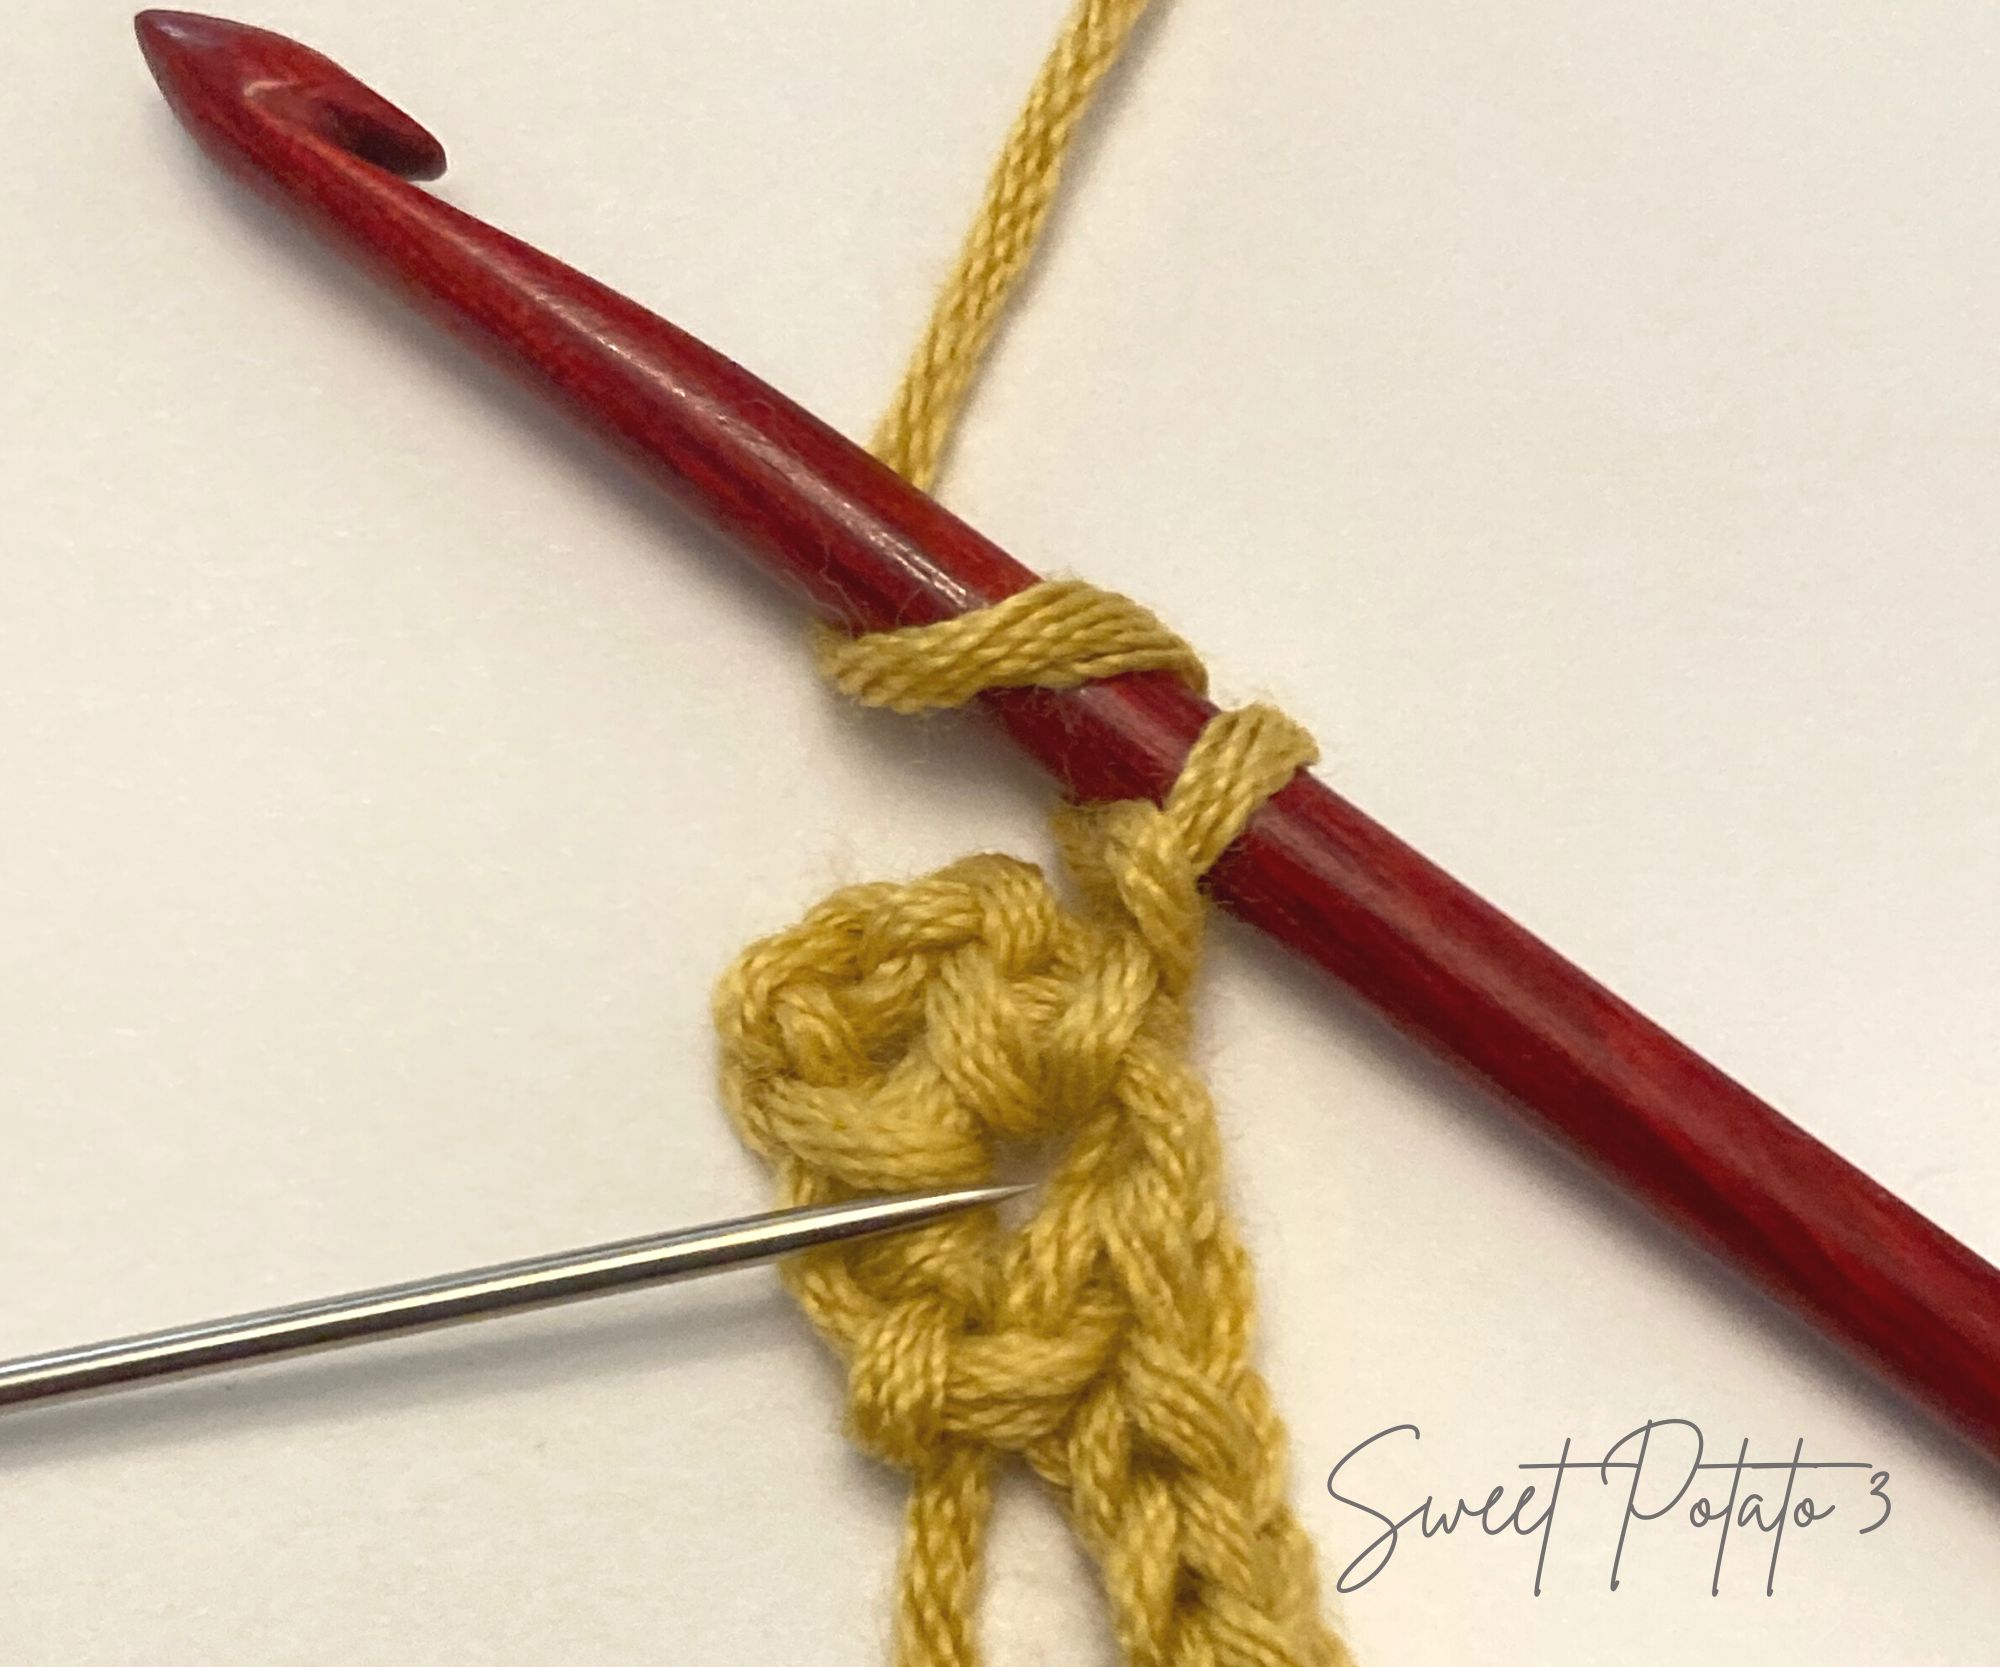
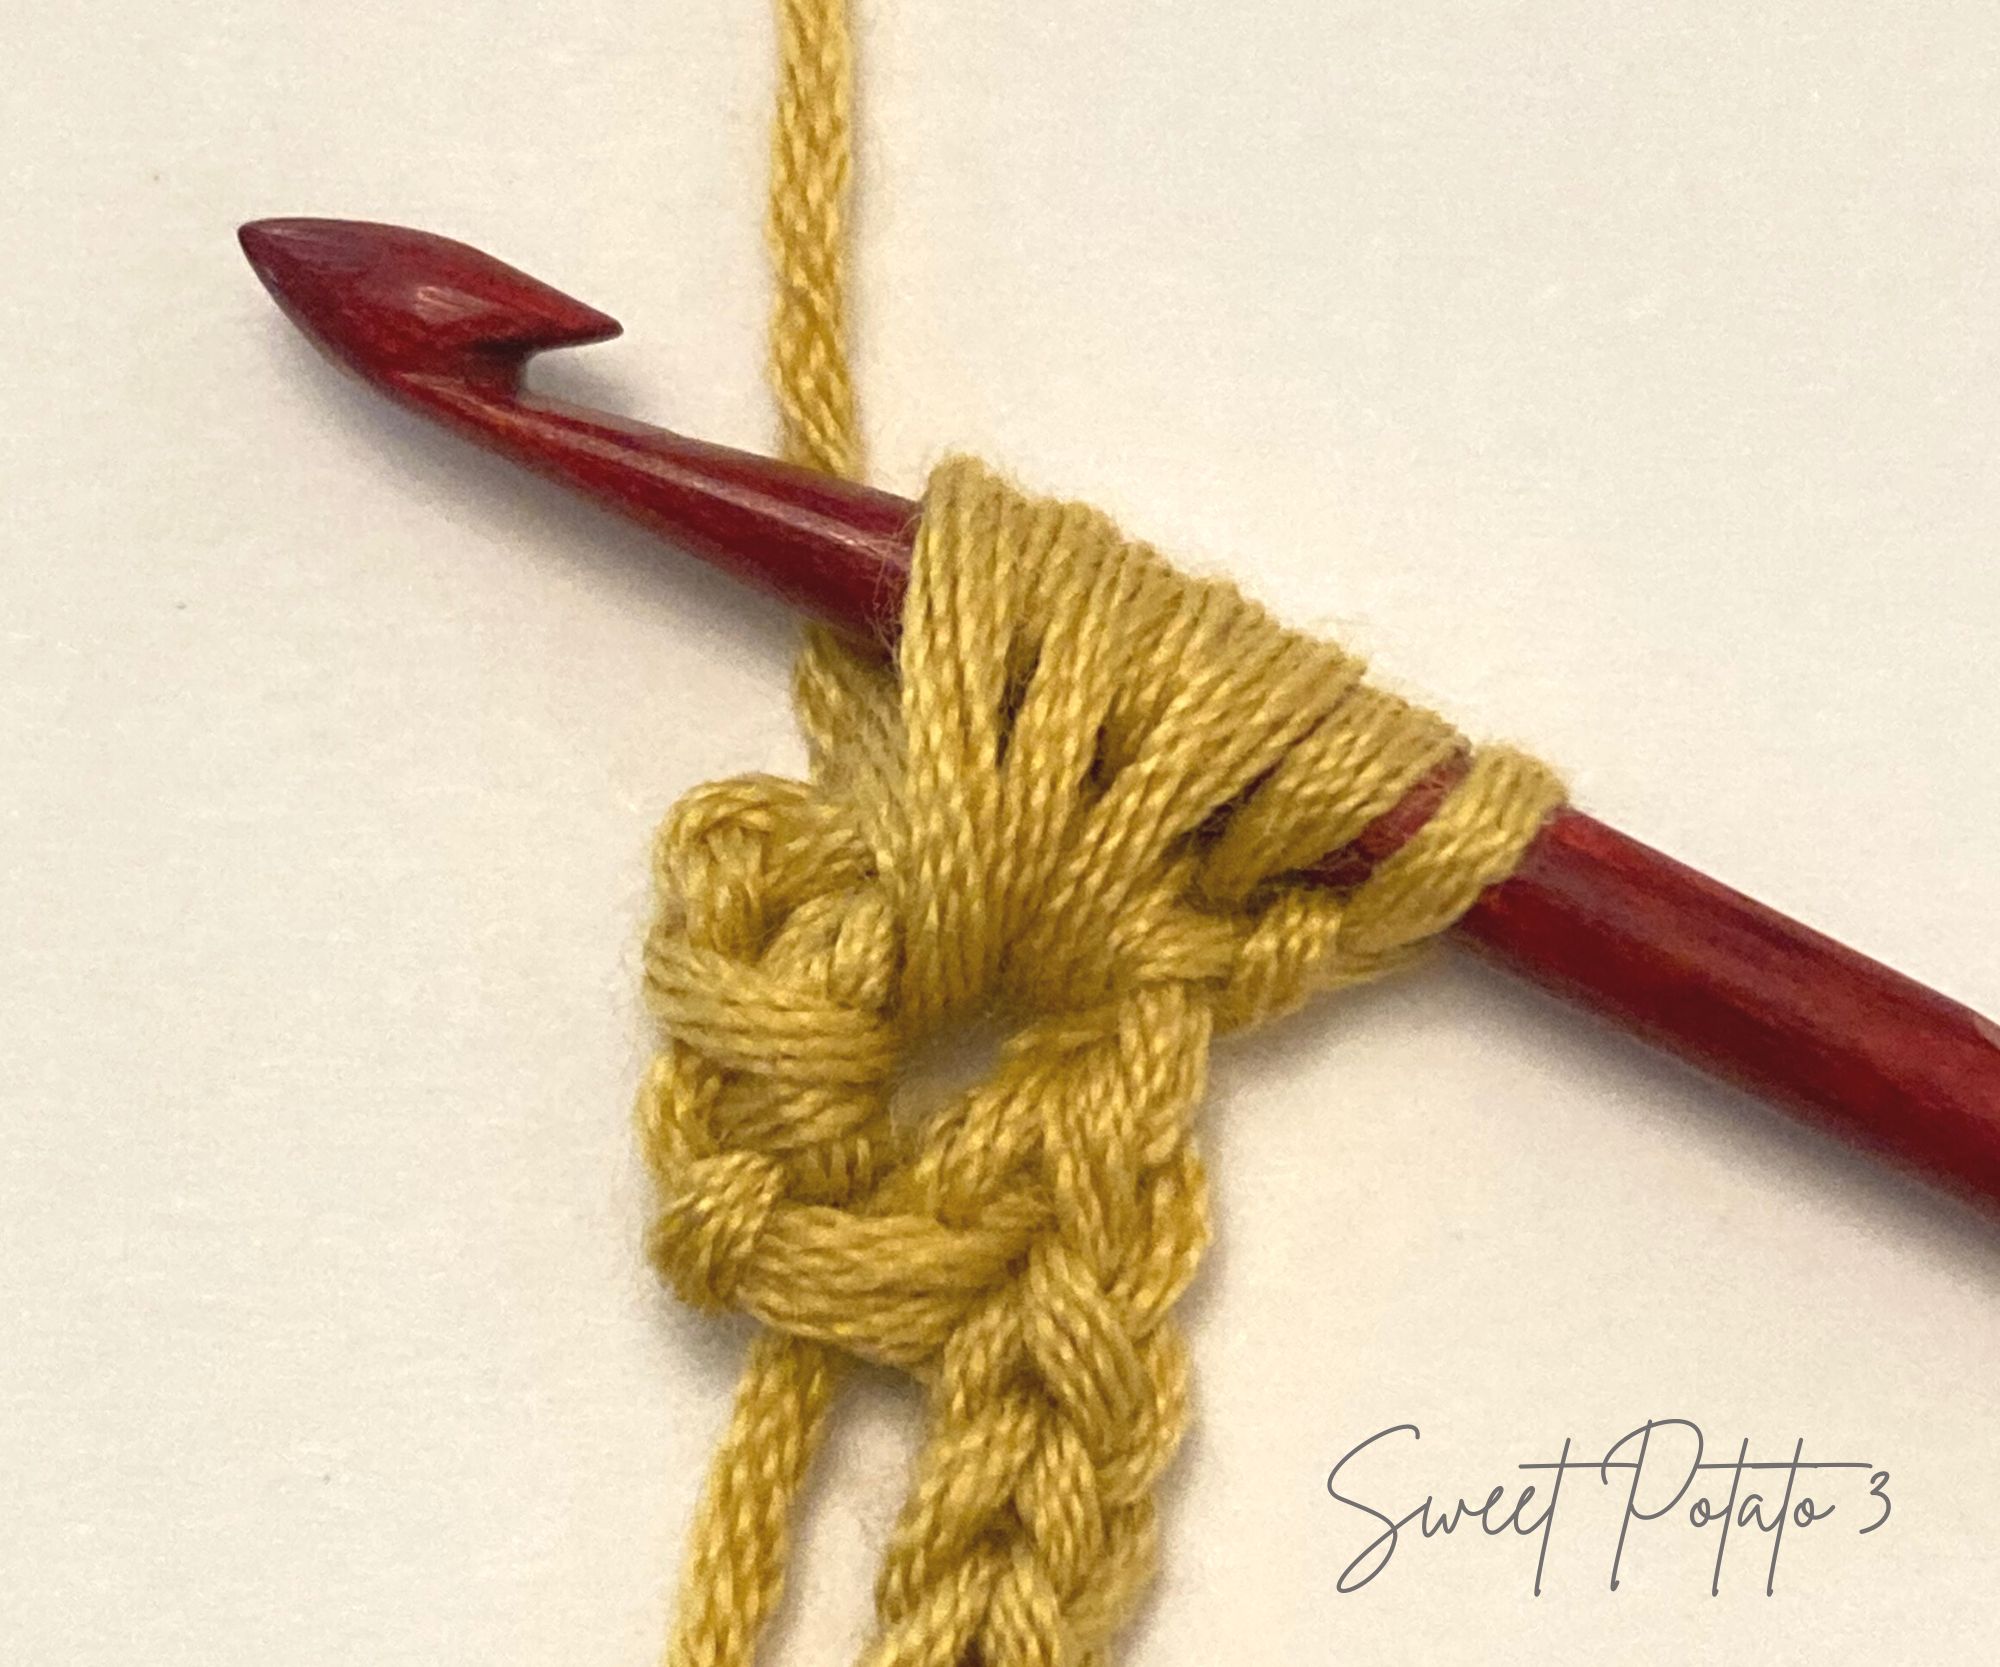
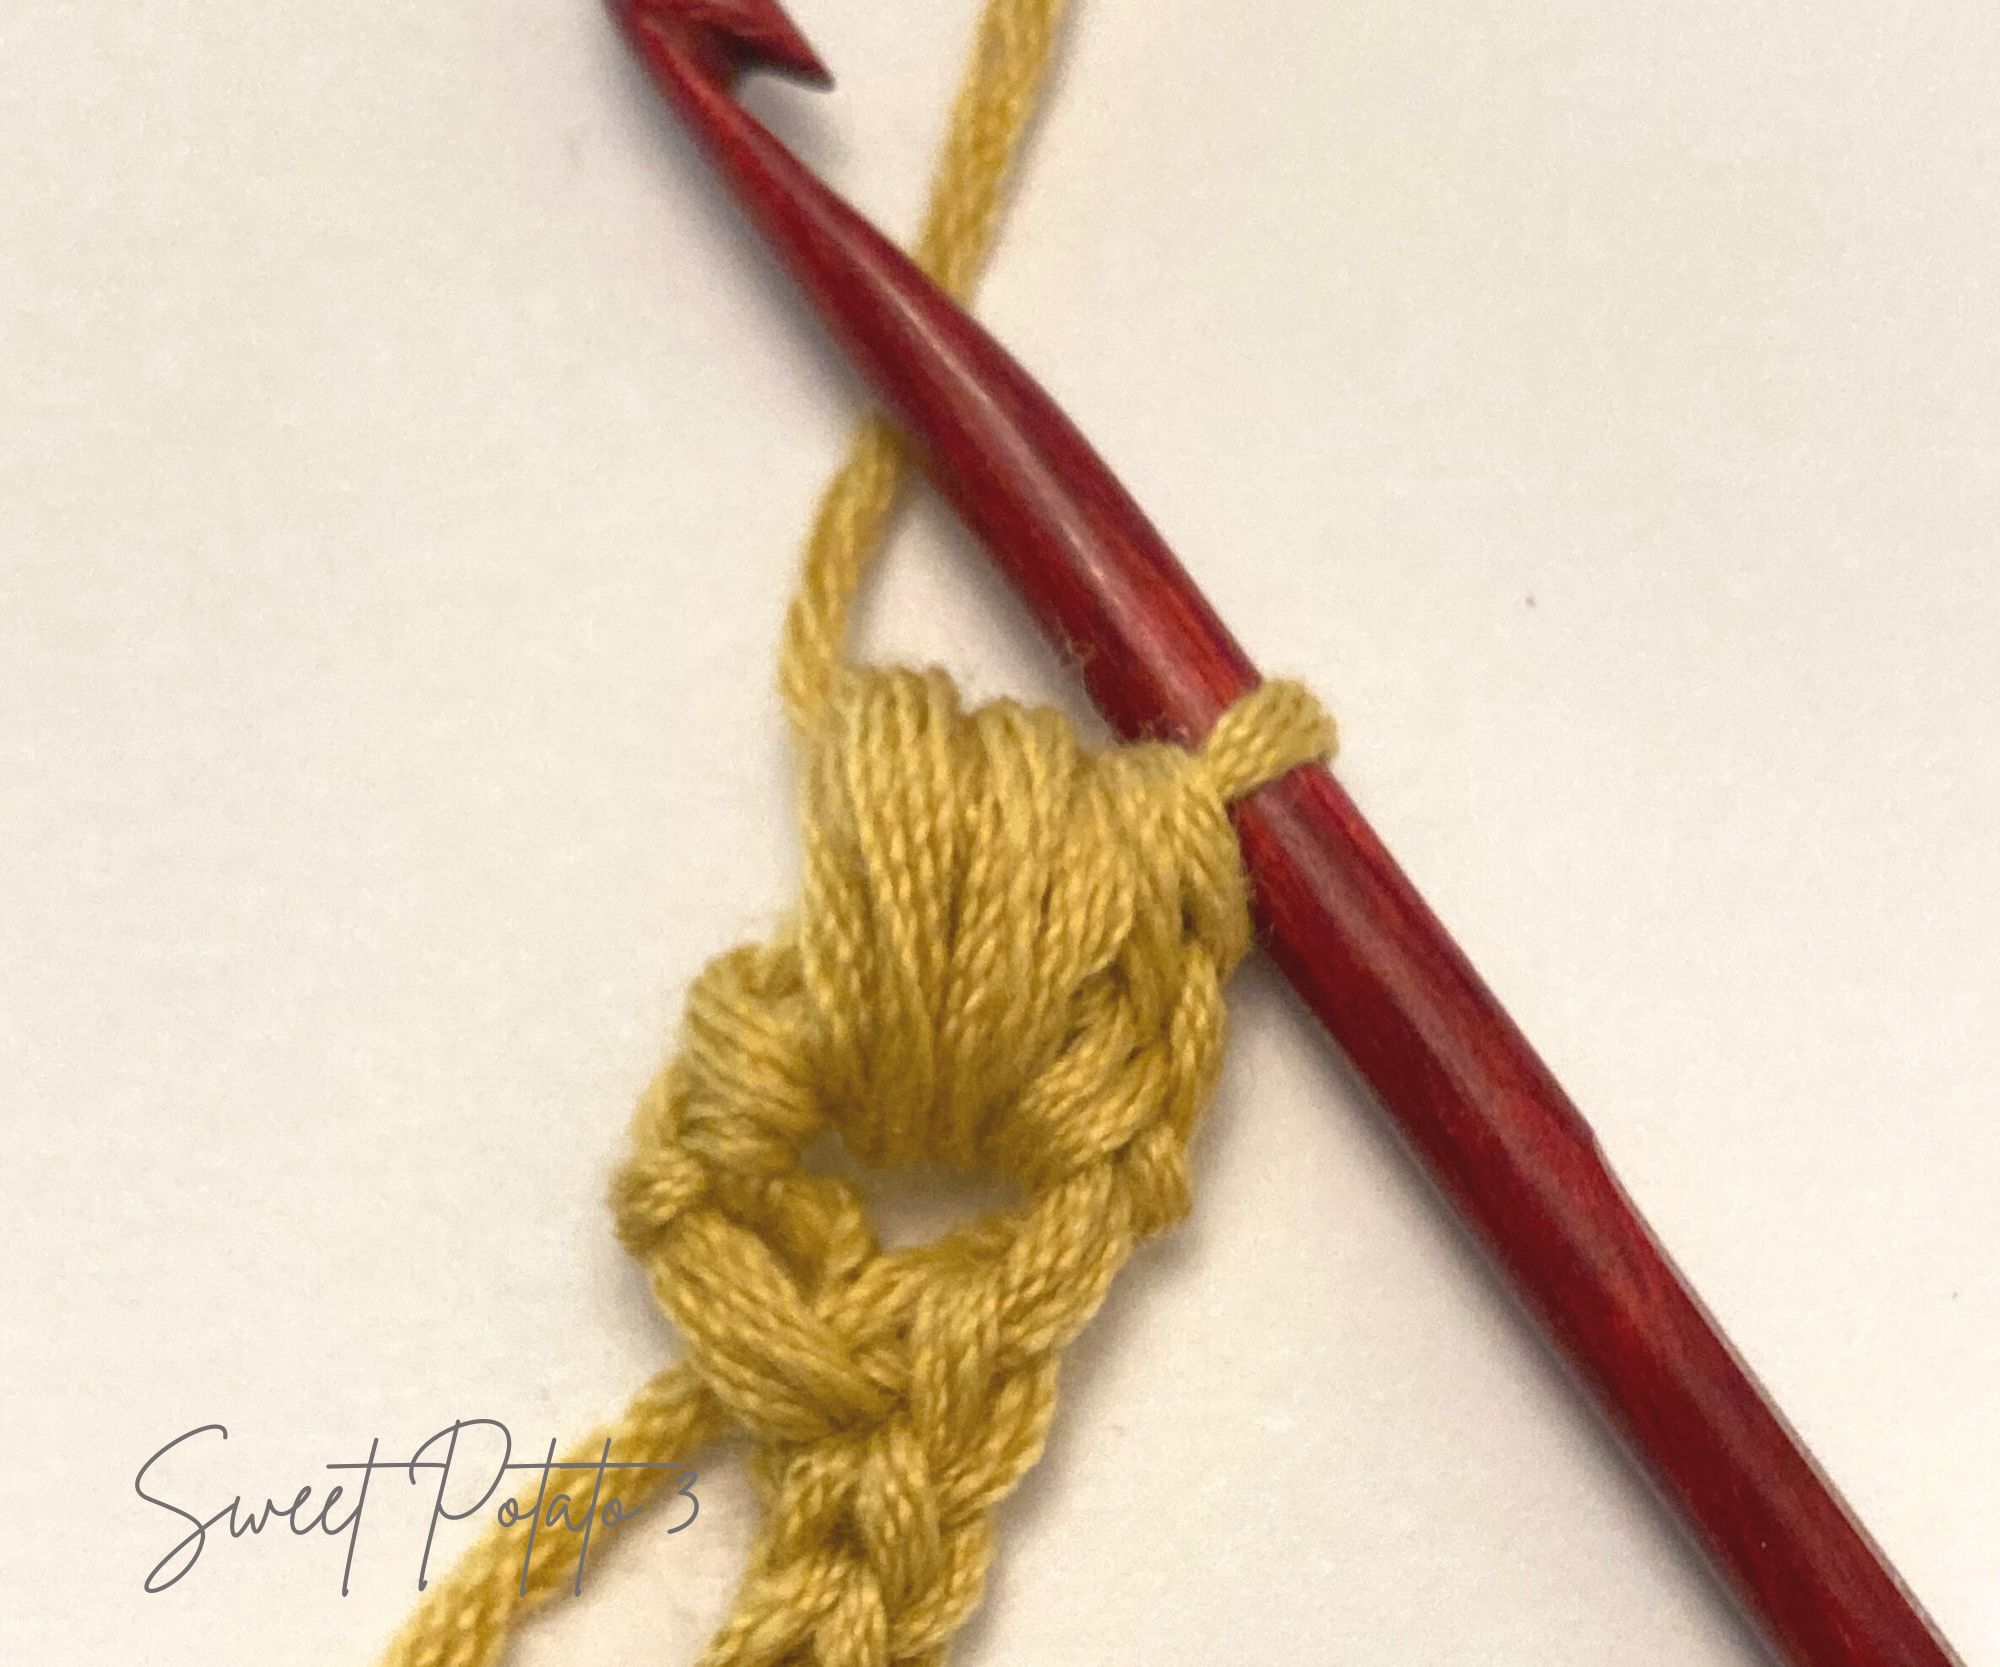
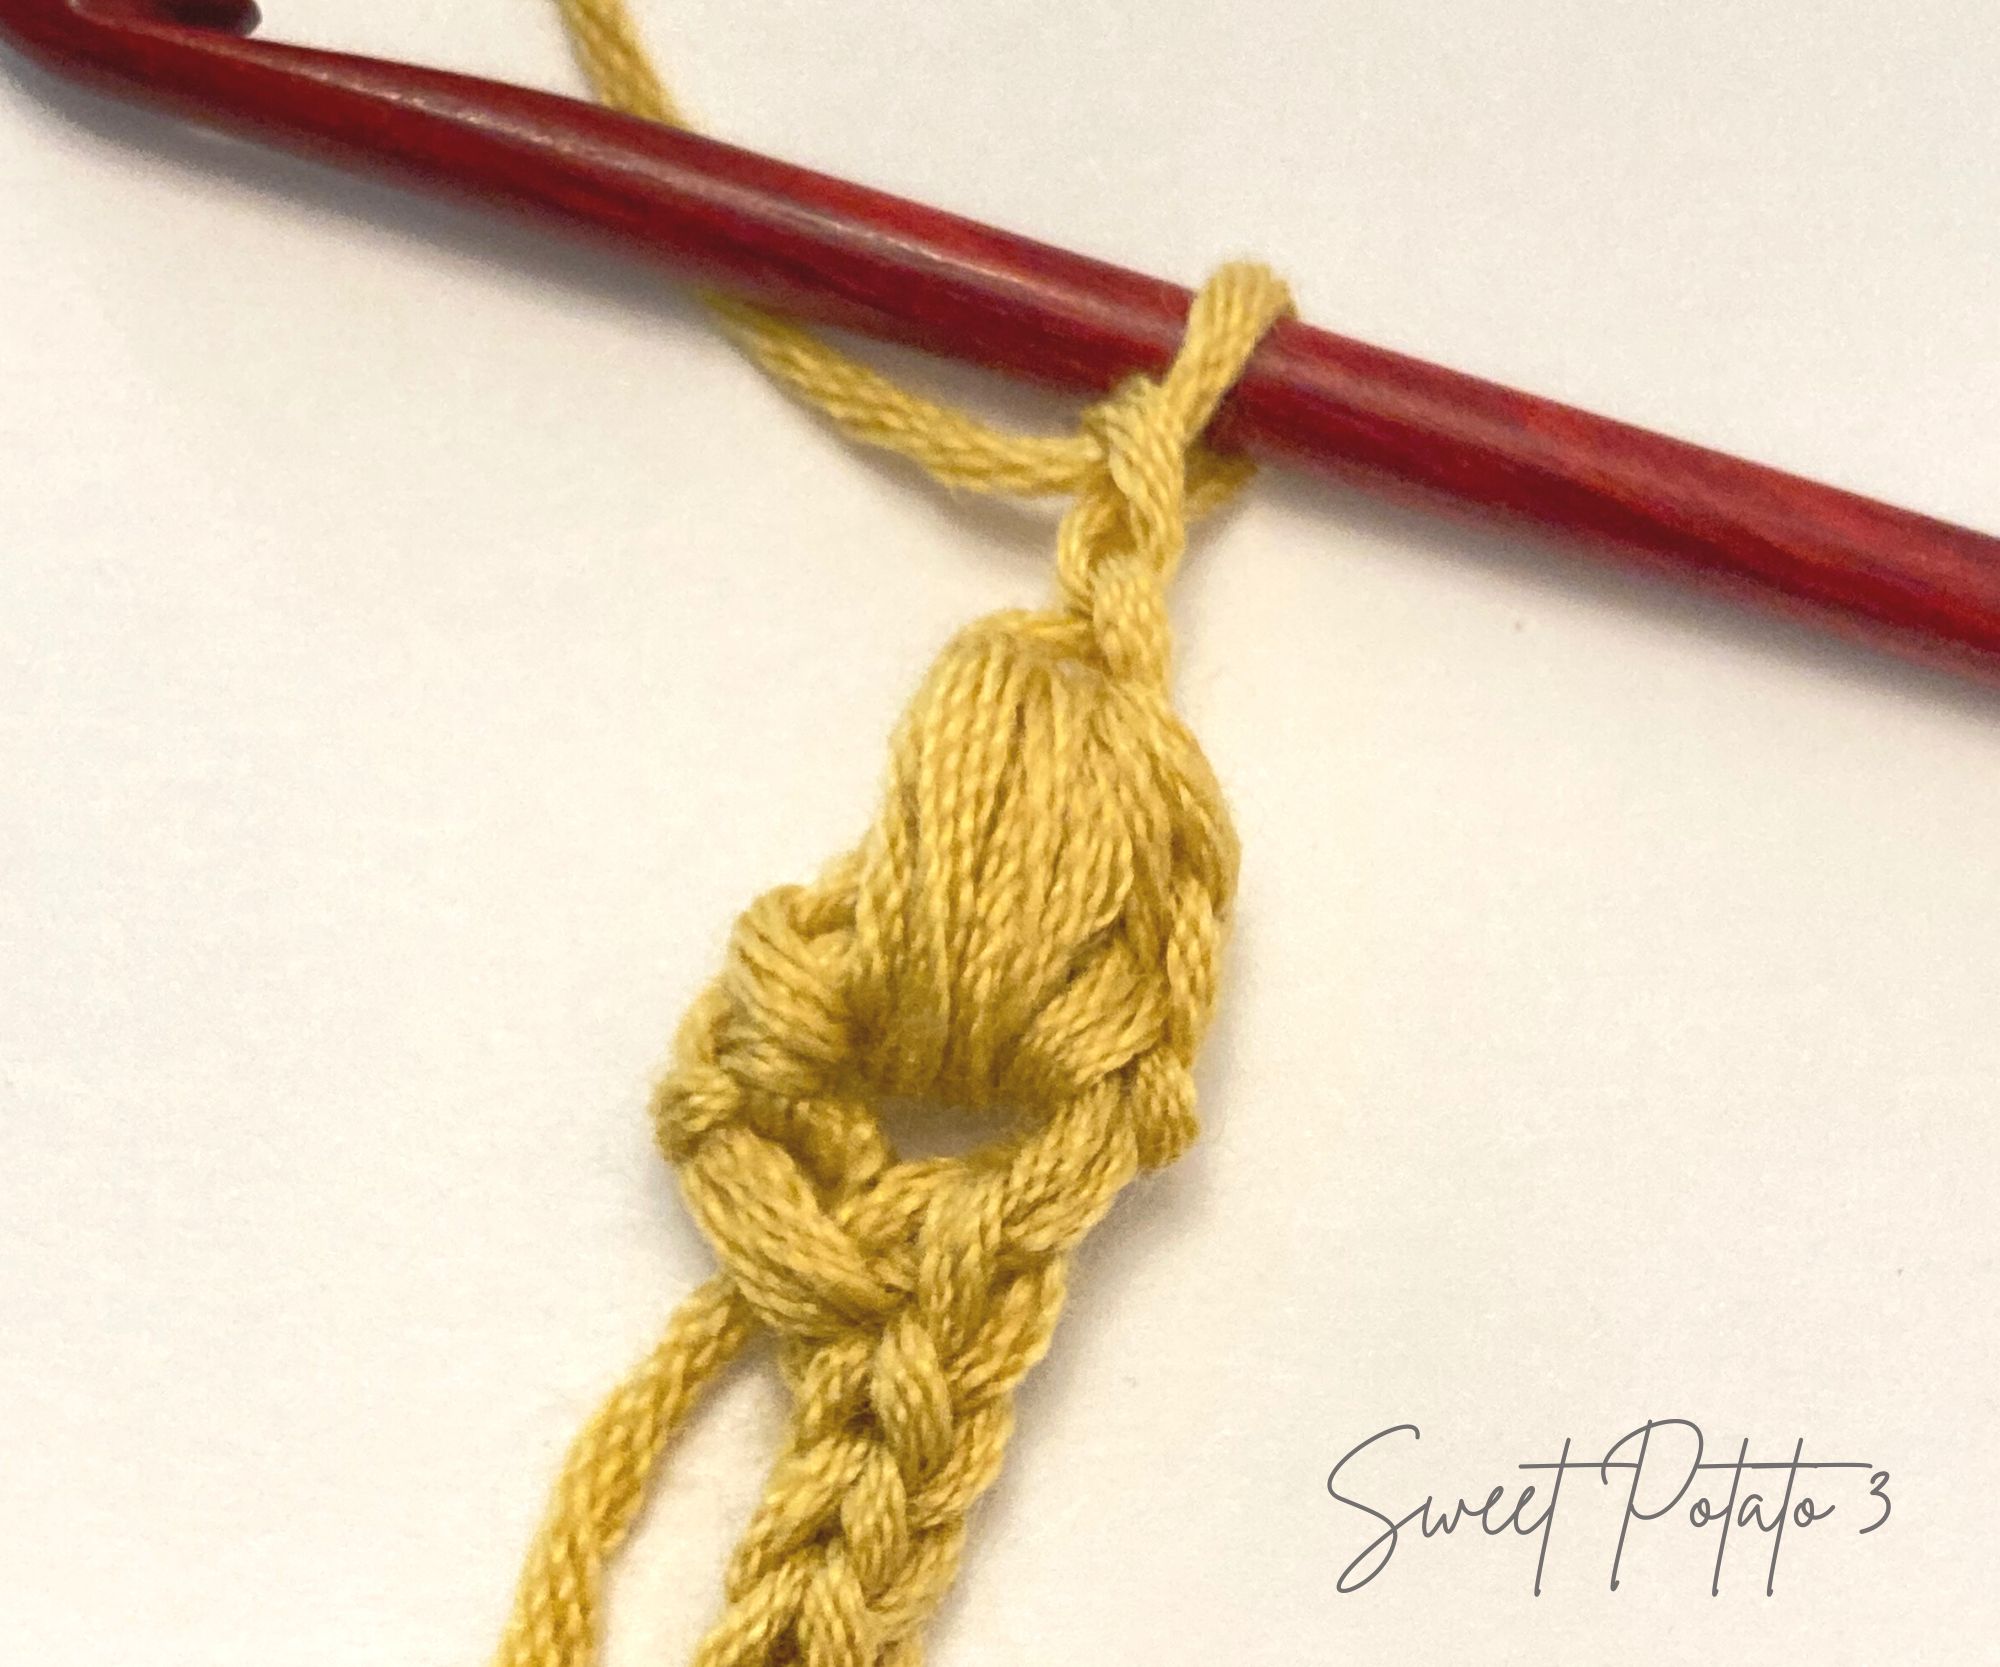
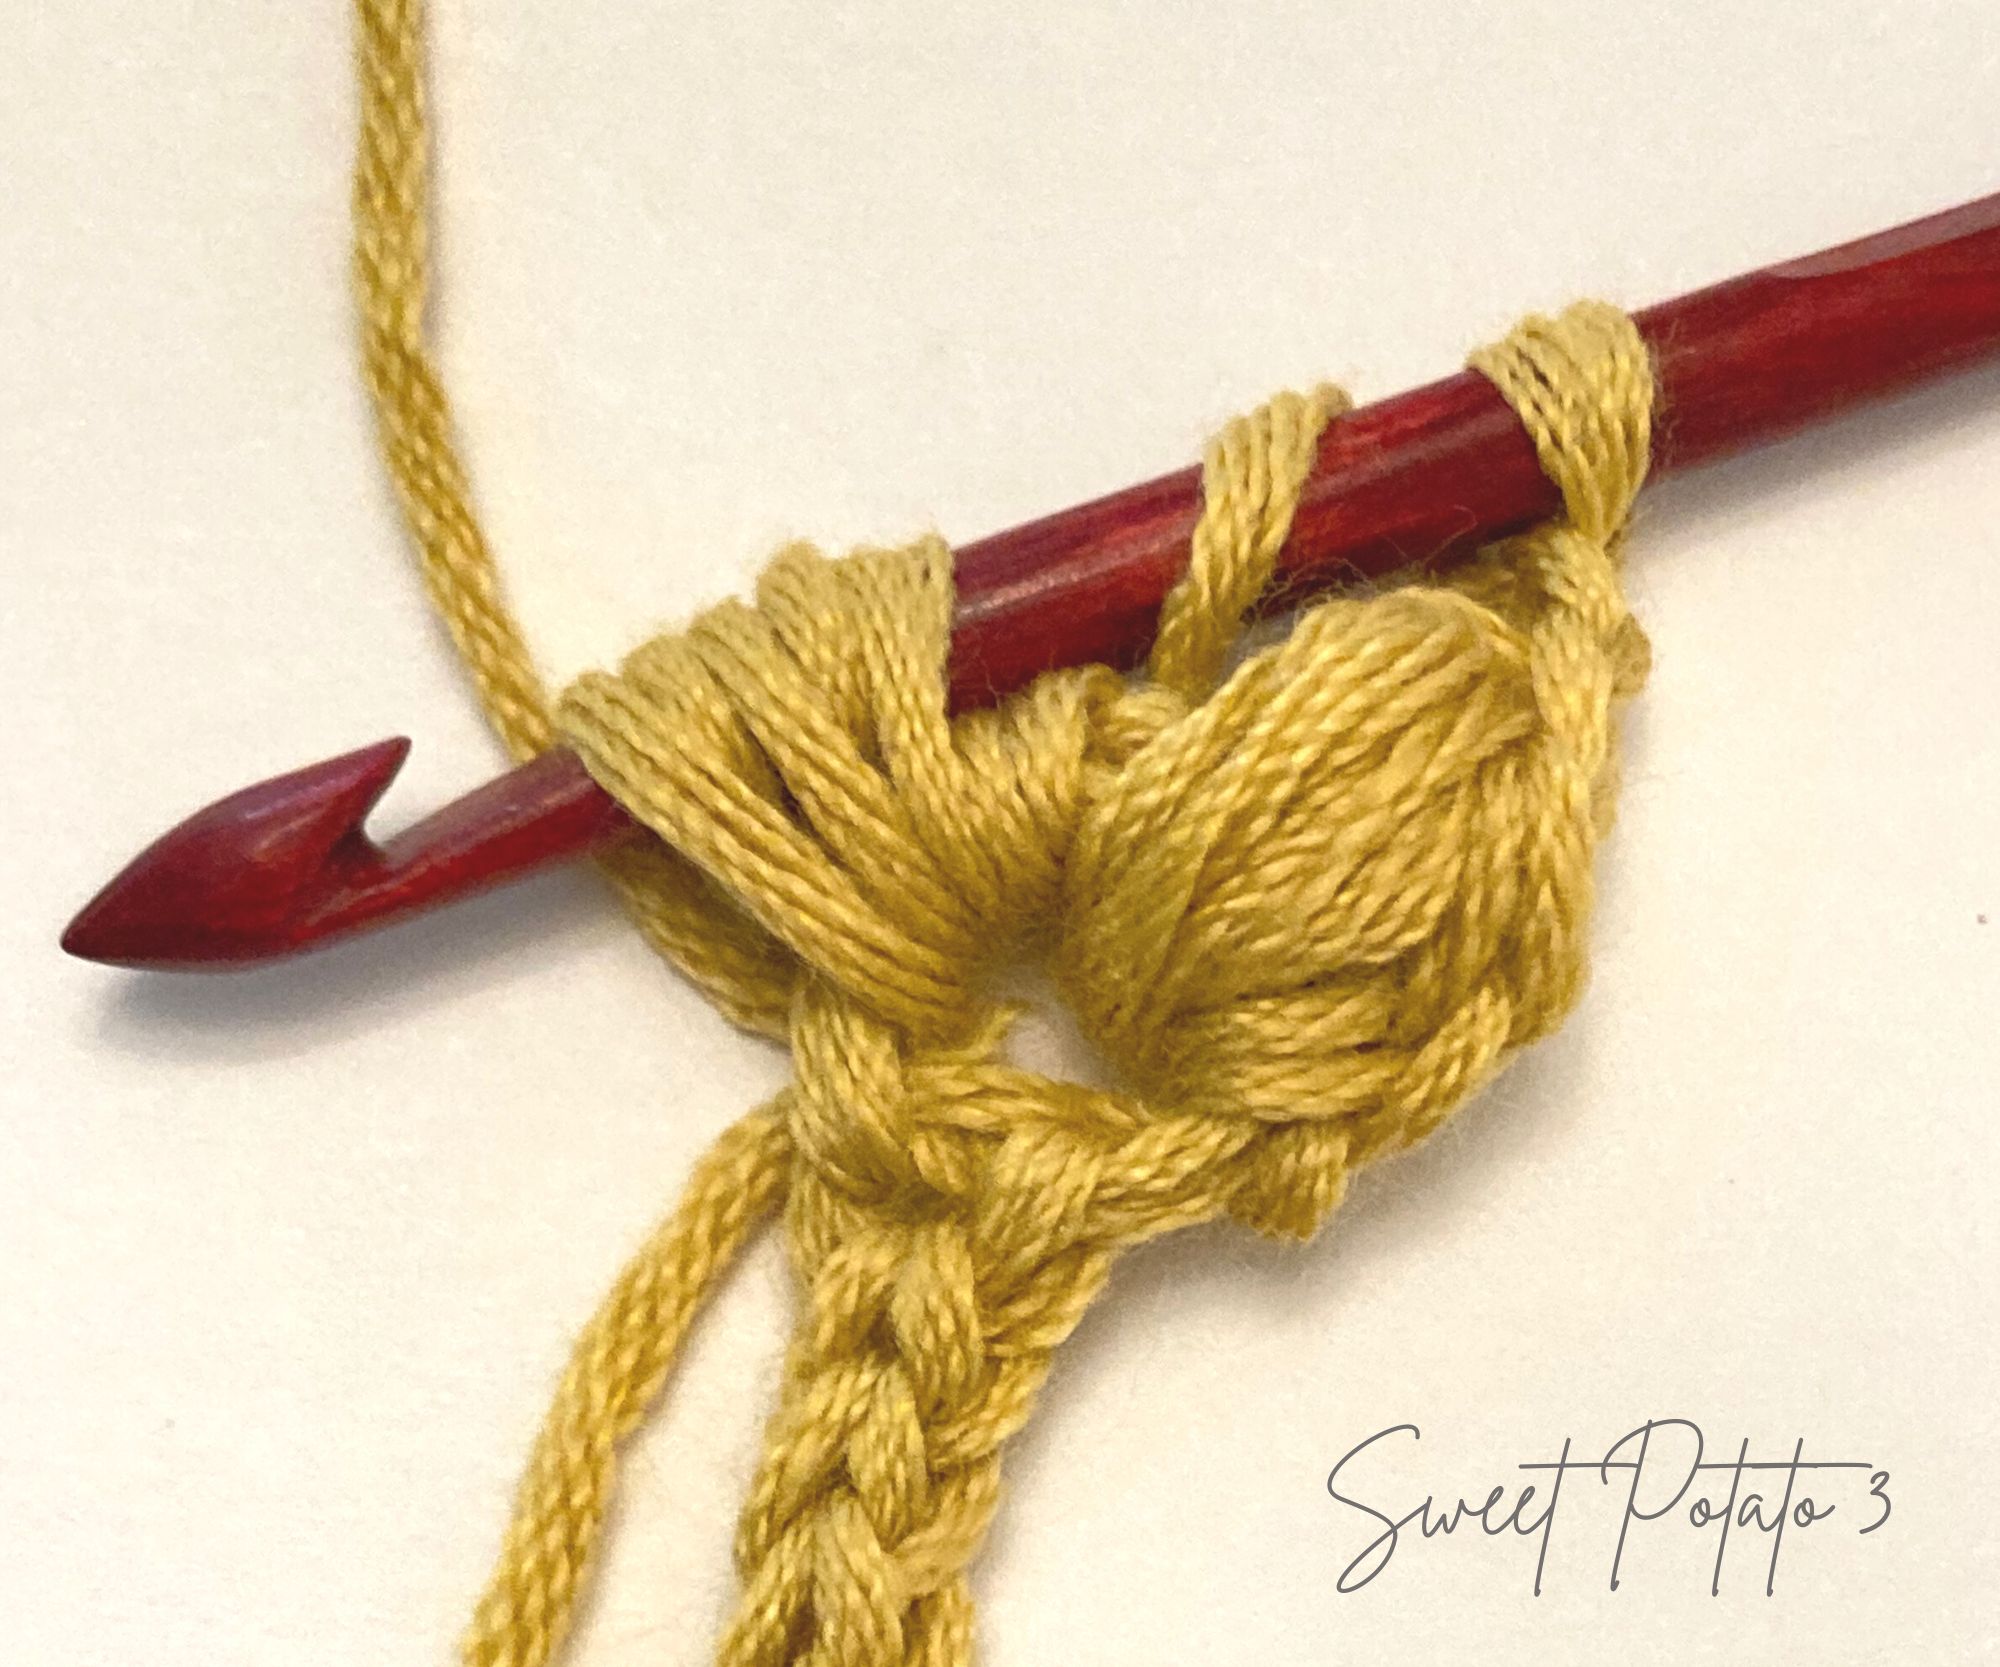

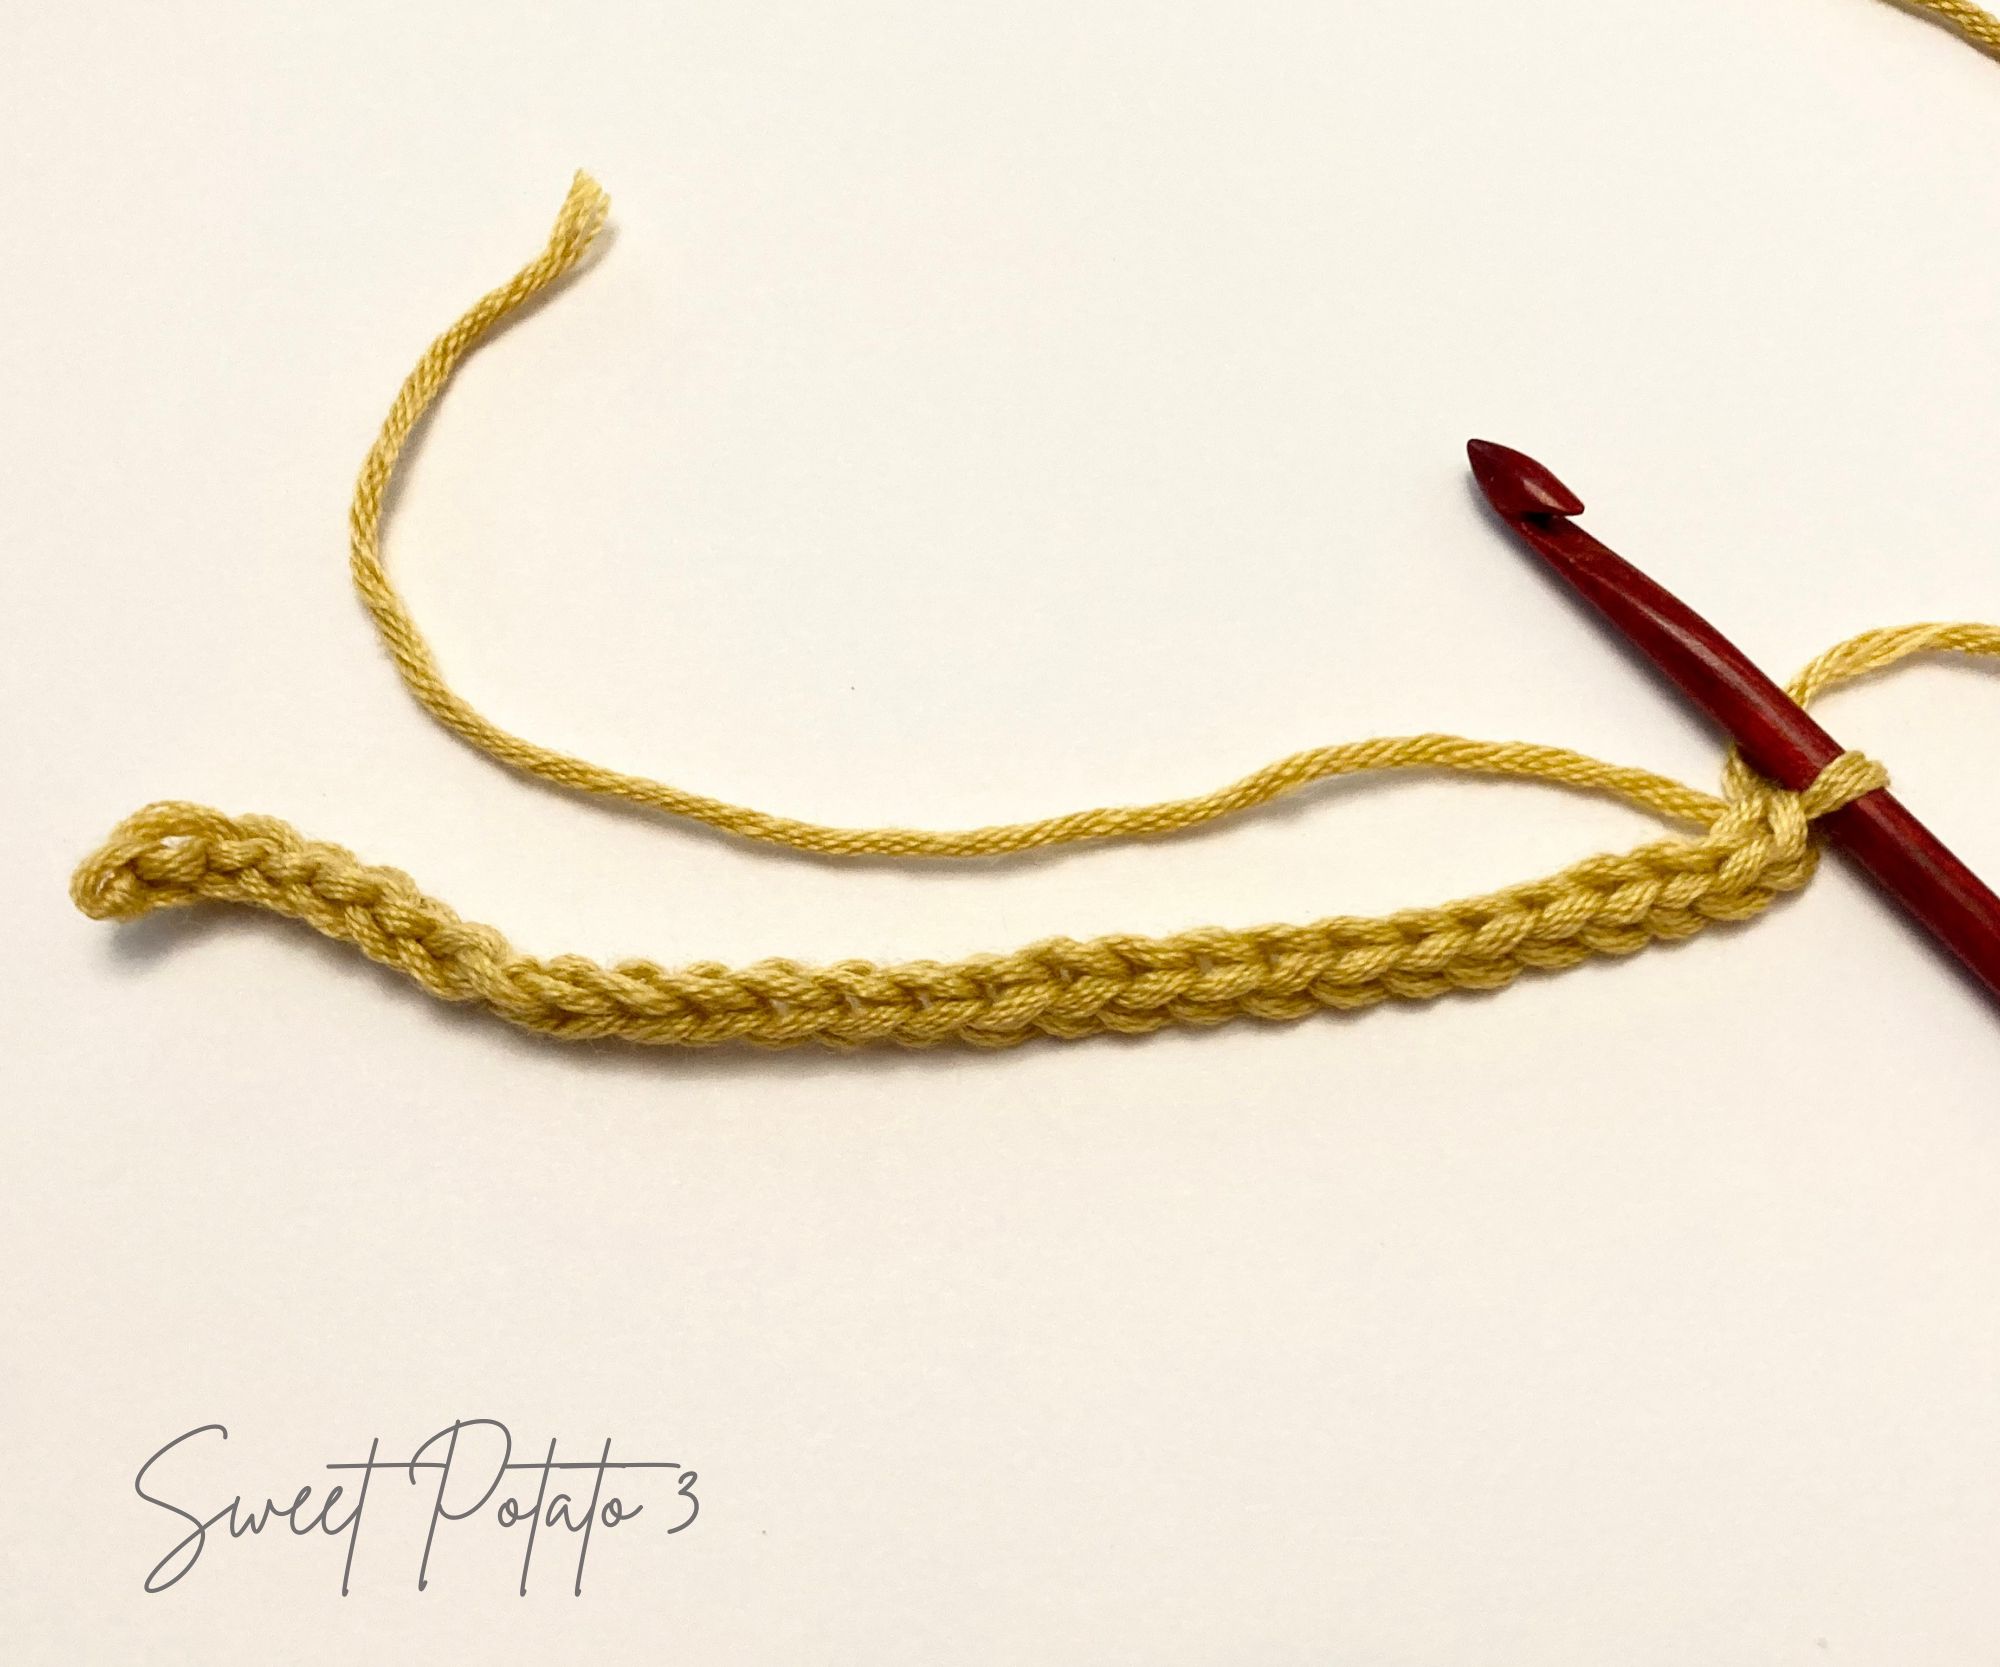
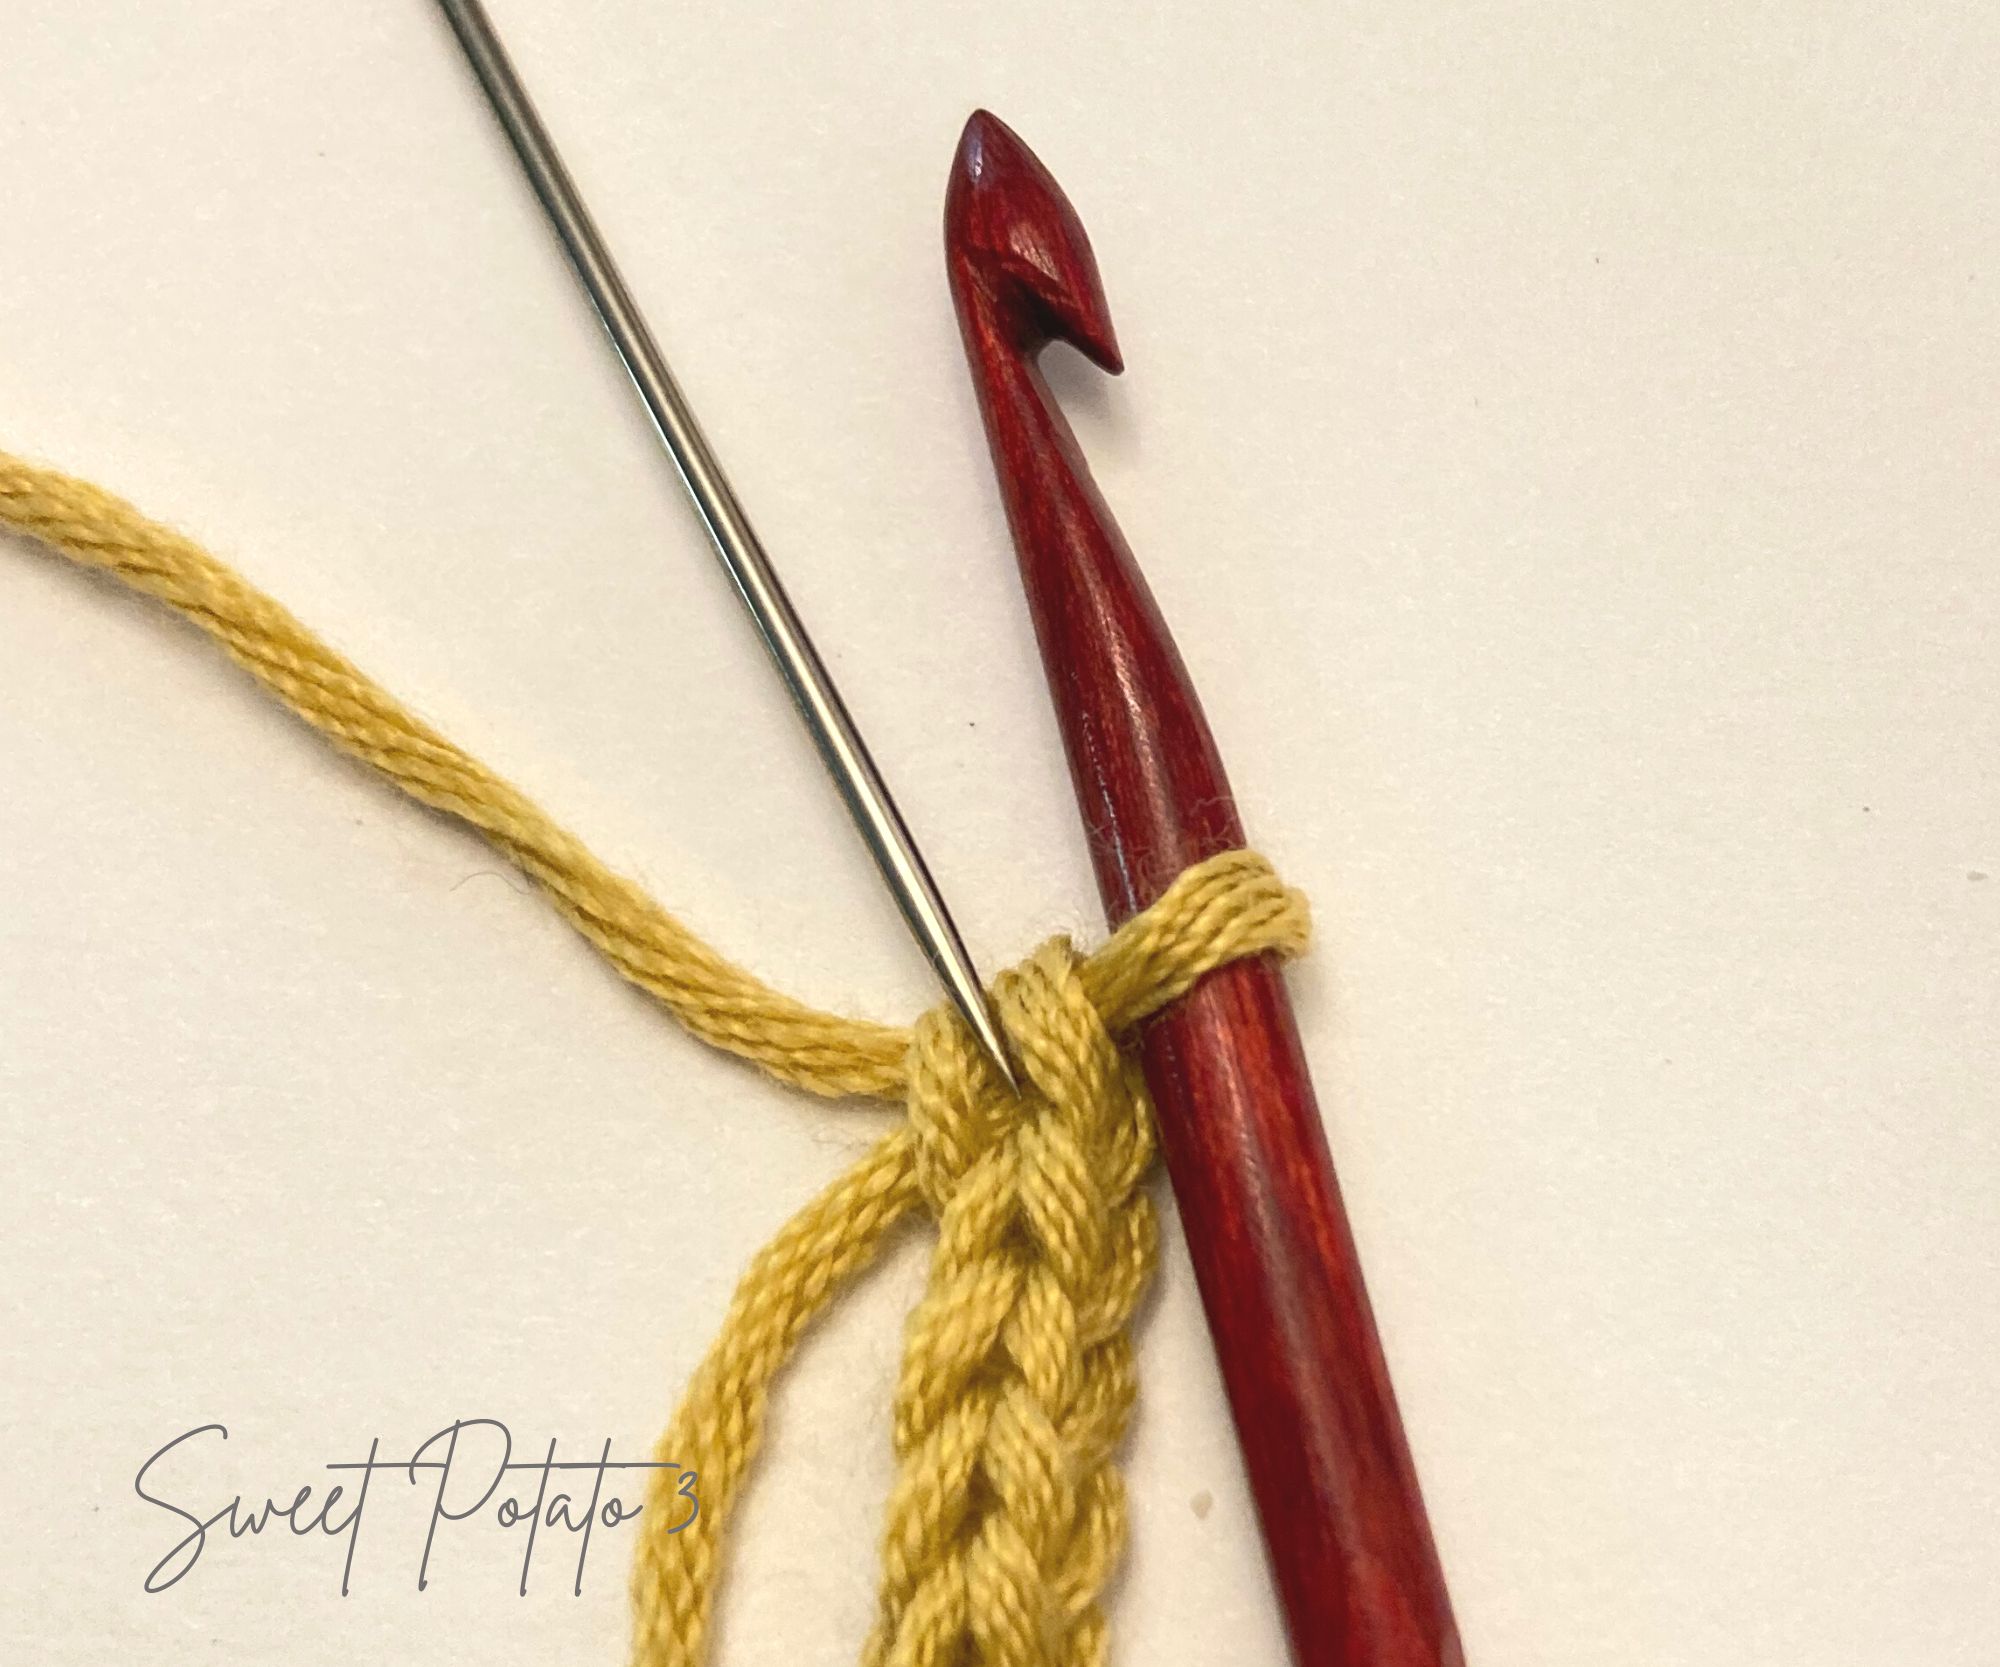
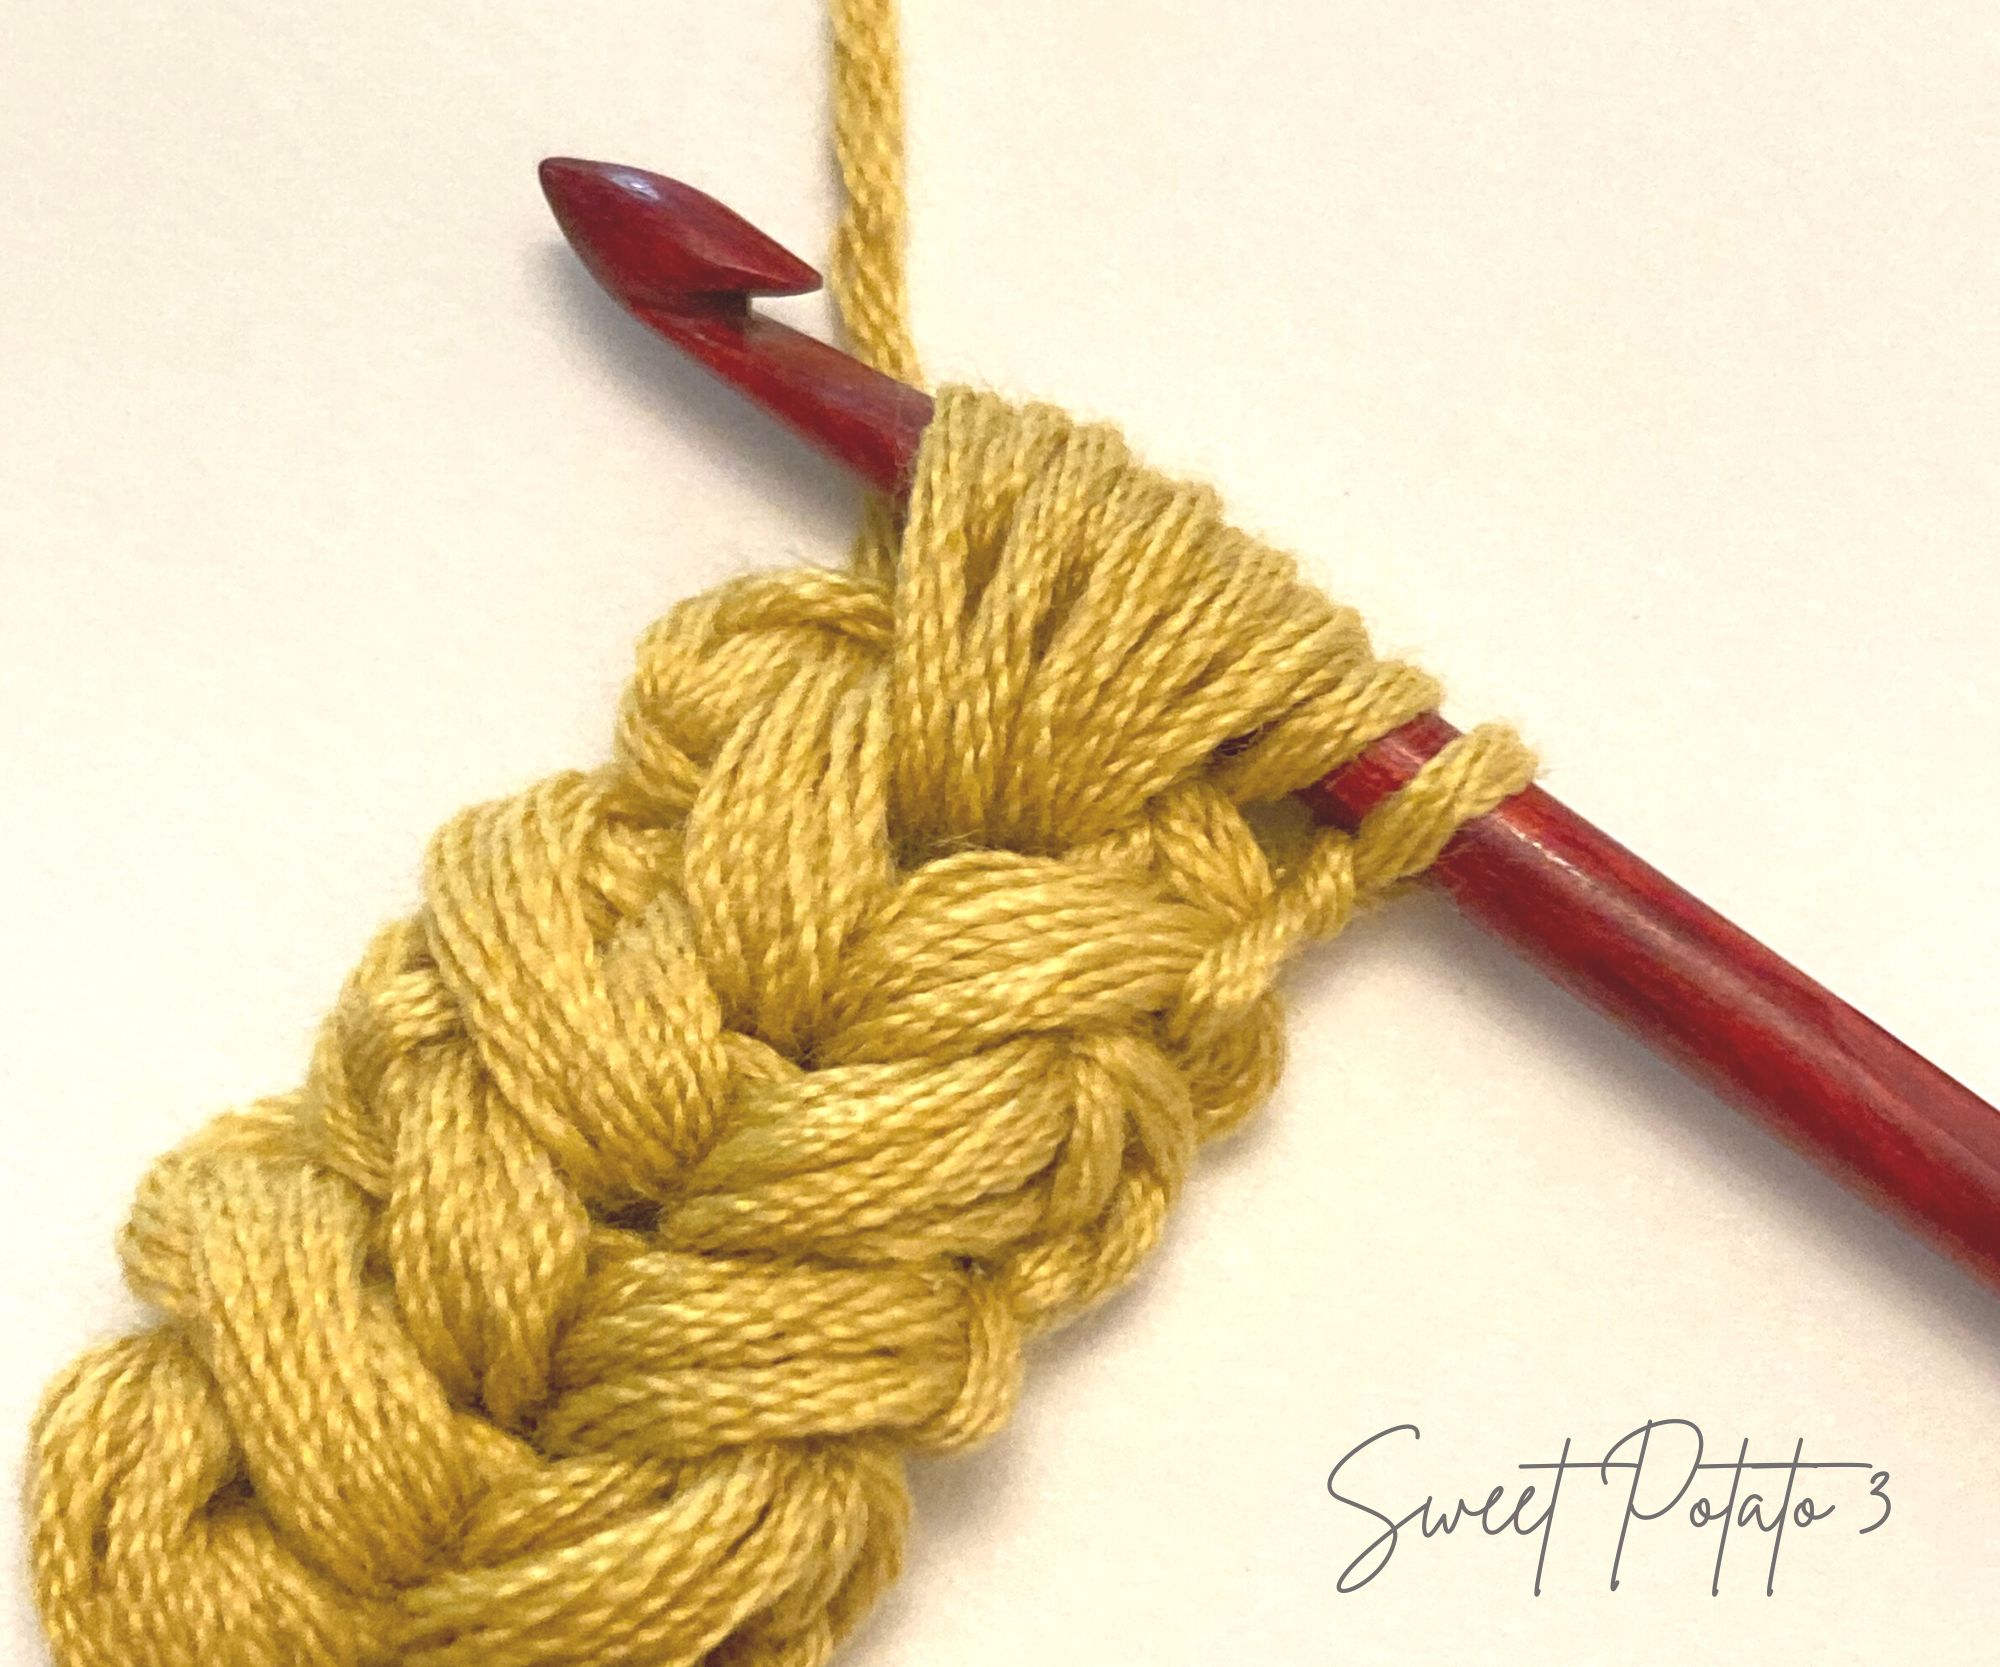
Ch 1 and turn your work, pull the two sides of the puff stitch apart and find the 2nd loop of the stack loops you created at the beginning of the head. This can be a little tricky, especially on this first one, using the rounded tip of your crochet hook can help. In this loop work another V Puff stitch. Continue to turn and work a V Puff in the chain space from 2 rows below until the head of the wheat is the height you like. In my sample I had 5 V Puff stitches.
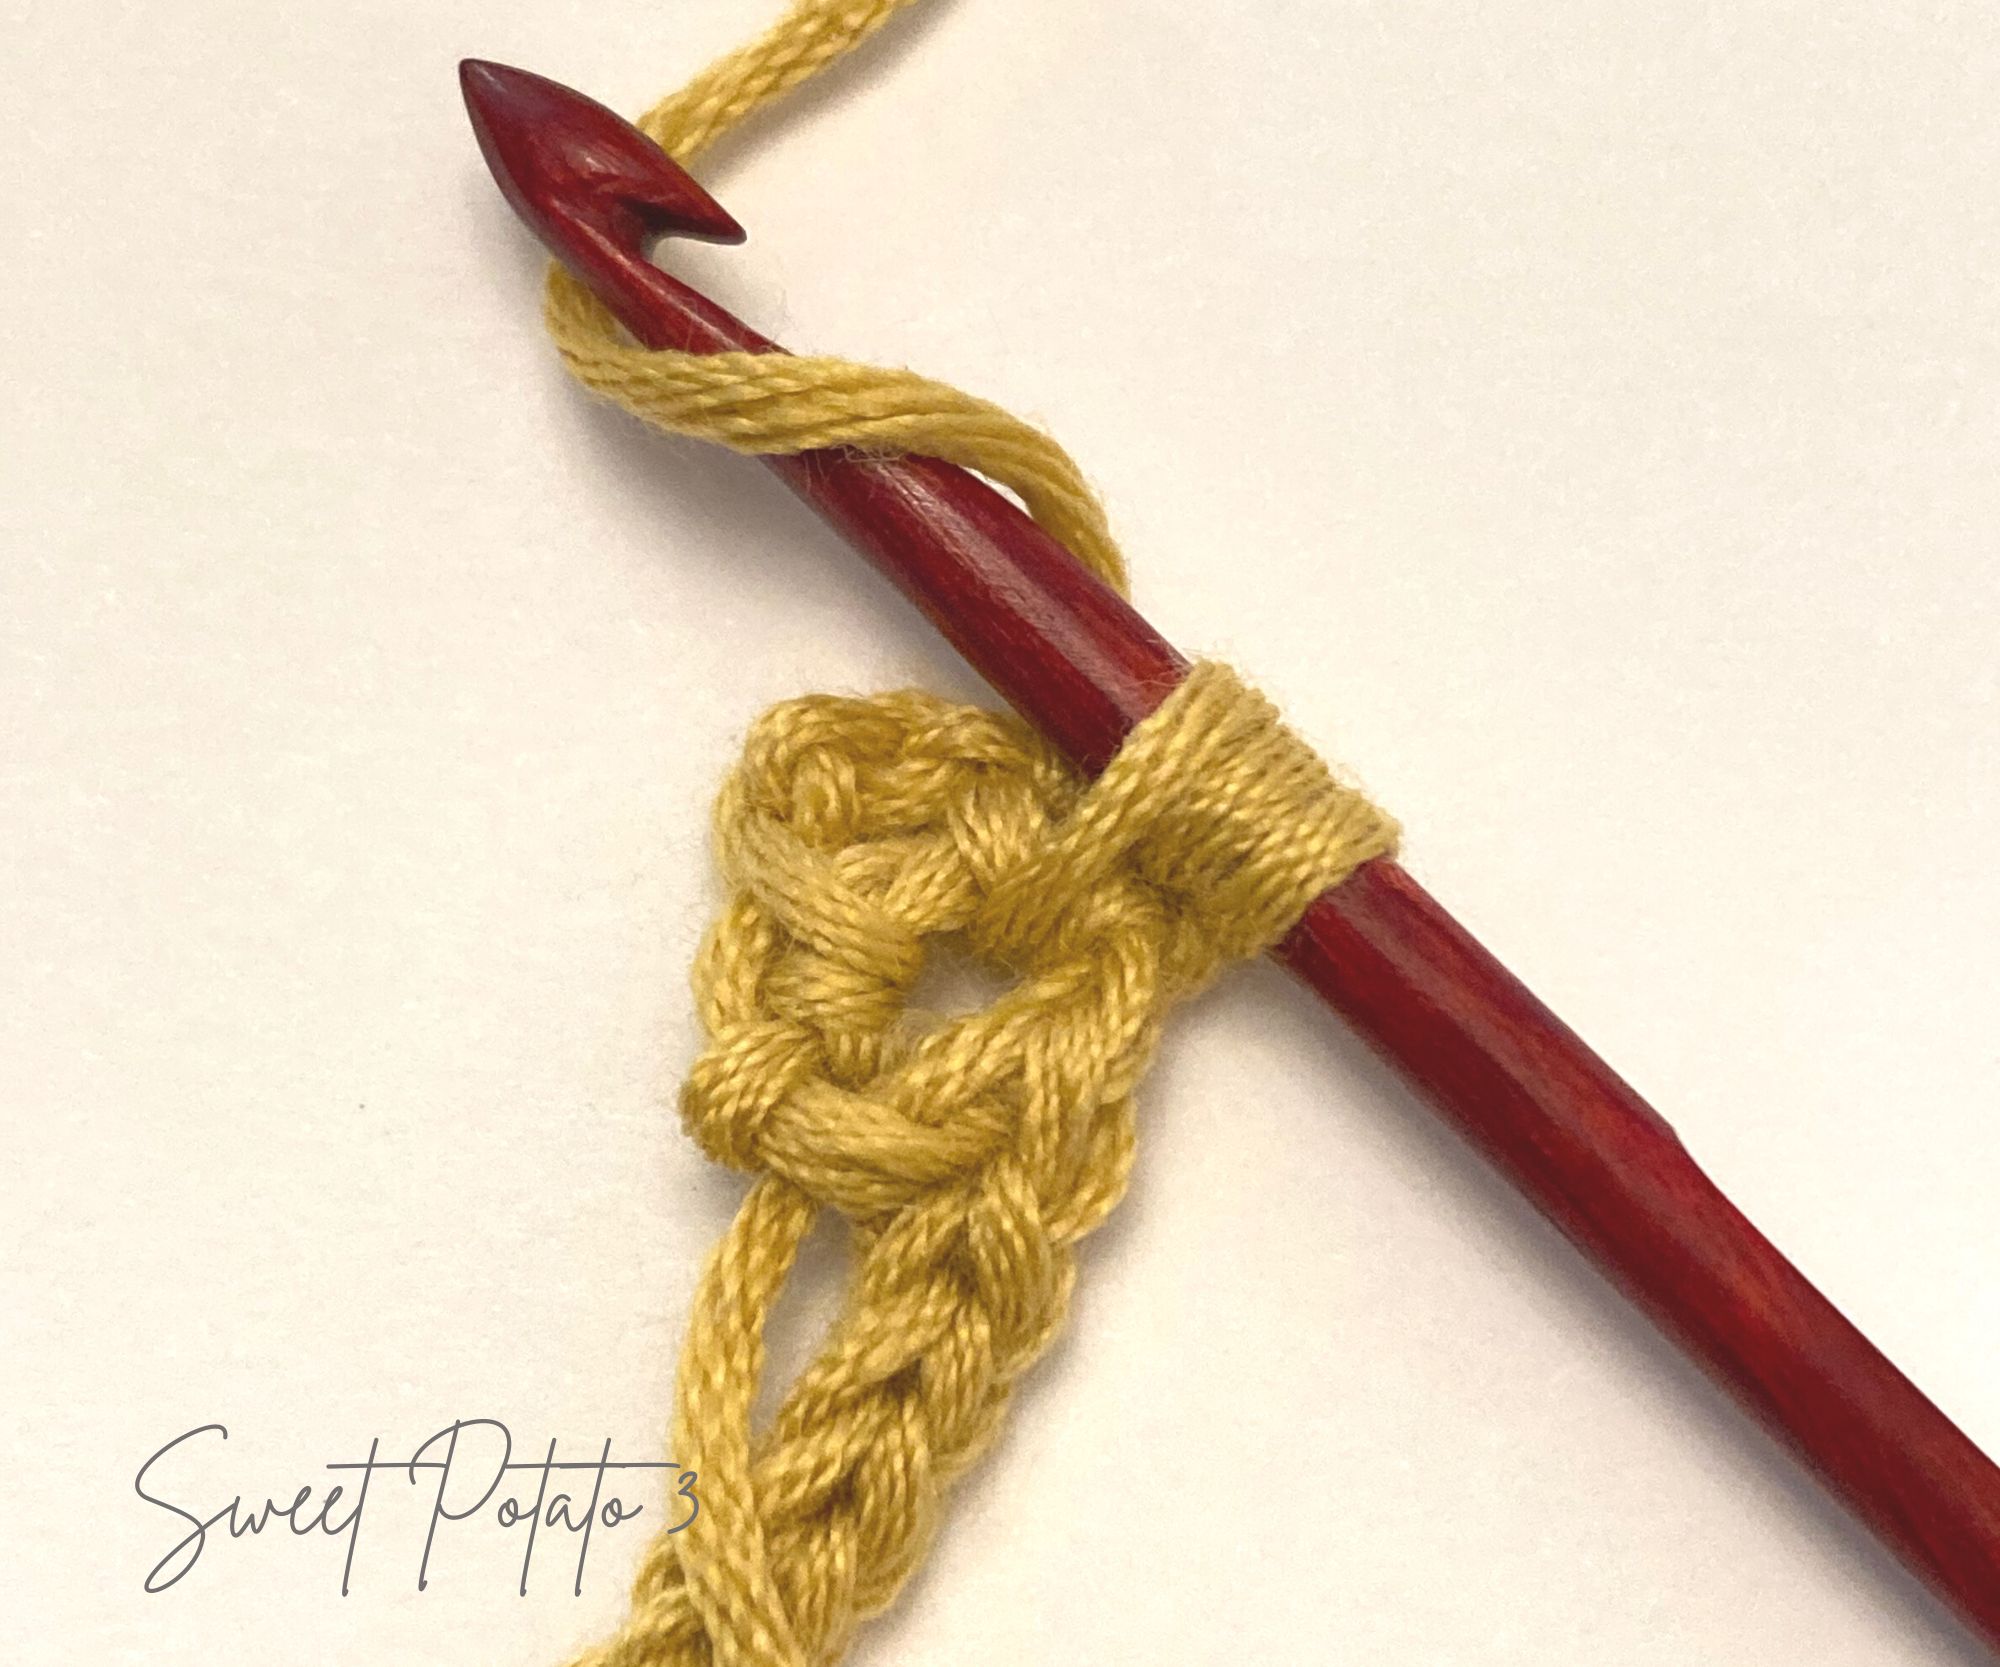
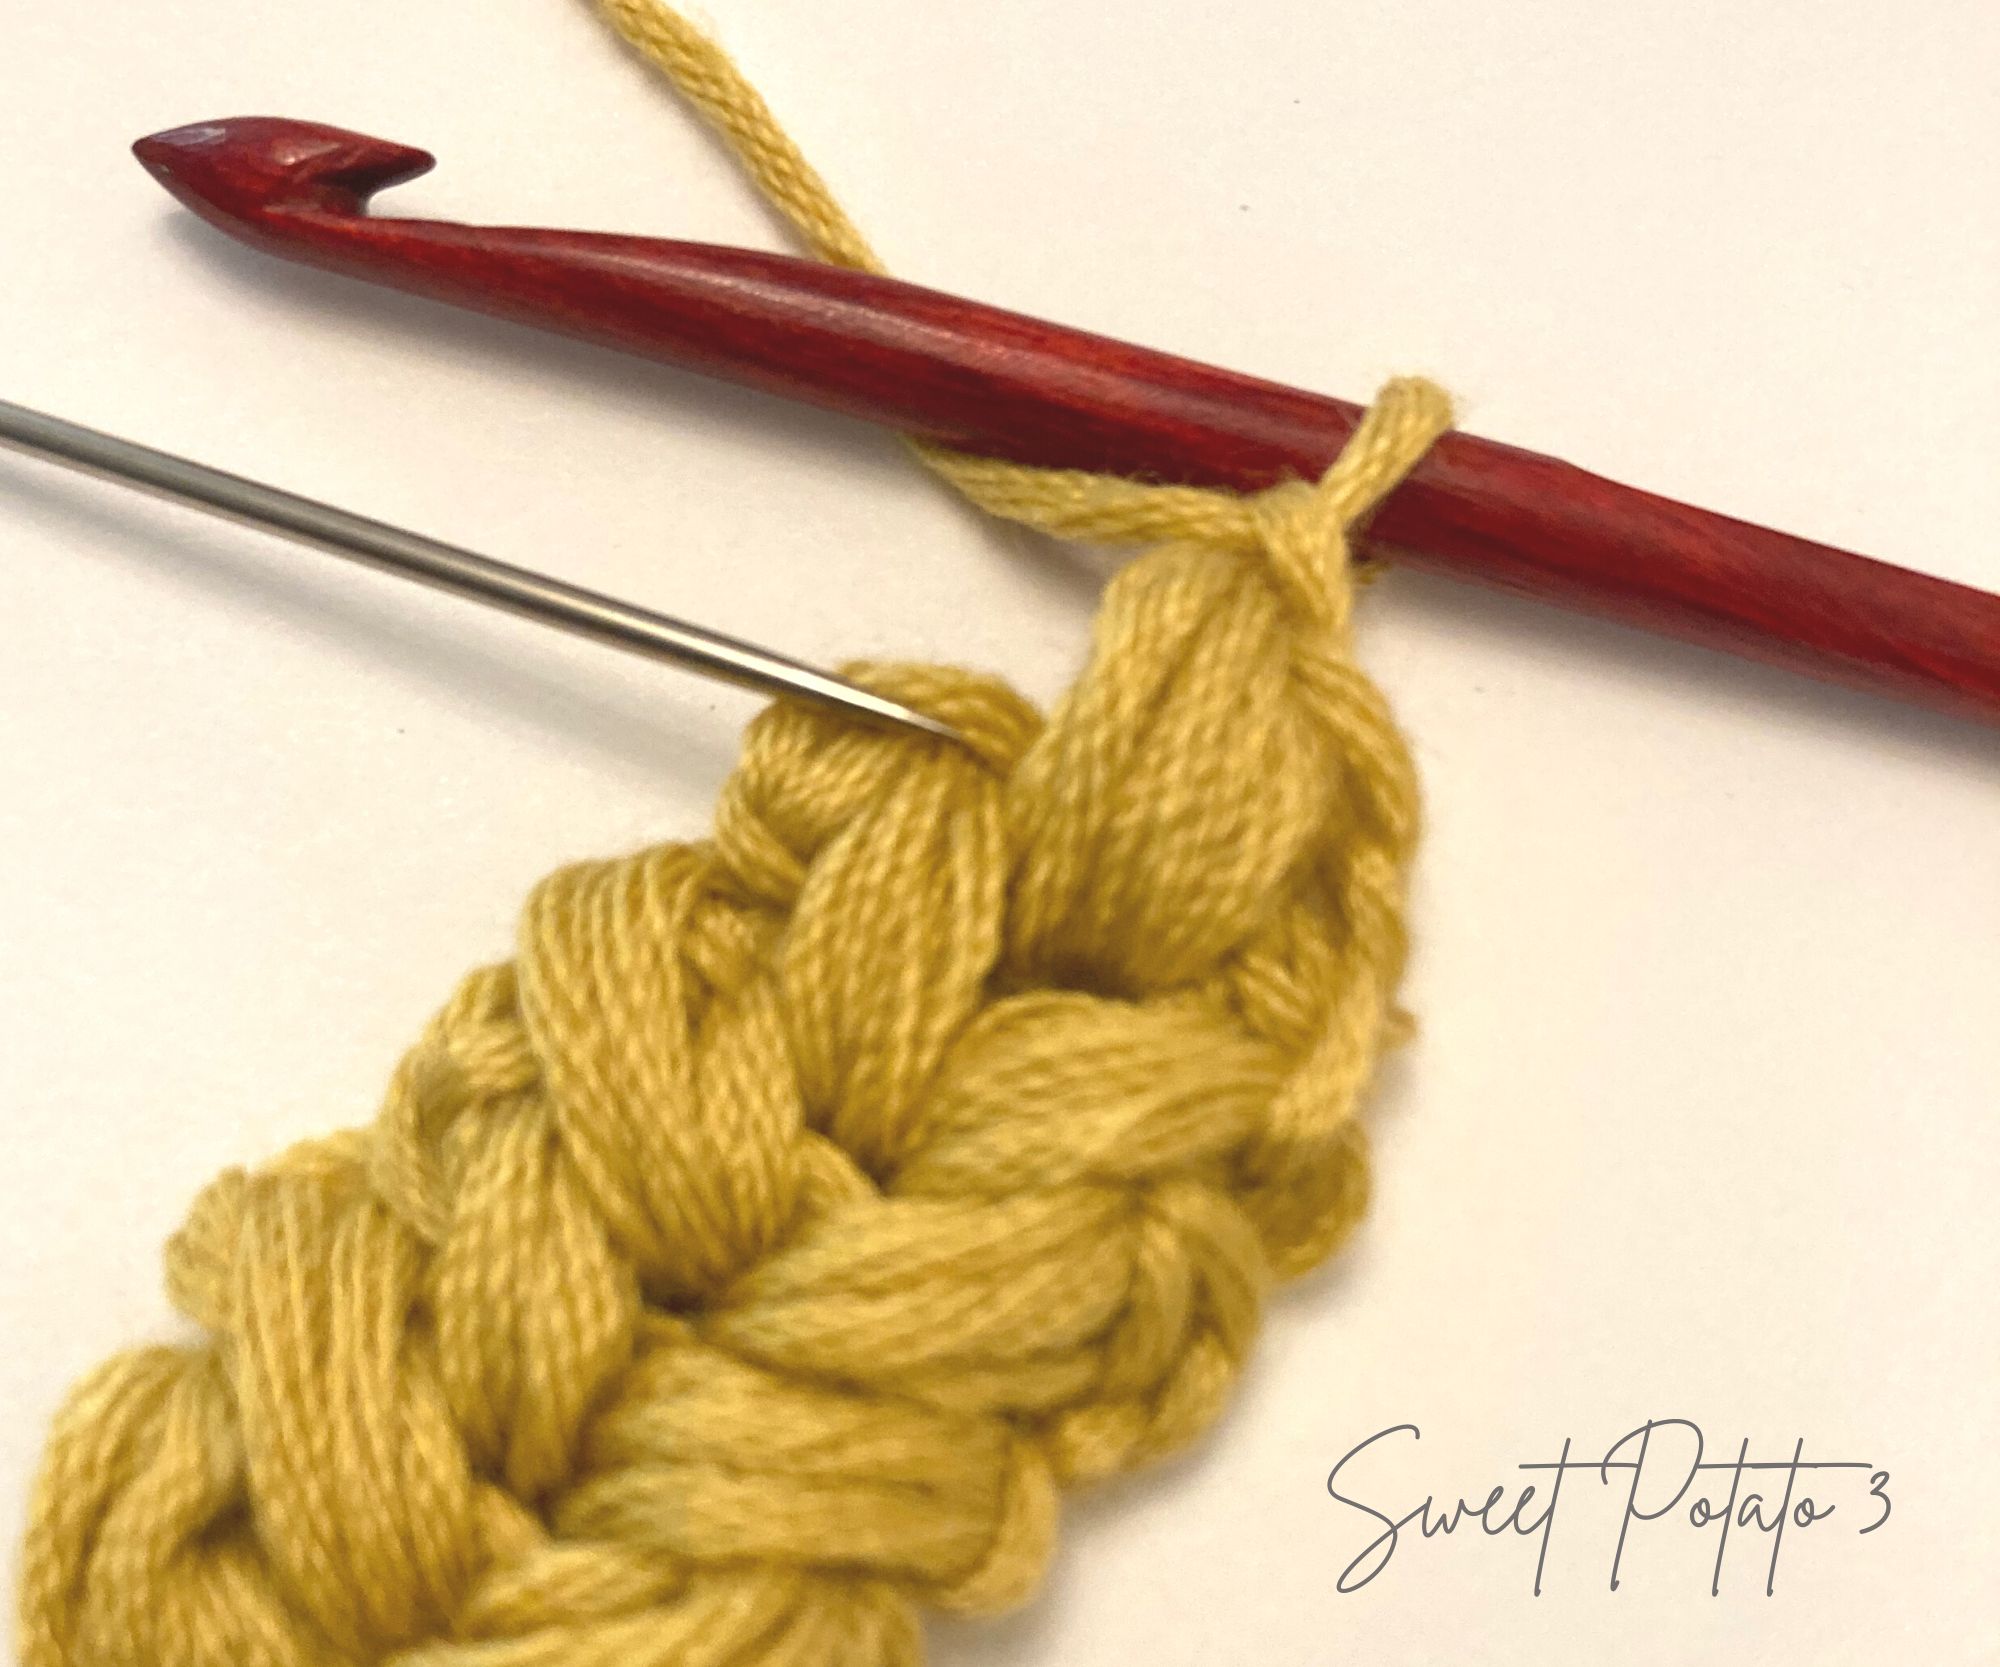
Last step to create the top of the head. Chain 1, locate the chain space from 2 rows below, just like you did the last steps. Instead of working a V Puff, you will just work a Puff stitch. For this puff stitch; [yarn over, insert hook and pull up a loop], repeat [ ] 4 more times, yarn over, pull through all 11 loops on hook. Chain 1, and slst in the turning chain of the last row. Secure and fasten off leaving about 18 inches of yarn that you can use to sew the applique onto something fun.
Secure the beginning tail of yarn with a small knot on the backside of the applique and weave in the ends. Use the remainder of the working yarn and sew the applique to whatever background you’d like.
This applique would be adorable on so many crochet pieces to give them a fall theme. Items such as pillows, table runners, scarves, bags and totes, blankets and so much more. I would love to see your creations using these appliques, please share them on social media and tag me so I can see.
Watch Video Tutorial to Make Wheat Applique
Some of these stitches may be a little tricky, and some of you may be visual learners just like me, that is why I created a full video tutorial. The tutorial will walk you through each step to crochet these Wheat Stalk appliques.
Tips for How to Sew on an applique
Now that you have crocheted these adorable wheat stalks you may be a little puzzled about how to sew them onto your crochet item. I have a tutorial for that one as well, in fact, this is one of my top video tutorials. I hope you find it helpful too.
If You Like This, You May Also Like…
- Free American Flag applique – click HERE
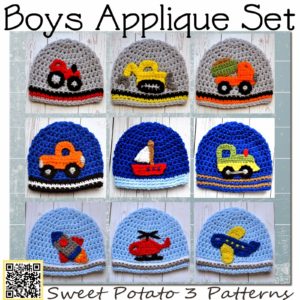
- All Boys Applique Set – click HERE
- Darling Animal Applique Round Up – click HERE.
Another FREE leaf crochet tutorial on my blog. Includes written instructions in the post along with a photo tutorial and a detailed video tutorial as well. Find all the details of this leaf pattern in the link in the button below:
More Crochet Fun
Follow Sweet Potato 3 on Facebook & Instagram to see more pattern releases, sales and crochet fun. I can be found @SweetPotato3Patterns.
However, if you would enjoy a more interactive group experience, you need to join my Crochet & Conversations facebook group, click HERE. It is a ton of fun and I encourage everyone to share their projects, WIPS (works in progress) and inspirations. Plus you get exclusive deals, are the first to see new releases, give input on designs and have opportunities to win patterns. Join now and get to know others who also enjoy the art of crochet.


So pretty!
I can see a set of 3 of the squares across the front of a sweater!
Yes, that would be so cute! If you make one, I would love to see it.
I really like this Pattern. Anytime I see a picture of wheat or the Wheat in its natural state I automatically Think of my Maternal Grandfather (Papa). He grew wheat and Cotton for as long as I can remember. Highlight of summer was being able to meet him in one of the fields and being able to ride with him in the Combine and even getting to drive it. Such Fun. I am a brand new Crocheter and I am going to try and make this in Honor of my Papa and the Future Farmers as well.
Oh, his is such a sweet memory and I am honored that it is so sentimental to you.