Appliques can add a fun and personal touch to anything crochet. However, many crafters avoid making appliques because sewing them on can be intimidating, some may even say, a bit scary. In this blog post I will show you how to sew on an applique in a professional way that results in a clean backside of your project.
I think we can all agree, after putting in so much love and time into a crochet project, you don’t want to ruin it when you sew on the applique, and it has a messy back side.

Sew On An Applique: a professional & Easy Tutorial
Today, I am going to teach you how to sew on applique so that you cannot see it on the back side of your crochet piece. That is right, it will be invisible! The best part is, you will be surprised at how easy it is to do.

Do I always need to have a clean back?
This is a great question and the answer is pretty easy. No, you do not always need to have a clean back on your crochet pieces. Many crochet projects have a backside that is never visible and if you never see the back, it really doesn’t matter. These types of projects might include things like a pillow cover or an amigurumi project.
Some projects are a tossup. It doesn’t really matter if the backside is invisible because you won’t see if but you may want to have a clean backside for other reasons. An clean back (created with an invisible sewing technique), also creates a smoother/flat back side and could be more comfortable or allows for something to lay nicer than a messy back. Therefore, I would strongly consider using this technique when crocheting items such as garment, hats, table runners or placemats (I know you want it to lay nicely), maybe even bags and totes.
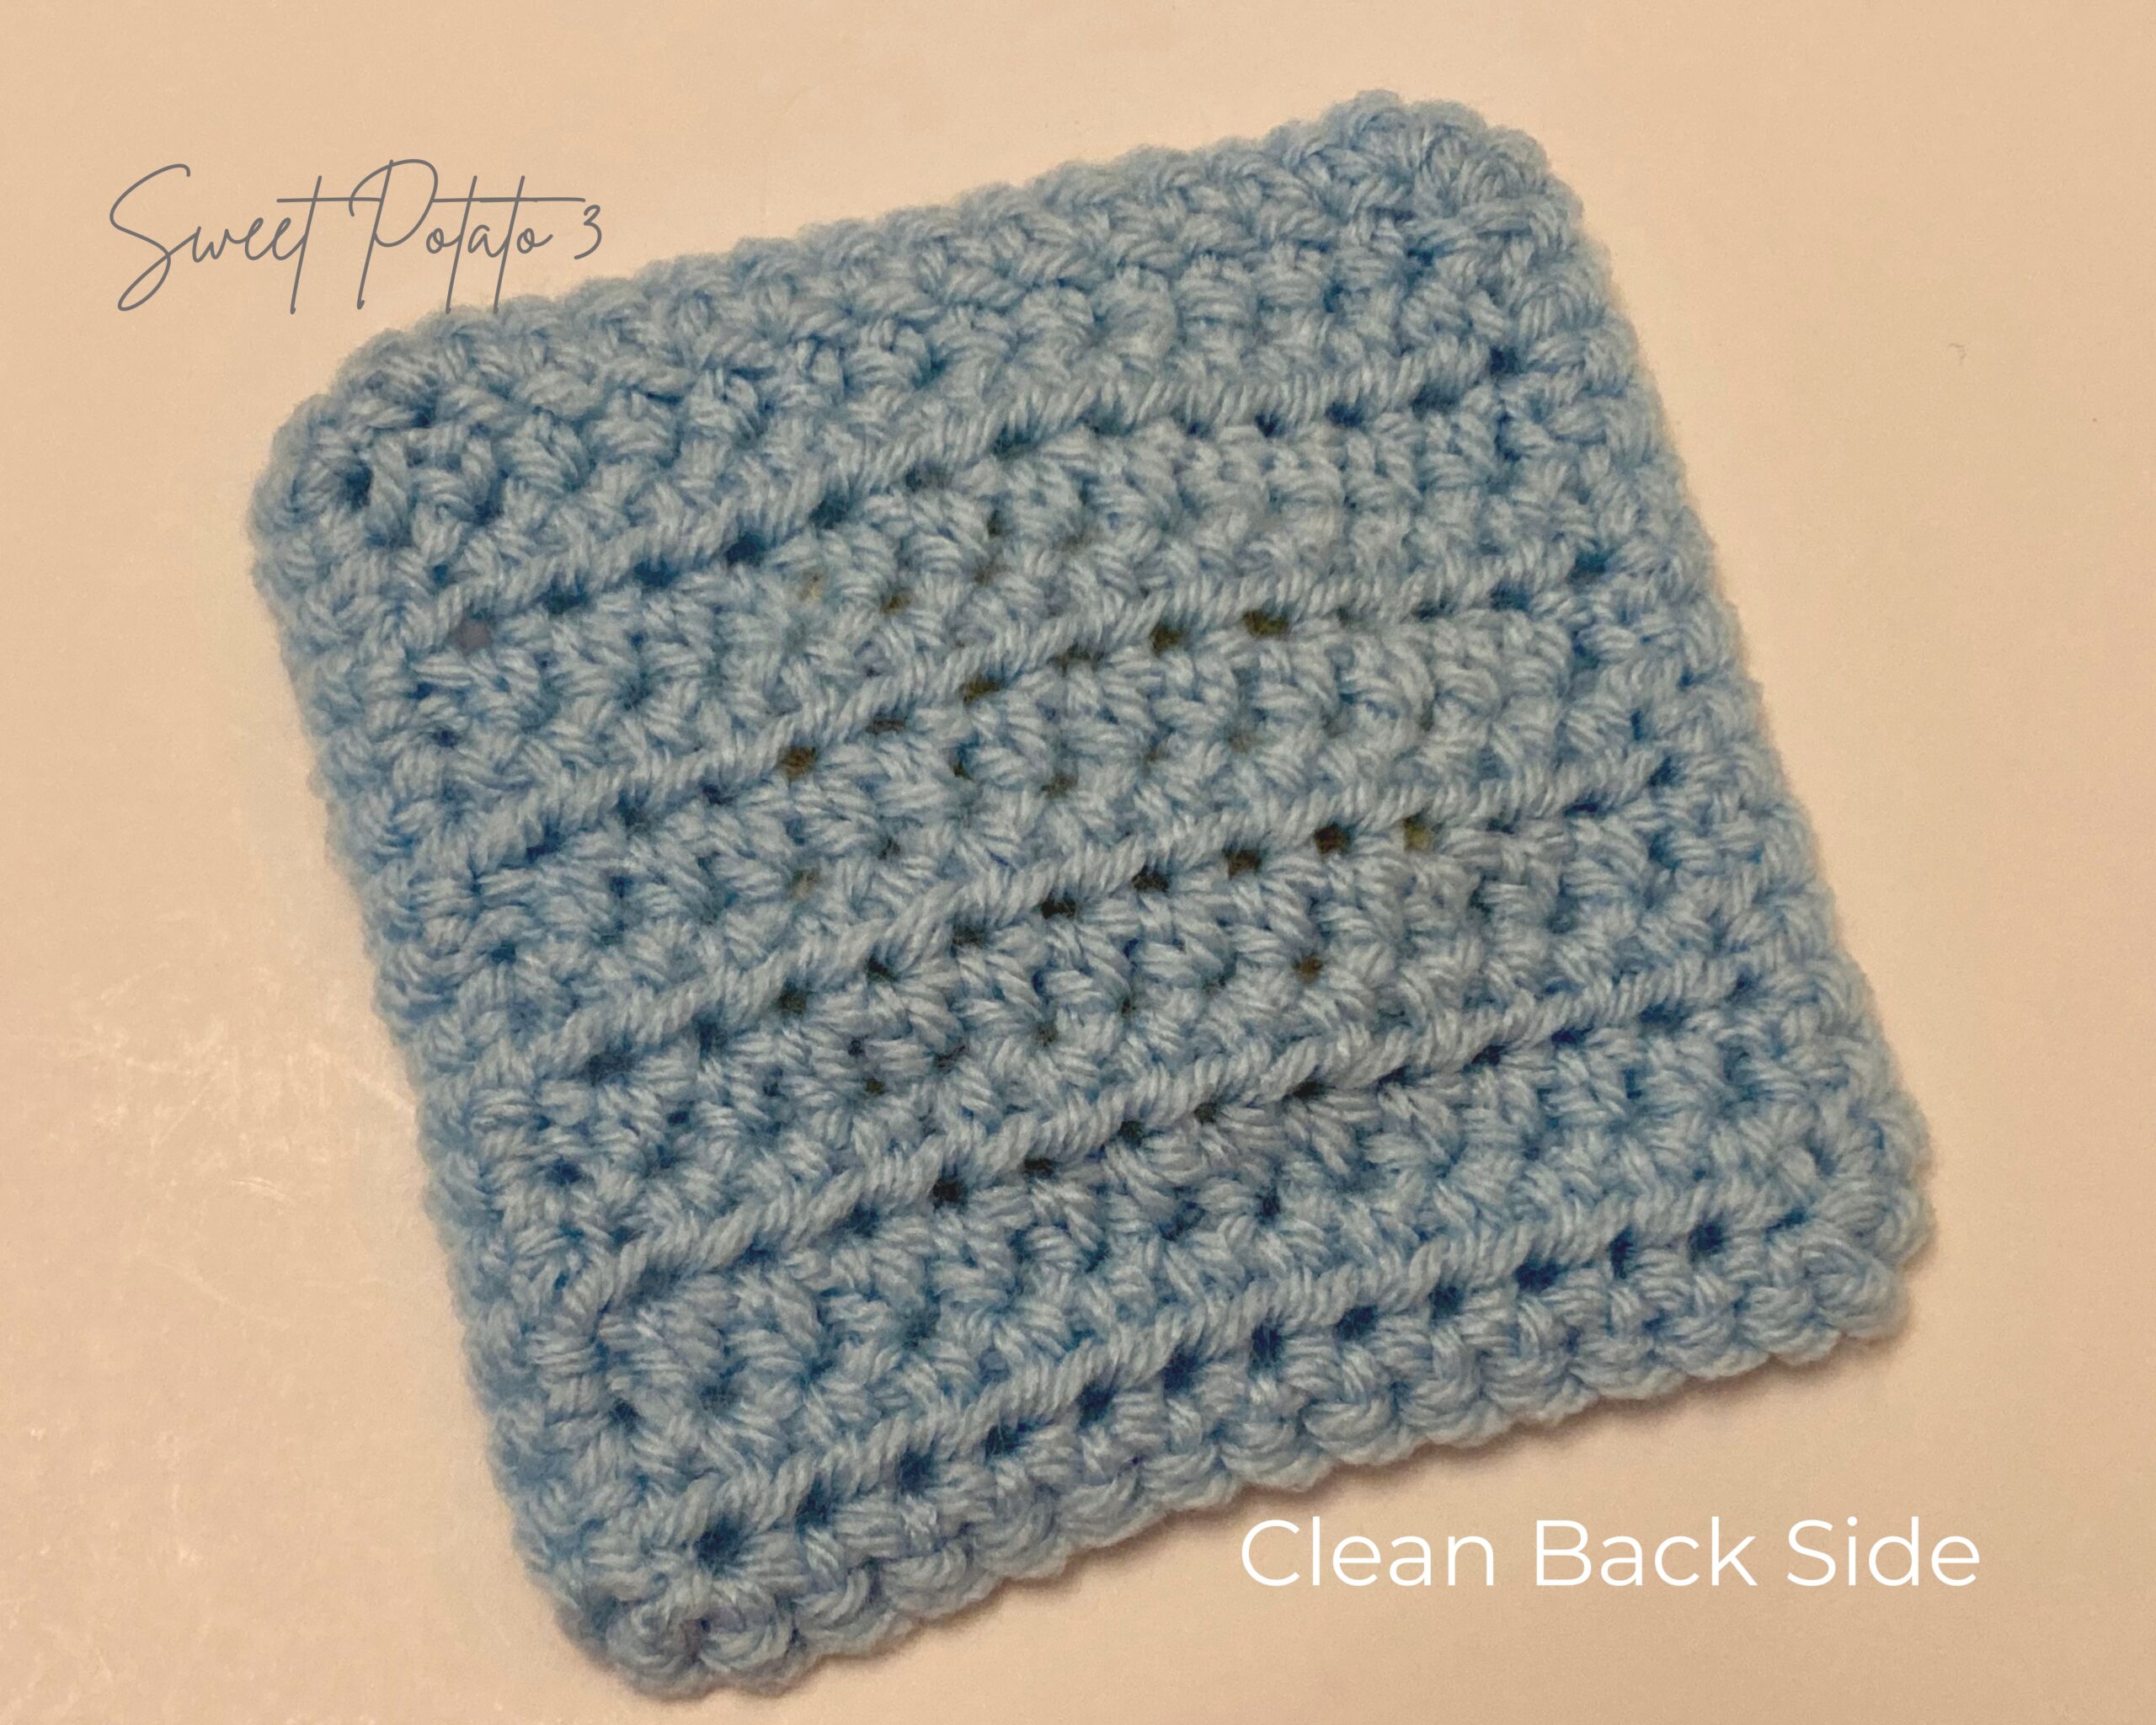
The more obvious projects that you would want a clean back on would be blankets, scarves, or any projects that the back side is often visible.
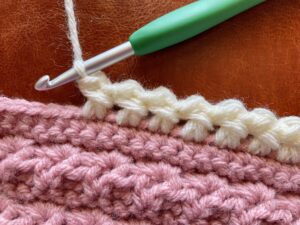
Look closely at crochet stitches
Nearly all crochet stitches naturally have 2 sides to them. There is a front and a back side that create two (2) layers. Grab your applique and check out the stitches.
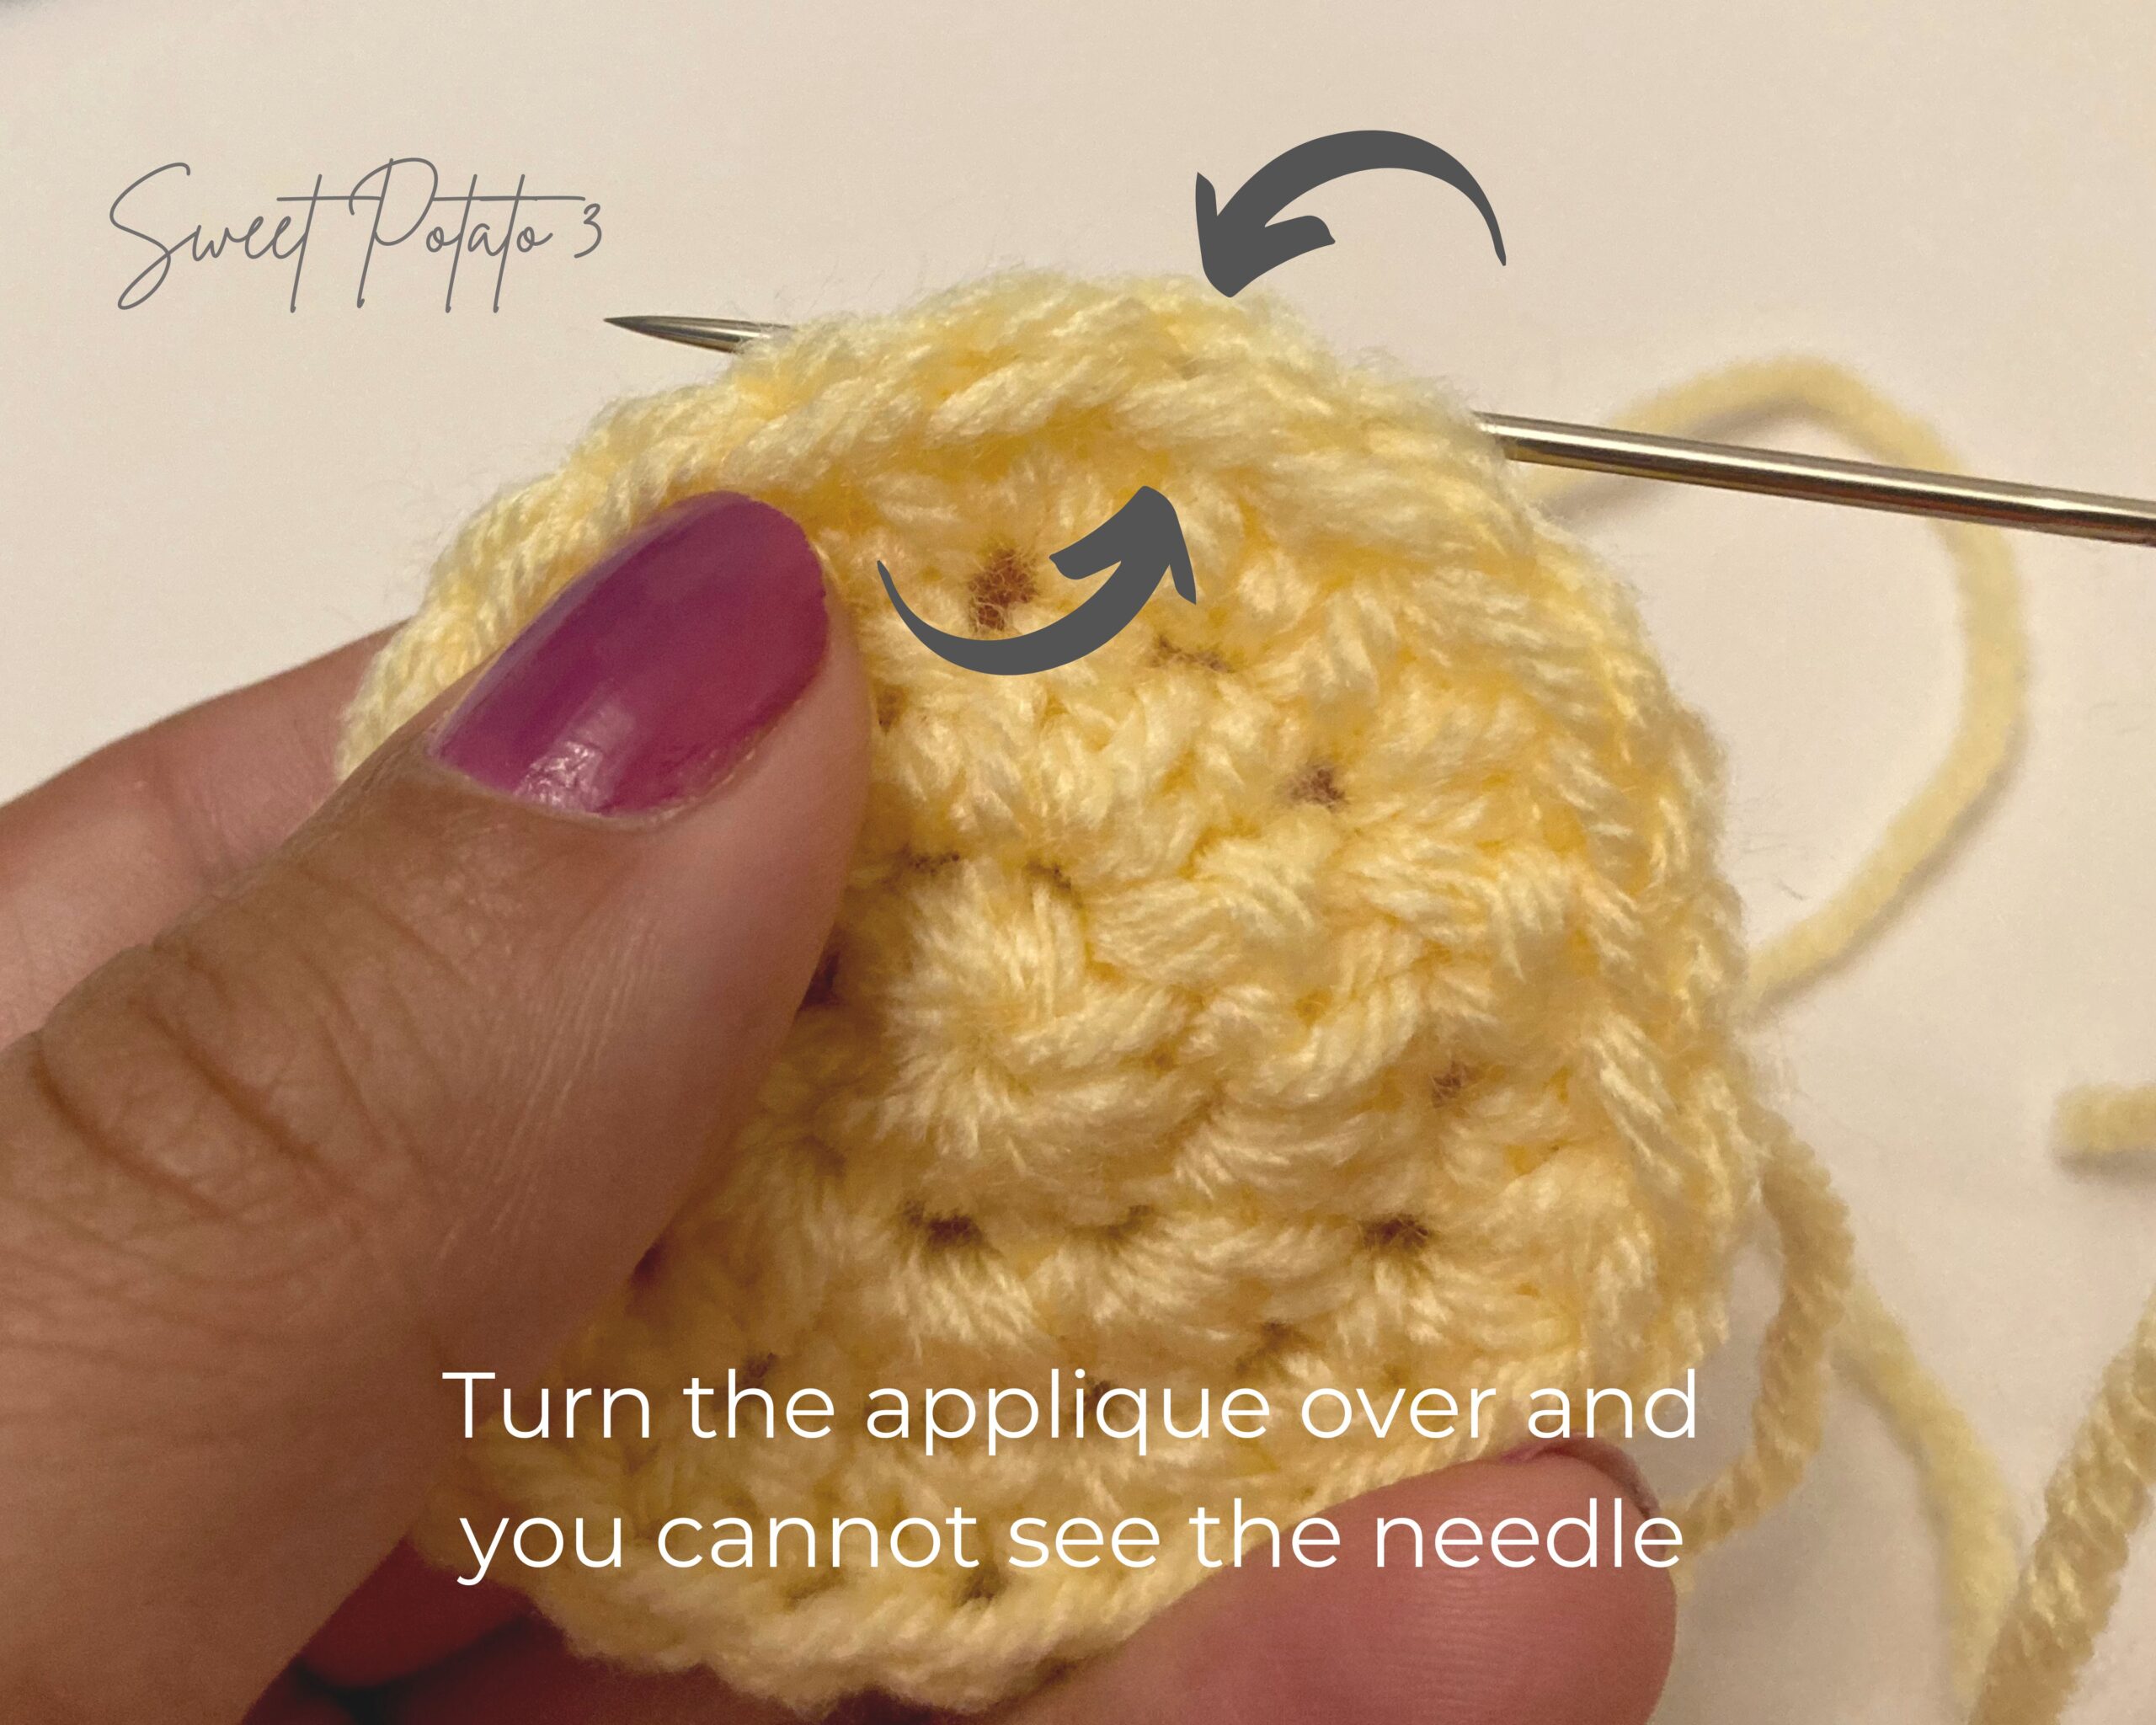
Flip the applique over to the backside and place a yarn needle through the center of the stitch (longways) from side to side, it will separate the front and the back. Now, turn over the applique and look at the front side. You cannot see where the needle is threaded through.
Repeat this same process on the background crochet piece but start on the front side. Thread your needle through the front side of the stitch. Flip over the crochet piece and see if you can see the needle.
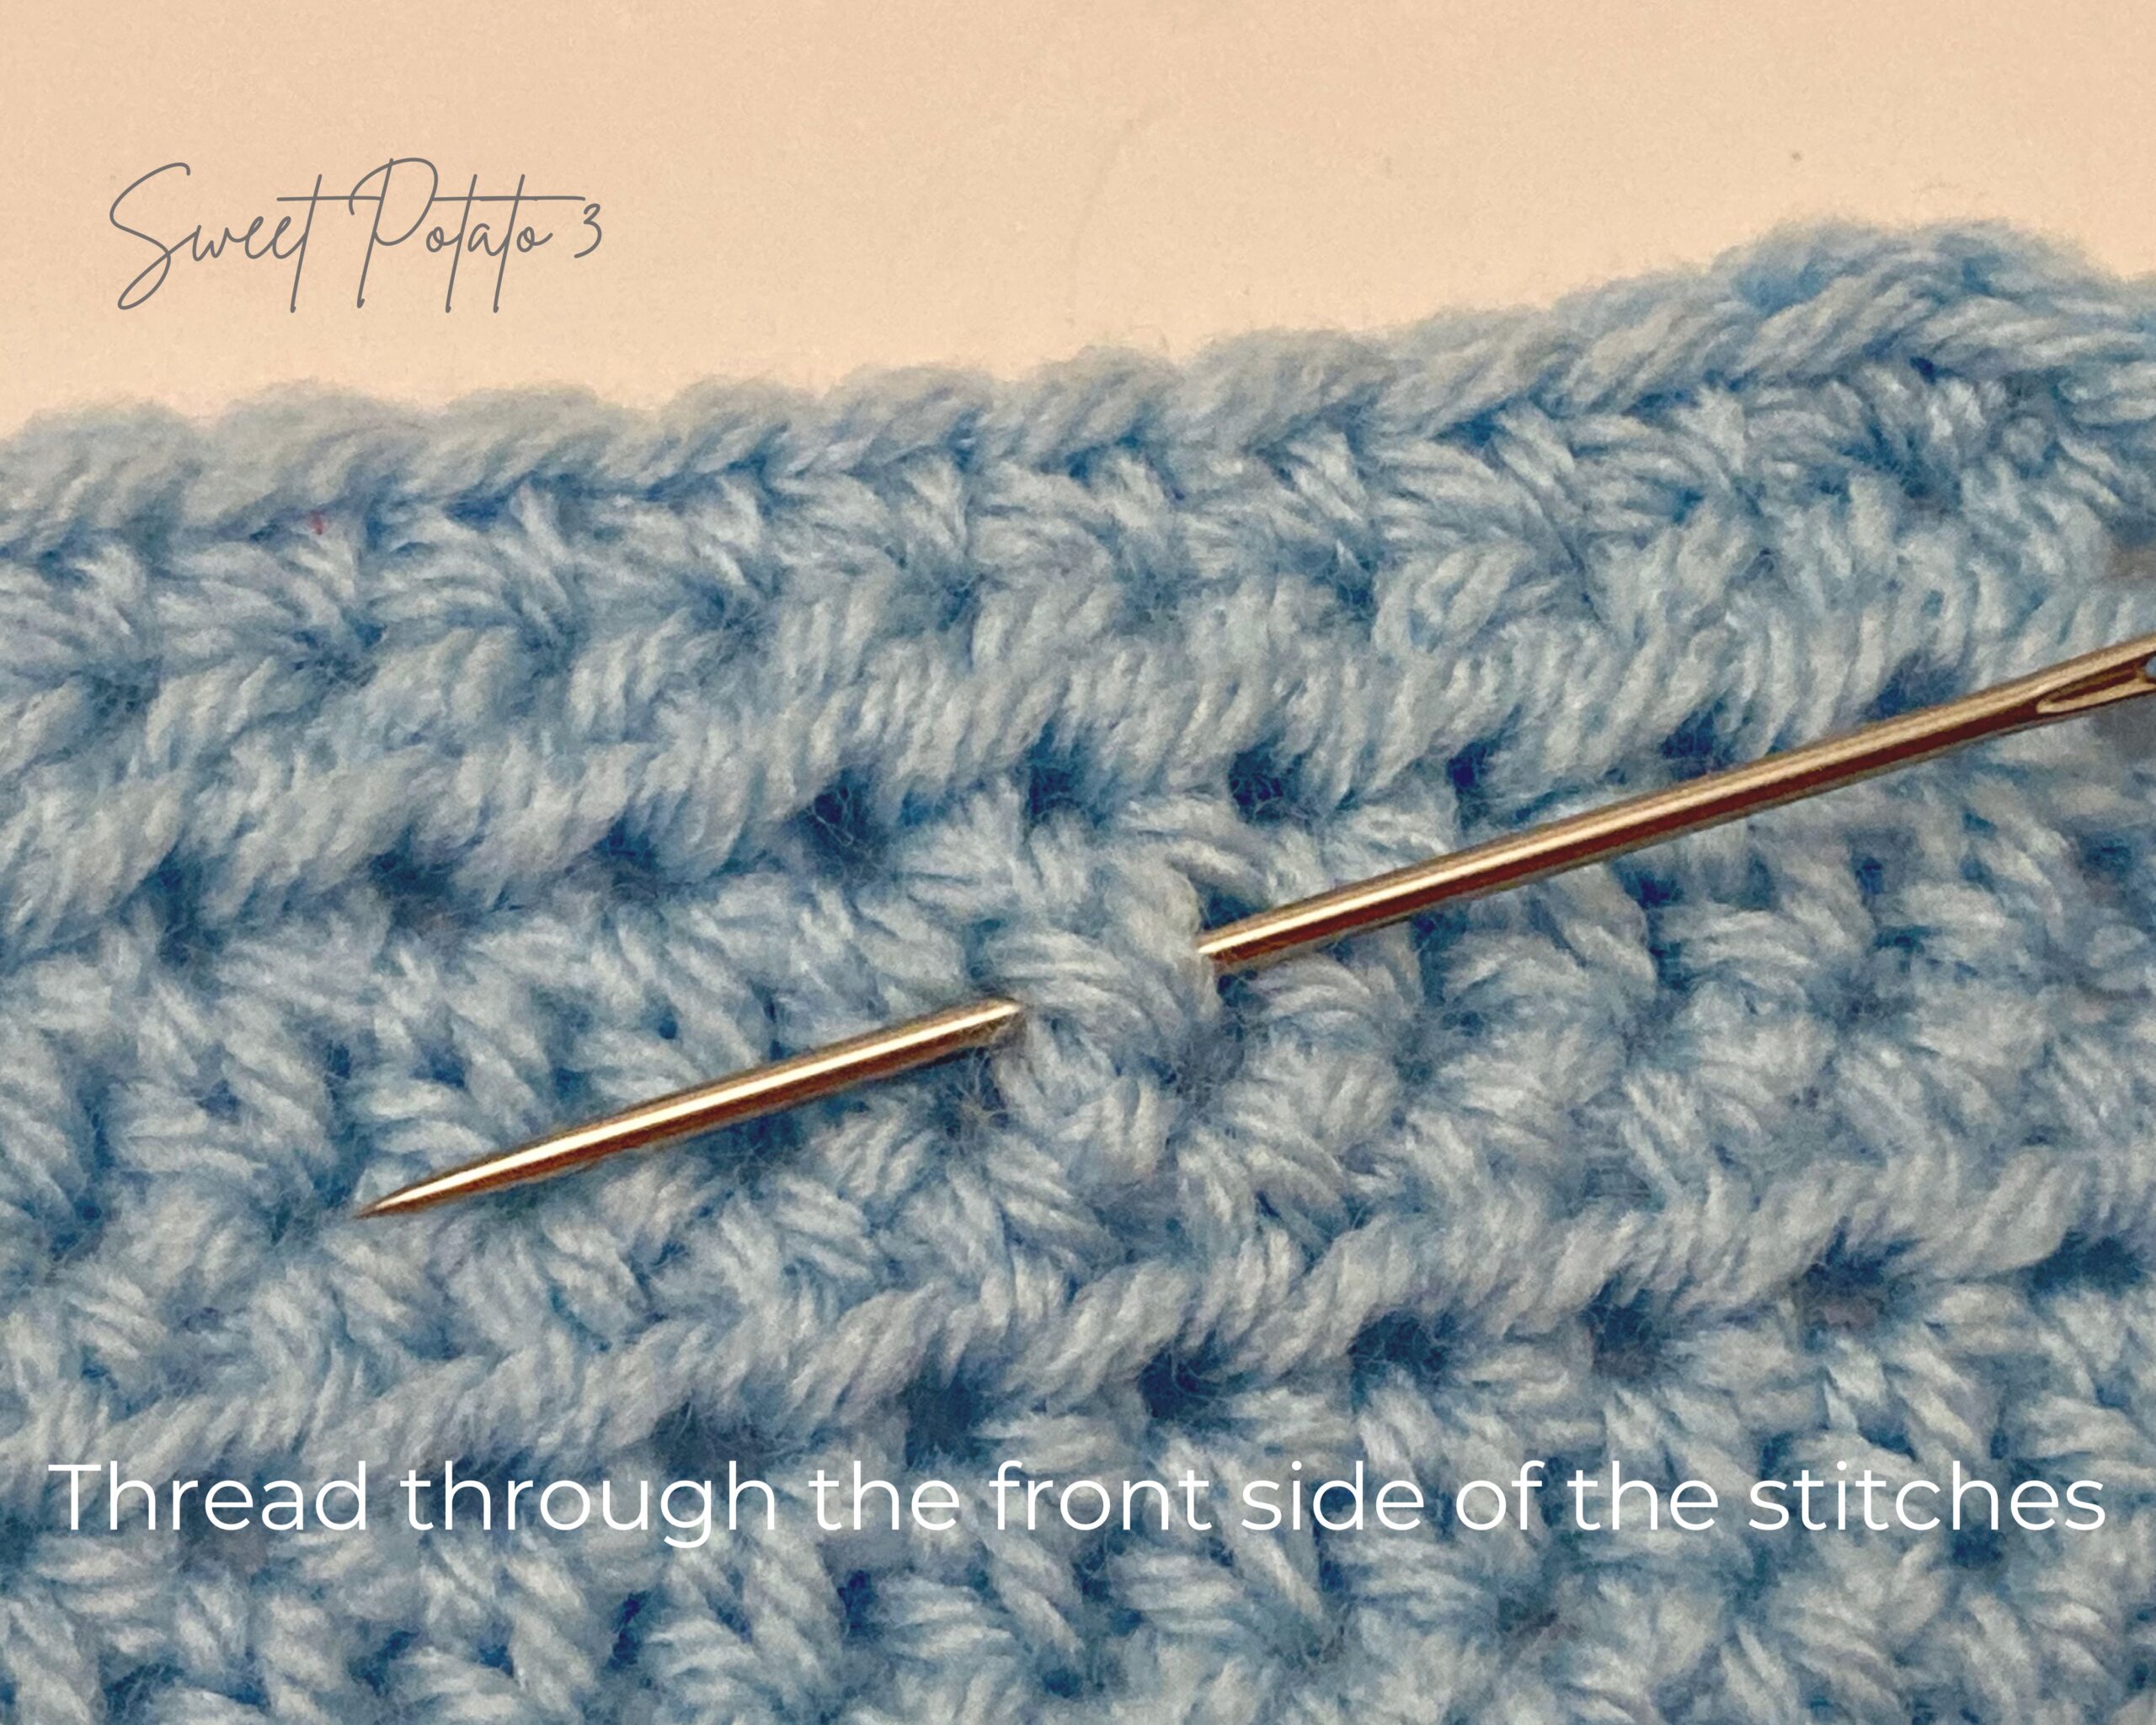
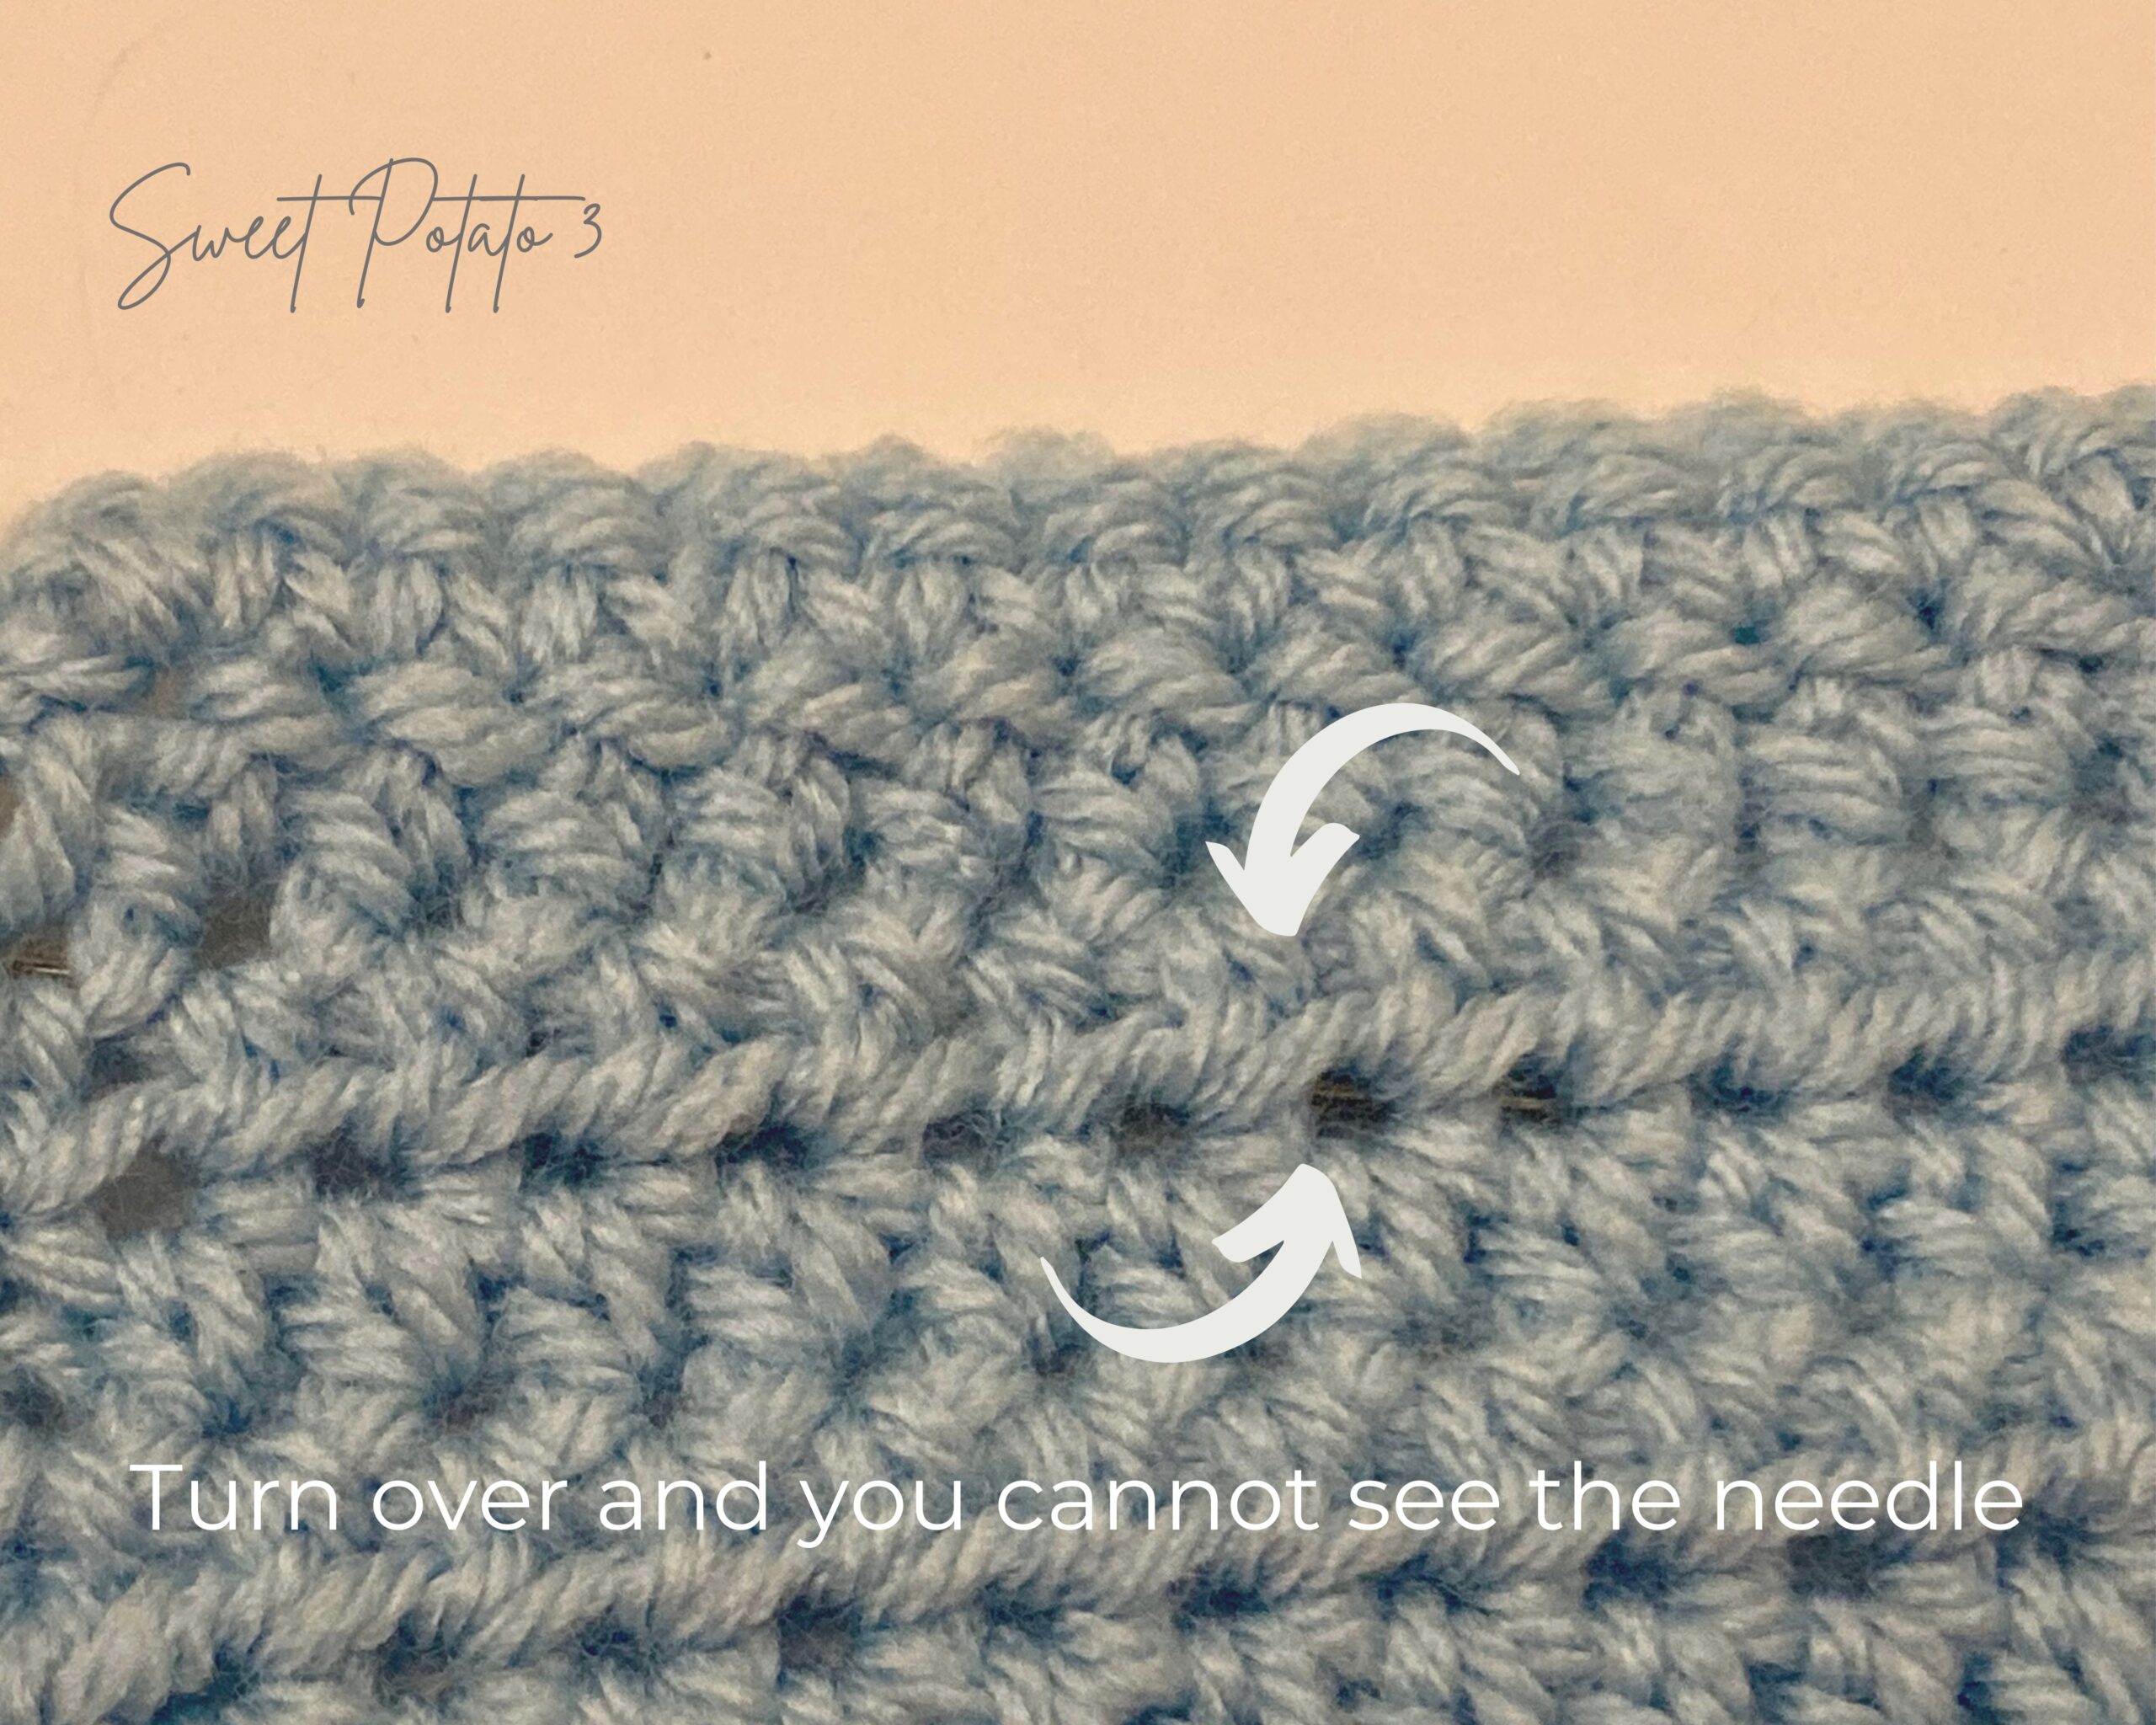
Being able to split a stitch in half through the middle is key to sewing on appliques. This is where you will “sew”, resulting in not being able to see the seams on either side. Not seeing the seams makes it invisible and provides a professional finished look.
Isn’t this exciting? Keep going and you will be able to apply this in just a couple more minutes.
How To Sew On An Applique
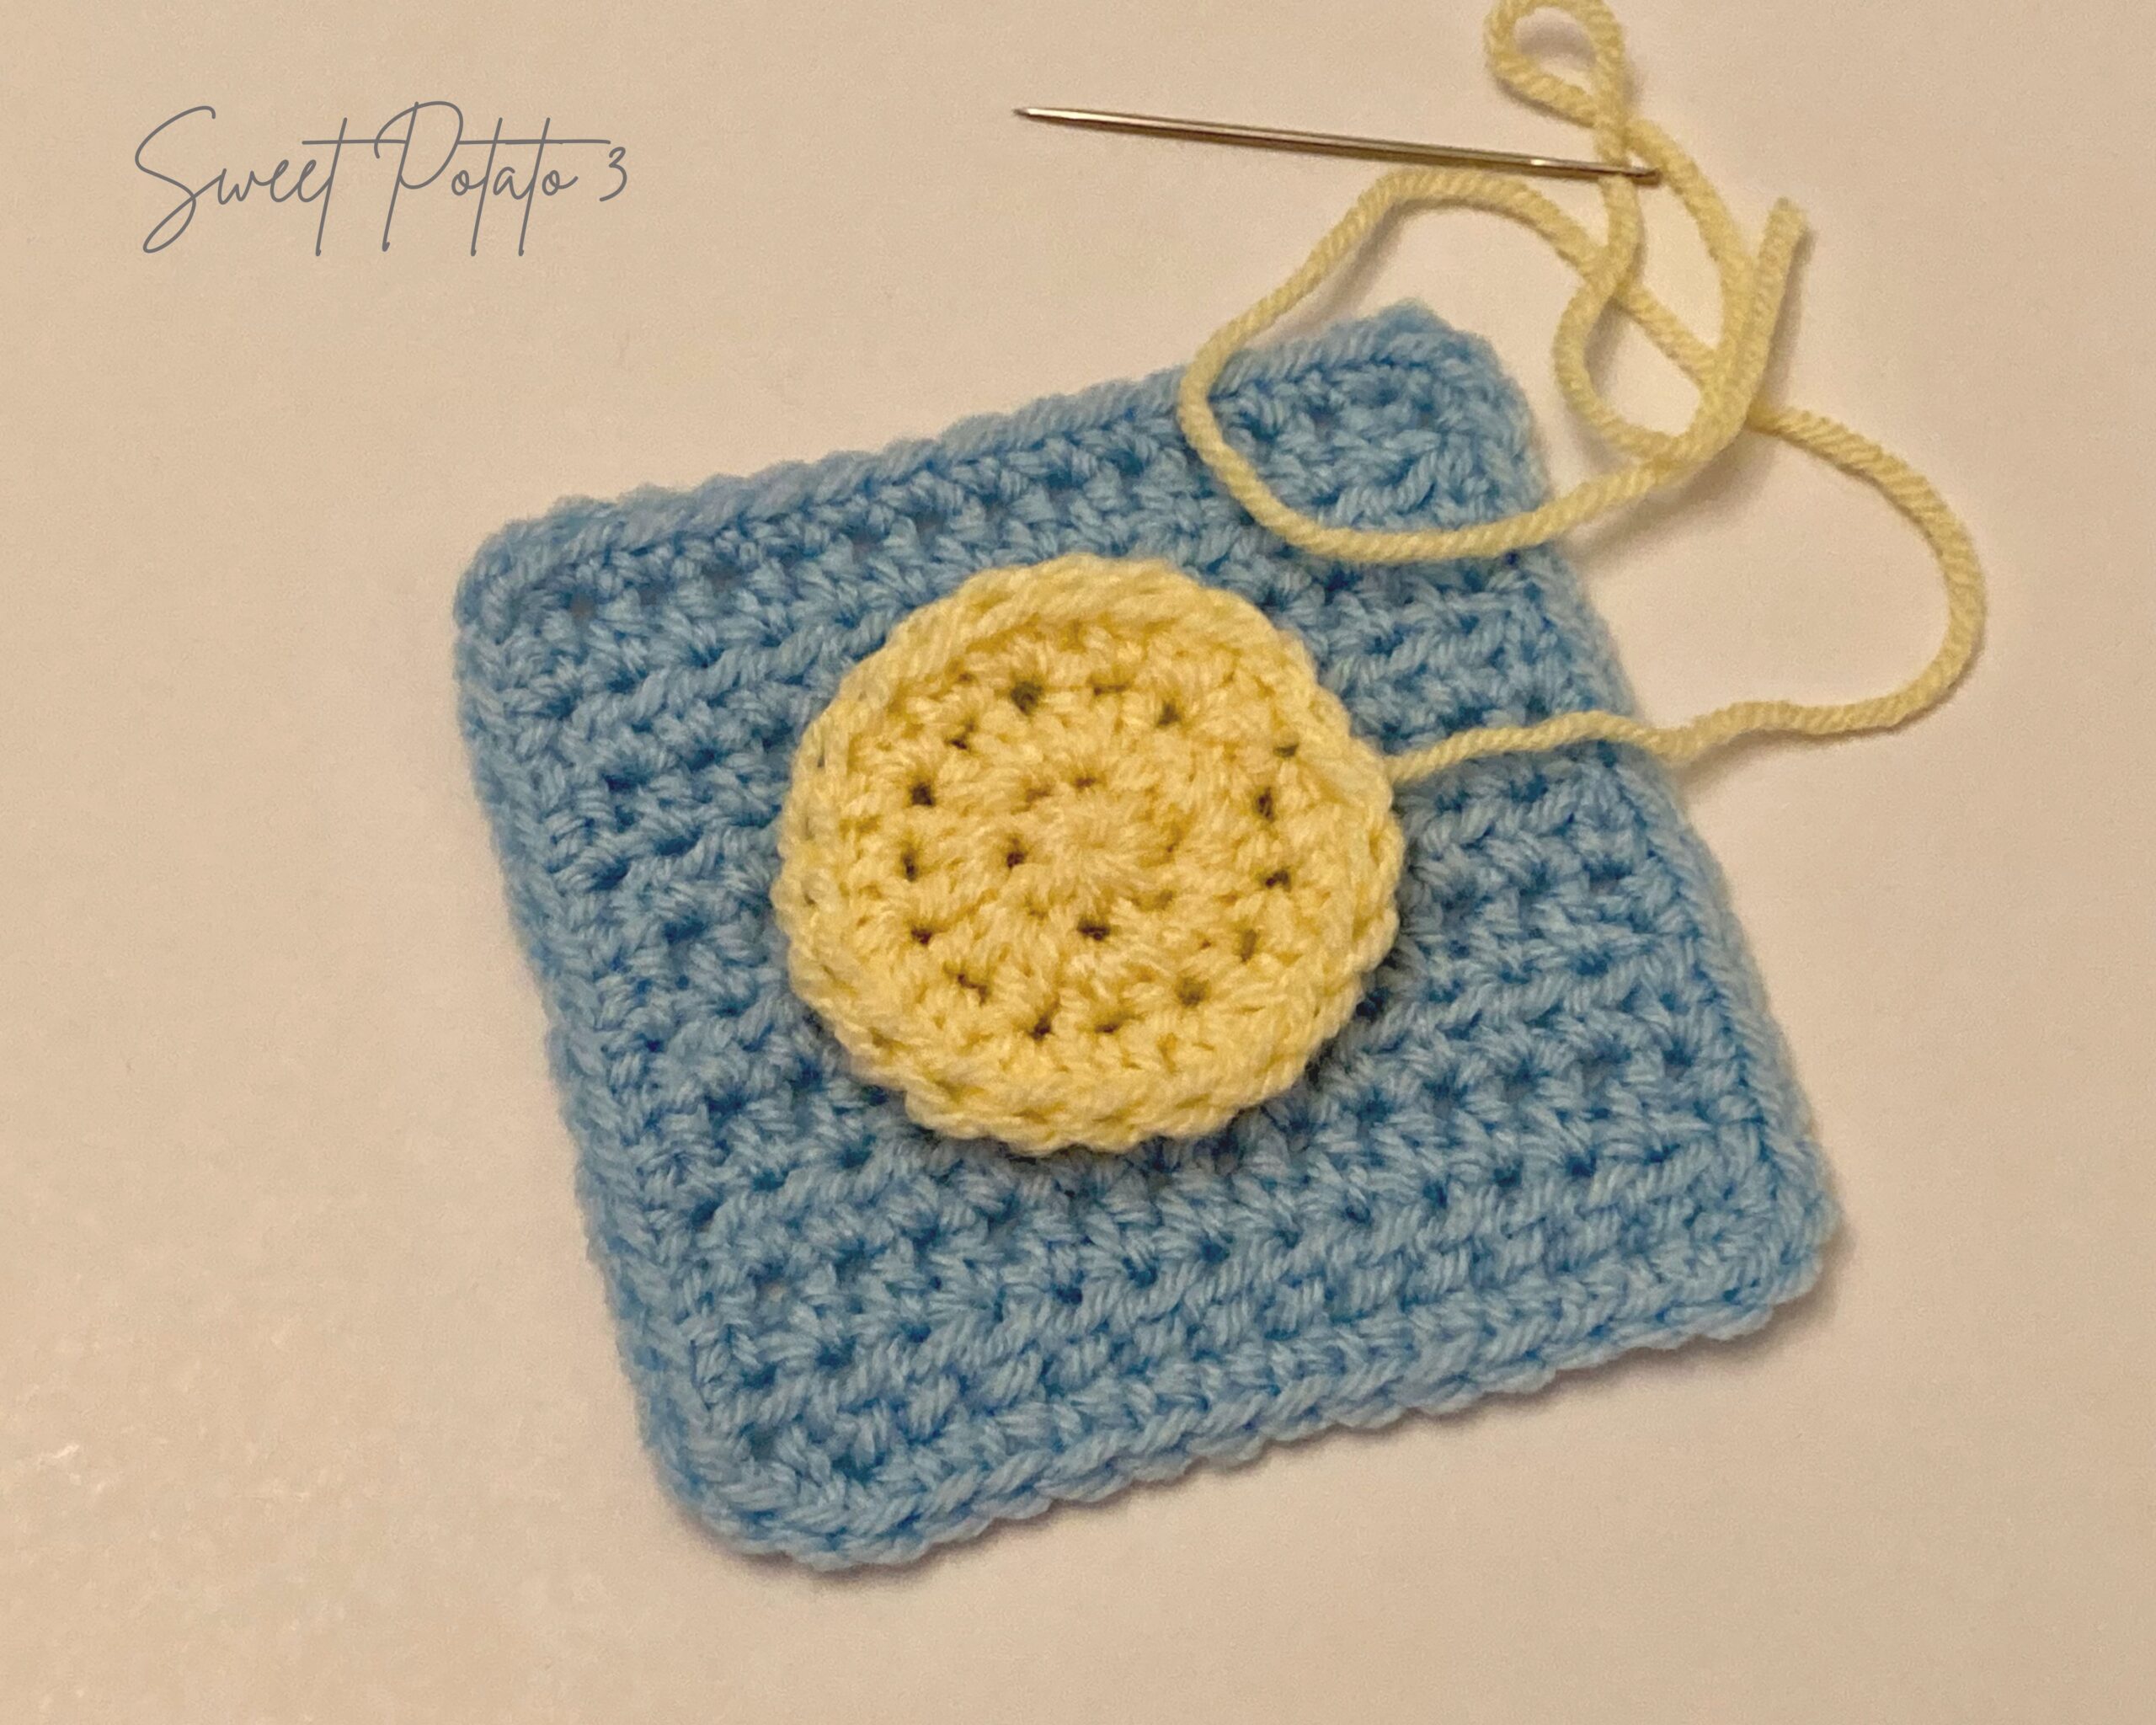
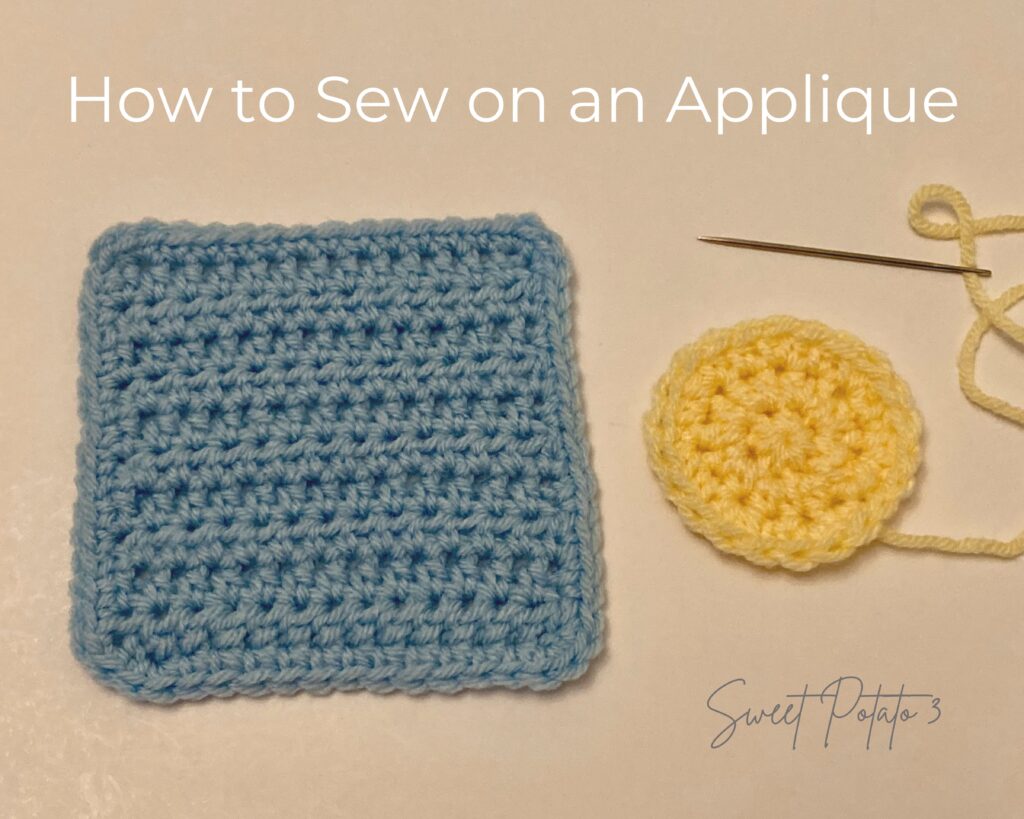
The first thing you need to have is a completed background crochet piece and applique. Place the applique where you want it on the project. If it is a large applique, you may find it helpful to pin it in place. Small appliques are more easily held in place.
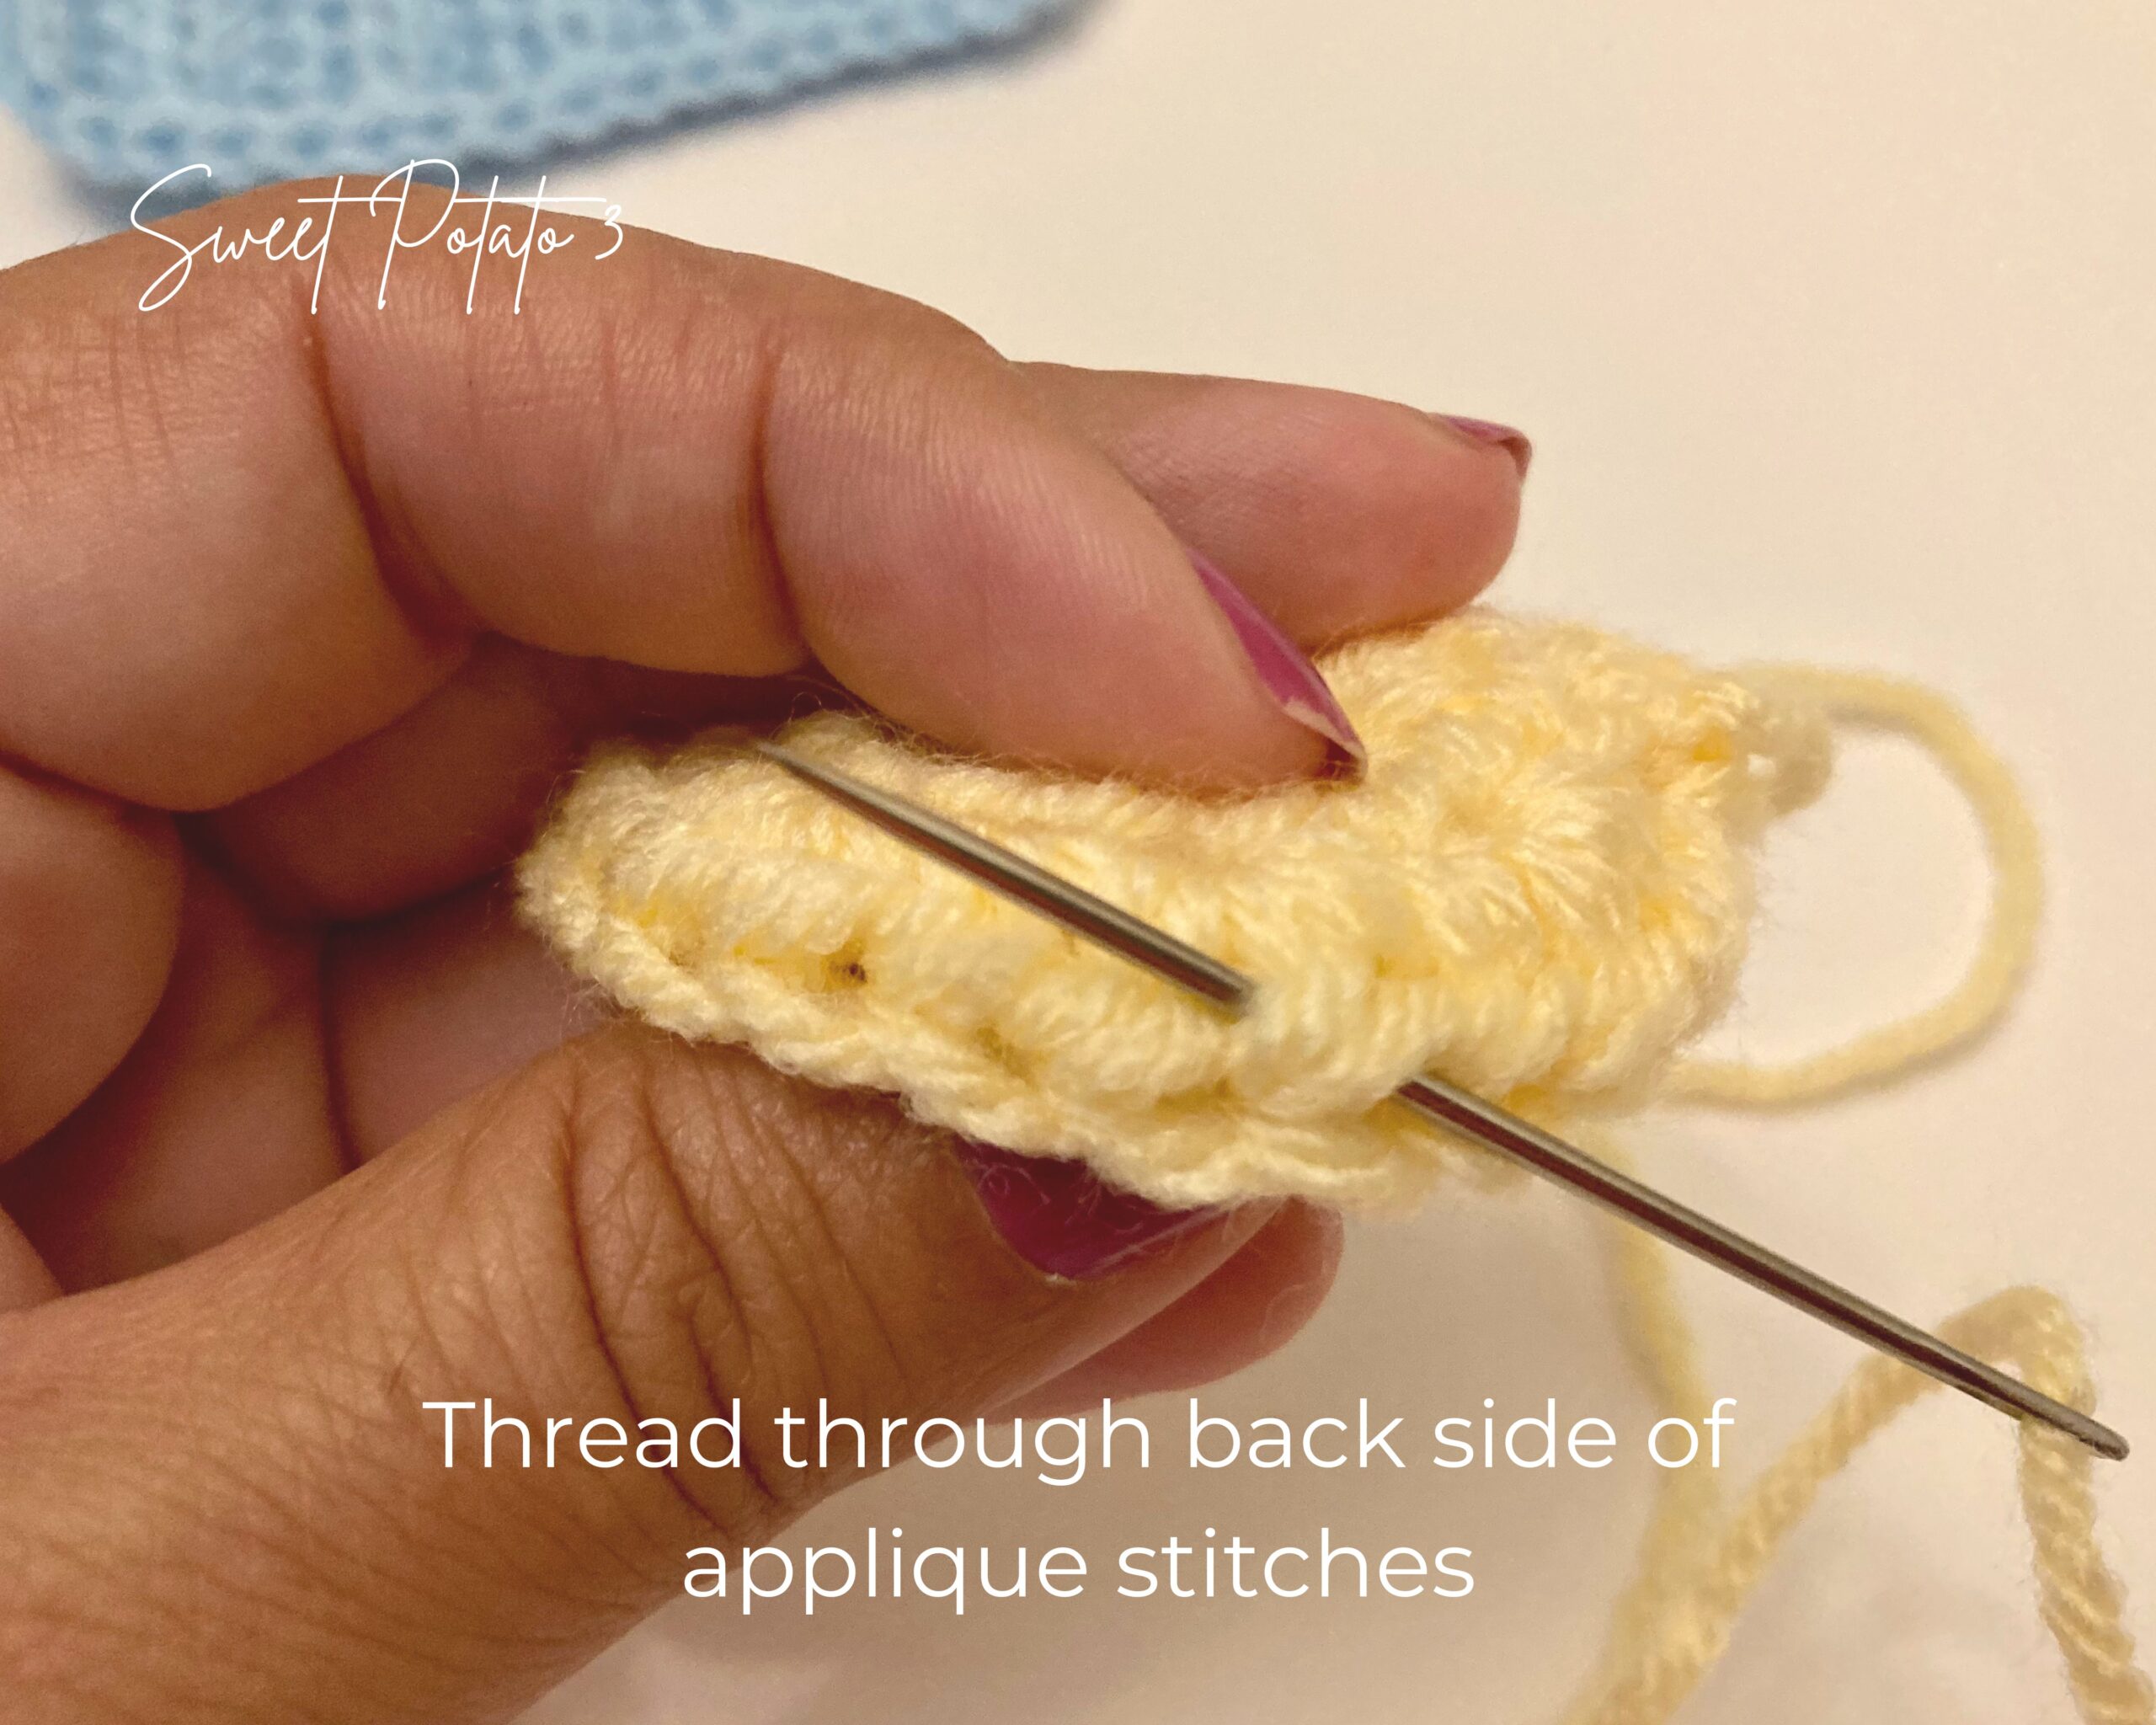
Thread the yarn onto a yarn/darning needle (these are just needles with a larger eye, making it easier to thread). Thread the needle through the backside of one stitch of the applique. Now thread the yarn on the frontside of a crochet stitch on the front side of your crocheted background piece.
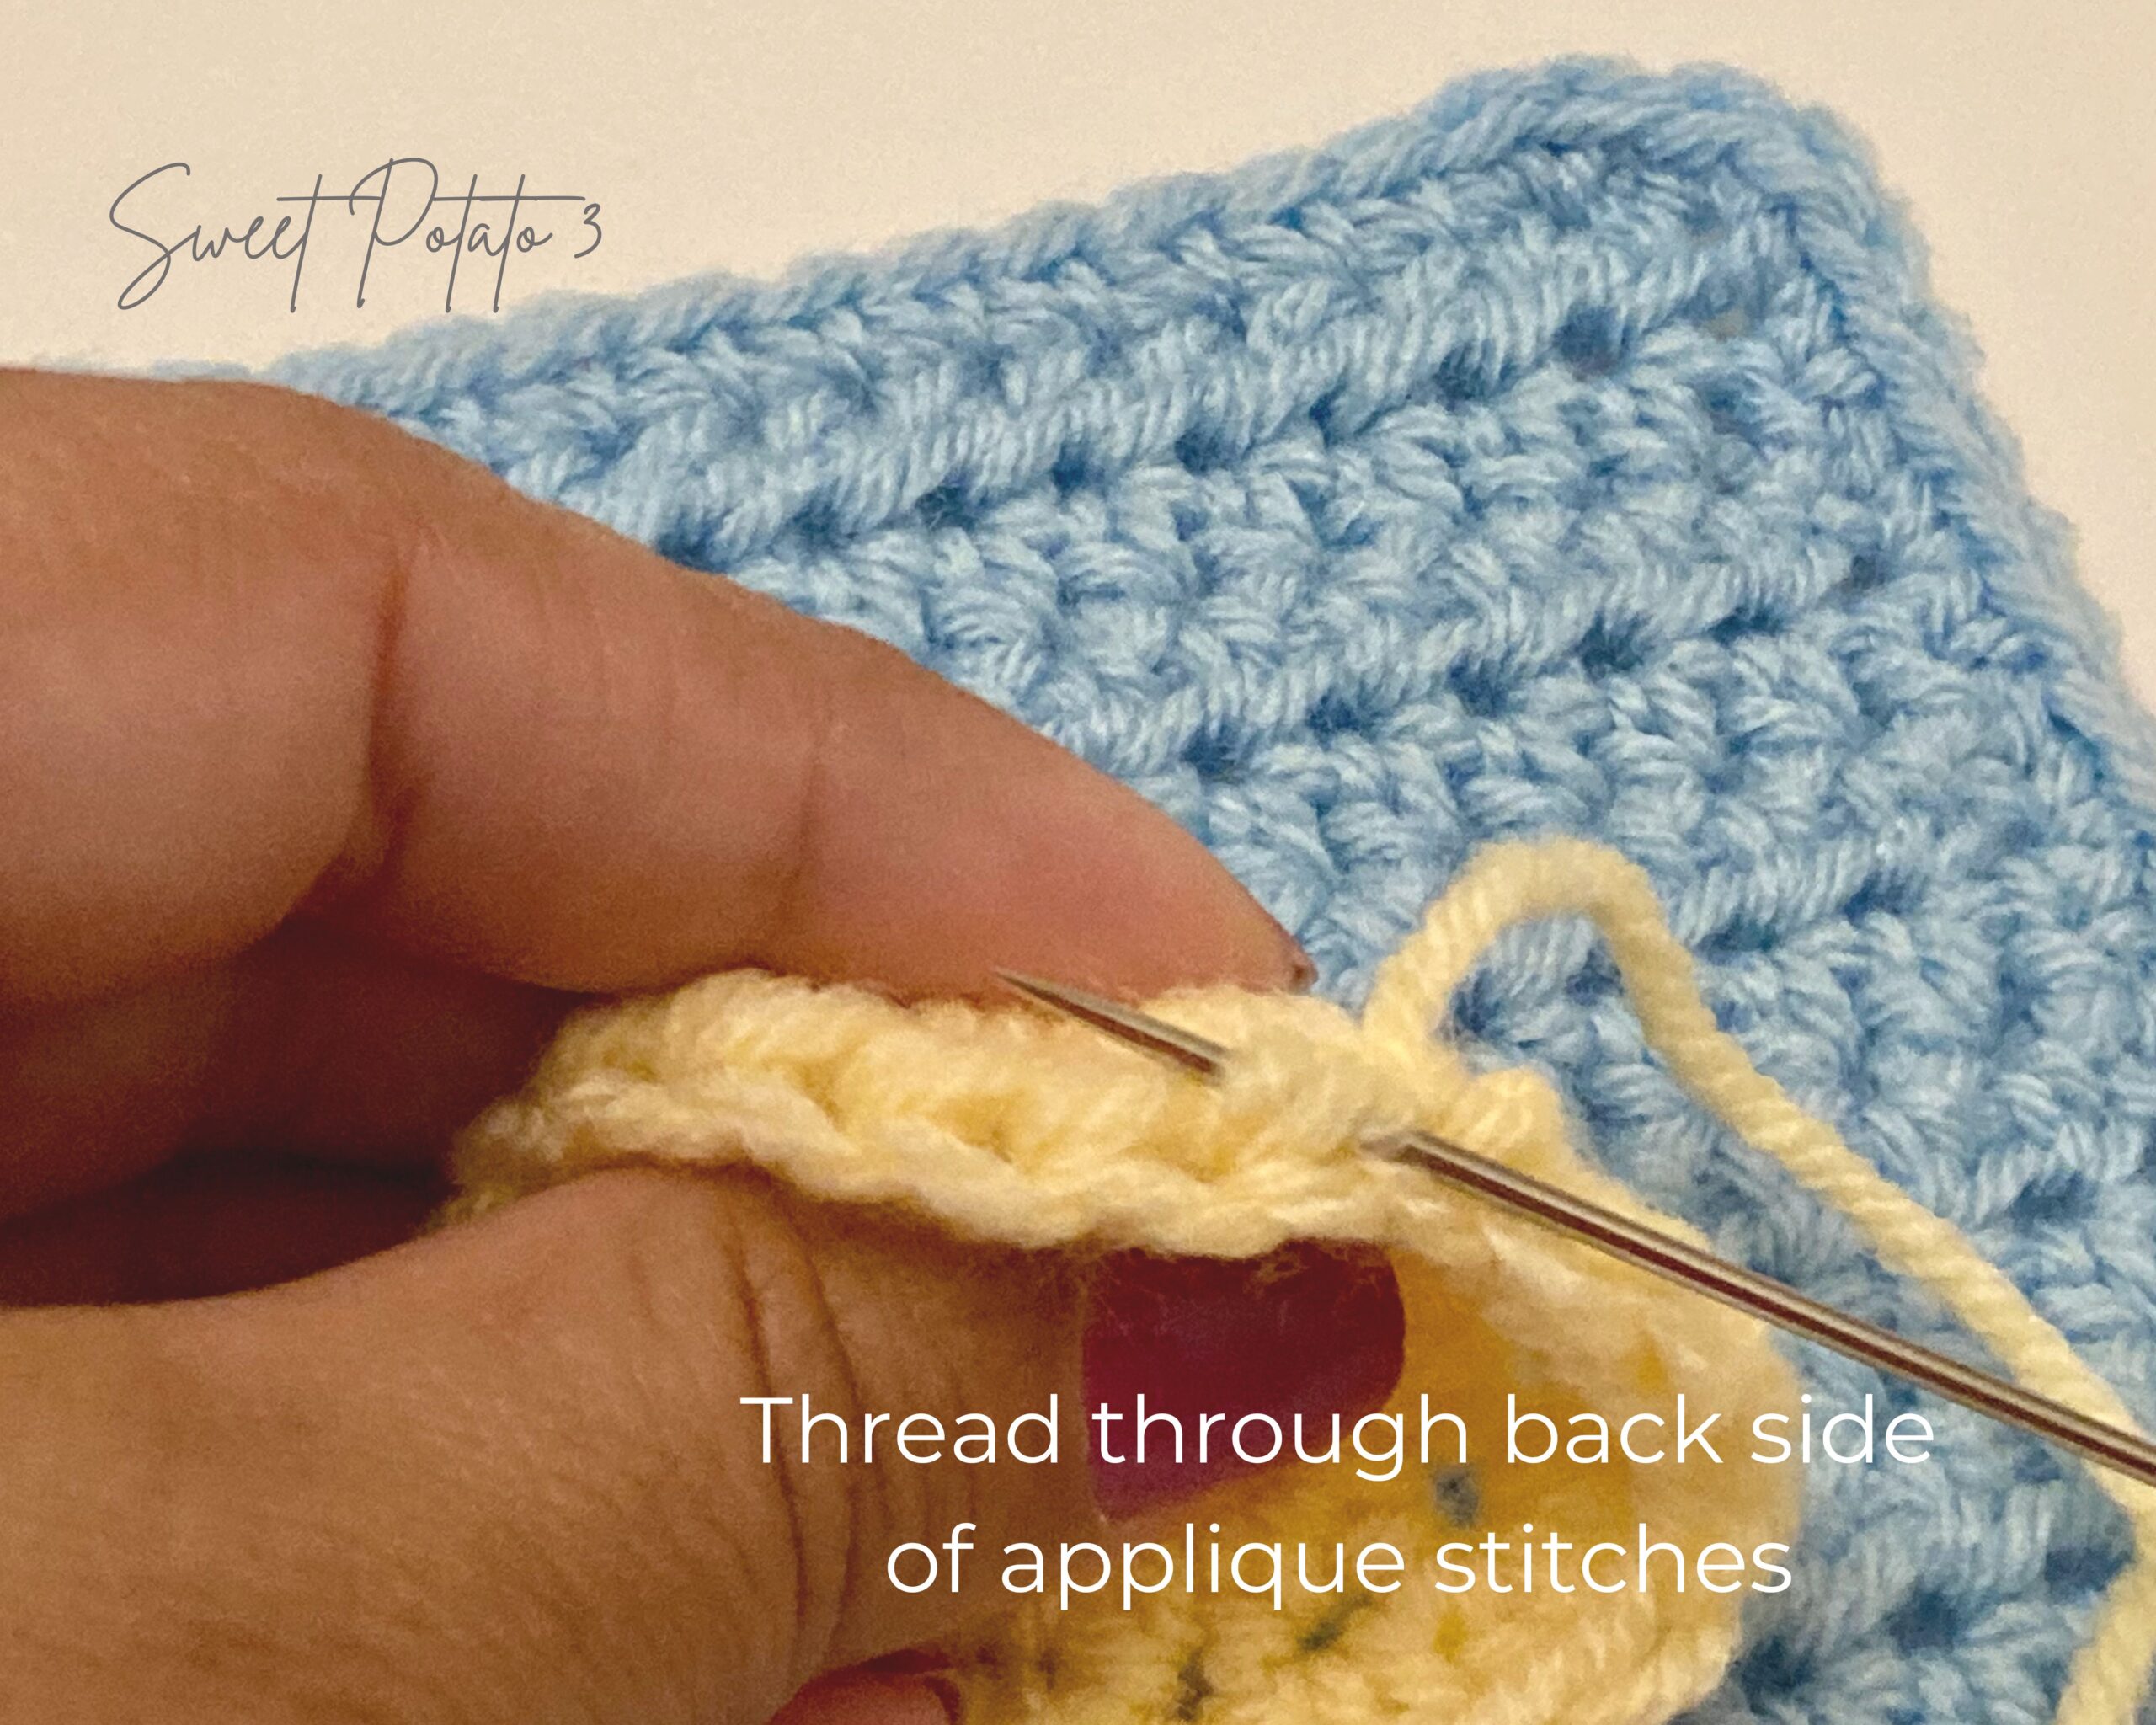
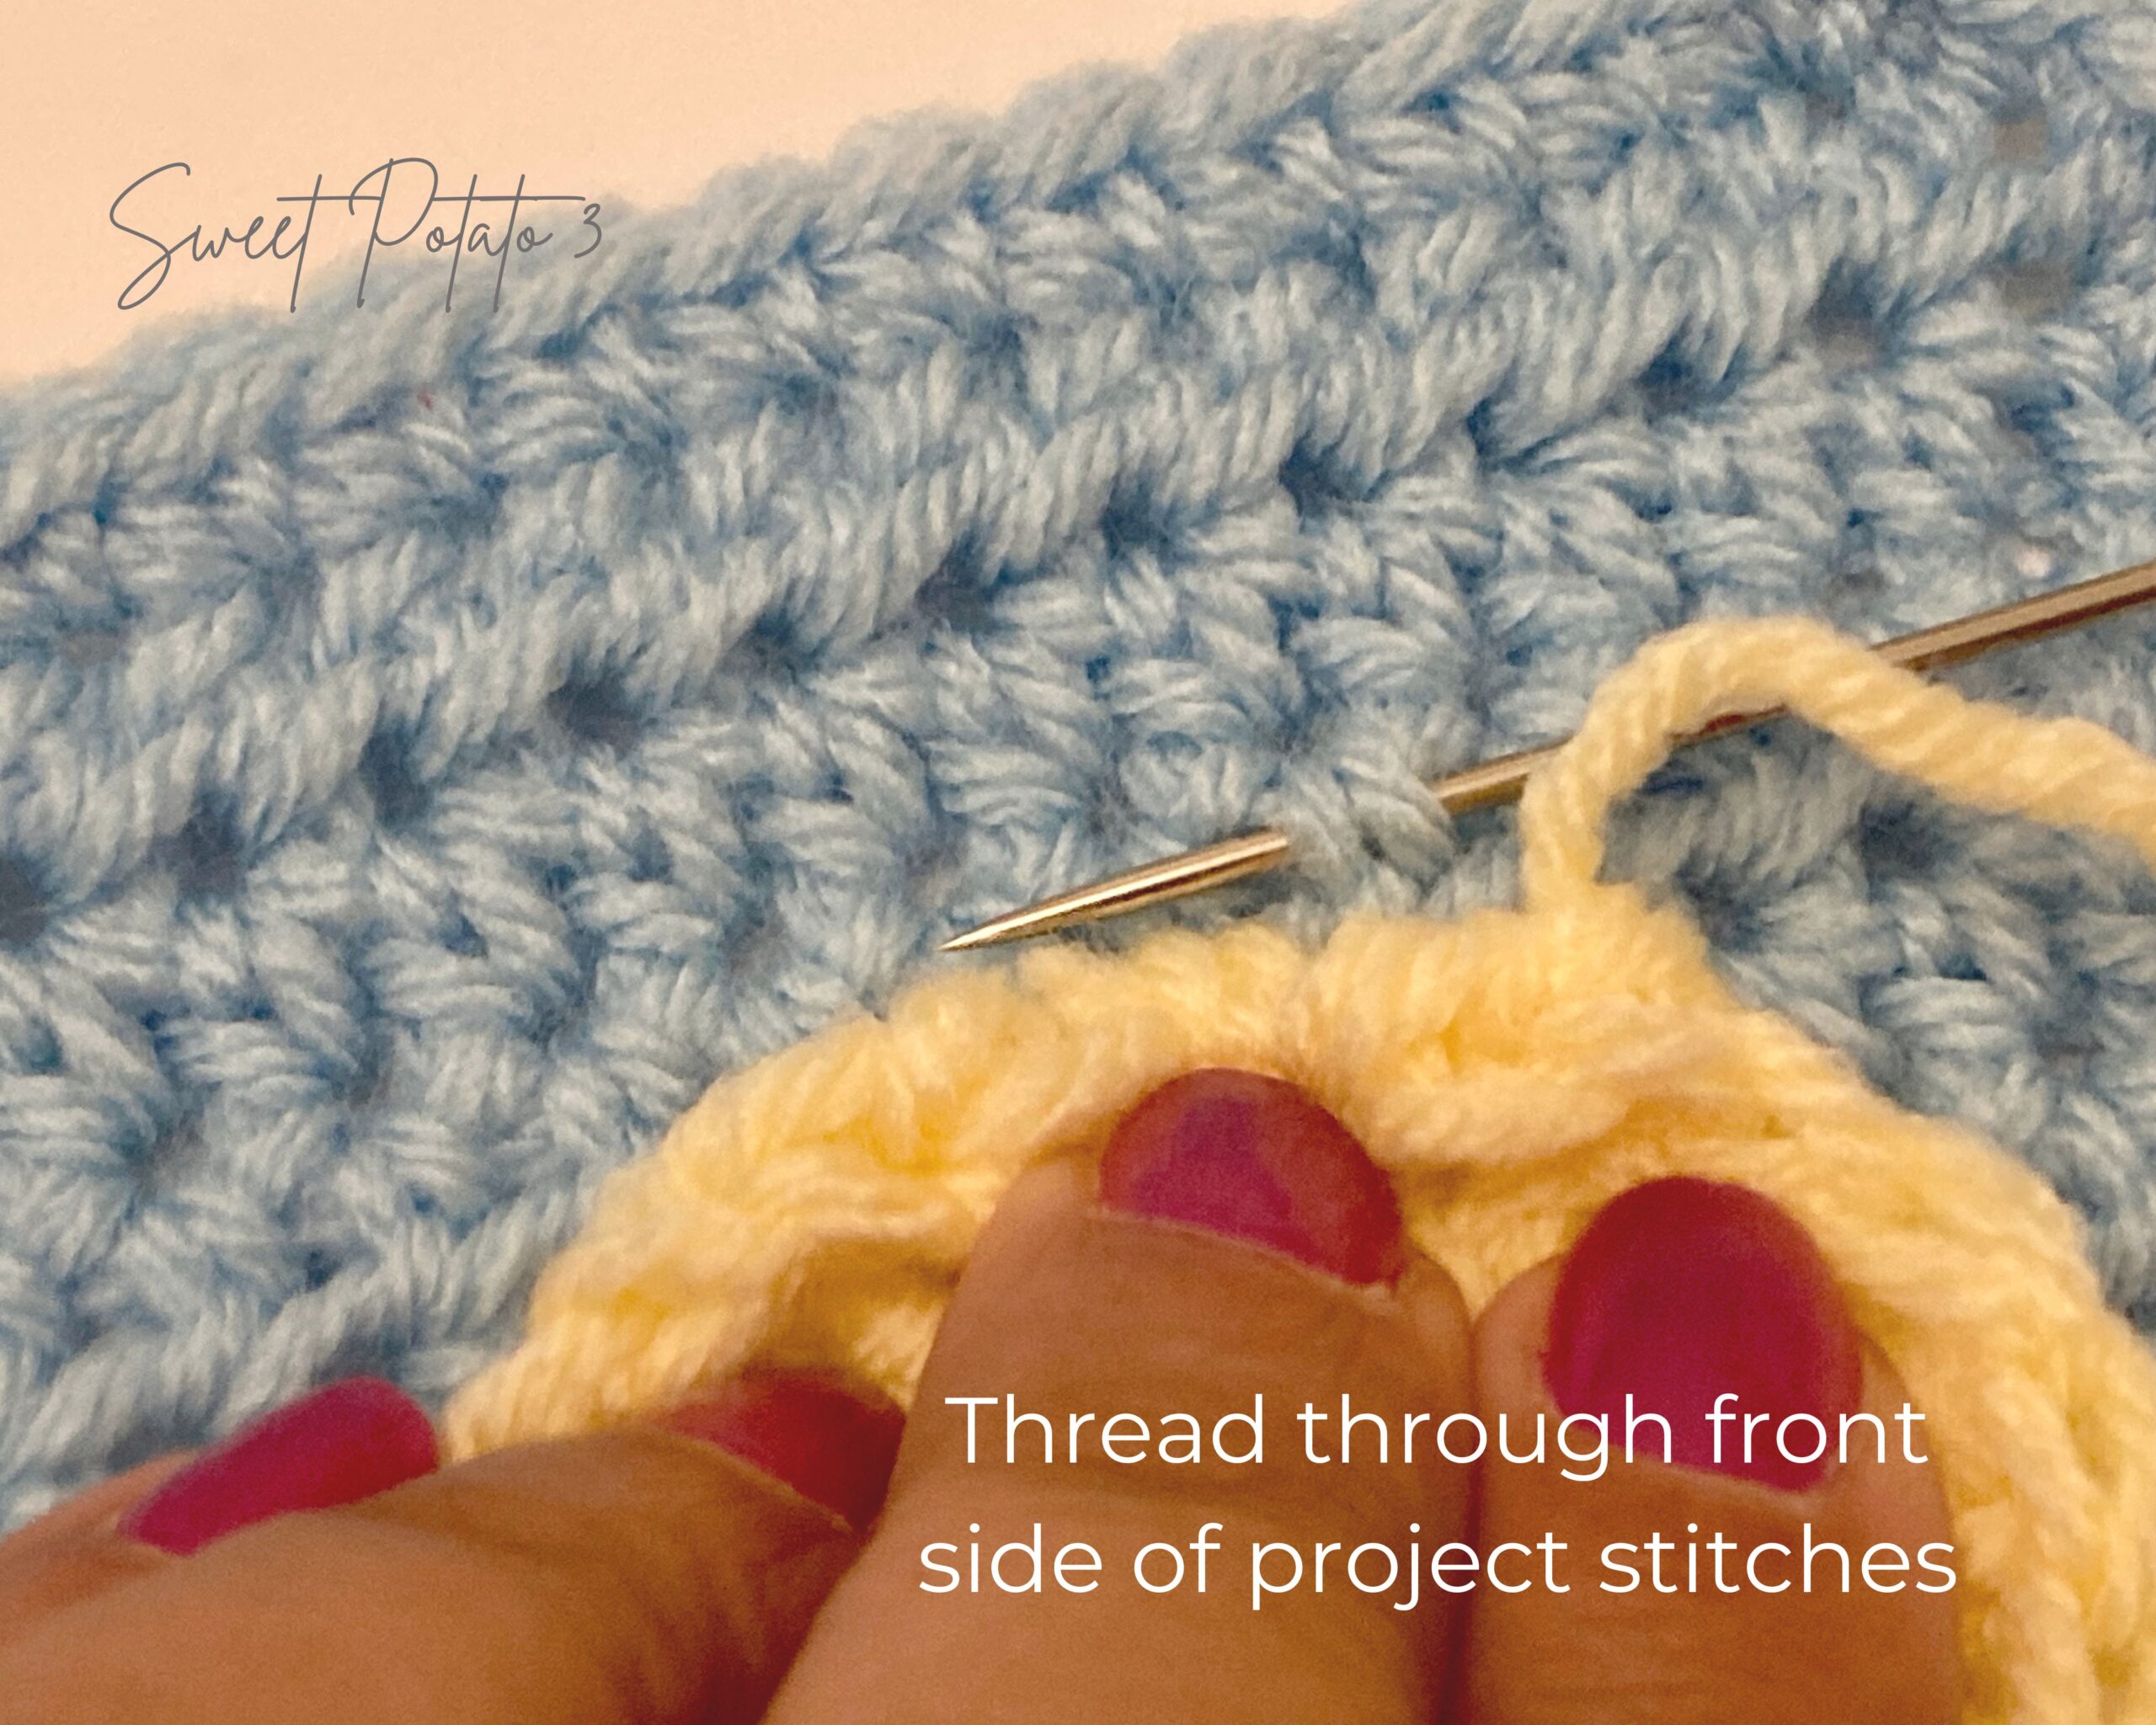
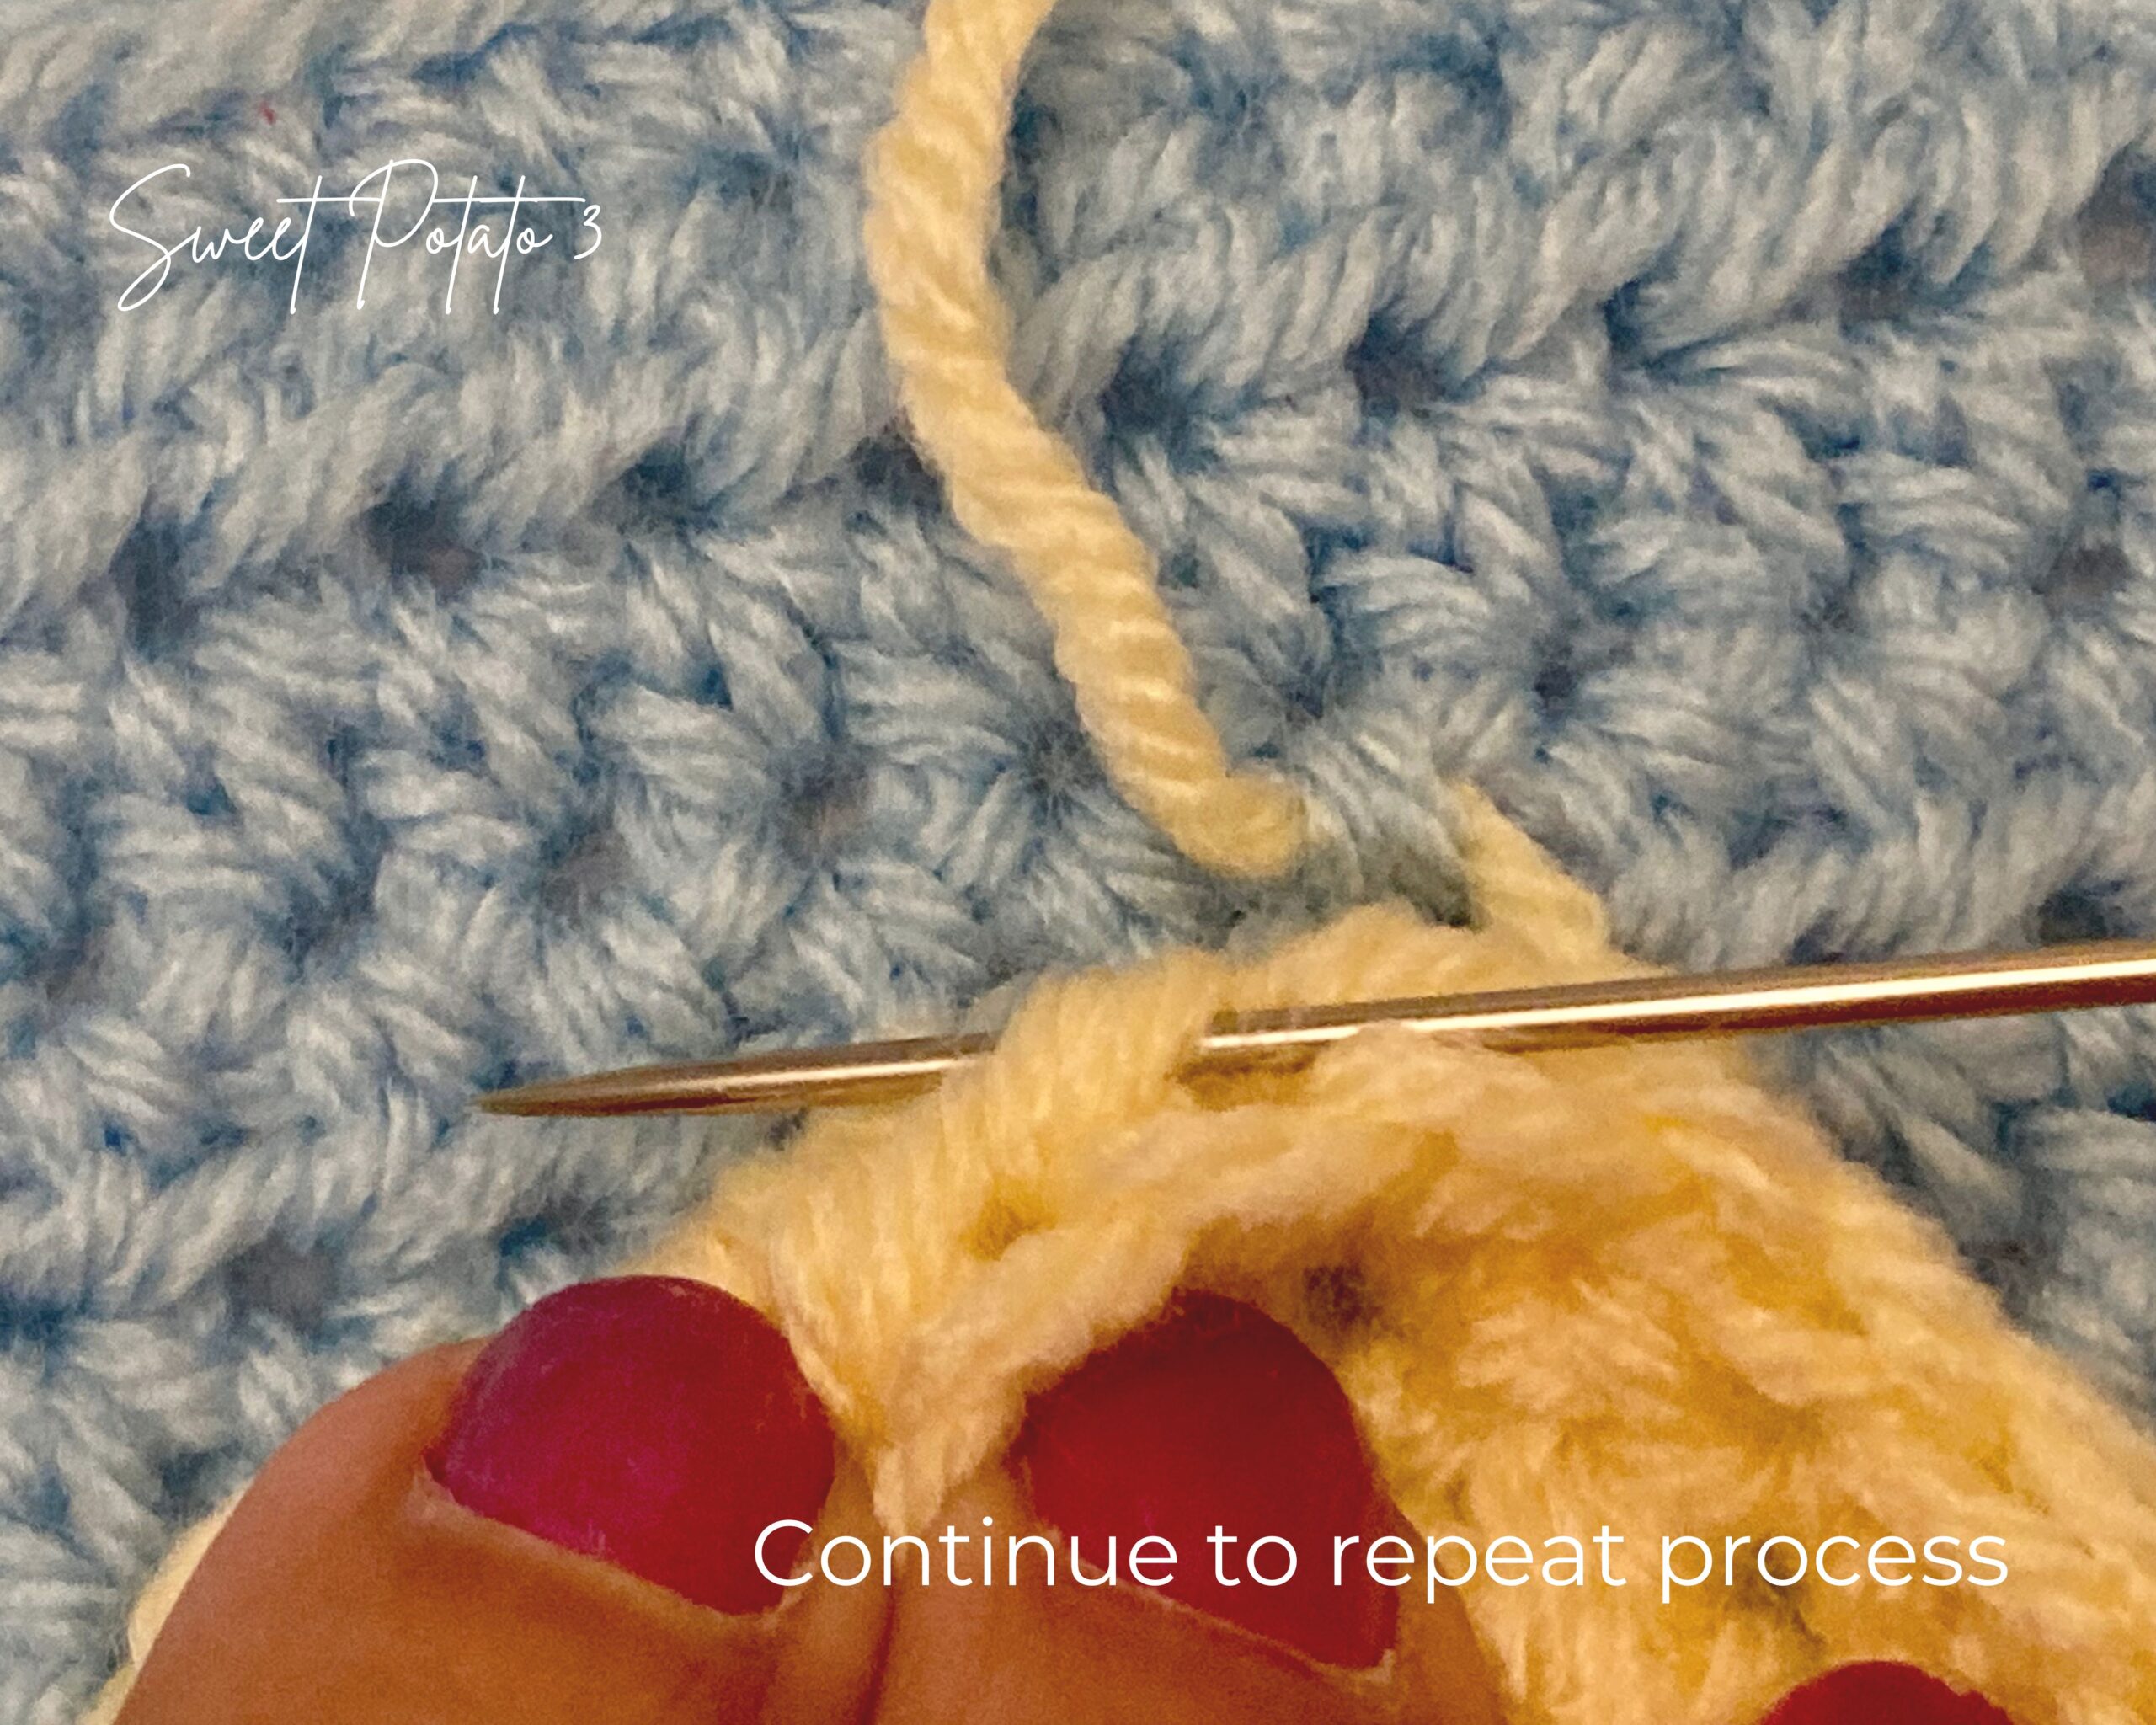
Repeat this process of threading through the backside of the stitches of the applique, then the frontside of the next stitch of the background crochet piece. Repeat this around the entire applique.
After every few stitches pull the yarn so it is about the same ease as your crochet pieces. If the yarn is pulled too tight, it may gather or cause a pucker in your crochet fabric. If you don’t pull it tight enough, the applique will be loose, and the sewing yarn may be visible.
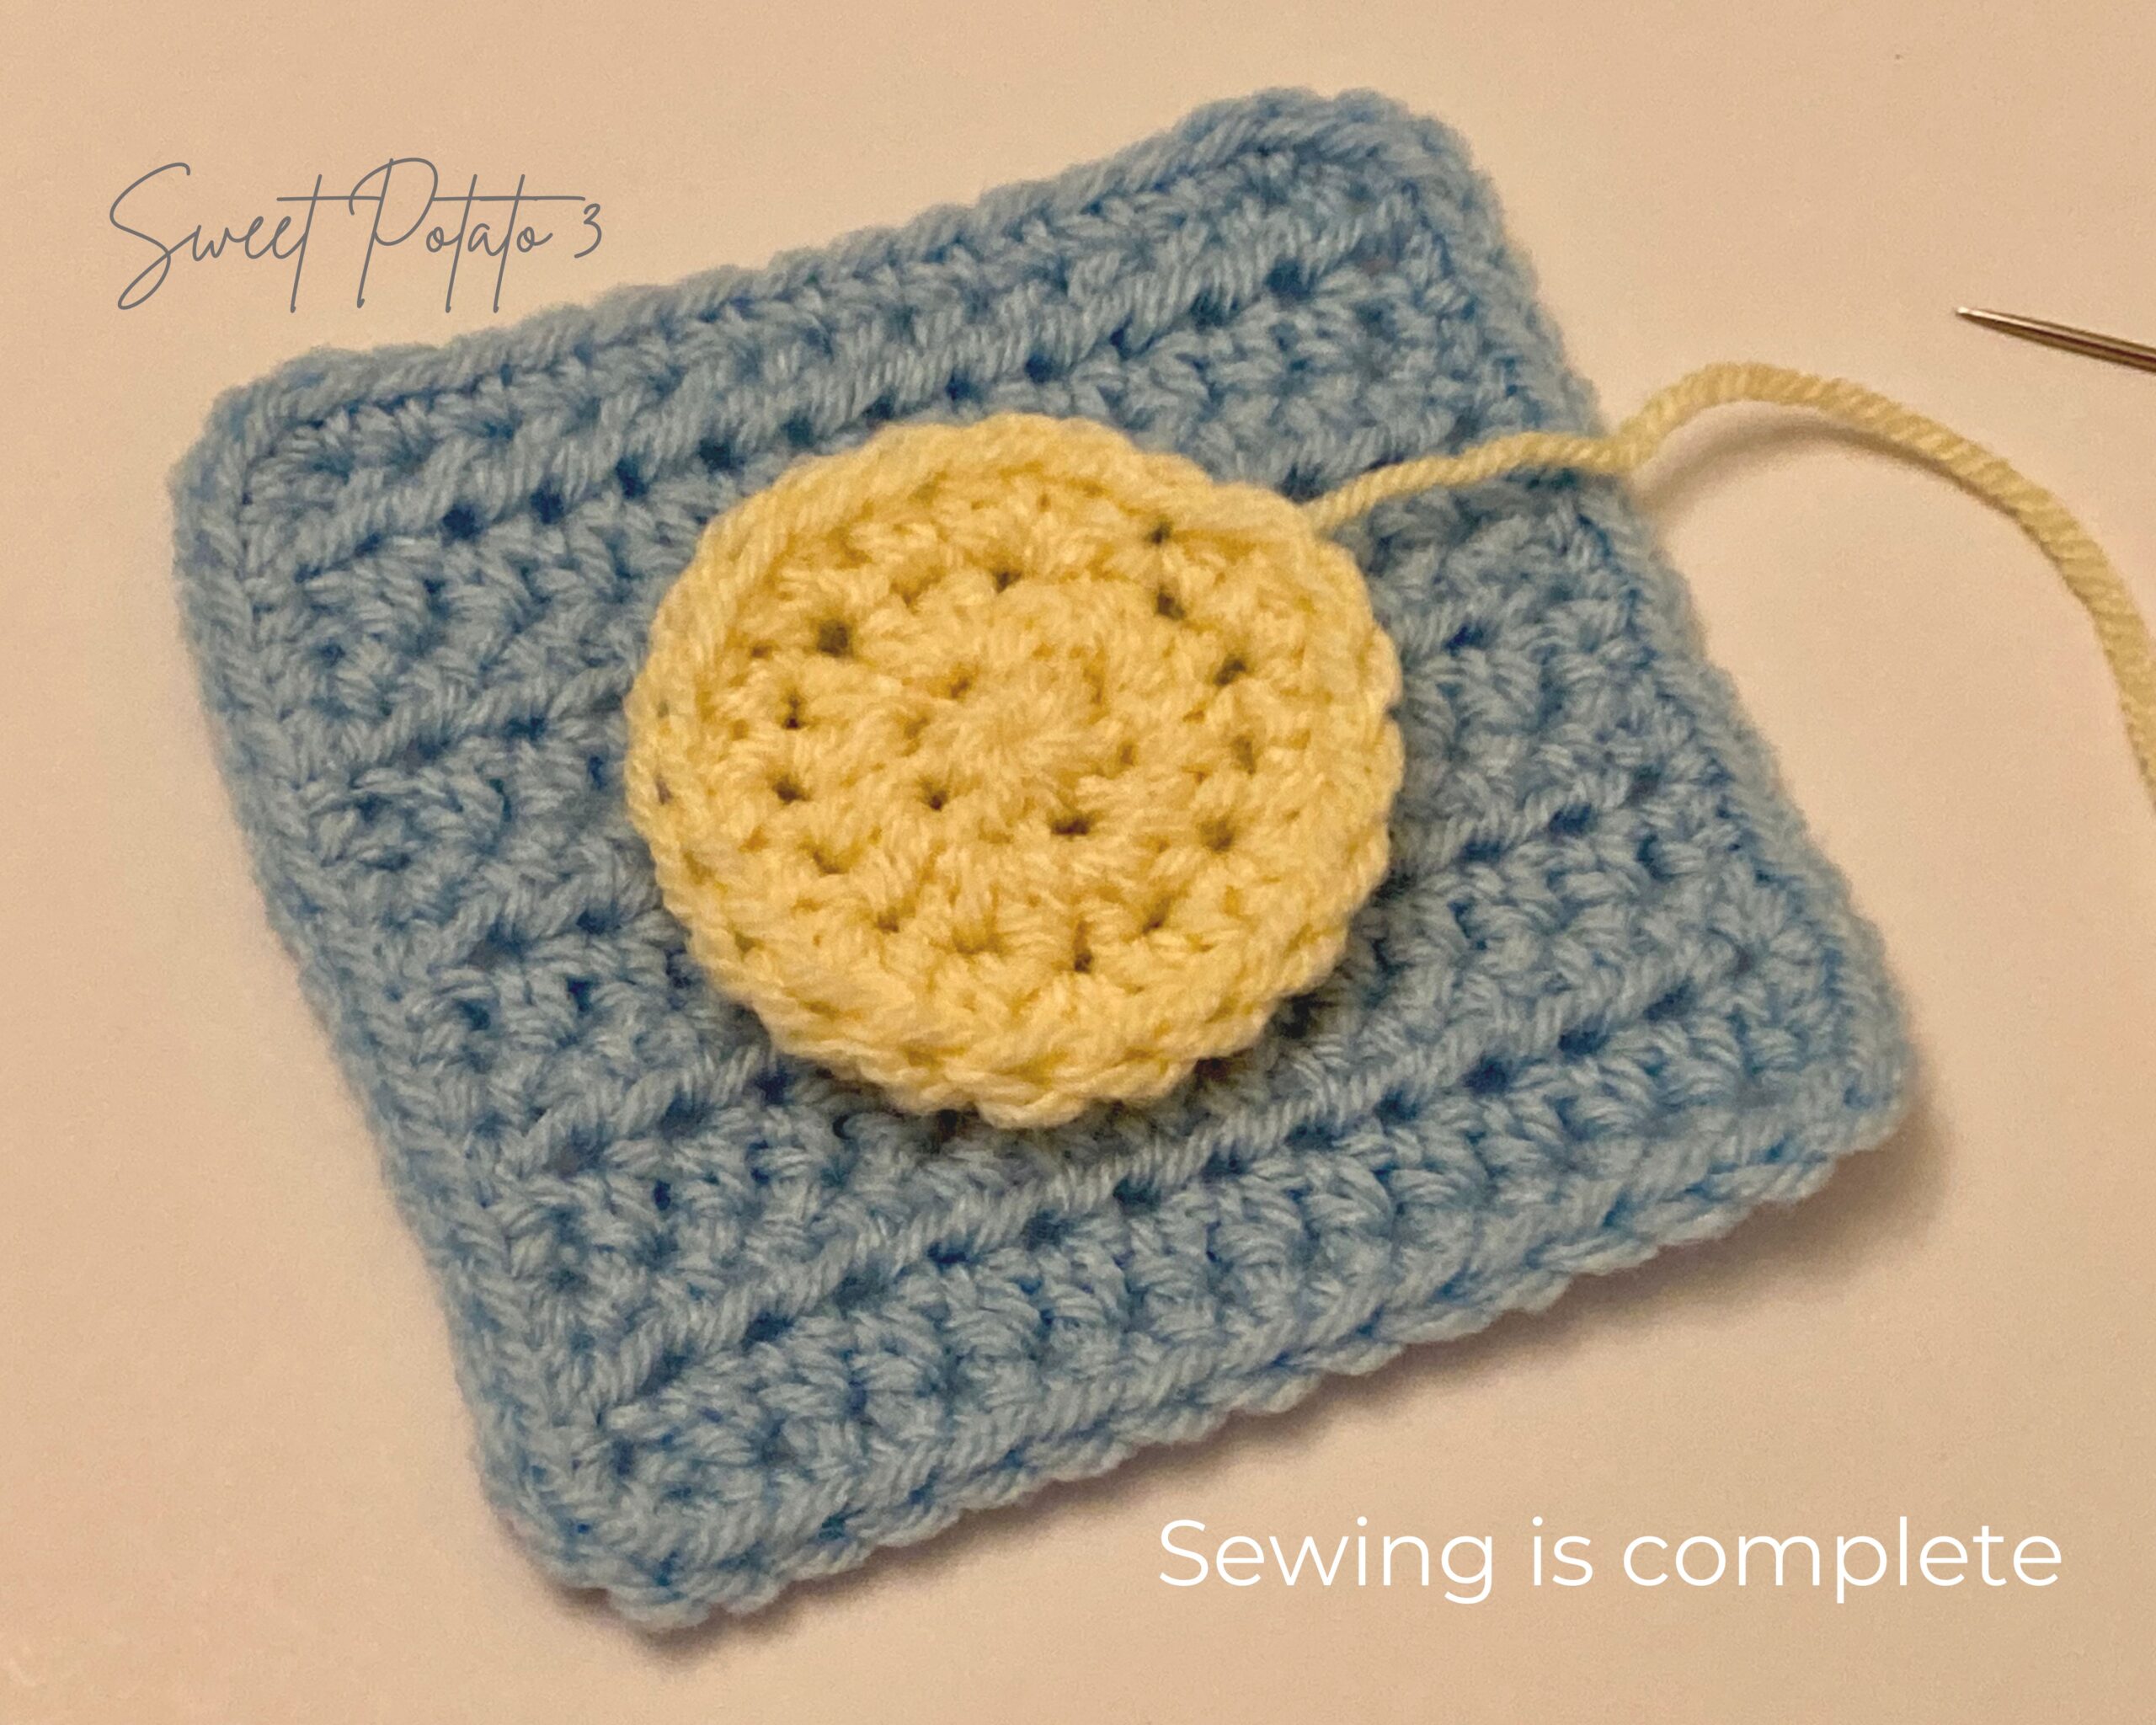
Finishing
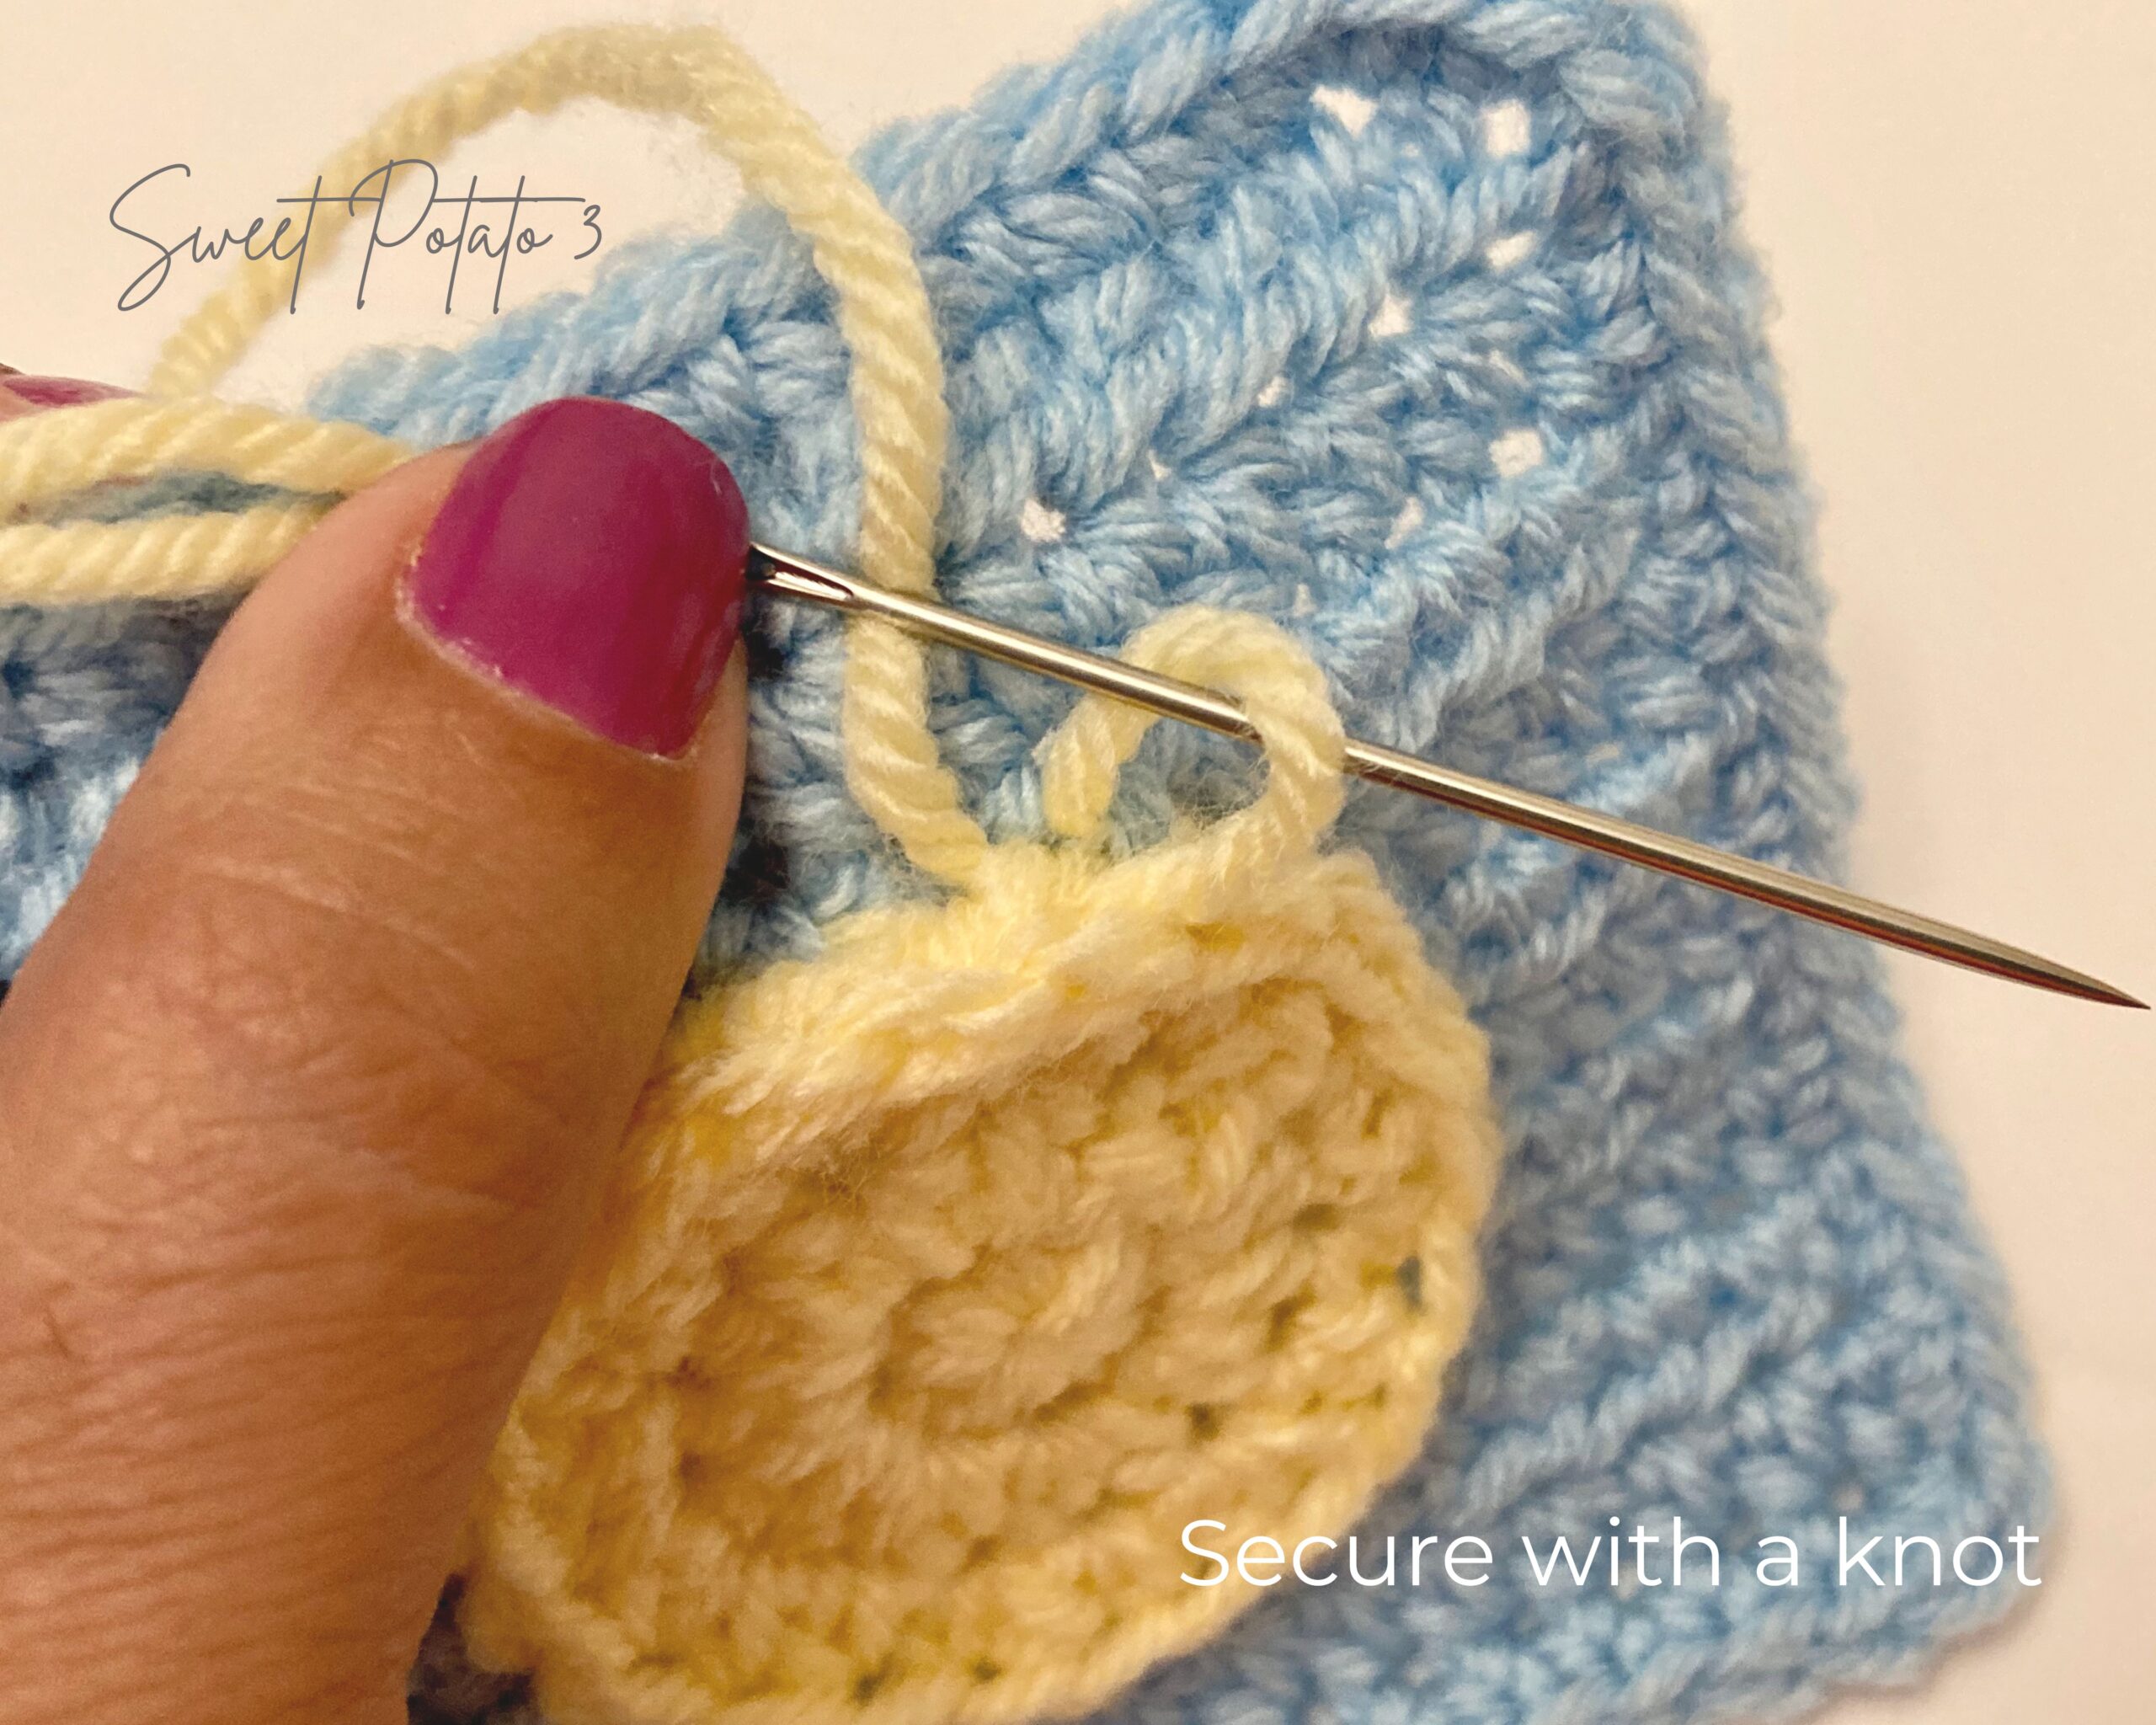
Once the applique has been sewn onto the crochet piece, take the time to look it over and make sure it is in the correct spot before securing it in place with a knot.
You don’t want to secure it and then notice it is crooked, or worse yet, sewn onto the wrong spot.
Once you know for sure it looks good, tie a knot behind the applique but in front of the background piece. This knot will secure it all in place and will not be seen.
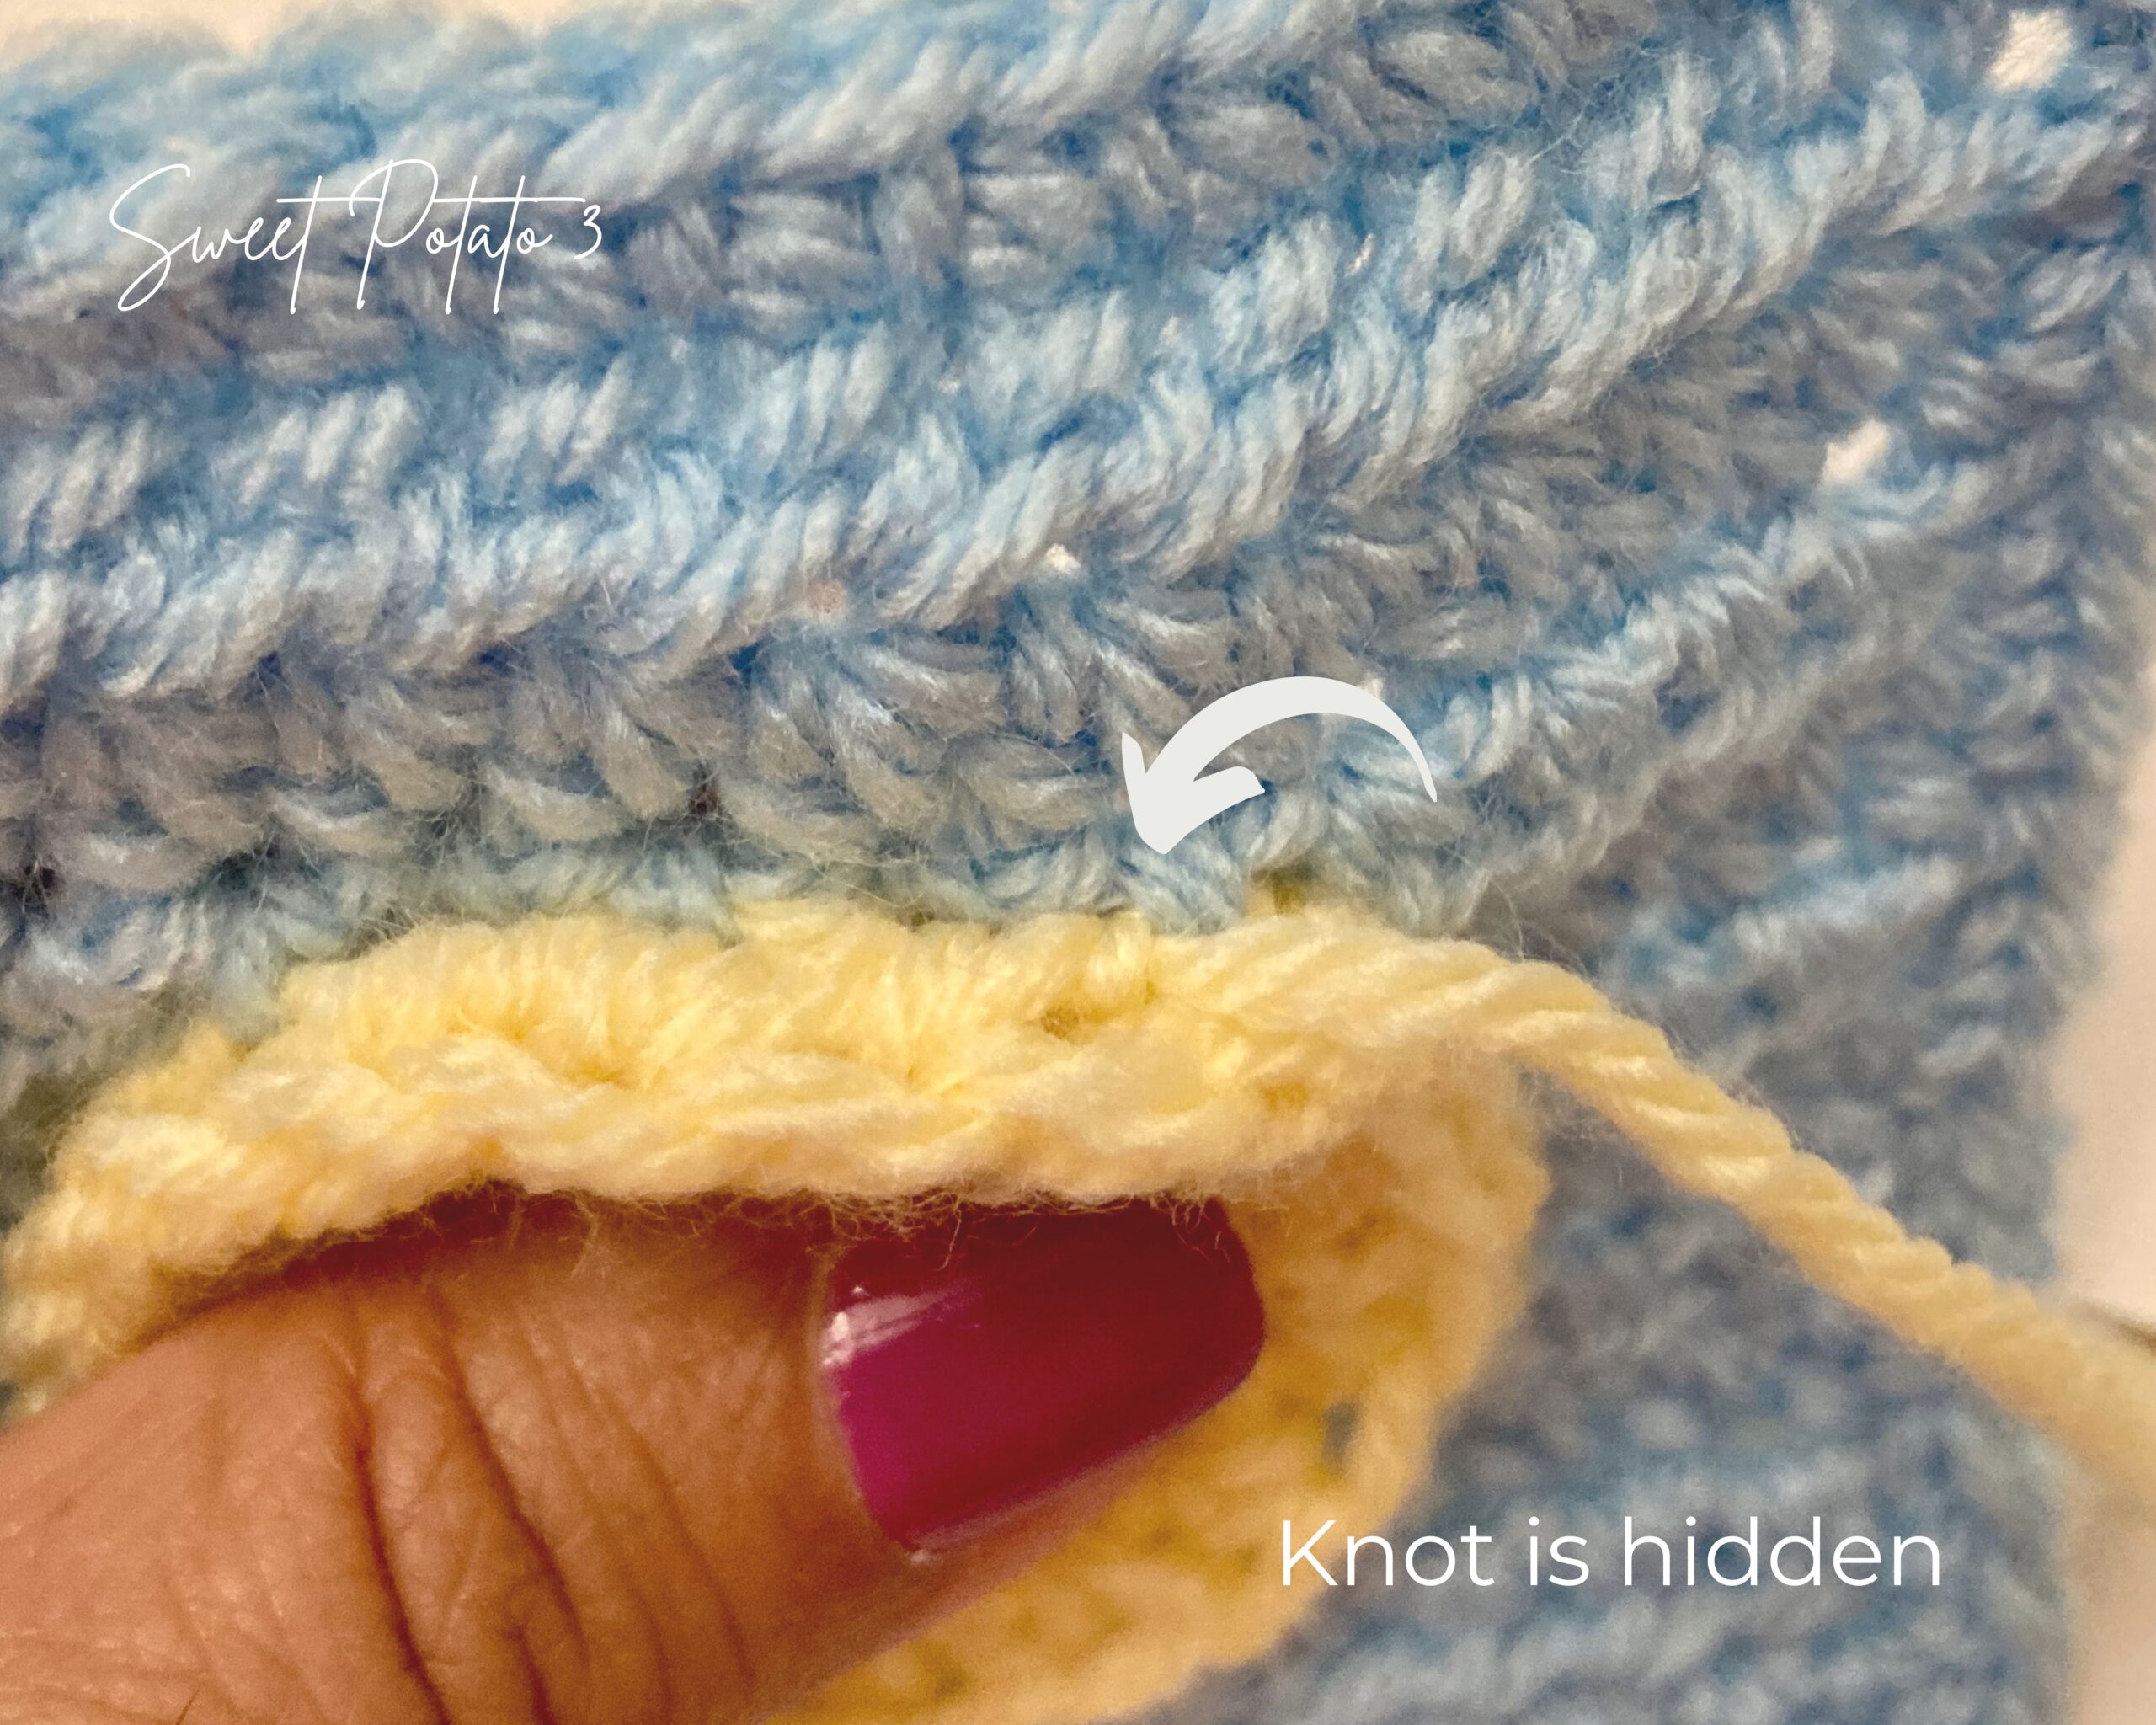
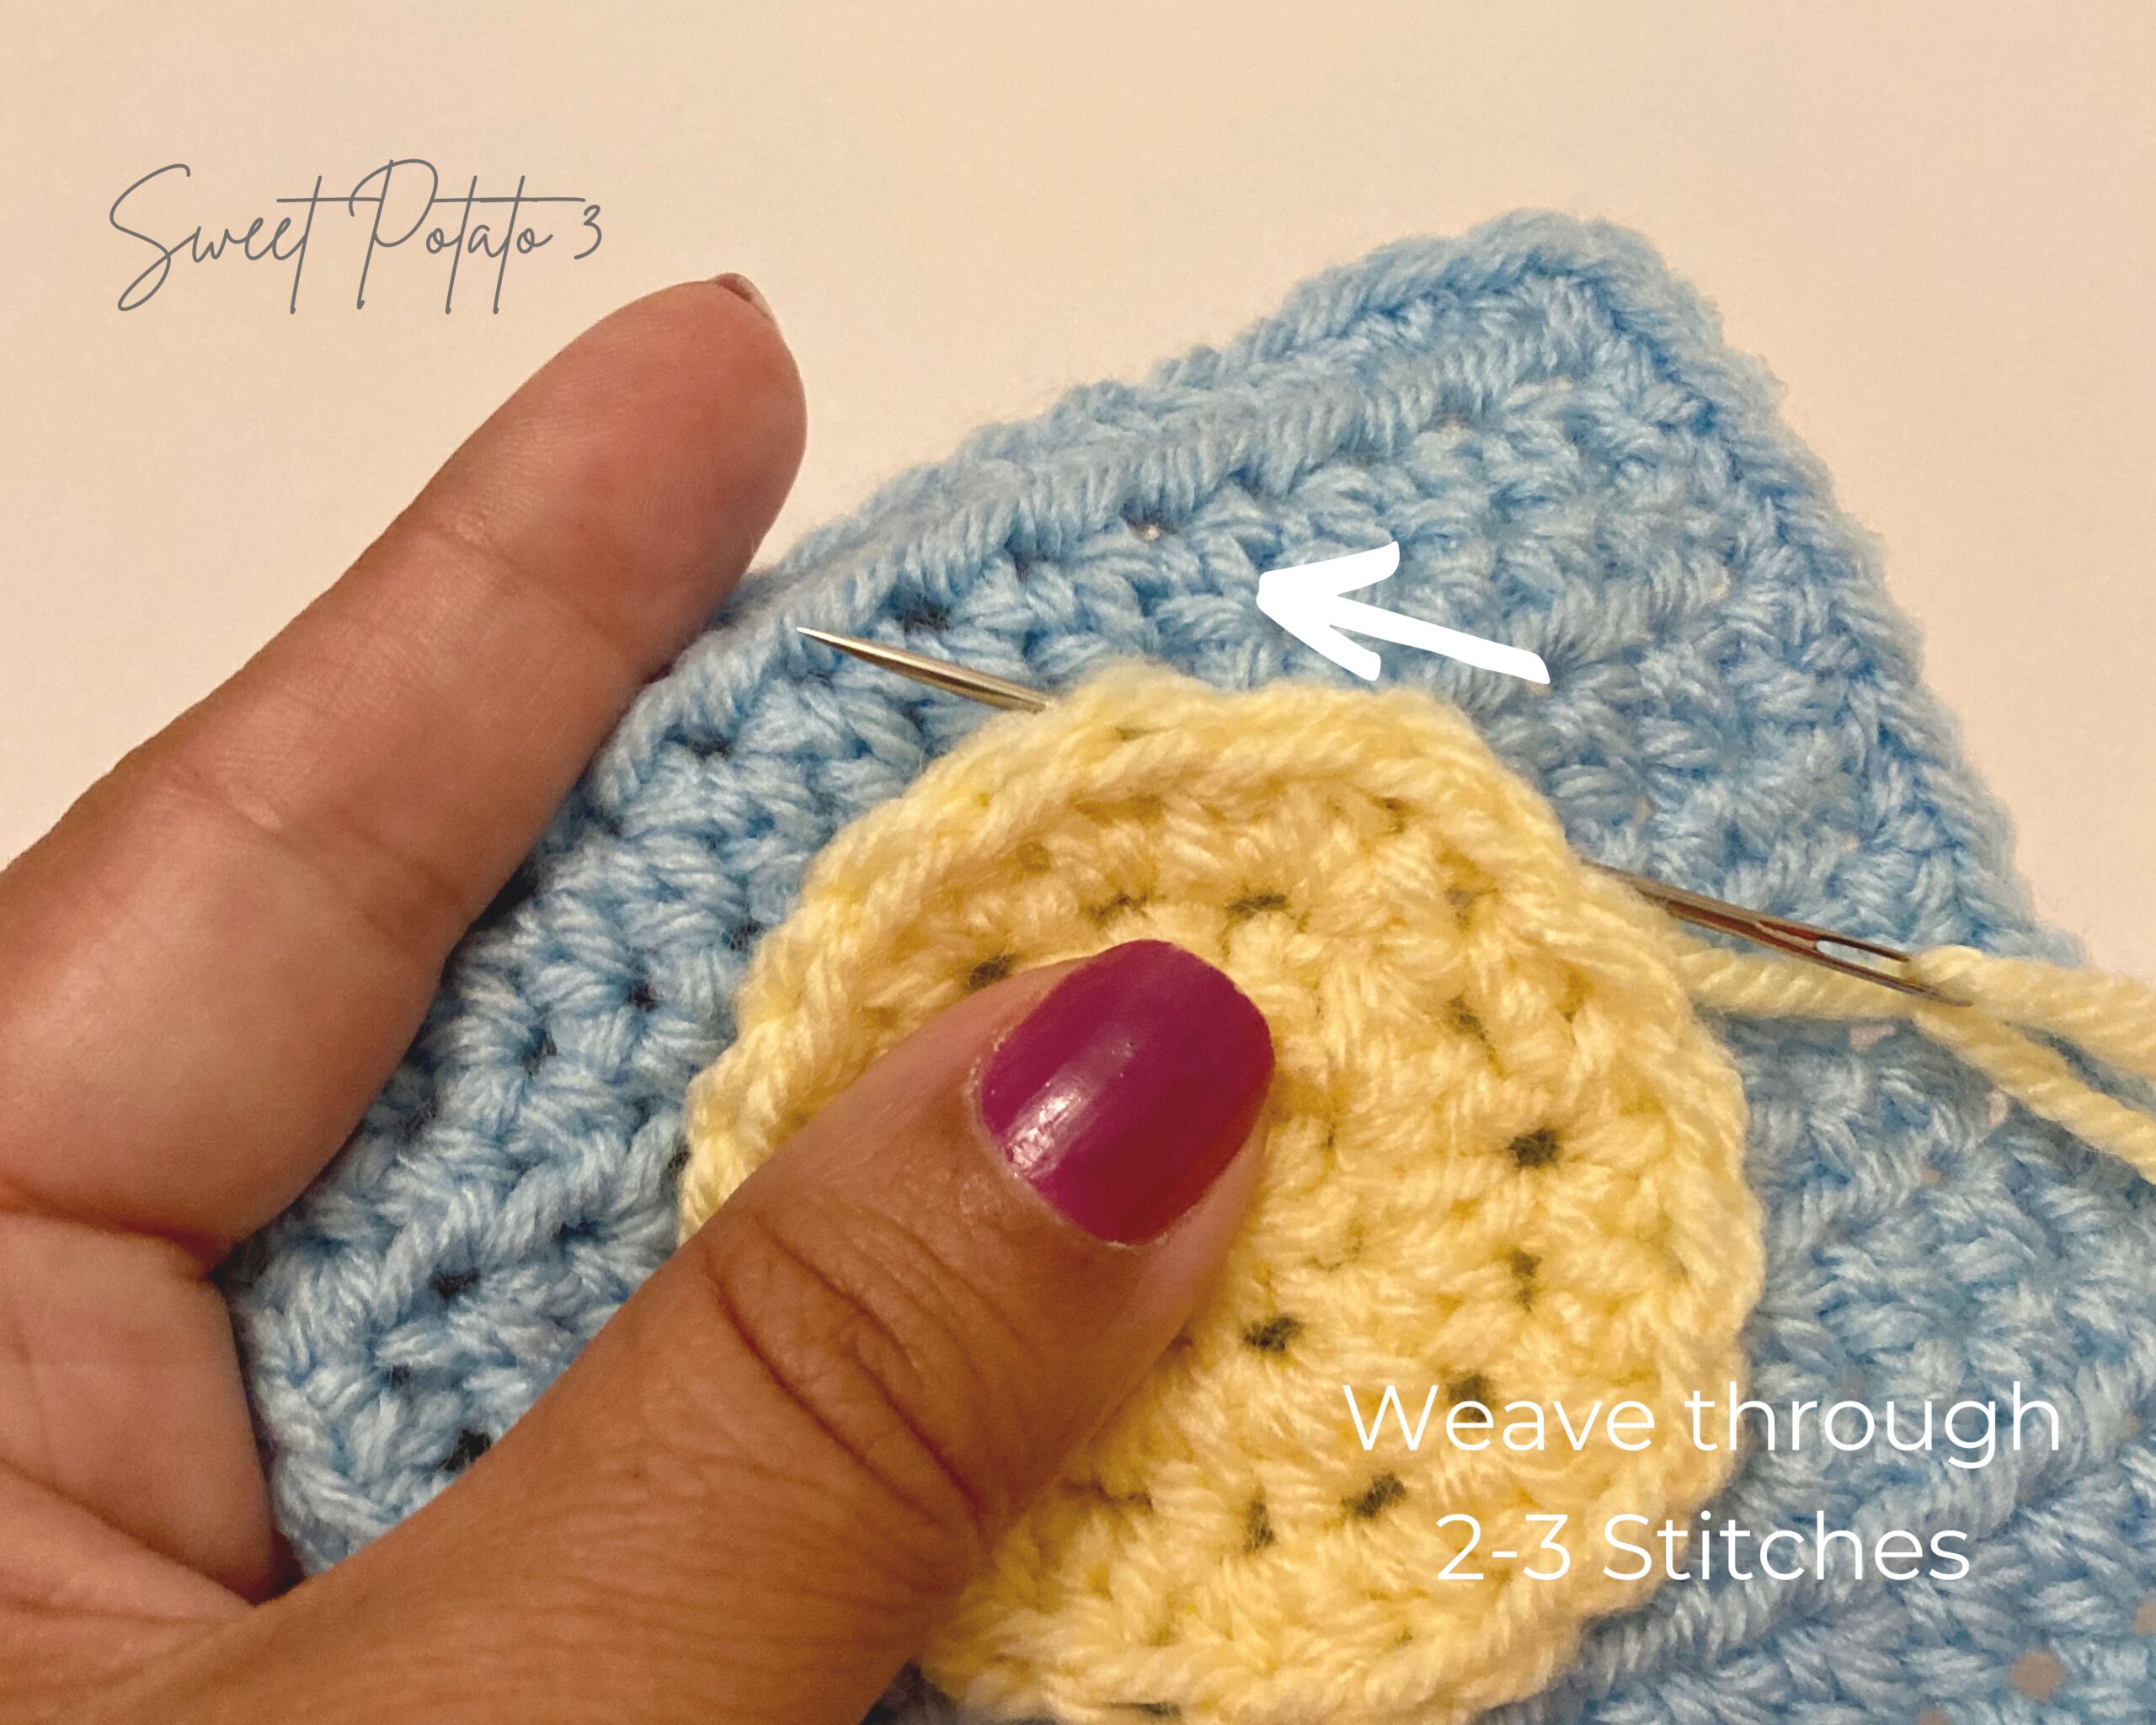
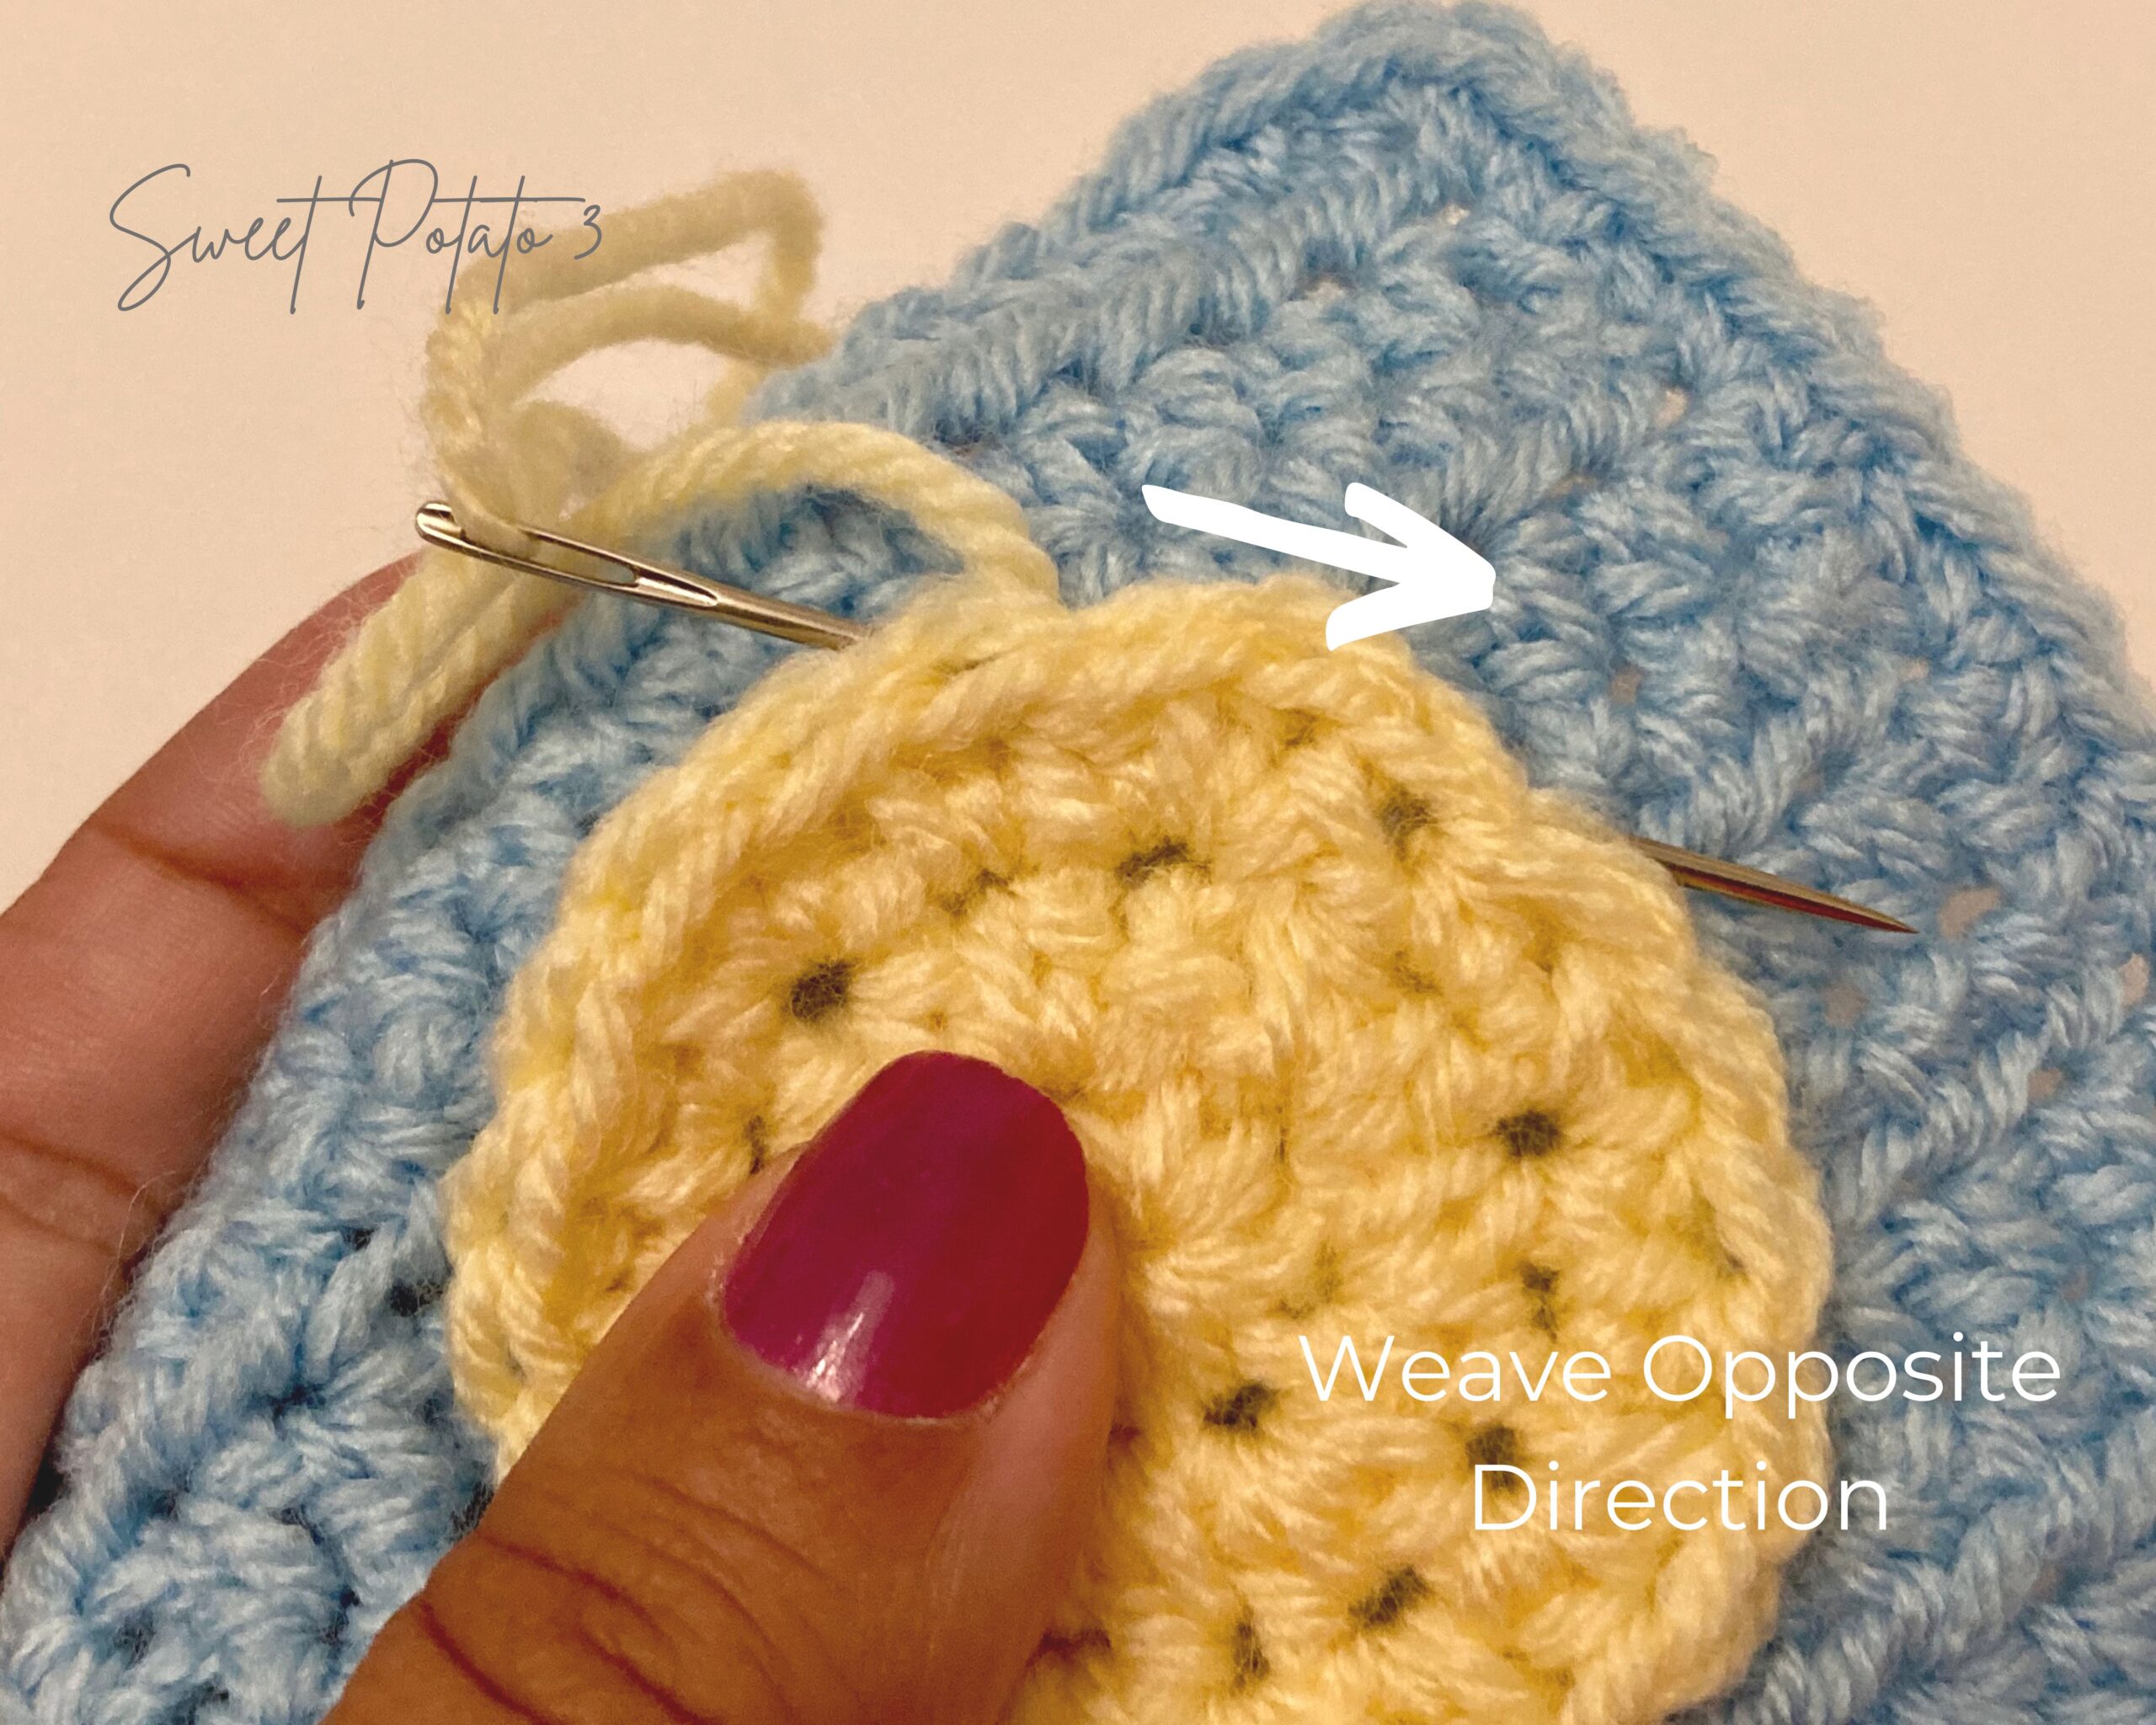
Now weave in your yarn ends working through about 2-3 stitches that are the same color as the yarn ends, pull yarn tight. Return the yarn in the opposite direction and back through 2-3 stitches. Cut ends of yarn with scissors and you’re all done.
Turn your crochet project over and you will see how clean it looks, yay! Give yourself a pat on the back for learning a new skill. If it doesn’t look perfect, practice a little. Sometimes a little practice is all it takes to master a new crochet skill.
Watch A Full Video Tutorial of this technique – Sew On Applique
If you are a visual learning, take a few minutes to watch this tutorial I created a few years ago. I will walk you through all the steps I showed above.
Other Crochet Tips You May Enjoy
- How to Crochet a Foundation Row (sc, hdc, dc) – Click HERE
- Blocking Crochet Pieces: Why, When & How – Click HERE
- How to Add Labels to Your Crochet Project – Click HERE
- Adding Care Instruction Labels (a FREE Printable) – Click HERE
- Crochet Hooks: Wood, Plastic or Aluminum – Click HERE
- Ideas on How to Clean Up Your Craft Room – Click HERE
More Crochet Fun
I know you’re a crocheters and enjoy learning more skills and tips. So, I would like to invite you to join my interactive Facebook Group called, “SP3 Crochet & Conversations”. This is a great community to share photos, ask questions and have fun. I invite you to join today by clicking HERE.