The moment you finish a crochet project is one of life’s simple joys. You weave in the last end, set down your hook, yarn and scissors and lay out your masterpiece to check it out – and WAIT – it doesn’t look quite as nice as you had hoped, what went wrong? It does not have the sharp finished look that you had hoped for, so what more does it need? Perhaps, blocking your crochet piece will do the trick.

I know, I cringe when the word “block” slips into my mind too. However, this technique really isn’t as bad as it is made up to be. Blocking crochet pieces is one tip that you can do to elevate your crochet work to the next level.
What Does Blocking refer to in Crochet?
The most basic answer is that blocking getting your crochet piece wet or damp to manipulate the shape/size and allowing it to air dry. Blocking will shape your crochet project giving it a clean and professional look. An important note to remember is that blocking can increase the size of a crochet piece slightly but it cannot decrease the size.
You only need a few tools to block your crochet piece and they include: water, measuring tape, a blocking mat, blocking pins and of course your crochet piece.
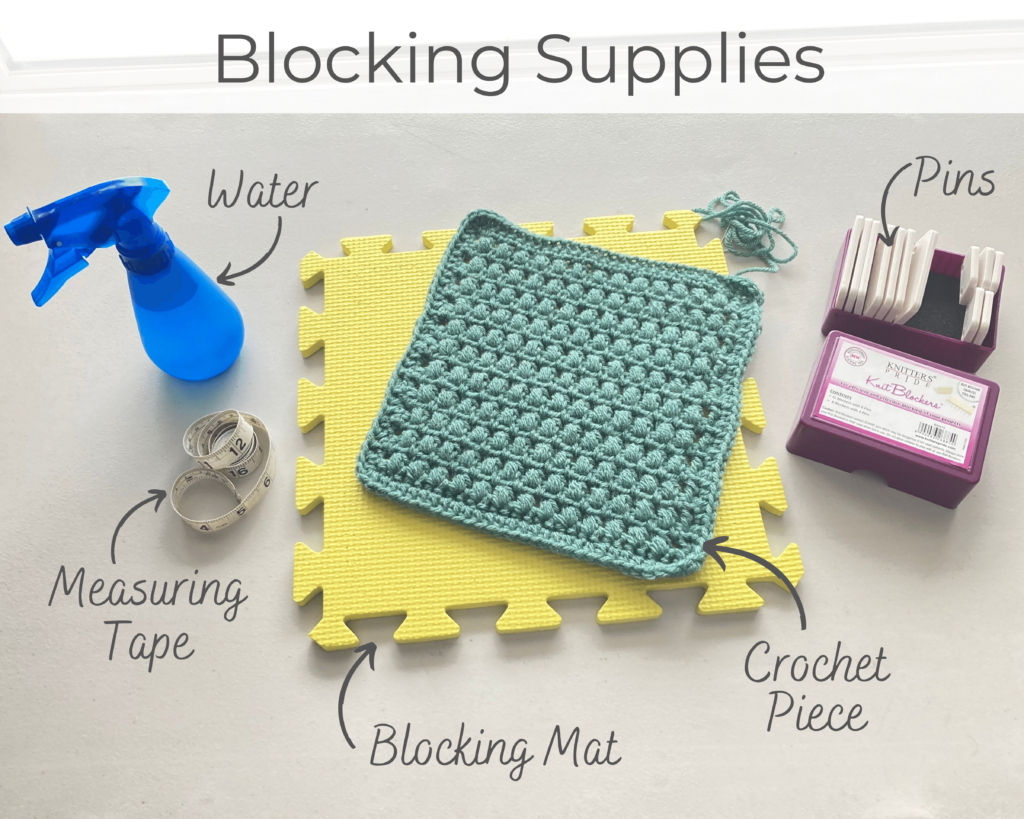
Blocking Mats
The size of the project you are blocking will determine how many mats you will need. I love my blocking mats from Knitters Pride. They come in a convenient plastic tote that helps keep them clean while in storage. I also love that it keeps them together so that when I need them, I simply grab the handle and have access to multiple squares that can snap together to make a larger mat if needed. You can purchase these blocking mats by clicking HERE, or discover more crochet tools from Knitters Pride by clicking HERE.

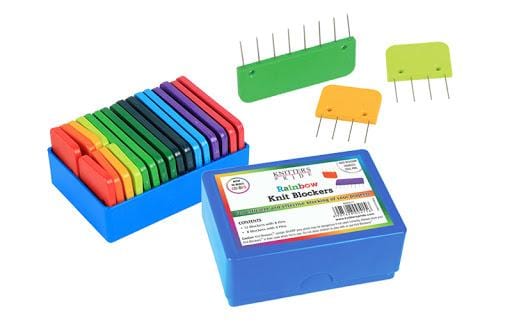
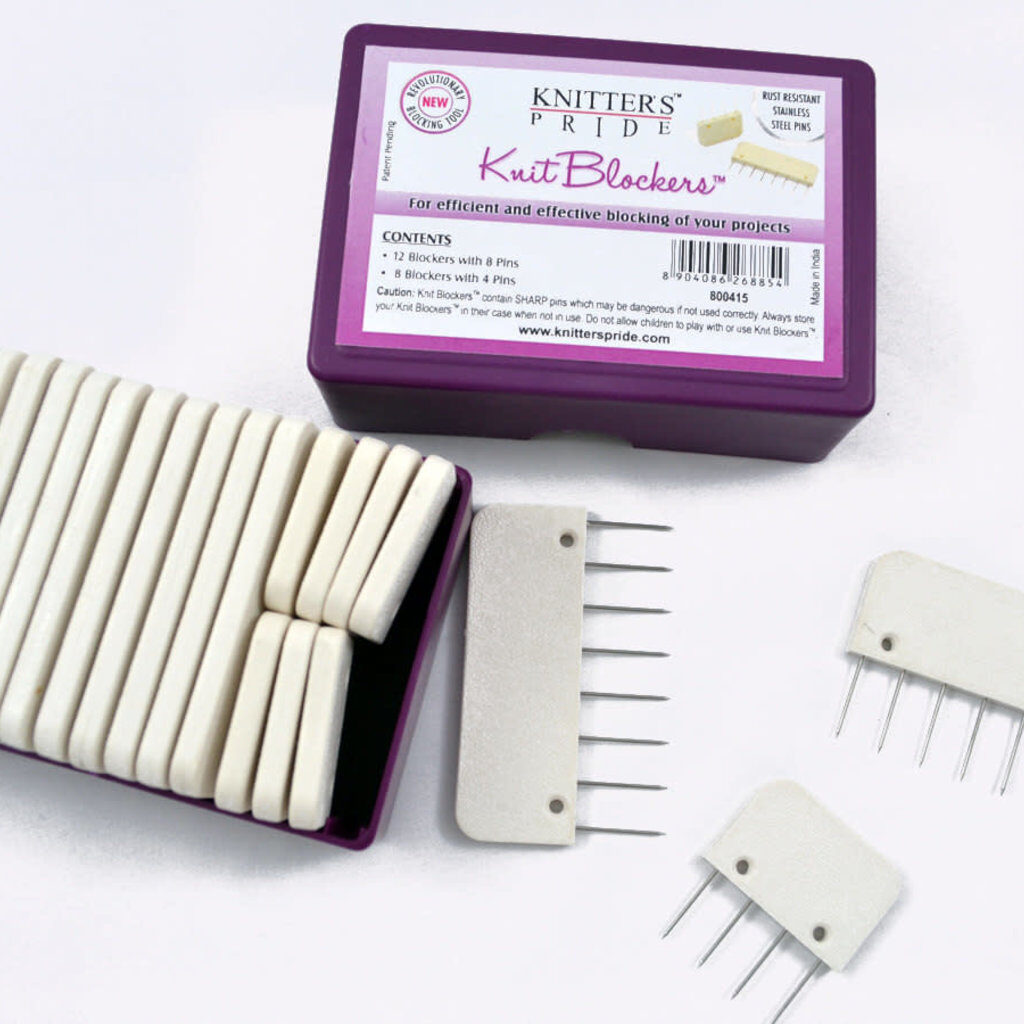
Blocking Pins
The other tool that is a must is a set of rust proof blocking pins. There are many options of blocking pins, many of which come as individual pins. Using individual pins can make blocking a larger project take forever (which is why so many of us are not fans of blocking). Individual pins do have their place though as they are ideal for detailed edges and to help place stitches (such as picots) into place.
Knitters Pride has fabulous pins that come in a case and instead of being individual pins, they are grouped together in two different sizes. These groups allow you to quickly pin an entire section of your crochet project and speeds up the process.
Ever since I received these blocking pins the thought of blocking hasn’t bothered me at all. It is actually kind of fun because they make blocking feel like a breeze. They really are a game changer. You can purchase the Knitters Pride Blocking Pins by clicking HERE.
When should I Block my crochet piece?
Blocking has a few different purposes and is not required (in my opinion) for every crochet piece. Obviously, there is no need to block amigurumi projects. Crochet hats will naturally get shaped as they are worn so blocking is not required.
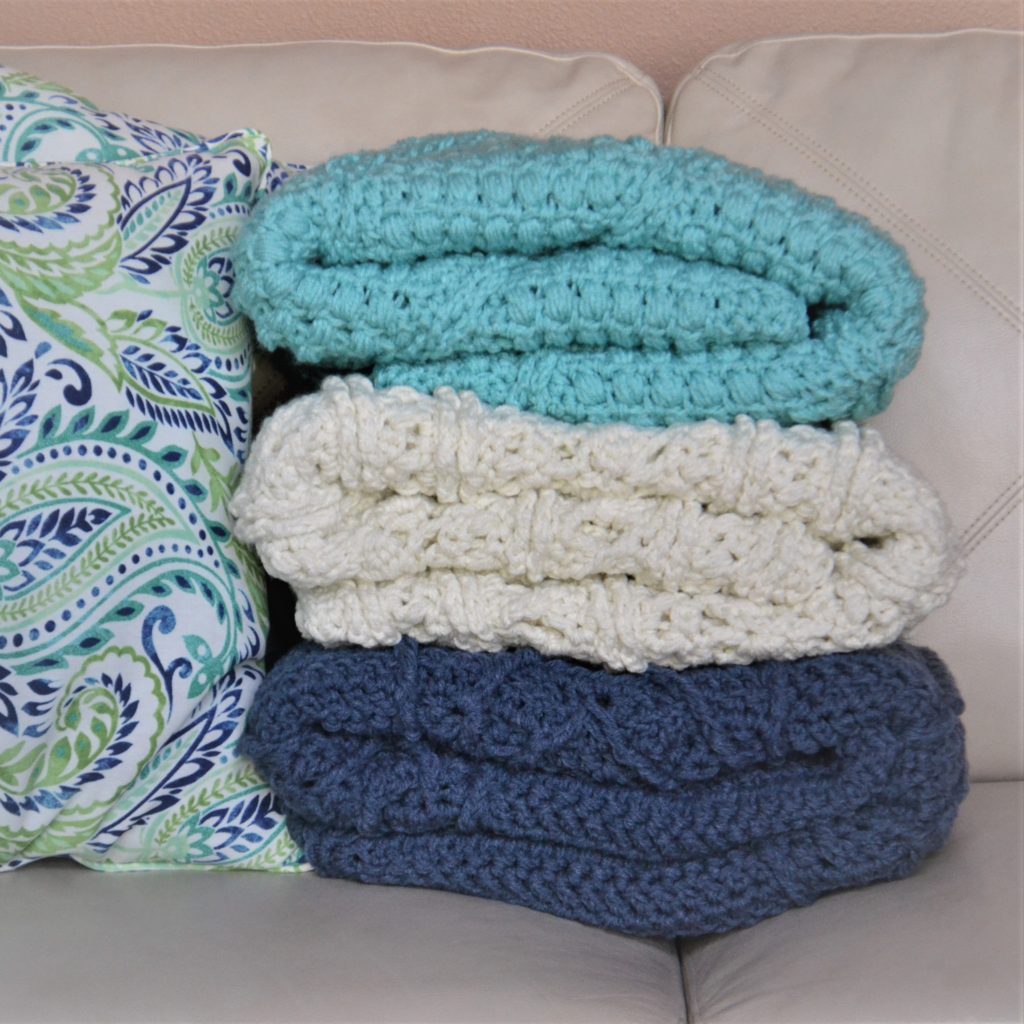
I do recommend blocking some types of crochet pieces such as Home Decor items (especially ones that will lay flat like doilies, table runners, placemats, etc.), lace projects of any type, garments (helps with the drape) and sometimes blankets, but let’s look into that one a little more closely.
Blankets – Hmmm, this one can be tricky
Some (and I stress some) blankets that are used for daily use and use a simple or basic stitch throughout do not need to be blocked. However, if you crochet a simple stitch blanket and notice the tension/gauge has changed, blocking can help and I would recommend it in this situation. Also, if you are gifting a blanket, blocking can make it really look clean and sharp so blocking would be encouraged in this situation.
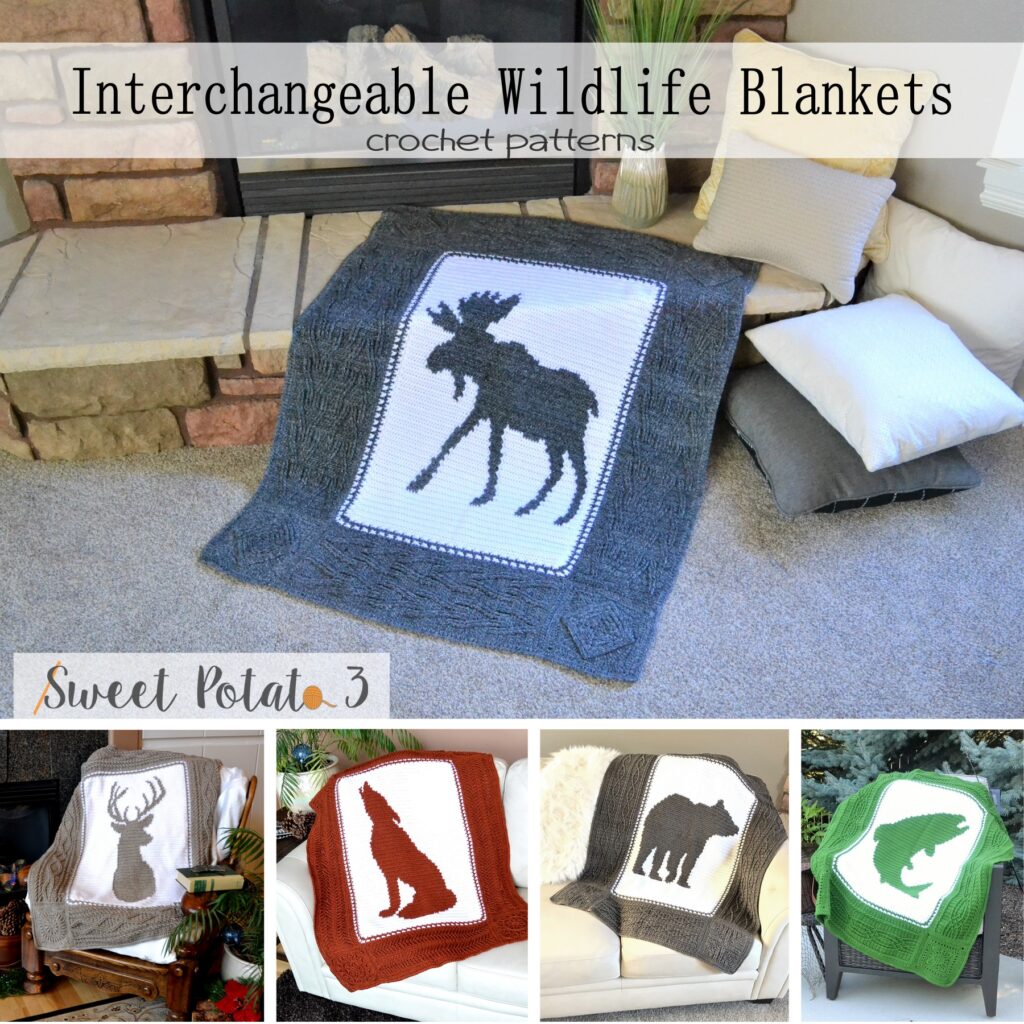
If the blanket is being used more as a home decor element and not as a warm wrap to snuggle up with on the couch, then blocking is also recommended. A good example of these blankets would be my Interchangeable Wildlife Blankets shown below (pattern can be found by click HERE).
When to Block Continued
If your crochet piece has “curled” due to tightening or loosening of your stitches, as you worked through your project, blocking can help correct the roll.
If a crochet piece has a delicate stitch pattern that kind of gets lost in the drape (such as a garment or curtain) blocking can help. By blocking the piece, the stitches will be more defined and it will improve the drape and overall look of the crochet piece.
For projects that need to have an exact measurement, blocking can work wonders. For example, if you are making a blanket with squares that will later be sewn together you may find that each completed square may vary slightly due to using different yarn brands, different stitches or simple tension changes. Blocking can make these squares uniform in size.
Types of Blocking
Soak (or Wet) Blocking, is where you submerge the entire crochet piece in water. Soak the project for 30 minutes so all the fibers are thoroughly wet. Press the water out. A common way to do this is to lay the project on a towel, then roll the towel and the crochet project up together to press out the water, repeating until project is not dripping. It is very important to never twist the water out. Pin the project out on the blocking board and allow it to dry completely. This type of blocking takes the longest but has the biggest impact. So, if your crochet piece needs a lot of help, this would be recommended.
Steam (also known as Dry) Blocking, instead of getting your project completely wet you will simply use a steamer to moisten and heat the fibers in the yarn. Often this is done while the crochet project is hanging to help enhance the drape such as in a garment. It is quicker than soak blocking because it takes significantly less time to dry.
Spray Blocking, this is the most common type of blocking and is right between soak and steam blocking. This form of blocking is quicker than soaking your garment but gives a little more assistance than just steaming. I will walk you through Spray blocking below.
Spray Blocking – the project
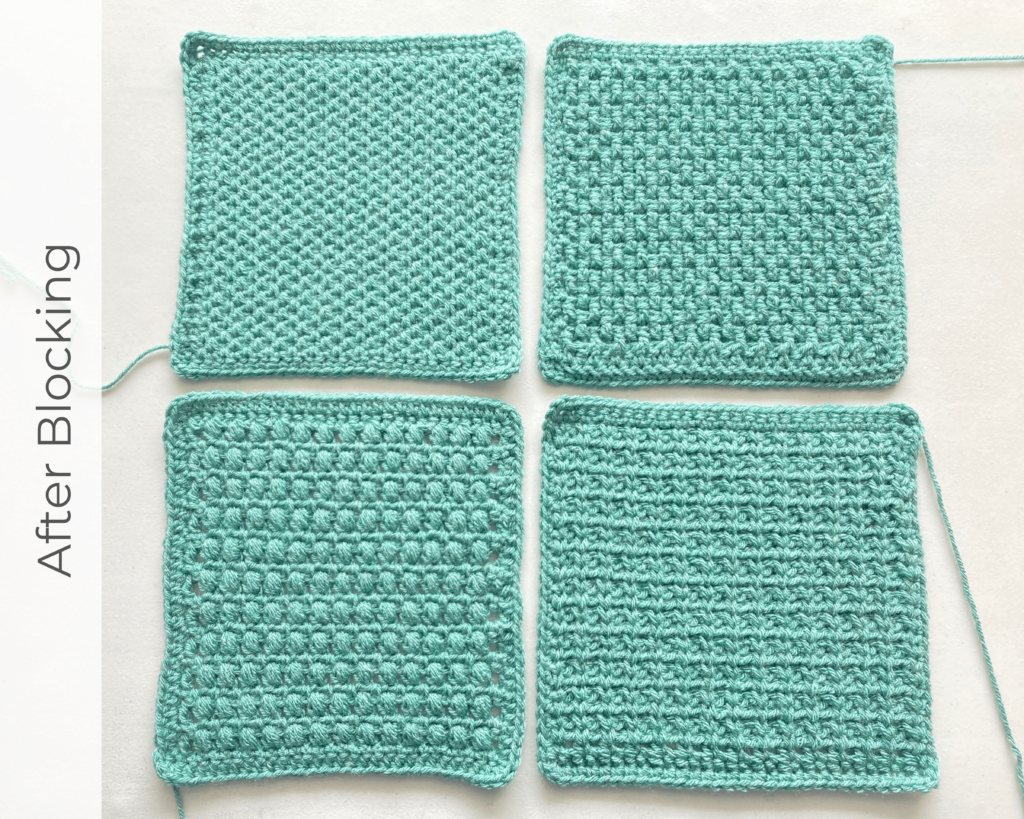
Recently, I was working on a blanket that was crocheted using squares. Each square used a different stitch (I’ll share this pattern when it is released-you’ll love it). This was so fun to make but each square varied slightly, so blocking was essential.
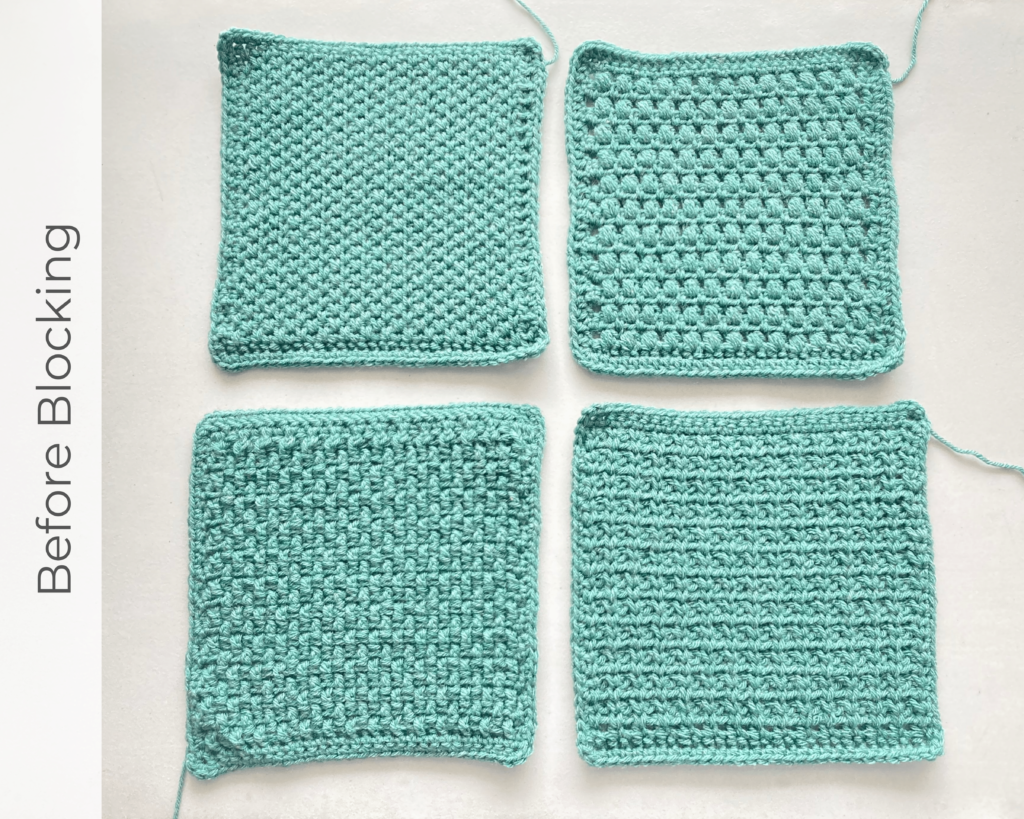
Each block was designed to be 10″ X 10″ and honestly, they were all very close. But looking carefully you can see that they all vary slightly, with the top two squares being slightly smaller. With just 4 squares this may seem like a minute difference, but this blanket has 30 squares total. Having 30 squares that vary this much in size will result in some pulling or stretching as the squares are stitched together, resulting in an unprofessional or messy looking blanket.
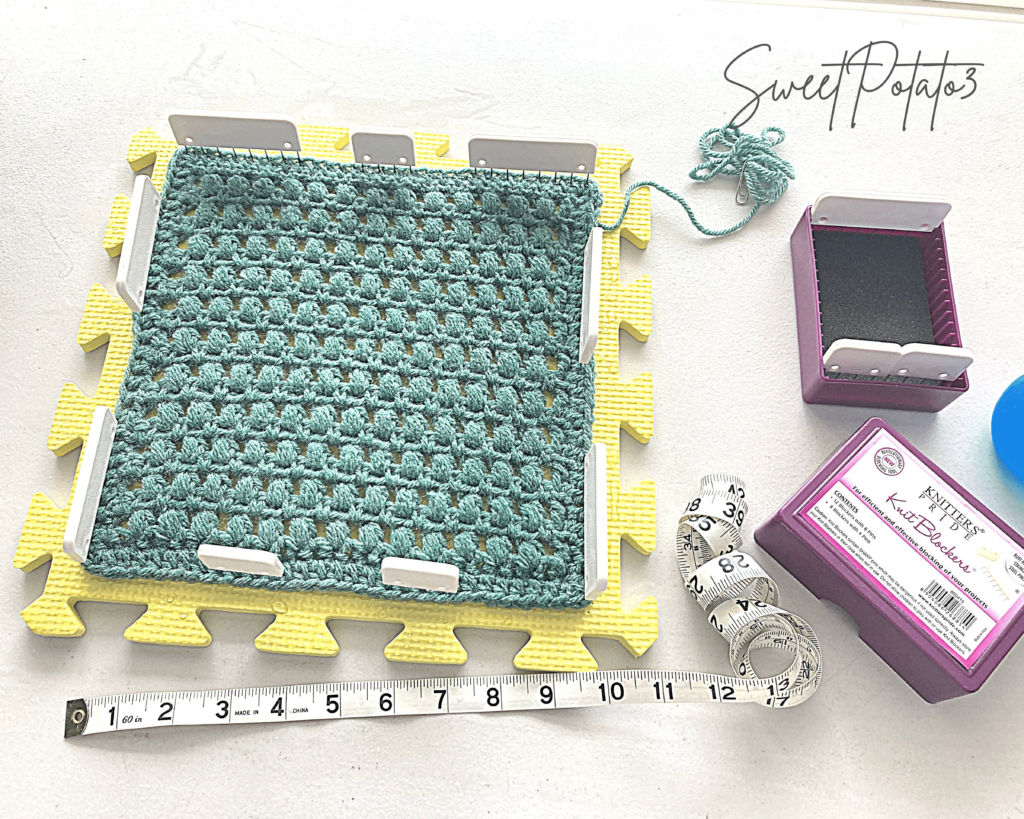
Before you begin any blocking project, make sure your blocking mat is larger than the size you are blocking. For this example, I needed each square to measure exactly 10″, the mats are about 12″ so I was able to use just one. If my project was larger than the mat, I would simply need to snap multiple blocking mats together.
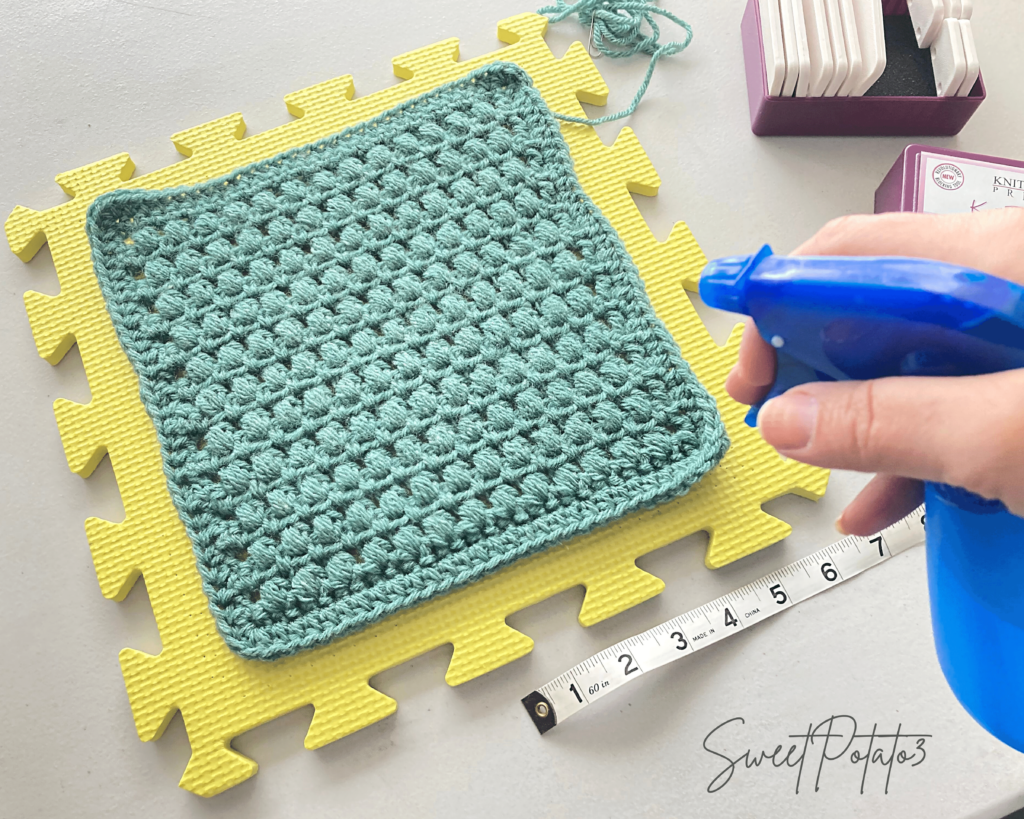
How To Spray block
Lay your crochet piece on the blocking mat. Generously spray the crochet piece with room temperature water until the entire piece is moist. Flip the crochet square over and repeat, spraying generously until the entire surface is damp.
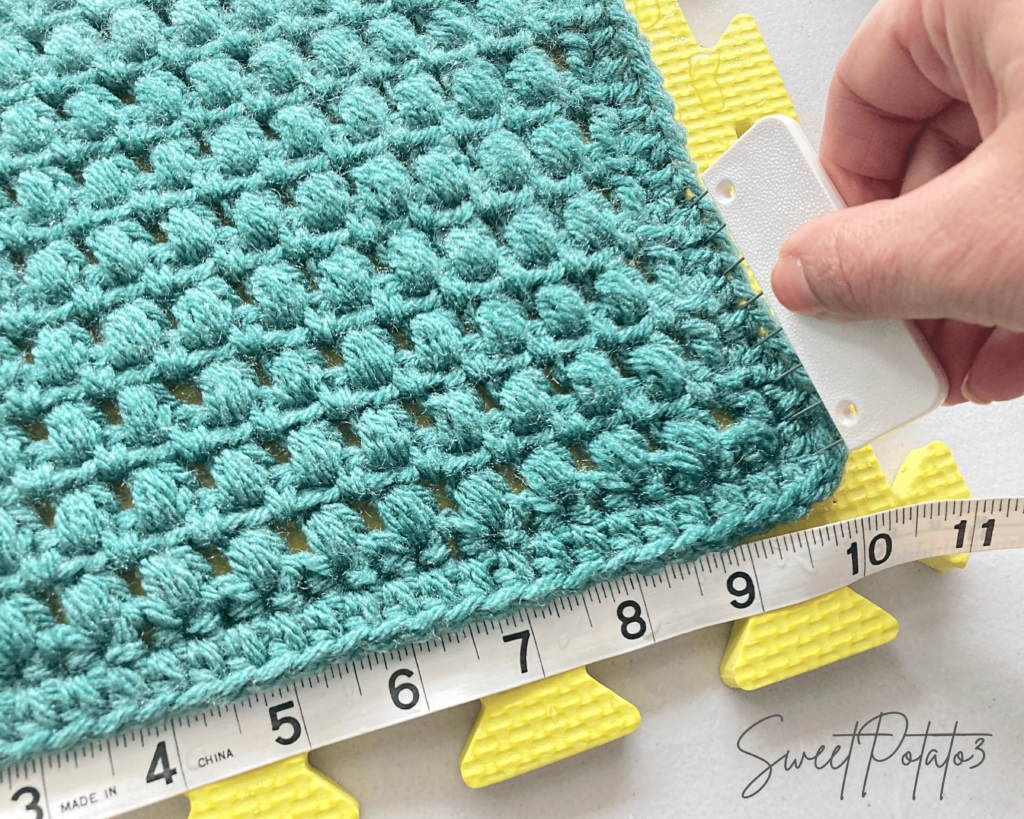
Measure All Edges and Pin in Place 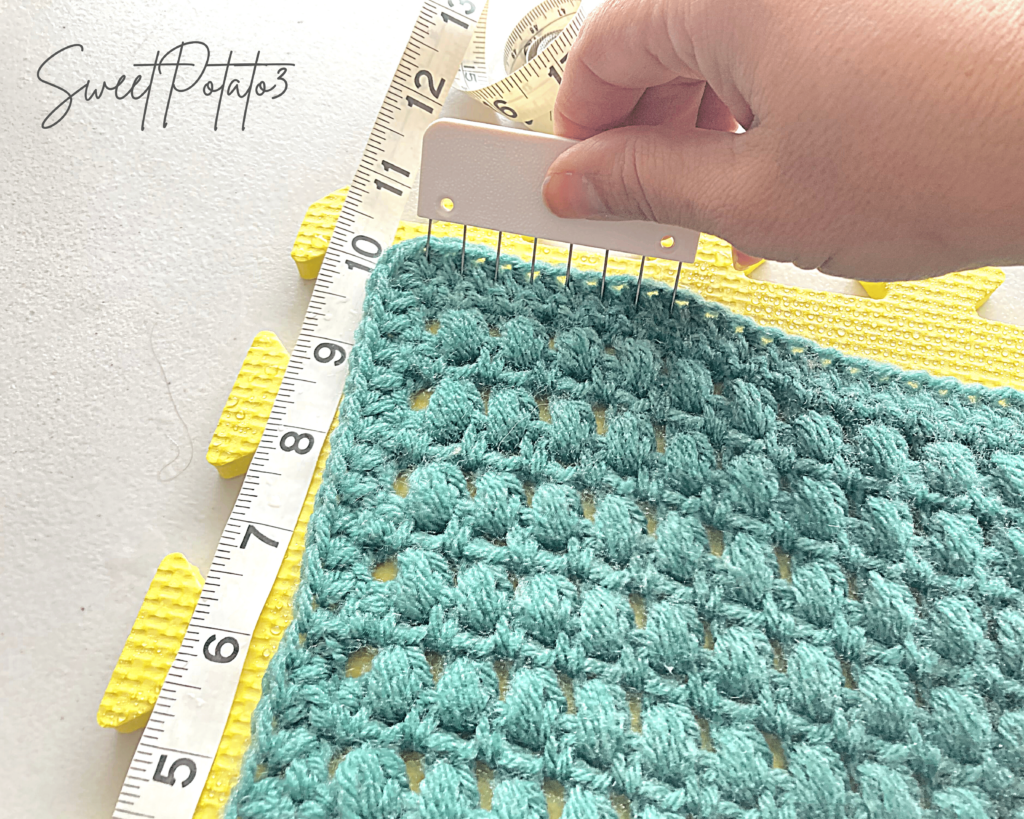
Double Check All Measurements after Pinning in Place
Using rust proof pins, measure and pin the square into place. Don’t pull the square into place. Gently press from the center of the square and nudge it to the correct size. Measure each side carefully and pin all edges. After the entire square has been pinned, remeasure for accuracy.
After the crochet piece has been blocked let it dry completely. I typically let it dry over night or longer. You do not want to take the pins out while there is still moisture in the crochet piece. After all the pieces have been blocked you can see that the edges are more aligned. The top squares are no longer smaller and this will result in a more polished blanket.
Tips to elevate your crochet
I would like to bring you more blog posts about how to elevate your crochet. This is the first post and I hope you found it helpful. I will be releasing more posts and will link them below. Until then, I would love to hear your suggestions on tips you would like to see.
- How to Add Labels to Your Crochet Project – click HERE
- Ideas on How to Clean Up Your Craft Room – click HERE