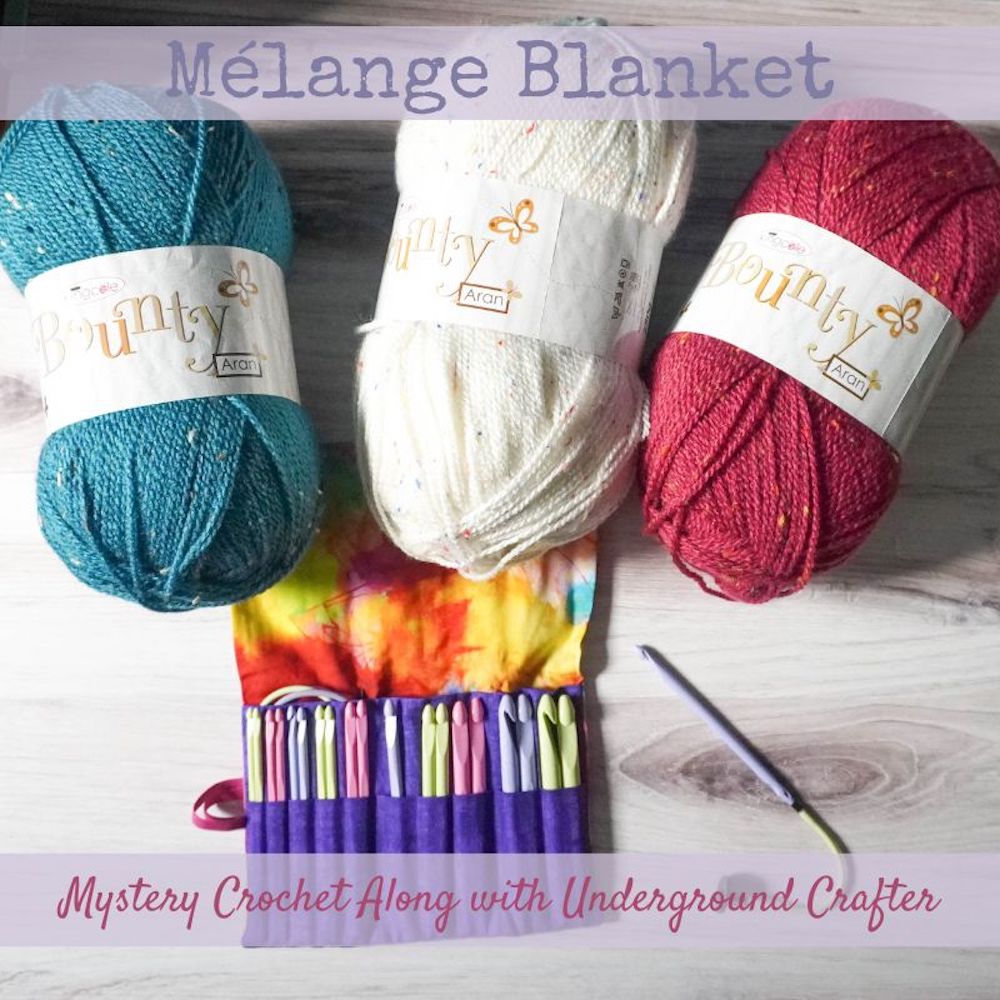
If you’ve been following me and my designs, you know that I am a little obsessed with designing blankets. I also have a passion for hosting crochet along’s. I just love having the chance to teach fellow crocheters something new. Then seeing them finish projects in a group setting.
So, when Marie from Underground Crafter asked me to participate in a yearlong Melange Blanket Mystery crochet along, I jumped at the chance. Plus, I didn’t have to design an entire blanket, instead I just had to create 1 square. That’s right, Marie has collectively asked a handful of designers to all design a square and then she puts them all together into a magnificent blanket!

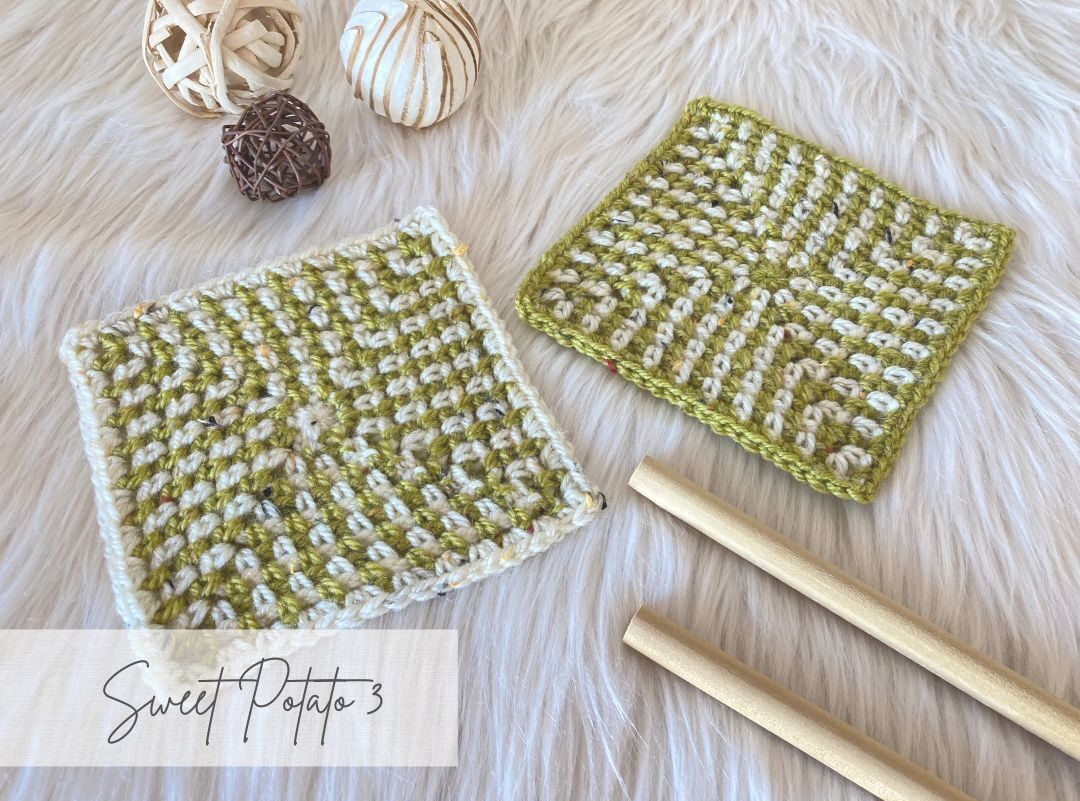
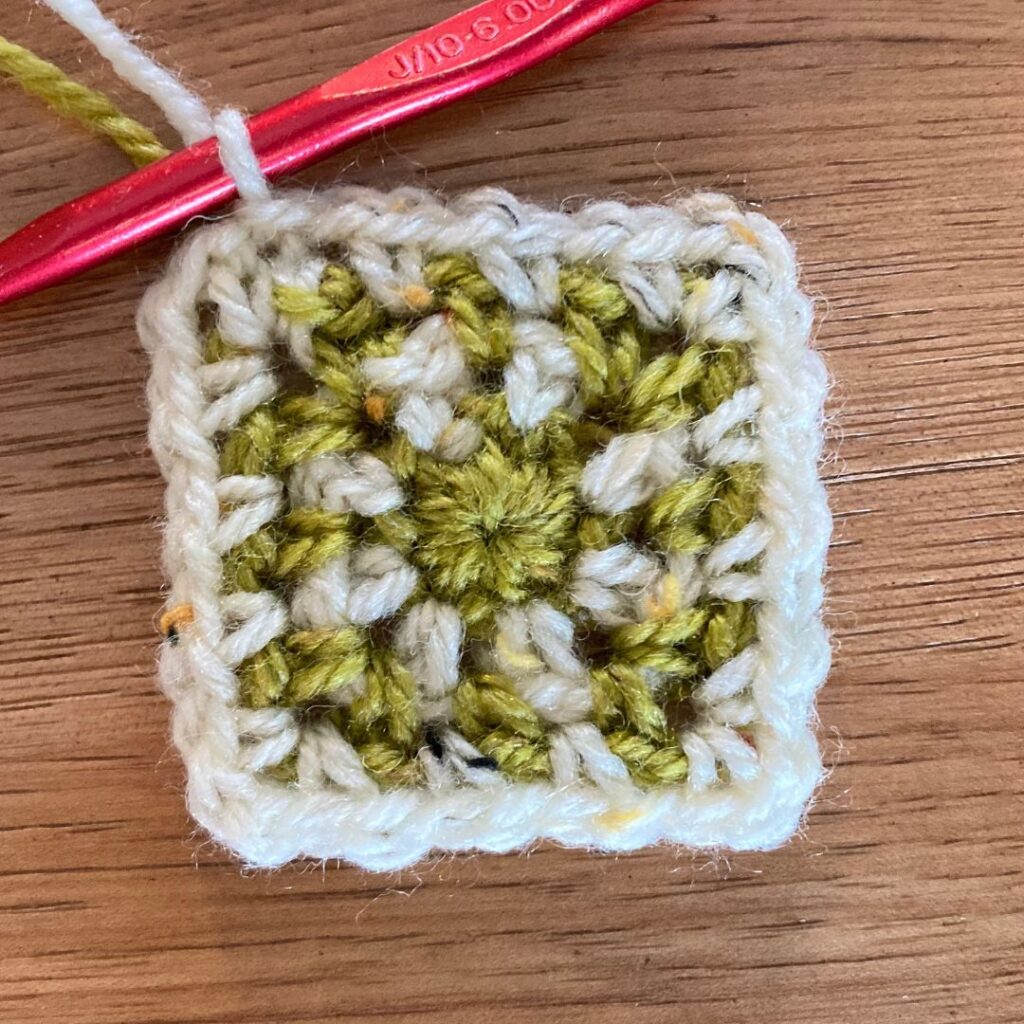
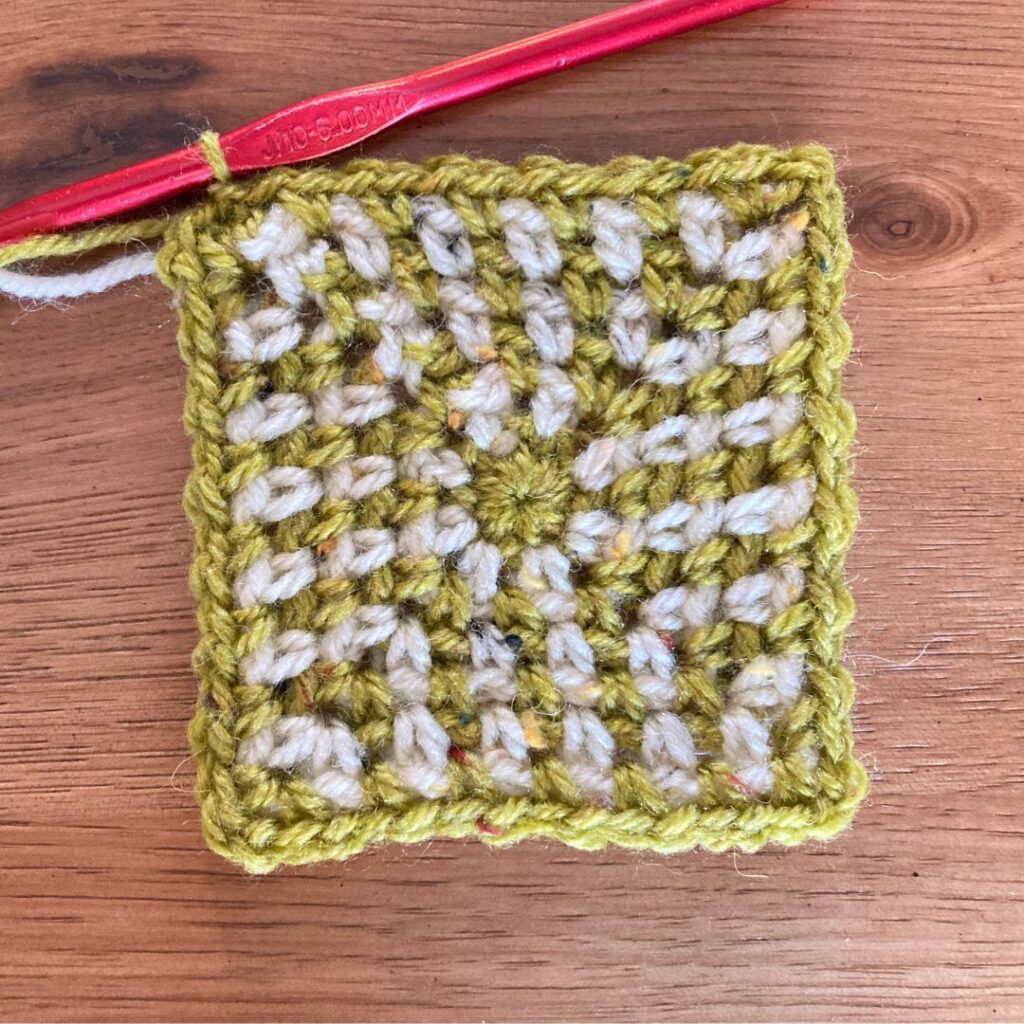
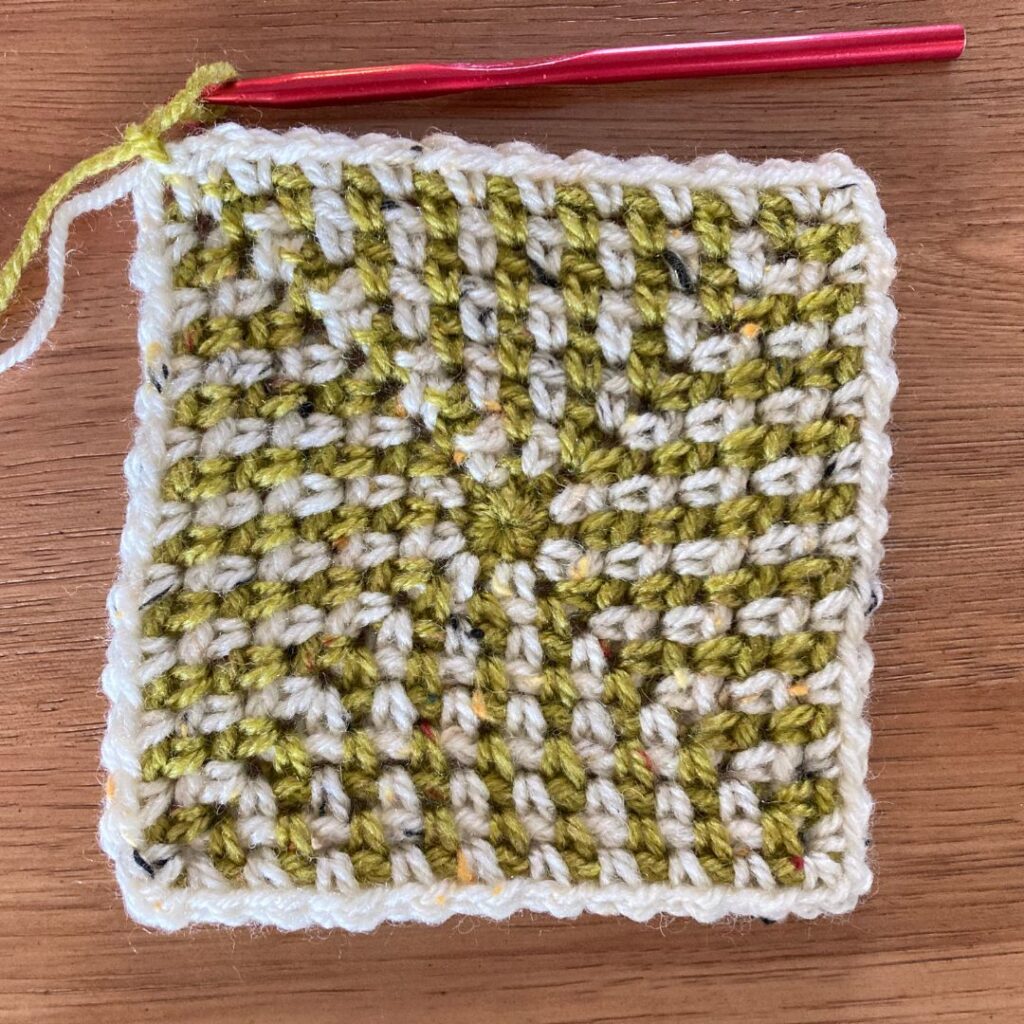
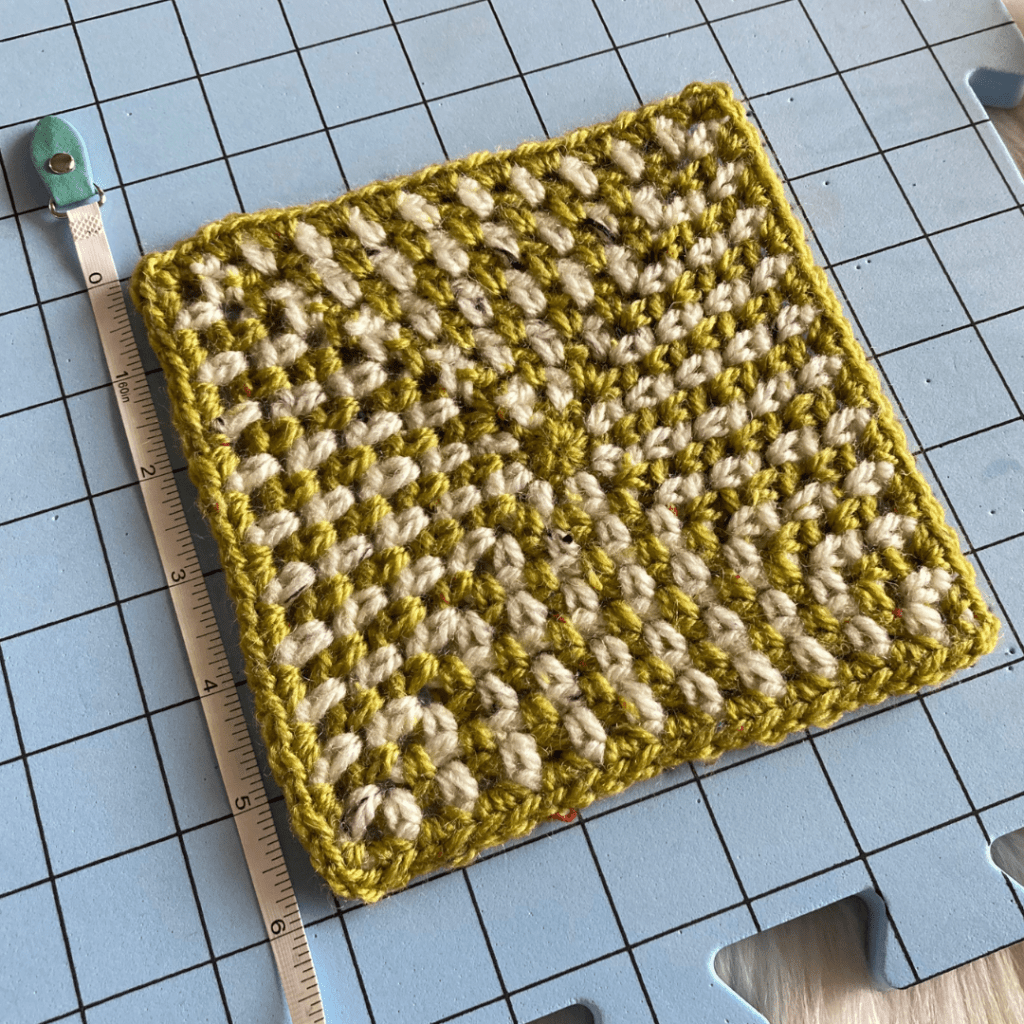
Striped Linen Square
When I sat down to decide on how to work up my square, I knew I wanted to incorporate 2 colors to add some interest to it. I often enjoy manipulating stitches to look different and color play is a great way to do just that.
I used 2 colors and crocheted a square from the center out (like most granny squares), but I wanted to make it looked like it had stripes running towards the center of the square. This has such a unique look to it AND it is so EASY to do!

Materials Needed to Complete the Striped Linen Square
- Crochet Hook J (6.00 mm)
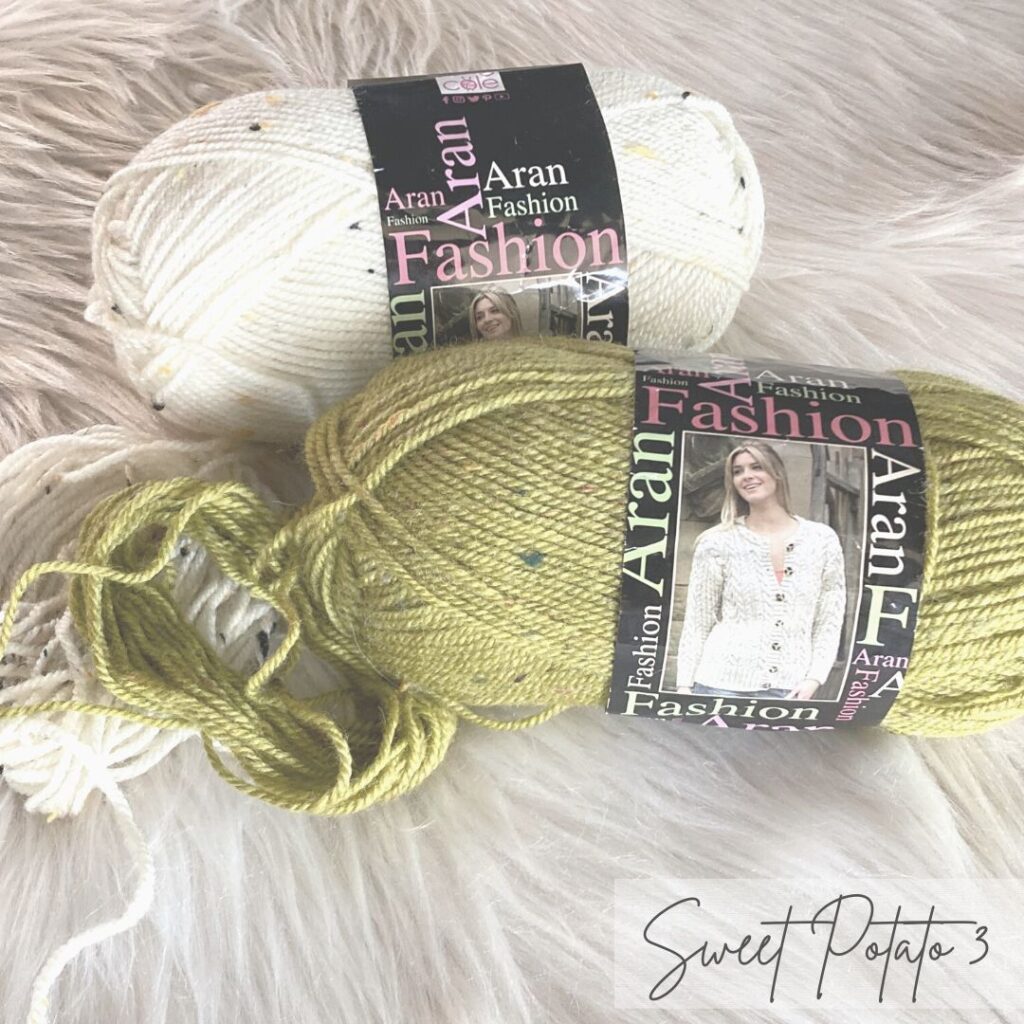
- 2 colors of Aran/Worsted Weight Yarn (#4) – 22 total yards or 11 of each color
- Sample made in: King Cole Aran Fashion / Color: Staffa & Olive
- Measuring Tape
- Scissors
- Yarn Needle
Stitches & Abbreviations Used within the Pattern
- Ch(s) = Chain(s)
- Slst = Slip Stitch
- St(s) = Stitch(es)
- Sc = Single Crochet
- Sp = Space
- R = Row/Round
- Join = join in top of the first stitch of the row with a slip stitch
Always Check Your Gauge
Gauge is always important to obtain the stated size in the pattern. If you are completing the Melange Blanket it is essential for you to check your gauge so all your squares will come out the same size.
The gauge for the square is: using Hook J (6.00 mm) 11 sc X 12 rows = 3” square
If your gauge swatch is larger than 3″ square, adjust by decreasing your hook size and try again. However, if your gauge swatch is smaller, increase your hook size and try again. Continue to adjust until the appropriate size is met. The square for the Melange Blanket is relatively small, so you can just check your measurements as you make the square to save you time.
Finished Size of the Striped Linen Square: 6” square
Notes About the Pattern
Pattern Notes:
There are a couple things to keep in mind. As you crochet your square, do not count the beginning chain as a stitch. You will be changing your yarn color in each row. Do not cut the yarn, instead you will drop it to the back side of your work and pick it back up on the following row. There is a trick to this that will leave the backside of your square looking just as clean as the front (a video tutorial is linked further in this blog post). This technique is very important if you are making the blanket.
Save on Ravelry
I know so many of you use Ravelry, if you want to add this tutorial to your library for later use, just click the link below:
Striped Linen Square Pattern
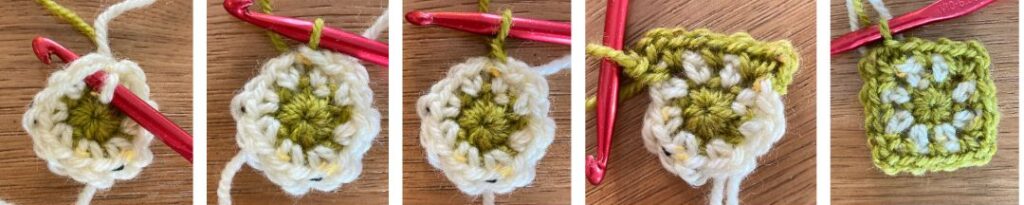
R1: using MC, Ch 2, 8sc in 1st st, join with a slst in top of beg sc changing to CC in last pull through of slst (8) pull beginning tail of yarn to cinch hole together (or you can begin with a magic loop)
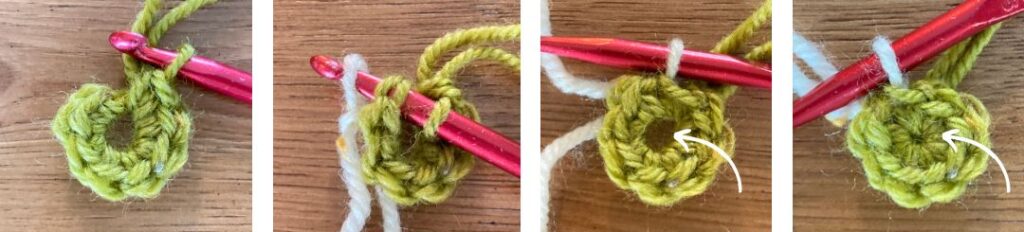
R2: using CC, Ch 1, sc in 1st st, ch 1, [sc in next st, ch 1], repeat [ ] around, join with a slst in top of beg sc (8 sc + 8 ch sps)
R3: still using CC, Slst into ch-2 sp changing to MC in last pull through, Ch 1, [in ch space work (sc, ch 2, sc), ch 1, skip next st, sc in next sp, ch 1, skip next st], repeat [ ] around, join with a slst in top of beg sc (12 sc + 12 ch sps)
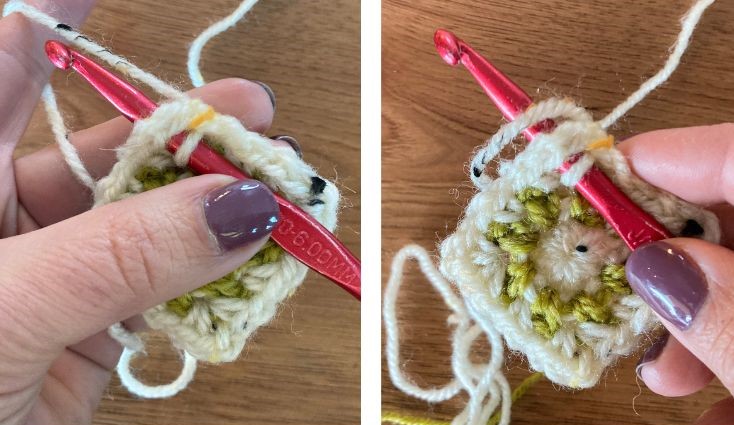
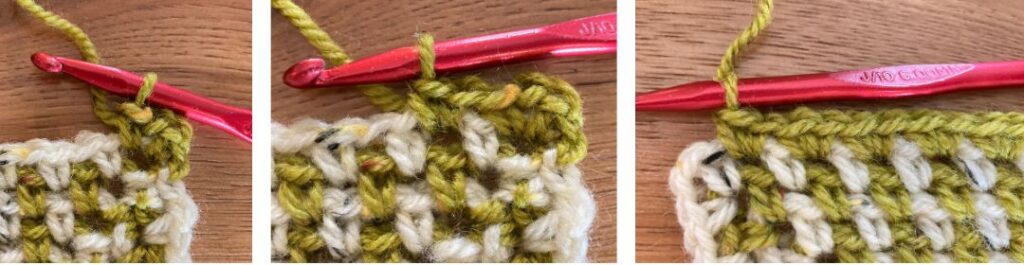
Hiding Yarn When working a Color Change (after round 3)
To hide the yarn follow the steps below, or you can opt to watch the video tutorial that I have embedded below.
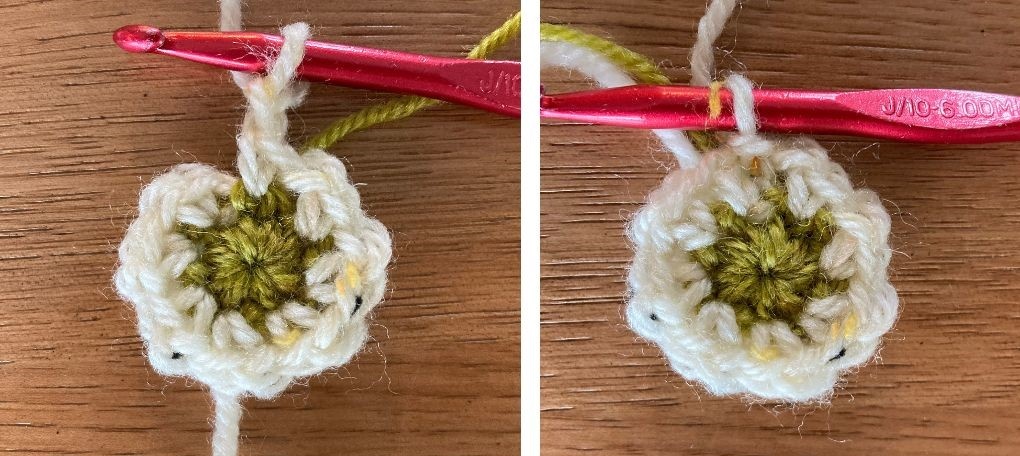
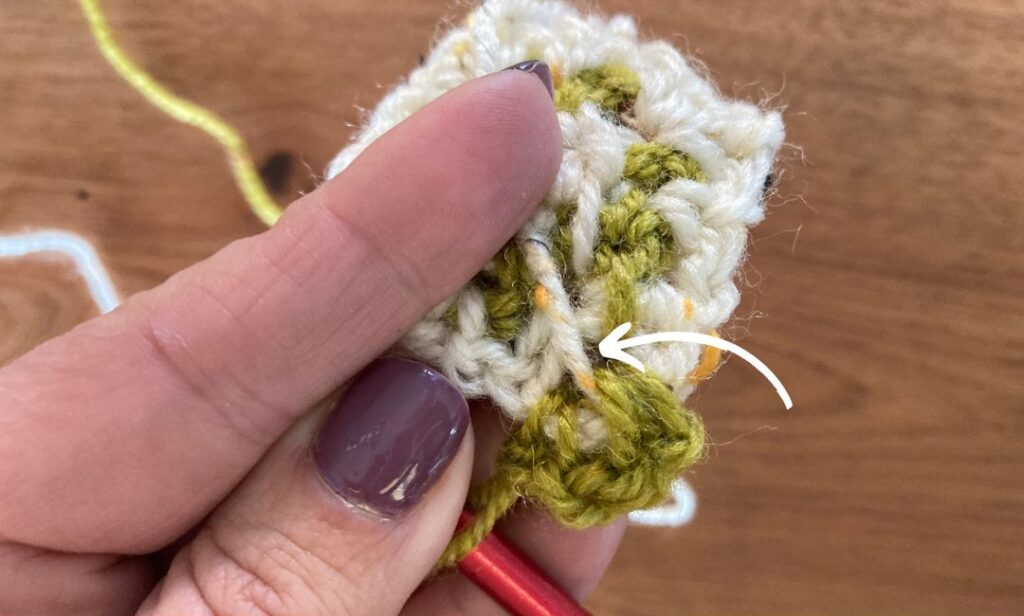
The color of yarn will change at the beginning of each round, beginning after round 3 has been completed. Please ignore the colors in this section, the sample I photographed uses the opposite colors from the rest of the blog post (opps). To begin round 4 you will slip stitch into the corner chain space of the prior row. As you slip stitch insert your hook into the corner space with the old color of yarn, now lay that “old” color of yarn over your hook.
Now wrap the new color of yarn over your hook and pull through to complete the slip stitch. Using the new yarn color work a chain, the old yarn color should now be working into the center of that chain.
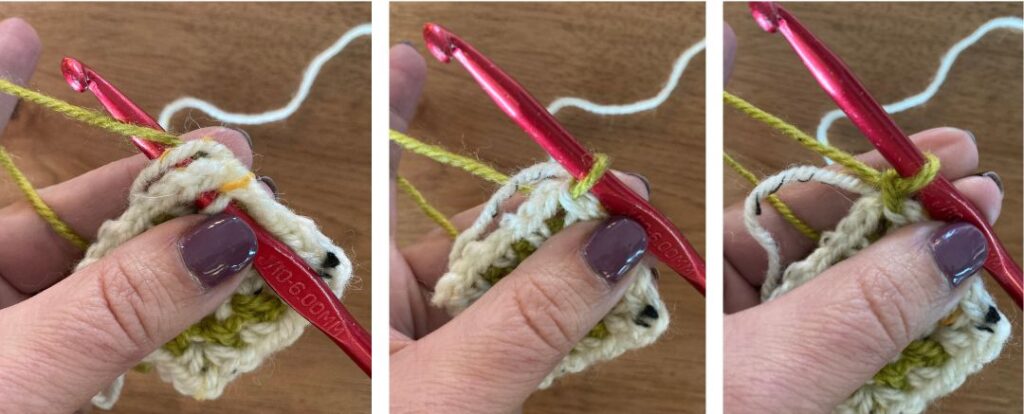
Continue using the new color of yarn and single crochet over the old yarn color one time. Now DROP the old color of yarn behind your work and continue to complete the corner stitches WITHOUT working over the old color of yarn. The old yarn will be left alone on the back side of the crochet piece where you will have access to it for the next row.
If you turn your corner over, you can see the old color of yarn will be dropped between the corner single crochets, this is the correct technique to hide your carrying yarn.
Continuing with the Linen Square Pattern
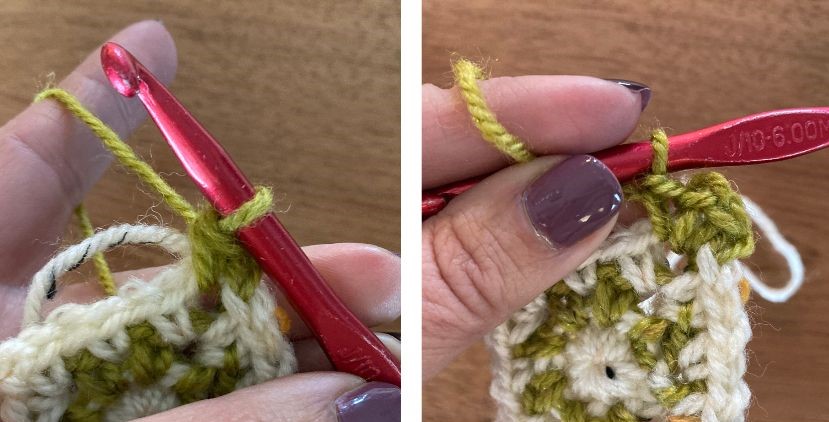
R4: still using MC, Slst into ch-2 sp changing to CC in last pull through, Ch 1, [in ch space work (sc, ch 2, sc), ch 1, skip next st, sc in next sp, ch 1, sc in next sp, ch 1, skip next st], repeat [ ] around, join with a slst in top of beg sc (16 sc + 16 ch sps)
From this point on in the pattern I will begin to put the total stitch count for only 1 side of the square. For example, in round 4 you ended with 16 total single crochet and 16 chain spaces. When I break that down for the side only, you will have 4 single crochets and 4 chain spaces, this will always include one of the corner chain spaces.
R5: still using CC, Slst into ch-2 sp changing to MC in last pull through, Ch 1, [in corner ch space work (sc, ch 2, sc), ch 1, skip next st, {sc in next ch sp, ch 1, skip next st}, repeat { } to next corner ch sp], repeat [ ] around, join with a slst in top of beg sc (5 sc + 5 ch sps)
R6: still using MC, Slst into ch-2 sp changing to CC in last pull through, Ch 1, [in corner ch space work (sc, ch 2, sc), ch 1, skip next st, {sc in next ch sp, ch 1, skip next st}, repeat { } to next corner ch sp], repeat [ ] around, join with a slst in top of beg sc (6 sc + 6 ch sps)
R7: still using CC, Slst into ch-2 sp changing to MC in last pull through, Ch 1, [in corner ch space work (sc, ch 2, sc), ch 1, skip next st, {sc in next ch sp, ch 1, skip next st}, repeat { } to next corner ch sp], repeat [ ] around, join with a slst in top of beg sc (7 sc + 7 ch sps)
R8: still using MC, Slst into ch-2 sp changing to CC in last pull through, Ch 1, [in corner ch space work (sc, ch 2, sc), ch 1, skip next st, {sc in next ch sp, ch 1, skip next st}, repeat { } to next corner ch sp], repeat [ ] around, join with a slst in top of beg sc (8 sc + 8 ch sps)
R9: still using CC, Slst into ch-2 sp changing to MC in last pull through, Ch 1, [in corner ch space work (sc, ch 2, sc), ch 1, skip next st, {sc in next ch sp, ch 1, skip next st}, repeat { } to next corner ch sp], repeat [ ] around, join with a slst in top of beg sc (9 sc + 9 ch sps)
R10: still using MC, Slst into ch-2 sp changing to CC in last pull through, Ch 1, [in corner ch space work (sc, ch 2, sc), ch 1, skip next st, {sc in next ch sp, ch 1, skip next st}, repeat { } to next corner ch sp], repeat [ ] around, join with a slst in top of beg sc (10 sc + 10 ch sps)
R11: still using CC, Slst into ch-2 sp changing to MC in last pull through, Ch 1, [in corner ch space work (sc, ch 2, sc), skip next st, 2sc in each ch sp to next corner sp], repeat [ ] around, join with an invisible join and fasten off (20 sc + 1 ch sps)
Your square is now completed but you may notice that the corners almost curve in one direction. This can be corrected by blocking your square.
Project Love
I hope you all enjoy this square tutorial. If you are making it along with the Melange Crochet Along, please be sure to tag me in your social media posts (@sweetpotato3patterns). I would love to see your work and may even share your project.
If you use this tutorial for a different project, I would love to see that as well. Happy Crocheting!
Other Crochet Blanket Designs you may love
- Stitch Sampler Blanket – click HERE
- Free Rock the Block Blanket – click HERE
More Crochet Fun
Follow Sweet Potato 3 on Facebook to see more pattern releases, sales and crochet fun, just click HERE.
However, if you would enjoy a more interactive group experience, join my Crochet & Conversations facebook group, click HERE. It is a ton of fun and I encourage everyone to share their projects, WIPS (works in progress) and inspirations. Plus you get exclusive deals, are the first to see new releases, give input on designs and have opportunities to win patterns. Join now and get to know others who also enjoy the art of crochet.