

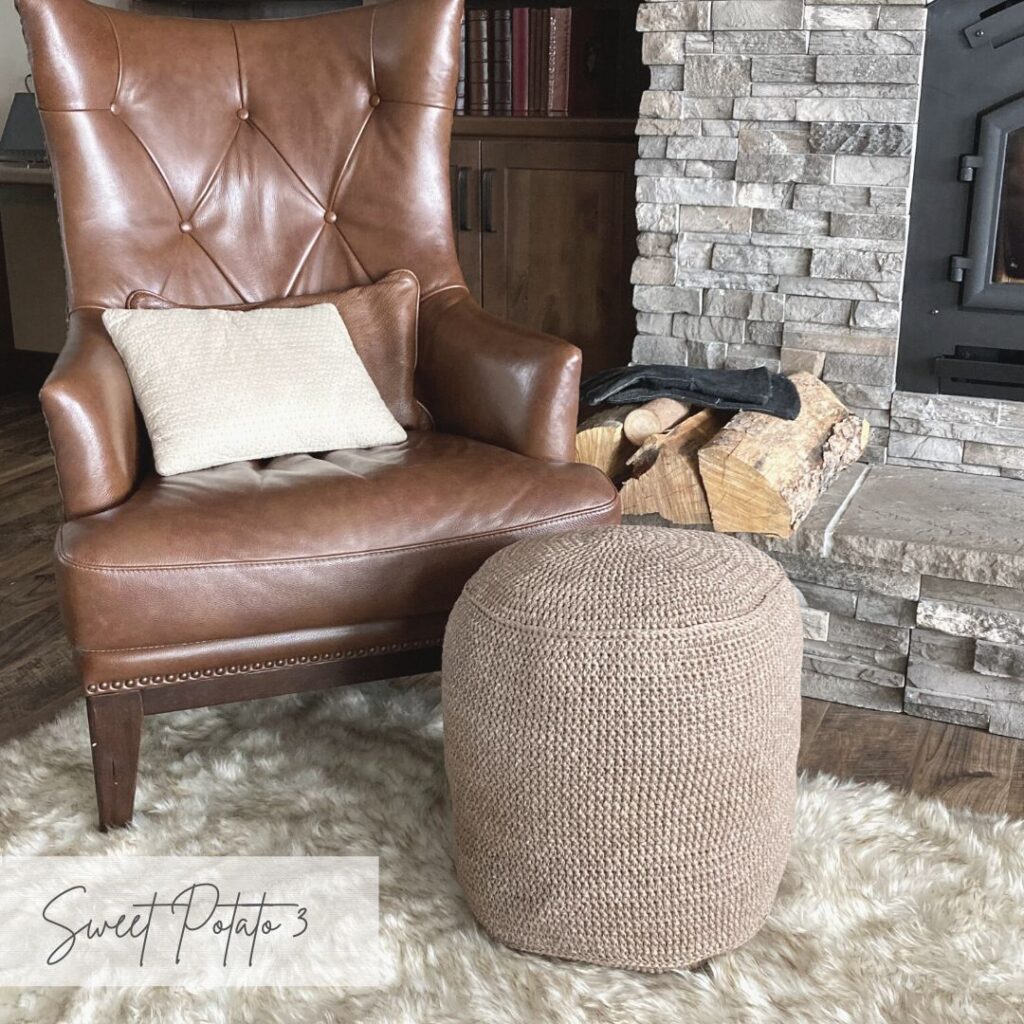
I recently moved into a new home that my husband and I had custom built. It’s our dream home and we are slowly getting it all furnished. One thing we are still in need of is an ottoman as my husband loves to prop his feet up while lounging in the evenings. Living in a small mountain town, however, you can’t just run into a store and purchase one. So I went to my yarn stash and thought, I’ll just crochet a pouf ottoman to get us by.

Stash diving
A pouf ottoman is a project that I knew would take a larger amount of yarn, so that was the first thing I needed to consider when selecting what to use. I also wanted to make sure it was a bulkier yarn so it would work up relatively quickly and hold up to wear and tear.
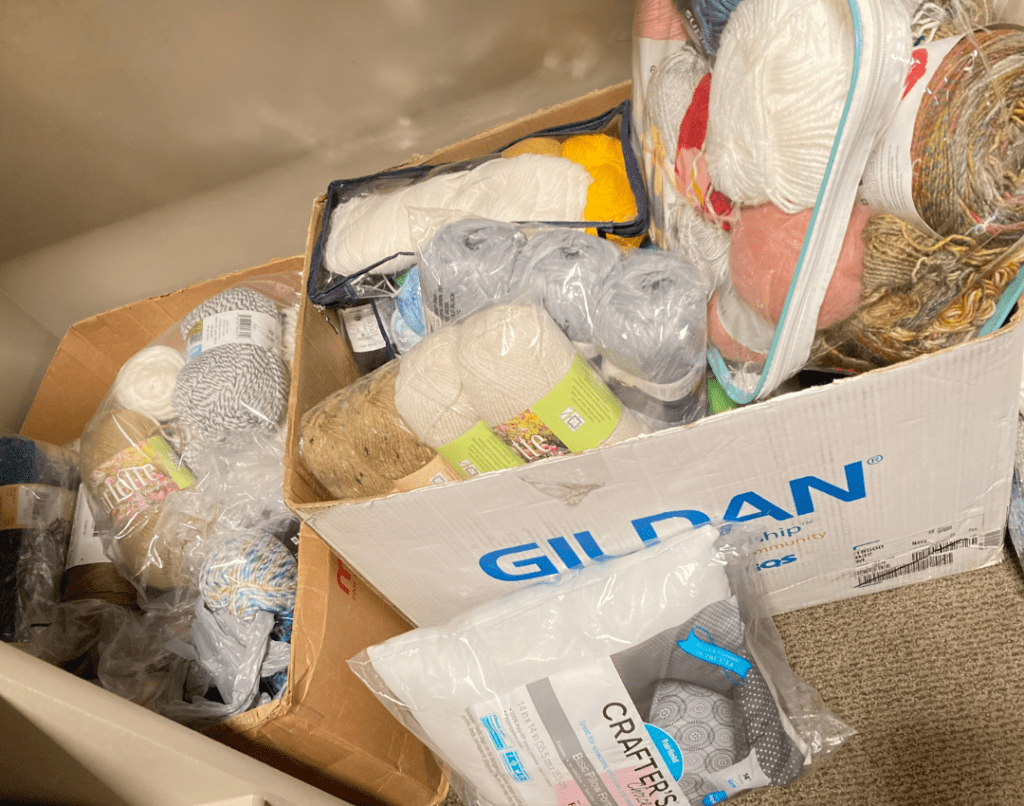
This photo is my actual stash of yarn, and as you can see, it isn’t huge. This explains why I was so excited when I saw that I had 5 skeins of Lion Brand Rewind Tape Yarn. Even better was that I had it in a color that would match our decor perfectly. The color is called Willow and is a very neutral, warm brown tone.
Trial & Error
My thoughts continually returned to how long it was going to take to make the pouf ottoman. I knew it could be a very time-consuming project, therefore, I knew it was going to be important to use a stitch that worked up quickly, didn’t leave gaps (you don’t want the filler/stuffing to show) and it had to have a fun texture.
Over the past year I have used the Linked Double Crochet in many designs including the Braided Christmas Wreath (free pattern HERE), and two blanket designs that will be released in the next month. The linked double crochet is an amazing stitch because it creates the height of a double crochet, works up quickly but it does NOT have the hole/space between the stitches.
The Stitch…
Once I made the decision to use the linked double crochet stitch, I began my project. Although the texture of the stitch was nice, created straight lines and worked up quickly, it seemed just a little boring for the project. Needing a break, I set down my project and walked away for a little bit. Upon returning back to continue, I looked down at the project on my end table and guess what? The texture I saw seemed different, it was so fun and unique! Guess what? It was just the back side of the linked double crochet.

It was funny how that simple glance changed the look of the design so much. The backside of the stitch reminded me of a jute texture but with the softness of yarn. I now had a renewed excitement about my project.
Supplies Needed for your Pouf Ottoman
- Bulky (#5) yarn – preferably a decor yarn – in this tutorial I used Lion Brand Rewind Tape Yarn and used 5 skeins for a total of 1000 yards
- Crochet Hook K (6.50 mm)
- Stith Marker
- Scissors, Measuring Tape, Yarn/Tapestry Needle
- Something to stuff/fill your pouf (I used a mix of pillow forms and old sheets)
- Some suggestions are t-shirts, 16″ round pillow forms, bath towels, bean bag beans in a pillowcase, fabric scraps, sheets, or anything soft that you’re looking to upcycle should work great.
- if you want a sturdy pouf, you can cut pool noodles to the height of your pouf, set them upright in a circle and tape them together as seen HERE).
- Recycled Soda Bottles – see post HERE
Gauge
Getting the exact gauge on this project is not essential. It is more important to have stitches that are even and tight enough not to leave big gaps for your filling to poke through, fall out or show. I will give measurements throughout the project for comparison sake.
Completed Size of Pouf Ottoman
- 16″ across center of the top/bottom of the pouf
- 17″ high
Beginning the Pouf
Note: The pouf will be worked in continuous rounds, mark the first stitch in each row to help keep track of rows.
The pattern will be worked using the linked double crochet, if you are unfamiliar with this stitch watch my YouTube tutorial:
R1: Ch 2, in the 2nd chain from the hook work (sc, 3 hdc, 7 Ldc), do NOT join (11 sts), there will be a hole in the chain you just worked into, if you pull the beginning yarn tail the hole will snap closed. You may use a magic circle to begin instead if you prefer.
Reminder: mark your first stitch in each row to indicate the beginning of the rounds.
R2: work 2Ldc in each st around (22 sts)
R3: [2Ldc in next st, Ldc in next st], repeat [ ] around (33)
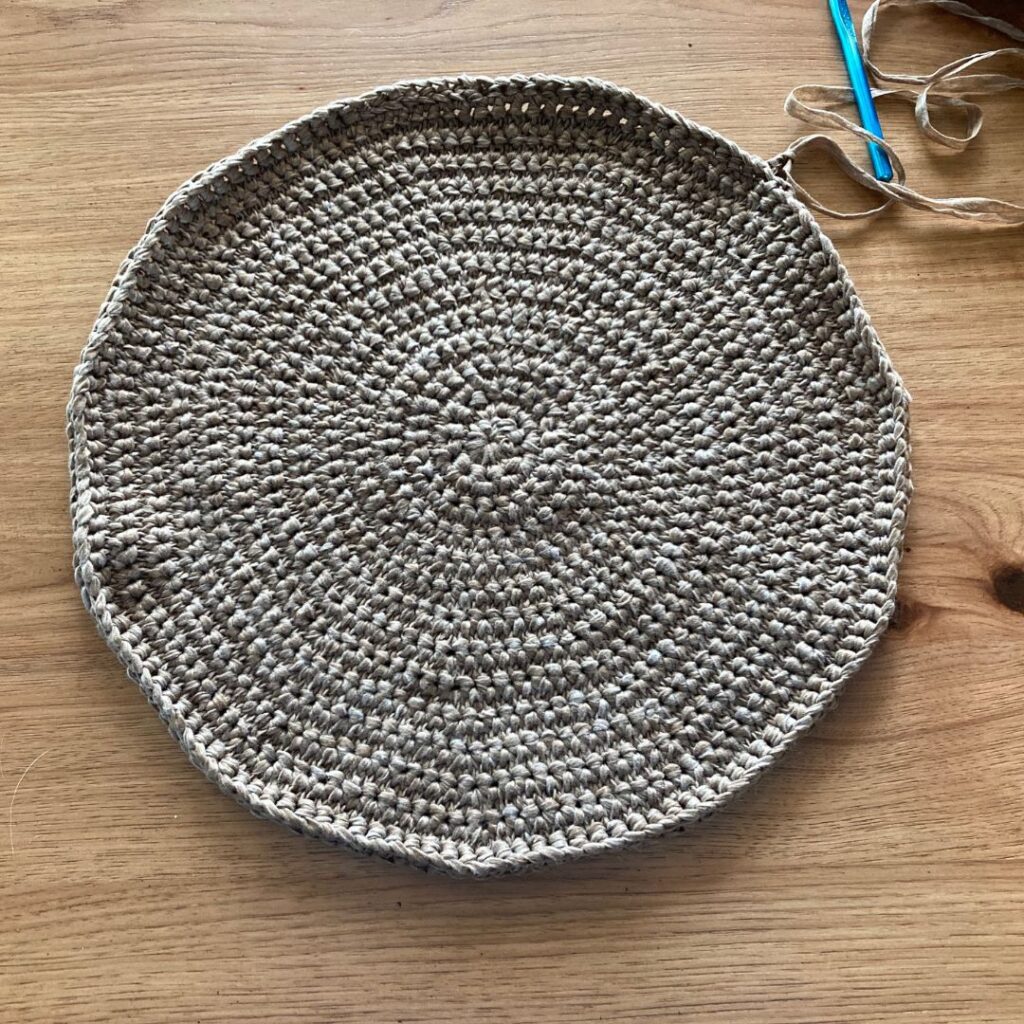
Gauge Check: 3 1/2″ across (measure across the center of the circle with the last stitch at the top of the circle-see photo below)
R4: [2Ldc in next st, Ldc in each of the next 2 sts], repeat [ ] around (44)
R5: [2Ldc in next st, Ldc in each of the next 3 sts], repeat [ ] around (55)
Gauge Check: 5 1/4″ across (measure across the center of the circle with the last stitch at the top of the circle-see photo below)

Continue to increase the rounds in the traditional manner of increasing each repeat by 1 sts in each row.
R6-13: [2Ldc in next st, Ldc in each of the next 4 (5, 6, 7, 8, 9, 10, 11) sts], repeat [ ] around (66, 77, 88, 99, 110, 121, 132, 143)
Finishing Section:
hdc in each of the next 5 sts, sc in each of the next 3 sts, slst in next st to bring the stitches in the round even. Chain 1, Front Post single crochet in each st around, join in top of the first FPsc (143). This section completed the top or bottom of your pouf ottoman. The round of front post stitches created a turn in your crochet work. The turn allows for a clean edge to now crochet the side of the pouf.
Gauge Check: 16″ across center of circle
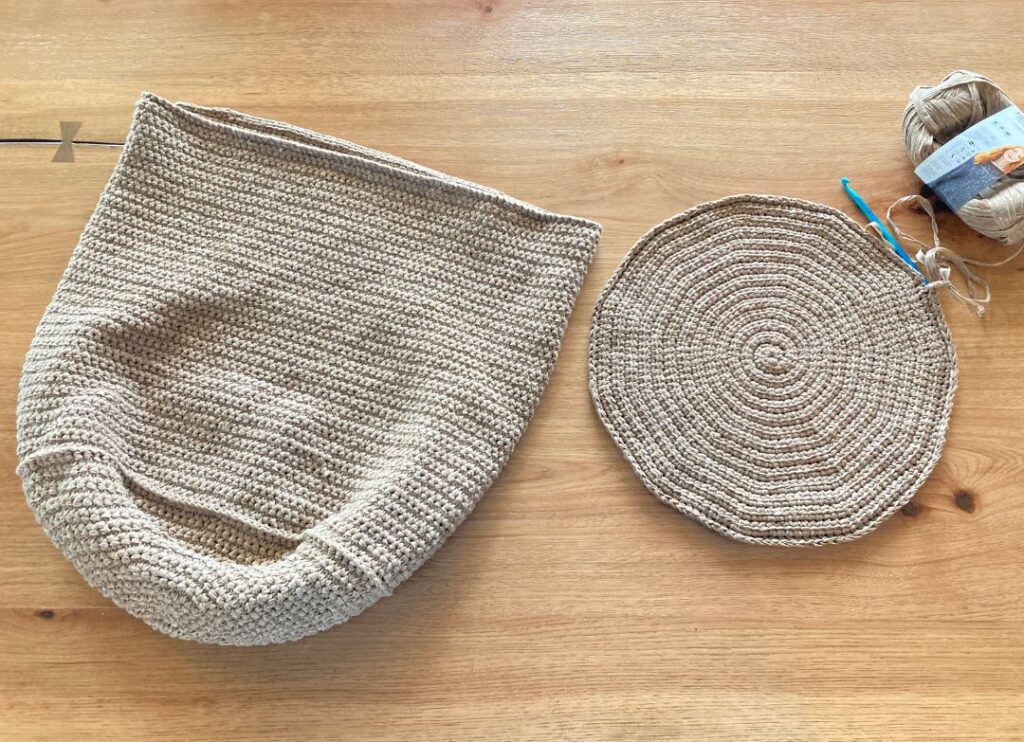
Crochet the side of the Pouf
Chain 1, sc in the first 5 sts, hdc in next 5 sts, Ldc in next st. At this point you will work one linked double crochet in each stitch around for 33 rounds which will create the side of the pouf. After 33 rounds have been completed you will want to bring the stitches down to show a more even edge.
To do this crochet a hdc in each of the next 5 sts, sc in each of the next 5 sts, join in the next st with a slst and fasten off. The main section of the pouf has been completed and will measure 16 1/2″ high from the turning front post round.
Repeat First Section
The top of the ottoman has been crocheted along with the sides. Repeat the first section of Rounds 1-13 plus the finishing section of the front post single crochets. This section piece will be the bottom of your pouf ottoman.
Sewing the Pieces Together
At this point in your project, you have the entire pouf crocheted. You will now need to sew the pieces together. The individual circle can be the top or the bottom of your pouf, they are identical, so it really doesn’t matter.
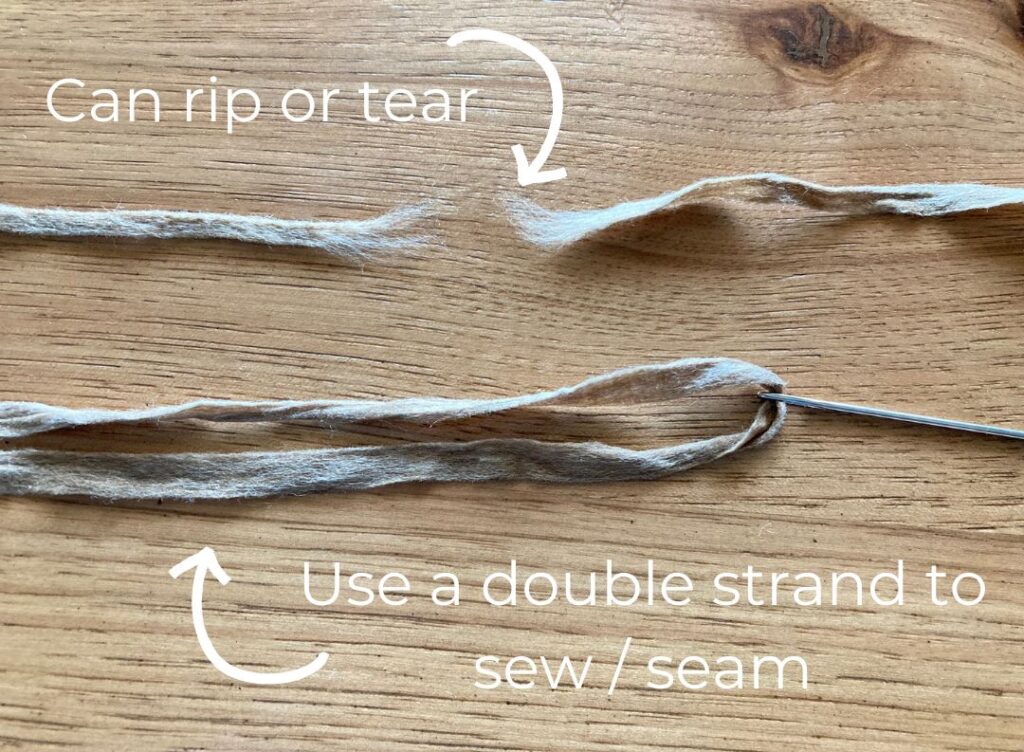
Use a strand of leftover yarn to seam the pieces together. Keep in mind that your seam needs to last and be durable. The Rewind yarn can pull apart and tear, so it is essential to seam with a double strand.
I recommend sewing between half and two thirds of the way around the pieces using the Mattress Stitch. I have a YouTube Tutorial for this seaming technique that you can watch by clicking HERE. Or you can reference the photos below.

The key to the mattress stitch is to always work from the inside of your project to the outside. Weave your needle in and out of about 7-8 stitches, then pull the seam tight. Repeat this around until you are about 2/3 of the way done.
Fill Pouf Ottoman
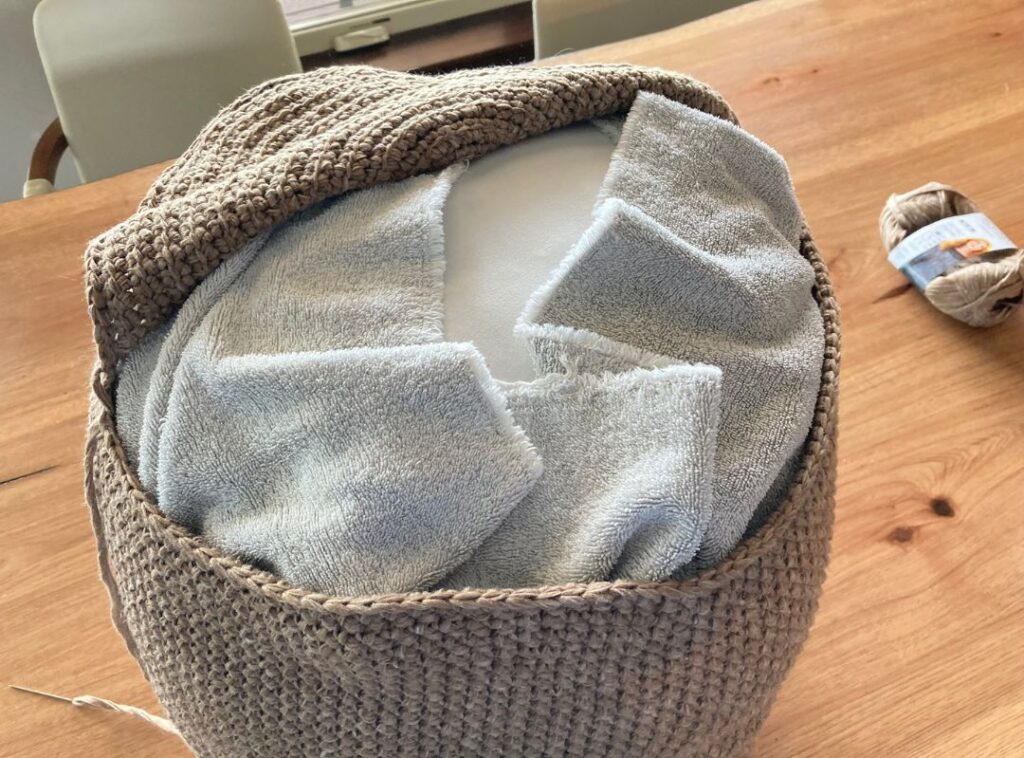
Using your preferred filler method, you will want to fill/stuff your pouf. Do not underfill the pouf, this will result in wrinkles and a softer fill similar to a pillow. Fill or stuff the pouf until it is tight, but not pulling on the stitches. I used round pillow forms and then wrapped an old towel around them to make it look more solid. After stacking the pillow forms, I noticed there was small creases between them, and the towel seemed to resolve it.
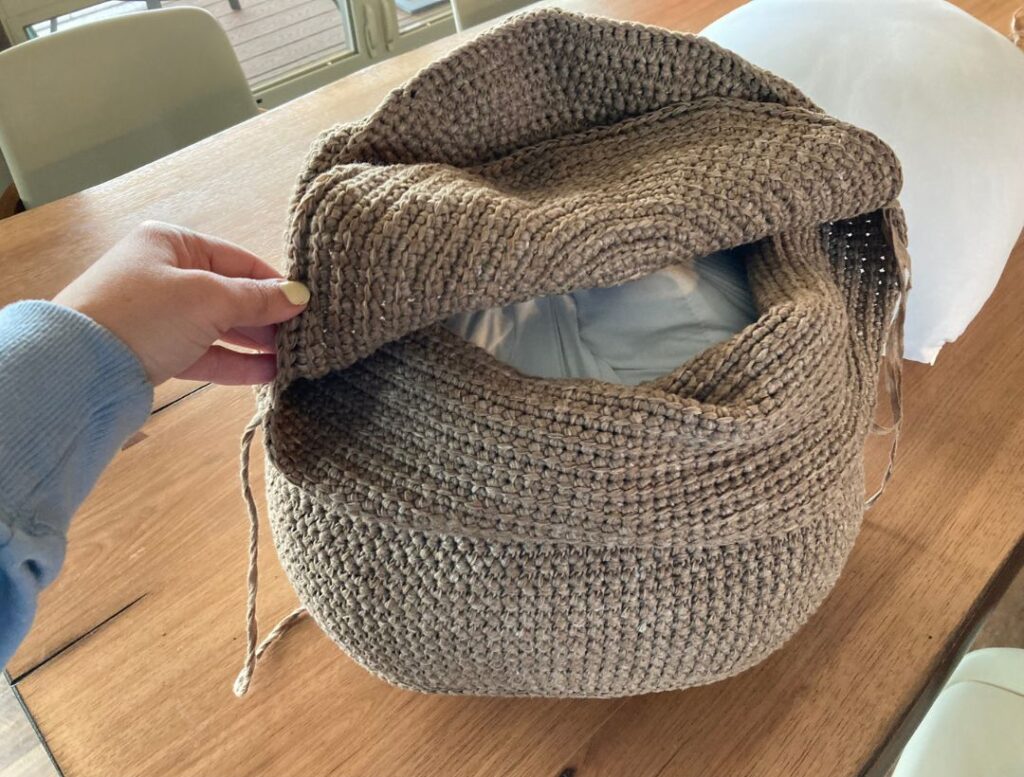
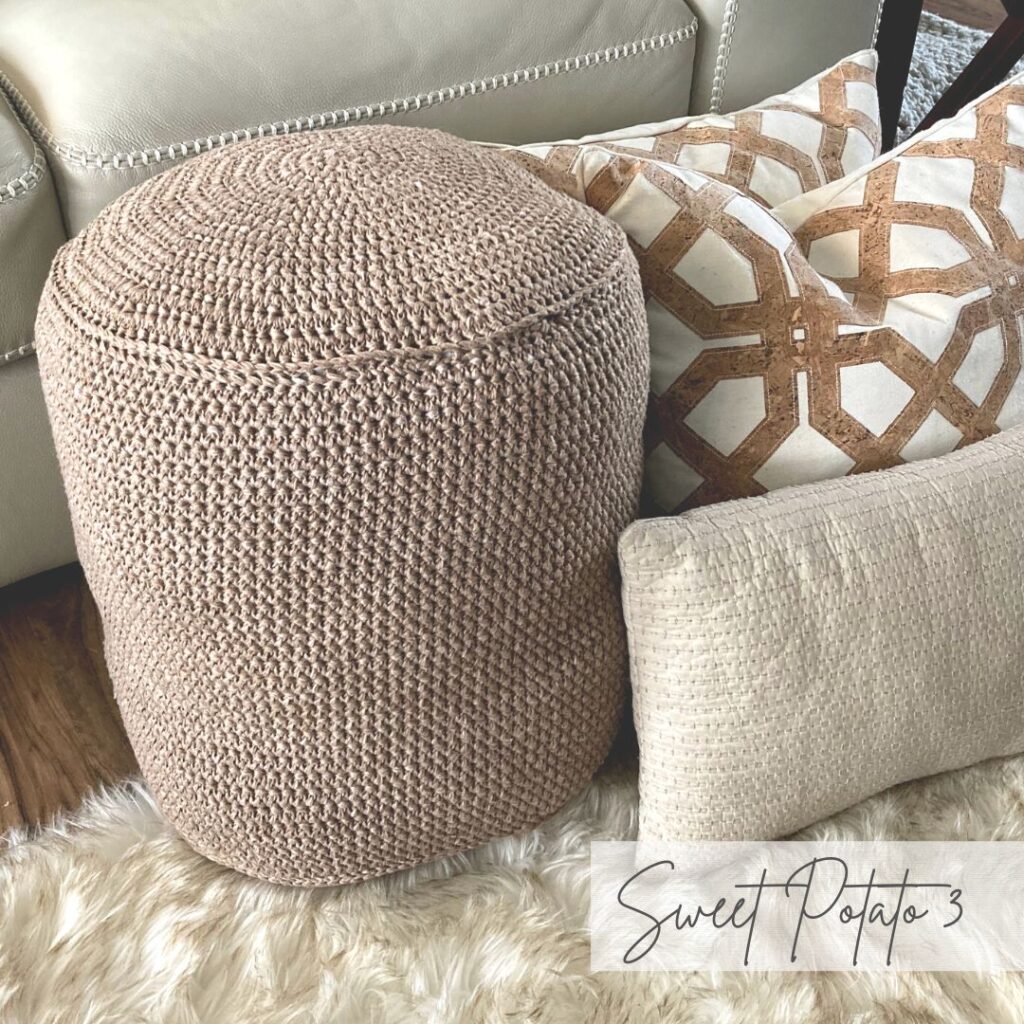
You will now continue to sew the top of the pouf into place with the mattress stitch. Once you have seamed all the way around, secure it with a knot and weave in your ends. What a fun project. My husband, kids and I all love it!
If you happen to make a pouf I would love to see it. Tag me on IG or FB, @sweetpotato3patterns.
More Home decor Designs You May Love
- Free Woven Basket Tutorial – click HERE
- Pocket Pillows Crochet Pattern – click HERE
- Home Decor patterns using Rewind yarn – click HERE
More Crochet Fun
I am sure you will love these home décor crochet patterns. When you make one, I would love to see a photo of your project. I host an interactive Facebook group called, “SP3 Crochet & Conversations”. You’re invited to join, it is a great spot to share photos, ask questions and have fun. I invite you to join today by clicking HERE.


Pingback: Rainbow Hope Crochet Blanket Pattern - Sweet Potato 3