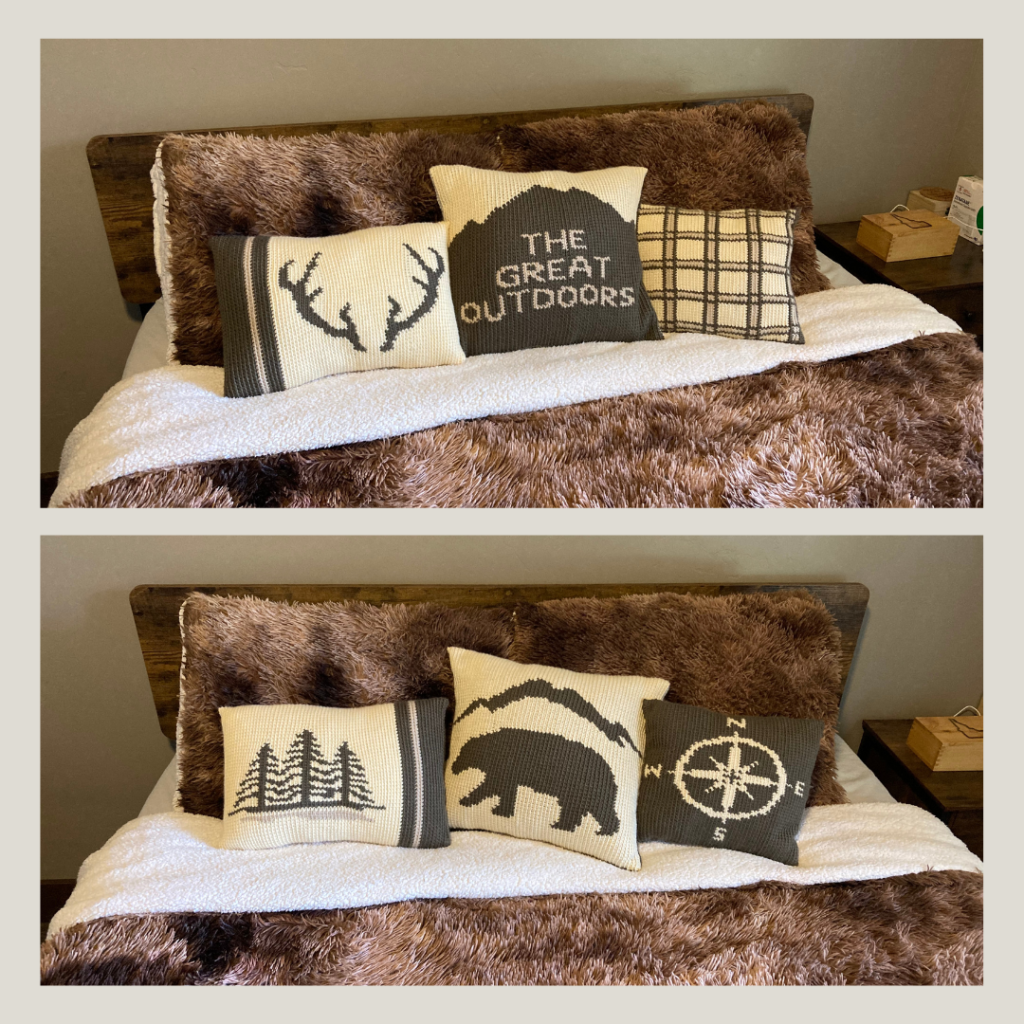
Over the years I have designed many blankets that have either a mountain or wildlife theme to them. I love making these, but sometimes I want a smaller project to work on. So, pillow covers are a great option. It is a much smaller project, but of course I want them to fit my style.
I like to switch things up so I designed my pillow covers to be reversible. Yep, you heard it right. I have a set of three pillows that have a different look on each side… so it’s like getting 6 pillows. And, I am not even going to try to do the math to show how many combinations you can have-LOL! It’s a lot, and they are all so much fun.
Choosing the Designs
I am fortunate enough to live in a mountain town, this is how so many of us decorate our homes. Others may consider this a great theme for a cabin, vacation home, camper, nursery, or even a man cave. Anyway you look at it, these are a fun and versatile set.
Each pillow cover is made in a different size to show some variety. The sizes include:
- 12″ x 12″ and features a plaid print on one side and a compass on the other
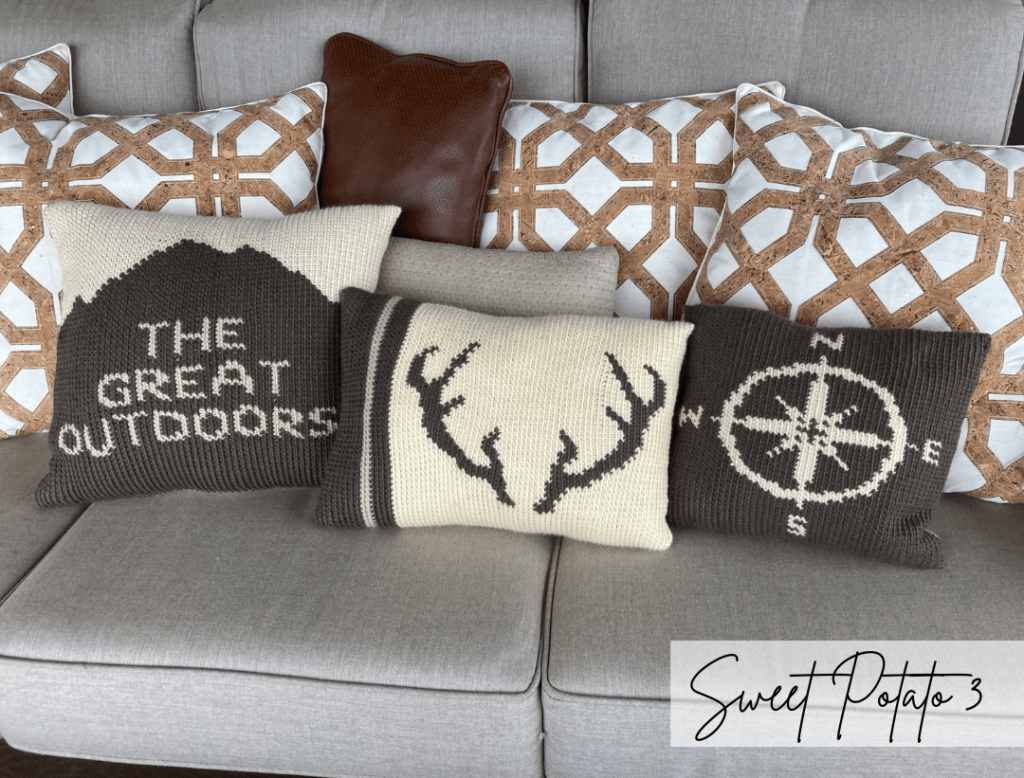
- 12″ x 16″ and features pine trees on one side and deer antlers on the other
- 16″ x 16″ and bears a bear with a mountain background on one side and a mountain on the other that says “The Great Outdoors”
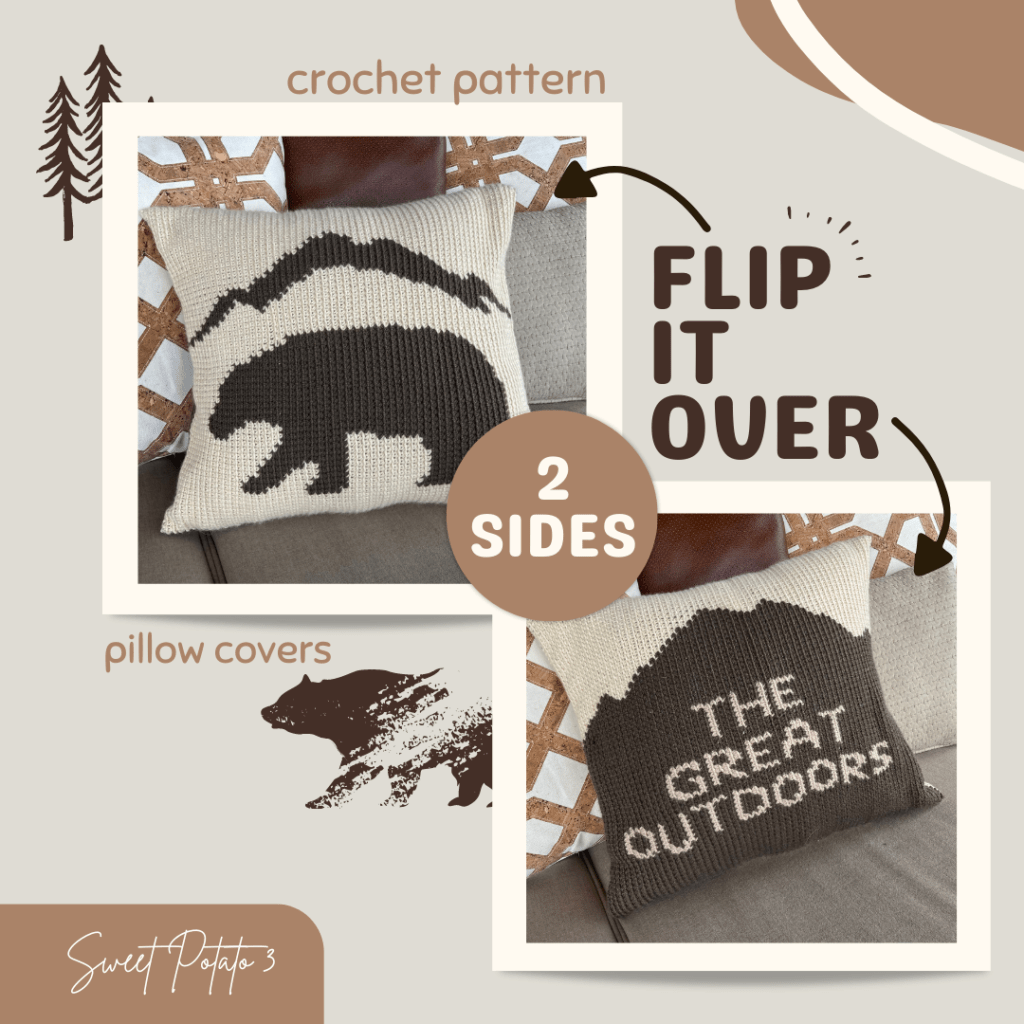
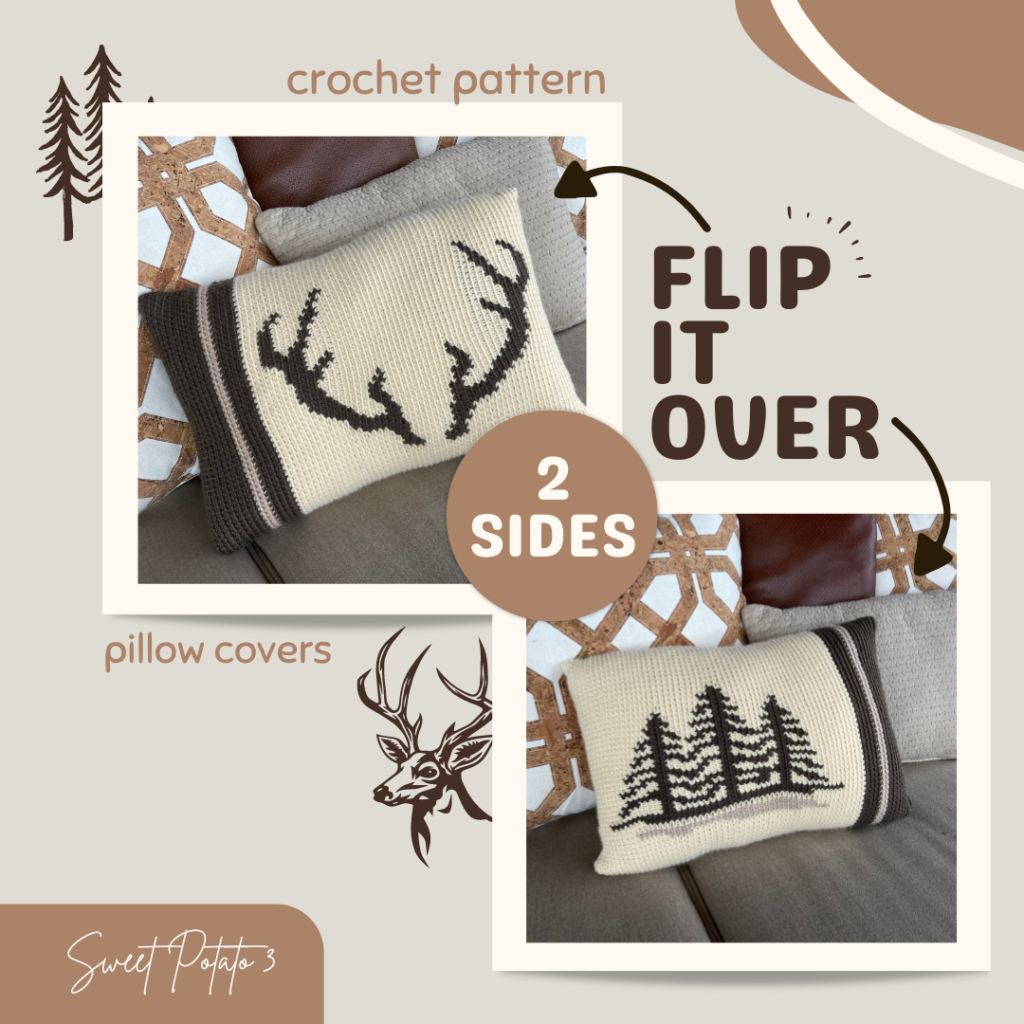
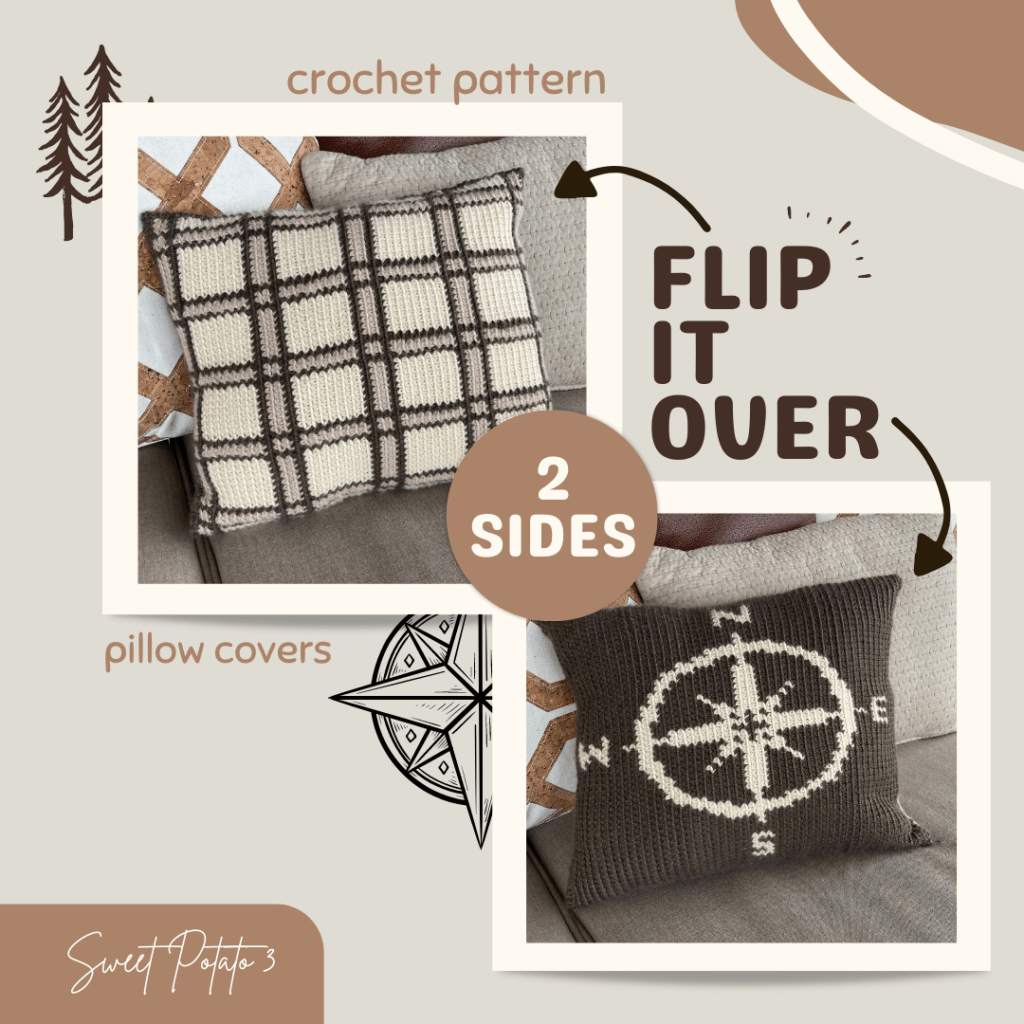
The uniqueness is not only in the look of the pillow cover, but the fact that each cover has two different sides giving you a great combination of designs to switch the look up as often as you like.
Cozy Alpaca Yarn
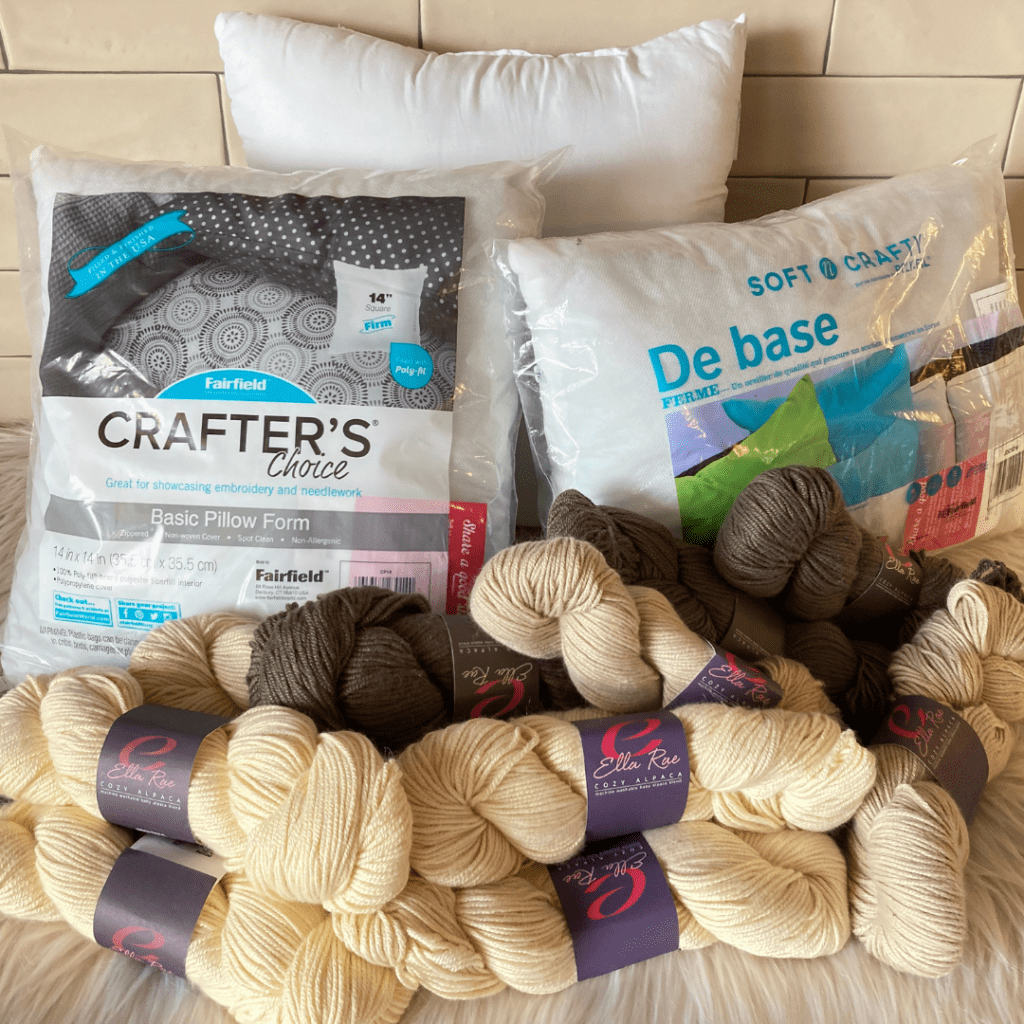
The yarn used for these pillow covers was a very luxurious cozy alpaca yarn. Boy, it was so wonderful and soft to work with. If you haven’t had the chance to try you Ella Rae yarns, you must. I got these hanks from Knitting Fever and will definitely be looking into getting some more.
Pattern Stitches and Details
Many of my designs use different stitches to work color changes. These pillows use the traditional modified single crochet stitch. As a popular technique many of you may be familiar with this. However, I created a video tutorial to walk you through the basic that you will need, or want, to know to create these pillow covers.
The video tutorial will includes information on how to work the modified single crochet stitch, how to join each round to minimize the look of the seam, and of course, how to change colors of yarn and carry the yarn as you crochet. Watch the tutorial below or to watch, bookmark or save on YouTube, click HERE.
The pillow covers are made in the round, as you crochet you will create a sleeve or cylinder shape. Once the cover has fully crocheted, you will fasten off and weave in all your ends. At this point, you will seam up one side (of the sleeve), insert the pillow form and then seam up the opposite side to finish your cover.

Find your Set of all three pillow covers in my shops
The individual pillow covers will be available soon, but it is a better deal for you to purchase the full set, which happens to be ready today!
- Ravelry Shop – full set of 3 pillow covers, click HERE
- Etsy Shop – full set of 3 pillow covers, click HERE
More Pillow Covers You May Love
- Pocket Pillows – click HERE
- Free Pouf Tutorial – click HERE
More Outdoor / Wildlife Patterns You May Love
- Wildlife Interchangeable Blankets – click HERE
- Faith Can Move Mountains Baby Nursery Blanket – click HERE
- Mountain Landscape Blankets – click HERE
More Crochet Fun
I am sure you will love these home décor crochet patterns. When you make one, I would love to see a photo of your project. I host an interactive Facebook group called, “SP3 Crochet & Conversations”. You’re invited to join, it is a great spot to share photos, ask questions and have fun. I invite you to join today by clicking HERE.
